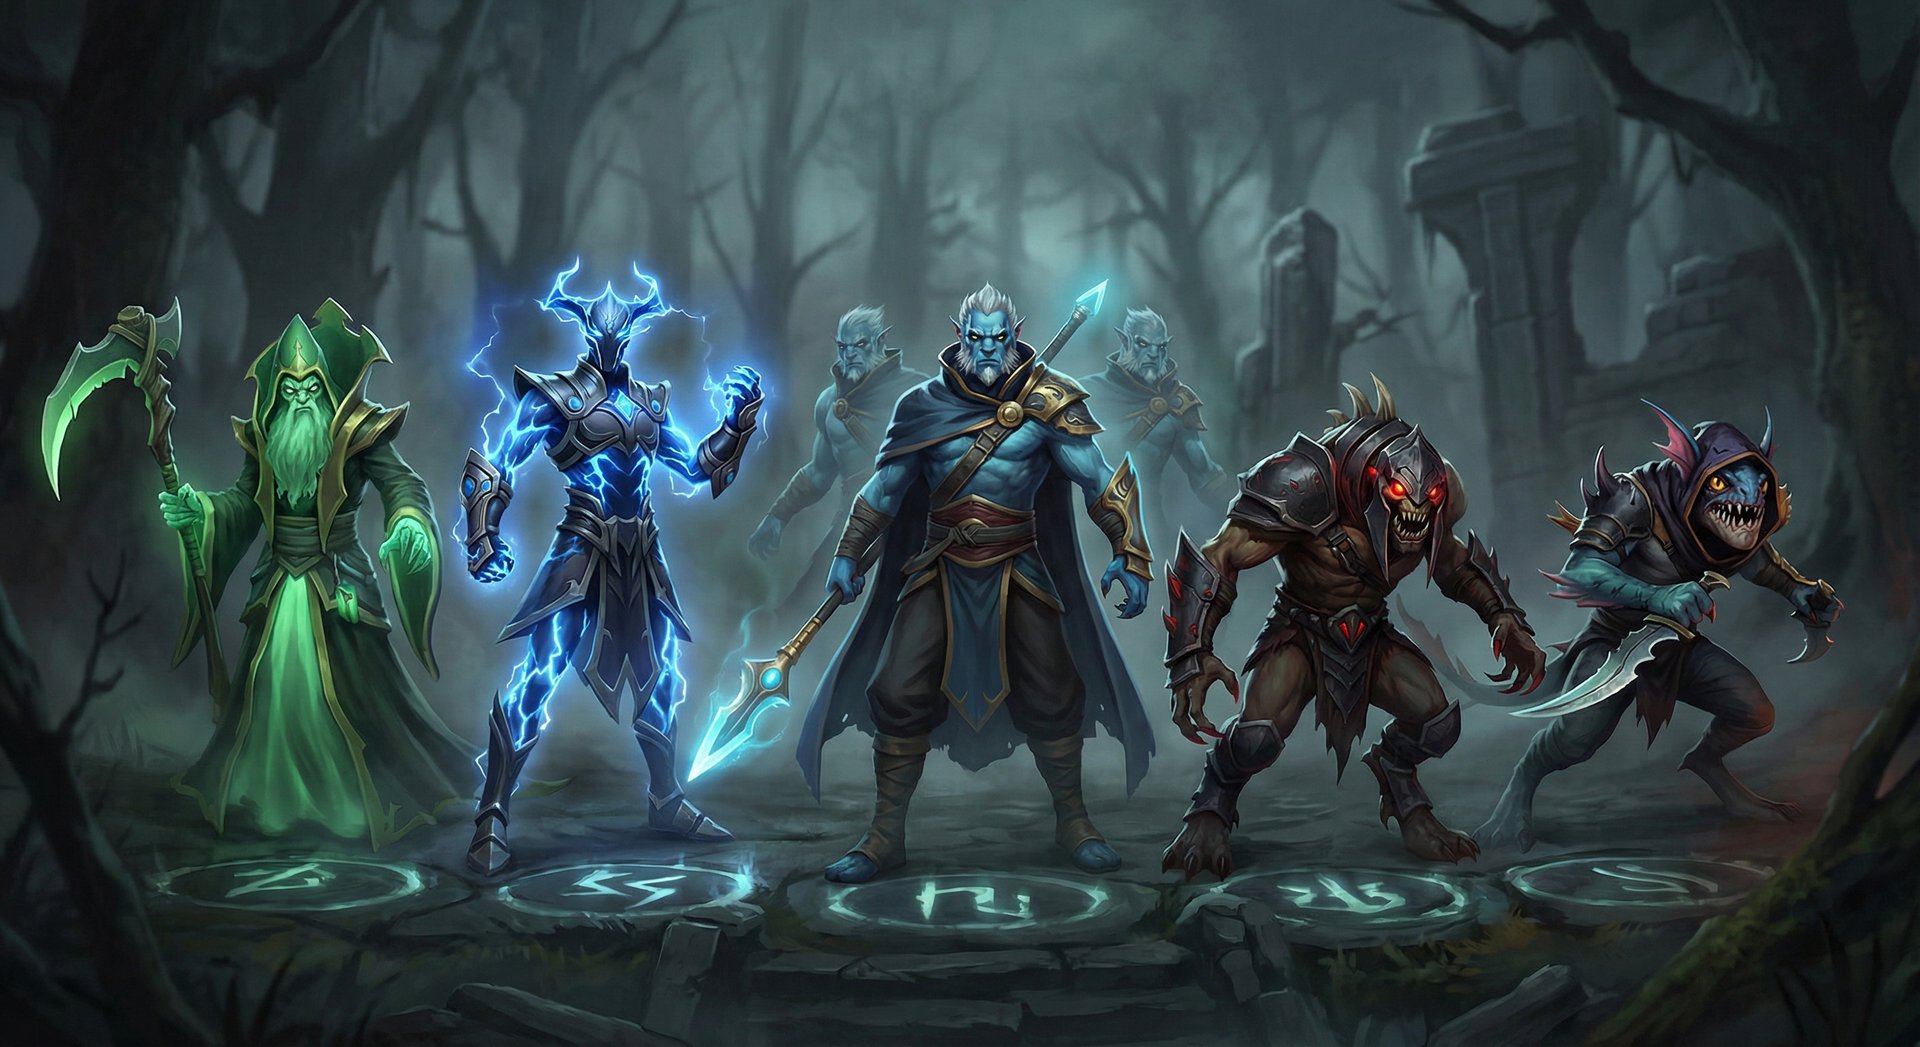
How to Master Underlord in Dota 2: The Ultimate Guide for Every Rank (2026)

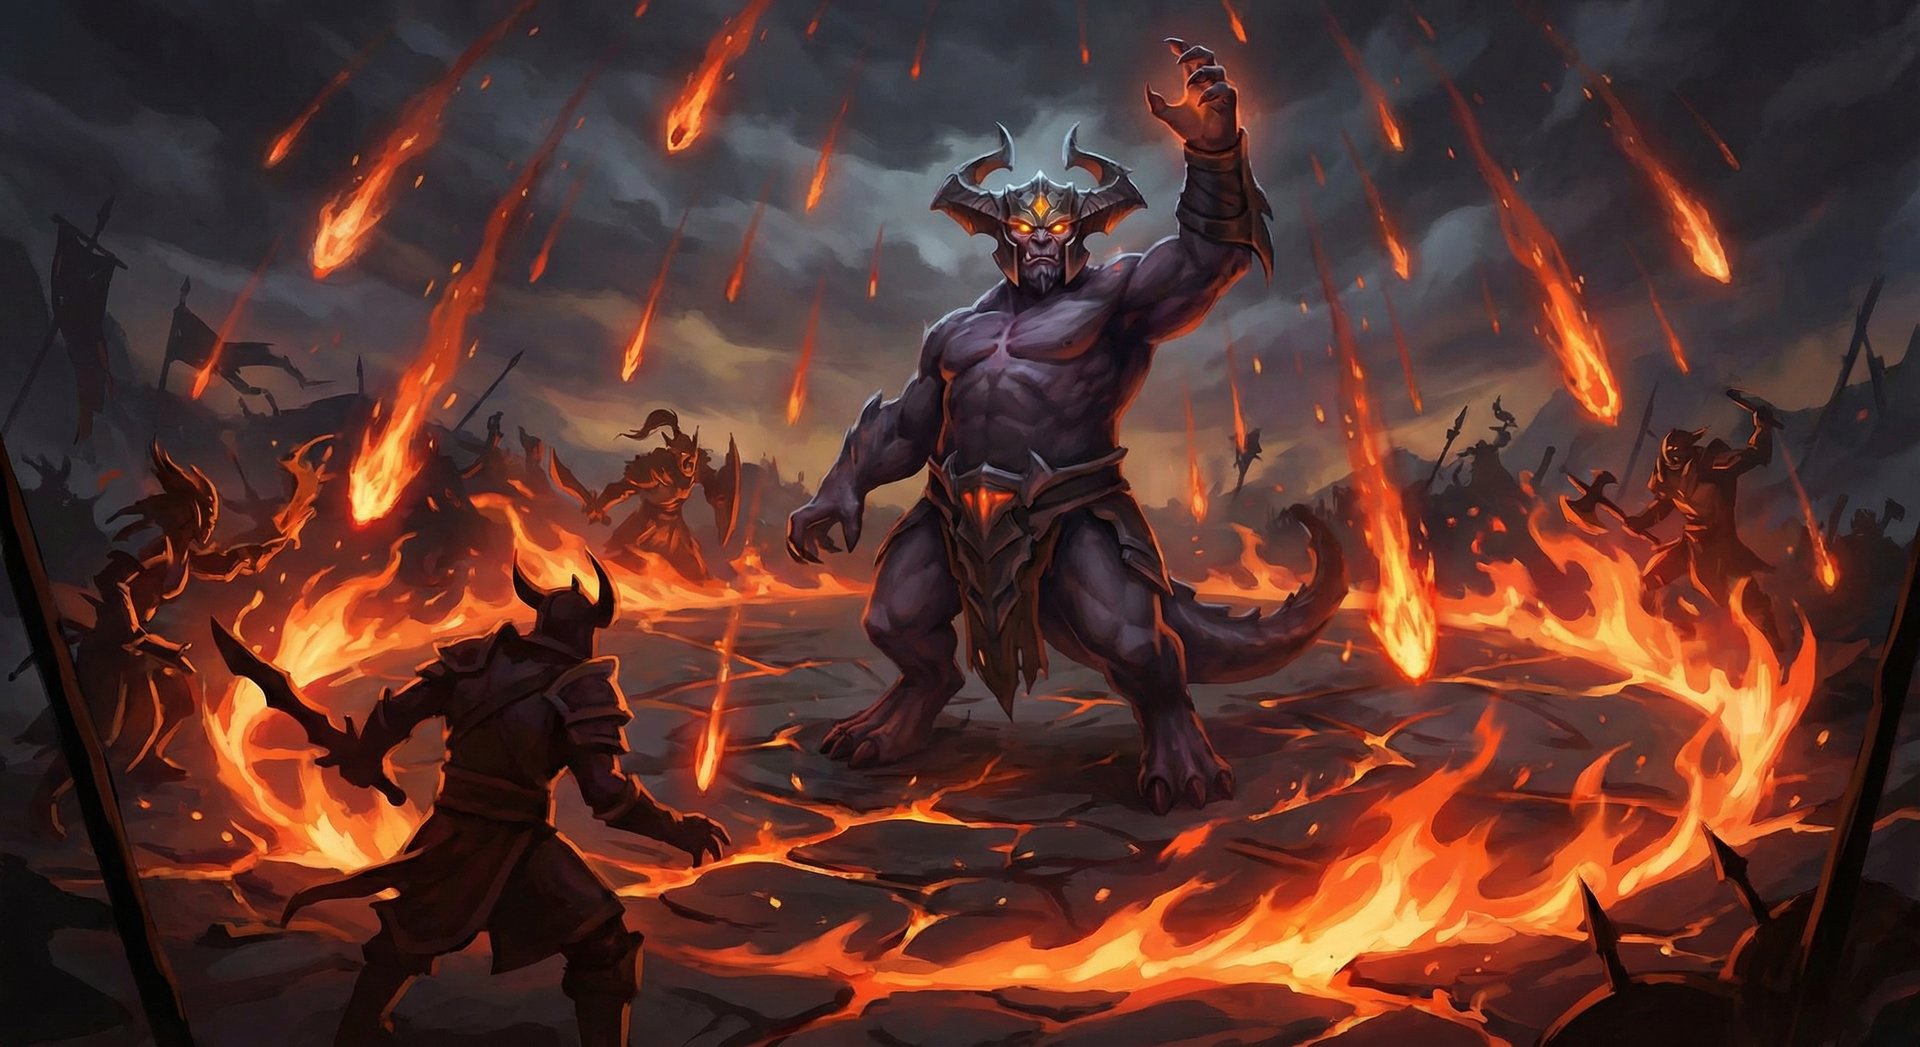
Underlord is the kind of hero that does not show up on highlight reels, does not get the crowd cheering, and does not appear in most players’ “fun hero” lists. And that is exactly why he wins games. With a consistent 52%+ winrate across all brackets and one of the most oppressive laning presences in Dota 2, Vrogros the Underlord is the ultimate “win condition through attrition” hero. He does not burst you. He does not outplay you mechanically. He just slowly, methodically drains every ounce of fight out of your team until there is nothing left.
In this guide, we are going to break down everything you need to dominate with Underlord in the current patch — from his abilities and hidden mechanics, to item builds that vary by rank bracket, to the exact laning strategies that make this hero a nightmare in the offlane. Whether you are a Herald trying to understand what this hero actually does, or a Divine player looking to add a reliable offlaner to your pool, this guide covers it all with the depth and specificity that only comes from thousands of games at the highest level.
Table of Contents
Why Underlord Is the Most Underrated Offlaner in Dota 2
Let us get the numbers out of the way first. Underlord currently sits at approximately a 52% winrate with around a 5.3% pick rate across all ranked brackets. That might not sound flashy, but consider this: most popular offlaners like Mars, Pangolier, and Primal Beast hover between 48-50% winrate because their skill floors are high and their execution demands are steep. Underlord just… wins. Quietly, consistently, and without requiring you to land a 4-man Reverse Polarity or a pixel-perfect Rolling Thunder.
Underlord is classified as a Strength melee hero with tags including Durable, Nuker, Disabler, Escape, and even Support. His base stats tell the story immediately: 25 base Strength with 3.2 gain per level makes him one of the tankiest heroes in the game by default. His 12 base Agility (1.6 gain) means his armor is modest early but grows respectably, and his 18 Intelligence (2.3 gain) gives him just enough mana to sustain his spell-heavy playstyle without running dry every 30 seconds.
What makes Underlord unique is his combination of area denial, passive damage reduction, global mobility, and late-game scaling through percentage-based damage. His Firestorm deals percentage-based burn damage that actually becomes MORE relevant as the game goes longer — the opposite of most nukers who fall off. His Atrophy Aura passively reduces the base damage of every enemy hero nearby, which means just standing near the enemy carry makes them hit like a wet noodle. And Fiend’s Gate gives your entire team the ability to reposition globally, turning won teamfights into instant Roshan takes or base pushes.
The hero peaks in the mid game but never truly falls off. He is the definition of a “set the pace” offlaner who dictates how fights happen, where they happen, and whether your team can capitalize on every advantage. If you want free MMR without learning 47 different combos, Underlord is your hero.
Abilities Deep Dive
Innate: Invading Force
Before we even get to Underlord’s active abilities, his innate passive sets the tone for his entire playstyle. Invading Force grants allied heroes 3.7% damage reduction and 9.5% movement speed (scaling with level at +0.3% damage reduction and +0.5% movement speed per level) for 5 seconds after teleporting. Allies who teleport through Fiend’s Gate receive double the bonuses.
This ability is easy to overlook, but it is quietly powerful. At level 20, your allies who TP in get roughly 9.7% damage reduction and 14.5% movement speed. Through Fiend’s Gate That doubles to nearly 19.4% damage reduction and 29% movement speed. That is an entire team arriving at a fight faster, tankier, and harder to kite. It turns your Fiend’s Gate from a simple teleport into a legitimate team-wide buff that can swing the opening seconds of any engagement.
The key interaction most players miss: this works on regular TP scrolls too. If your mid TPs to defend a tower, they arrive with the damage reduction buff. It is not just for Fiend’s Gate. This makes Underlord’s mere presence in the game a global strategic asset even before he uses a single ability.
Q — Firestorm
Firestorm is Underlord’s bread and butter. He calls down 6 waves of fire over 6 seconds in a 425 radius, each dealing 30/55/80/105 magic damage on impact and applying a 1.5%/2%/2.5%/3% max HP burn over 2 seconds. The mana cost is 110/125/140/155 with a cooldown of 16/15/14/13 seconds.
Why this ability is better than it looks:
- The percentage-based burn stacks with each wave. If an enemy stands in the full Firestorm, they take 6 instances of wave damage PLUS 6 separate burn debuffs ticking simultaneously. At level 4, that is 630 magic damage from waves alone, plus 18% max HP burn over the duration. Against a 3000 HP hero, that is an additional 540 magic damage from burns. Before any talents or items.
- The burn damage pierces through BKB for the already-applied debuff. If a hero catches a Firestorm wave before popping BKB, the burn continues ticking. New waves will not apply during BKB, but existing burns persist.
- Firestorm is one of the best wave-clear abilities in the entire game. At level 3-4, it kills entire creep waves, letting Underlord shove lanes from fog without ever showing on the map.
- The Aghanim’s Shard upgrade allows Firestorm to be cast on an allied hero, making it follow them around. The wave count increases and ticks occur faster. This turns any frontline hero into a walking death zone. Cast it on your Bristleback or Axe and watch teams melt.
Skill build note: You almost always max Firestorm first. The damage jump from level 1 to level 4 is enormous (30 to 105 per wave), and the percentage burn scaling from 1.5% to 3% is what makes this hero relevant against tanky lineups.
W — Pit of Malice
Pit of Malice creates a zone of 400 radius at the target location that lasts for 12 seconds. Any enemy that enters the pit is rooted for 1.5/1.6/1.7/1.8 seconds and takes 20/30/40/50 magic damage. The root can only affect each individual enemy once every 3.6 seconds, meaning a hero standing in the pit gets rooted, waits 3.6 seconds, and gets rooted again.
Hidden mechanics and interactions:
- The root goes through spell immunity — wait, no it does not. But the root DOES go through Linken’s Sphere because it is an area effect, not a single-target spell. This is a crucial interaction against heroes like Weaver or Morphling who rely on Linken’s to survive.
- Pit of Malice does not break channeling — it is a root, not a stun. Heroes can still cast spells and attack while rooted. However, it prevents all movement and mobility spells (blinks, dashes, and teleports are interrupted).
- The 12-second duration means a single Pit can root a hero up to 4 times if they stay in range. In combination with Firestorm, this creates zones where enemies simply cannot stand without taking catastrophic damage.
- The Aghanim’s Scepter upgrade increases the radius of Pit of Malice significantly. Combined with the level 25 talent (+0.4s root duration, bringing it to 2.2 seconds), Pit becomes an absurd teamfight control tool.
- The level 15 talent adds a 20% slow to Pit of Malice, meaning even after the root expires, enemies are slowed while inside the pit. This makes it significantly harder to walk out before the next root triggers.
Skill build note: Most players take one early point in Pit for the root utility, then max it second after Firestorm. In matchups where you need more lockdown (against mobile heroes like Slark or Weaver), you can consider putting 2 early points in Pit for the increased root duration.
E — Atrophy Aura
Atrophy Aura is what makes Underlord’s lane presence so oppressive. It passively reduces the base attack damage of all enemy units in a 900 radius by 8%/16%/24%/32%. When an enemy unit dies within the aura radius, Underlord gains temporary bonus damage: 2/4/6/8 per creep and 30/35/40/45 per hero for 30/40/50/60 seconds.
Why this ability is secretly broken:
- The damage reduction applies to BASE damage only, not total damage. This is important because it means items like Daedalus or raw damage items are not affected. However, early game when heroes rely primarily on base damage for last hits, this aura is devastating. At level 2 (16% reduction), enemy carries literally cannot contest last hits against you.
- The stacking bonus damage from creep kills adds up fast. In a typical laning phase, if you are getting good farm, you can easily have 40-60 bonus damage from Atrophy stacks. This makes your right-clicks hit surprisingly hard for a Strength hero with no damage items.
- Hero kill stacks are enormous. A single hero death in your aura at level 4 gives you 45 bonus damage for 60 seconds. If a teamfight goes well and 3 heroes die near you, that is 135 bonus damage — more than a Divine Rapier.
- Break disables both components — the damage reduction aura AND the ability to gain new stacks. Silver Edge carriers are a serious threat to Underlord for this reason.
- The level 10 talent adds +15 seconds to the duration, making stacks last 45/55/65/75 seconds. This is the preferred talent in most games because it means your farming stacks persist longer, giving you sustained damage between fights.
R — Fiend’s Gate (Ultimate)
Fiend’s Gate opens two portals — one next to Underlord and one at the target location (minimum 1500 distance apart). The portals last 20 seconds, and heroes can channel for 3.5 seconds to teleport to the other side. Cooldown is 110/105/100 seconds. Double-clicking teleports to your fountain.
Strategic applications most players miss:
- Post-fight objective taking: Win a teamfight on one side of the map Drop Fiend’s Gate to Roshan or the enemy high ground. Your entire team arrives in 3.5 seconds with the Invading Force double buff — nearly 20% damage reduction and 30% movement speed. This is how you convert kills into objectives.
- Split push escape: Underlord can shove waves deep into enemy territory with Firestorm and have Fiend’s Gate ready as an escape. If they commit heroes to kill you, your team takes objectives on the other side of the map. If they ignore you, you take towers.
- Base defense rotation: Double-click to TP home instantly. If a fight breaks out and you are across the map, Fiend’s Gate to your fountain and TP to the fight. You lose 3.5 seconds channeling, but it is a global repositioning tool.
- Aghanim’s Scepter summons a Pit of Malice around each portal and reduces cooldown. This turns Fiend’s Gate into an offensive tool — drop the exit portal on top of enemies and the Pit roots them as your team pours through.
- Level 25 talent adds 160 DPS in a 700 radius around both portals. This is absolutely massive for highground defense or aggressive portal placement in teamfights.
Item Builds by Rank Bracket
Underlord’s item builds differ significantly based on your rank bracket because the hero’s role in the game changes with the quality of your teammates. At lower ranks, you need to be more self-sufficient. At higher ranks, you focus more on enabling your team. Here is the breakdown:
| Rank Bracket | Starting Items | Early Game (0-10 min) | Core Items (10-25 min) | Late Game (25+ min) |
|---|---|---|---|---|
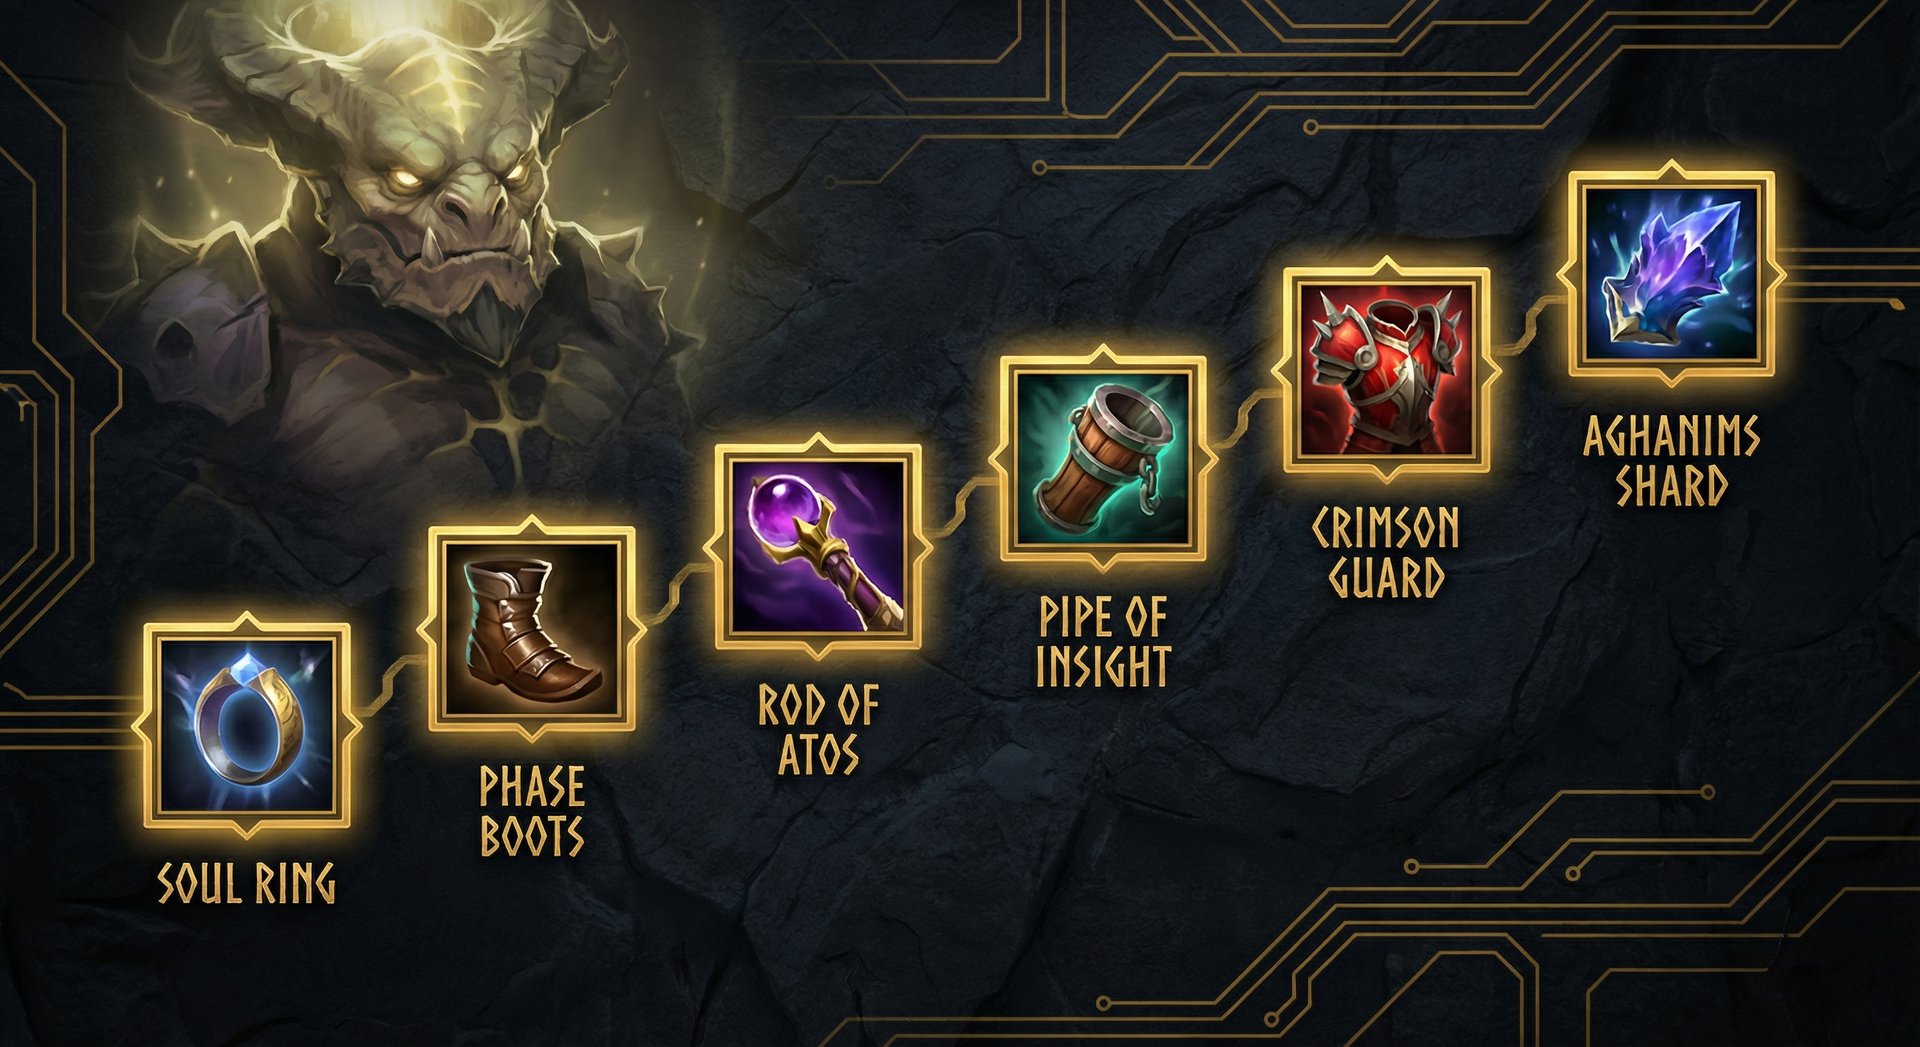
| Herald to Crusader | Tango, Quelling Blade, Gauntlets of Strength, Iron Branch x2 | Soul Ring, Boots, Magic Wand, Bracer | Phase Boots, Rod of Atos, Blade Mail | Pipe of Insight, Crimson Guard, Aghanim’s Shard |
| Archon to Legend | Tango, Quelling Blade, Ring of Protection, Iron Branch x2 | Soul Ring, Phase Boots, Magic Wand | Rod of Atos, Pipe of Insight OR Crimson Guard | Aghanim’s Shard, Shiva’s Guard, Lotus Orb |
| Ancient to Divine | Tango, Quelling Blade, Ring of Protection, Circlet | Soul Ring, Phase Boots, Wind Lace | Pipe/Crimson (team-dependent), Rod of Atos OR Veil of Discord | Aghanim’s Shard, Shiva’s Guard, Aghanim’s Scepter, Refresher Orb |
| Immortal | Tango, Quelling Blade, Ring of Protection, Circlet | Soul Ring, Phase Boots, Wind Lace | Pipe/Crimson (always build what team needs), Veil of Discord | Aghanim’s Shard, Shiva’s Guard, Aghanim’s Scepter, Refresher Orb, Overwhelming Blink |
Item Explanations by Phase
Starting Items
Quelling Blade is non-negotiable. Underlord’s base damage is decent (62-68), but with Atrophy Aura stacks and Quelling, you dominate the last hit game completely. Tango for sustain, and the stat items (Gauntlets, Ring of Protection, Branches) build into your early pickups.
Early Game Core
Soul Ring is Underlord’s most important early item. Firestorm costs 110-155 mana, and you want to spam it every time it is off cooldown. Soul Ring solves all your mana problems while giving you HP regen and armor. Rush this every single game.
Phase Boots over Power Treads. Underlord’s base movement speed is 290, which is abysmal. Phase Boots give you the burst movement to position for Pit of Malice and chase for right-clicks with Atrophy stacks. The armor also synergizes with his natural tankiness.
Mid Game Core
Rod of Atos deserves special mention. The root from Atos into Pit of Malice into Firestorm is Underlord’s kill combo. Atos roots for 2 seconds, then Pit roots for 1.8 seconds. That is nearly 4 seconds of lockdown during which Firestorm is ticking. At lower brackets, this combo solo-kills most heroes. At higher brackets, it sets up kills with your team.
Pipe of Insight vs Crimson Guard: Check the enemy lineup. Heavy magic damage (Zeus, Leshrac, Invoker) Pipe first. Heavy physical right-click (PA, Troll, Drow) Crimson Guard. In most games, you build one and let your support build the other. At Immortal, you always communicate with your team about who is building what.
Late Game Scaling
Aghanim’s Shard is a massive power spike. Making Firestorm follow an allied hero turns any frontliner into a walking Firestorm. Cast it on your initiator before a fight and watch the enemy team melt. This is typically your first pickup after your aura item.
Shiva’s Guard gives armor, intelligence, and an active slow that synergizes perfectly with your kit. Enemies caught in Pit of Malice, slowed by Shiva’s, burning in Firestorm — they simply cannot move or fight effectively.
Aghanim’s Scepter in the late game is game-changing. The Pit of Malice around Fiend’s Gate portals creates zones that root enemies trying to contest your repositioning. Combined with the level 25 talent (160 DPS around portals), this turns Fiend’s Gate into an offensive weapon.
Refresher Orb in the ultra-late game means double Fiend’s Gate, double Pit of Malice, double Firestorm. This is excessive in most games but absolutely wins you the base race scenario where you need to split the enemy team’s attention across multiple fronts.
Laning Phase Masterclass

Underlord’s laning phase is where the hero truly shines, and it is the single biggest reason he maintains a high winrate across all brackets. Understanding how to abuse his kit in lane is the difference between a dominant game and a mediocre one.
Levels 1-3: Establish Dominance
Start with Firestorm at level 1. At level 1, Firestorm deals 30 damage per wave (180 total if all 6 waves hit). This is not enough to kill anything, but it IS enough to force the enemy carry to choose between taking damage and contesting last hits. Position yourself so that your Firestorm covers both the ranged creep and the enemy carry.
Take Atrophy Aura at level 2. This is where the lane gets disgusting. With even 8% base damage reduction, the enemy carry starts losing last hits they should otherwise secure. Watch their damage numbers — they will start missing last hits under tower because their damage no longer crosses the threshold. Meanwhile, every creep that dies near you gives you bonus damage, making YOUR last hits easier.
Take Pit of Malice at level 3. Now you have your kill threat. Firestorm the wave, walk up with your Atrophy stacks, and if the enemy carry steps too close, drop Pit on them. The root into Firestorm waves is significant harassment even at these early levels. If your support has any stun or slow, this is your kill combo.
Levels 4-6: Accelerate
Max Firestorm as fast as possible. At level 7 with 4 points in Firestorm, you can one-shot ranged creeps and severely damage the melee creeps. This is your farming accelerator. Firestorm the wave, walk to the nearby jungle camp, stack or clear it, come back for the next wave. You should be farming 2 camps and the lane simultaneously.
At level 6, Fiend’s Gate gives you something most offlaners do not have: infinite sustain. If you are low on HP or mana, drop Fiend’s Gate, channel to fountain, heal up, and channel back. You lose about 10 seconds total but arrive in lane with full resources. This makes it nearly impossible to force Underlord out of the lane through attrition.
Lane Matchup Principles
Against melee carries (PA, Slark, Ursa, Troll): You dominate. Atrophy Aura reduces their already-limited ranged farming ability, and they have to walk into Firestorm and Pit range to contest. Maintain creep equilibrium near your tower and punish every attempt they make to come forward.
Against ranged carries (Drow, Sniper, Luna): Slightly harder because they can farm from outside Atrophy Aura range. Focus on securing your own farm with Firestorm and only commit to harassment when Pit is available. You outscale them in teamfights regardless of laning.
Against aggressive dual lanes (Jugg + CM, Ursa + Dazzle): You actually handle these well because Firestorm zones both heroes simultaneously. Play behind your creep wave, use Firestorm defensively to prevent dives, and call for ganks when Pit is ready.
Against trilanes: Do not be a hero. Soak XP from distance, Firestorm the wave from fog when possible, and once you hit level 6, use Fiend’s Gate for fountain trips to sustain. You need levels more than gold on Underlord.
Mid and Late Game Transitions
The 10-20 Minute Window: Your Peak Power
Underlord hits his first major power spike around the 10-15 minute mark when he has Soul Ring + Phase Boots + level 10-12. At this point, maxed Firestorm deals devastating damage to grouped heroes, Atrophy Aura makes you win any prolonged fight, and Fiend’s Gate lets you show up to any skirmish on the map.
Your job during this phase is to be everywhere. Push out the offlane with Firestorm, rotate to mid for a gank with Pit of Malice, TP to defend your safelane tower. Underlord excels at this constant map pressure because Firestorm farms waves so efficiently and Fiend’s Gate provides global mobility.
Key timing: Your Rod of Atos timing (usually 14-18 minutes) is your biggest kill window. Once you have Atos, actively look for pickoffs. The Atos root into Pit into Firestorm combo kills most supports instantly and chunks cores to half HP. Signal your team and hunt.
The 20-35 Minute Window: Team Enabler
This is where you transition from “I kill people” to “I make my team unkillable.” Your Pipe of Insight or Crimson Guard timing fundamentally changes how teamfights play out. An Underlord standing in the middle of a fight with Pipe active, Atrophy Aura reducing enemy damage, and Firestorm burning the ground is an absolute nightmare for the enemy team to play into.
Positioning in teamfights: You want to be in the front-to-middle of your formation. Not the initiator — leave that to your Tidehunter or Enigma. But not in the back either. Your Atrophy Aura needs to be hitting enemy cores, and your Pit of Malice needs to zone the enemy team’s approach angles. Think of yourself as a second wall behind your initiator. You use Pipe/Crimson, drop Firestorm on the largest clump, Pit the escape routes, and right-click with your Atrophy stacks.
After winning fights: This is where Underlord separates good players from great ones. Always have Fiend’s Gate available for post-fight objectives. Won a fight near your triangle Fiend’s Gate to Roshan. Won a fight in their jungle Fiend’s Gate to their highground. The Invading Force double buff means your team arrives at the objective with damage reduction and movement speed, making it nearly impossible for surviving enemies to contest.
The 35+ Minute Late Game: Percentage Damage Scaling
Underlord does not fall off in the late game the way most offlaners do. Firestorm’s percentage-based burn scales with enemy HP, meaning it actually deals MORE damage as enemy carries build HP items. A level 25 Underlord with Aghanim’s Shard and the +0.6% Firestorm burn talent is dealing 3.6% max HP burn per wave. Against a 4000 HP carry, that is 144 magic damage per wave from burns alone, on top of the 105 flat damage. Over 6 waves, that is 1494 magic damage before reductions.
Late game, your priorities shift to:
- Defending highground: Underlord is arguably the best highground defender in the game. Firestorm and Pit of Malice make it suicidal for enemies to stand under your tower, and Fiend’s Gate lets you evacuate your team if things go wrong.
- Split pushing: Firestorm clears waves from fog. You can push lanes without ever showing on the enemy’s screen, forcing them to react while your team takes objectives elsewhere.
- Enabling Roshan: Fiend’s Gate to Rosh pit after a successful gank is how you close games. Your Atrophy stacks from the kill(s) mean you shred Roshan faster too.
Counters: Heroes That Destroy Underlord
No hero is invincible. Understanding Underlord’s weaknesses is essential both for playing him and for picking against him. Here are the five hardest counters and how to deal with each:
1. Necrophos (52.3% Winrate Against Underlord)
Necrophos is Underlord’s nightmare. Heartstopper Aura negates Underlord’s natural tankiness by dealing percentage-based HP removal. Ghost Shroud prevents Underlord from hitting Necrophos with his Atrophy-empowered right-clicks. And Reaper’s Scythe has kill potential against Underlord’s massive HP pool because it deals damage based on missing HP percentage. The longer the fight goes, the worse it gets for Underlord.
How to play around it: Build Spirit Vessel early to reduce Necrophos’s healing. Do not commit to extended trades — your Firestorm and Pit are ranged, so use them from distance and avoid Heartstopper range when possible. If Necrophos uses Ghost Shroud, immediately Pit him and Firestorm — he takes increased magic damage during Shroud.
2. Razor (54.1% Winrate Against Underlord)
Static Link drains Underlord’s damage, and since Underlord is a slow melee hero with no way to break the link quickly, Razor steals enormous amounts of damage. Worse, Underlord WANTS to stand and fight in prolonged engagements, which is exactly what Razor wants too. Eye of the Storm shreds Underlord’s armor, and Storm Surge makes it hard to catch Razor with Pit of Malice.
How to play around it: Never manfight Razor. Drop Firestorm, Pit him, and walk away. Buy Force Staff as a luxury pickup to break Static Link. Focus on other targets in teamfights and let your carry deal with Razor.
3. Phantom Lancer (54.6% Winrate Against Underlord)
PL’s illusions flood the fight, making it impossible to target the real PL with Pit of Malice. Diffusal Blade burns through Underlord’s modest mana pool. PL also builds Manta and Heart, becoming incredibly hard to burst, and his illusions do not care about Atrophy Aura because they deal reduced damage anyway.
How to play around it: Firestorm actually helps here — the AoE damage kills illusions quickly. But the real answer is itemization: Shiva’s Guard slows illusion generation, and Crimson Guard reduces illusion damage to nothing. Coordinate with your team to burst the real PL during your root.
4. Lifestealer (High Threat)
Feast deals percentage-based damage, which hurts Underlord’s massive HP pool disproportionately. Rage provides spell immunity, rendering Firestorm, Pit, and all your magical damage useless. Lifestealer also naturally builds Desolator or Armlet, which provides damage that is not affected by Atrophy Aura (since they are bonus damage, not base damage).
How to play around it: You simply cannot fight Lifestealer 1v1 in any stage of the game. Focus on teamfights where your AoE contributes more value. Ghost Scepter can save you from Feast in emergencies. Coordinate with your team to kite and burst Lifestealer during Rage downtime.
5. Slark (Moderate-High Threat)
Dark Pact purges your Pit of Malice root. Shadow Dance makes Slark impossible to target. Essence Shift steals your stats in prolonged fights, which Underlord inherently wants. Slark also builds Silver Edge, which breaks Atrophy Aura entirely.
How to play around it: Time your Pit of Malice for AFTER Dark Pact ends. The purge has a 1-second duration, so Pit 1.5 seconds after you see Dark Pact start. Build Crimson Guard to reduce Slark’s right-click damage (Essence Shift gives agility, but Crimson blocks flat damage). Keep sentries and dust for Shadow Dance.
Heroes Underlord Destroys
Now for the fun part — the matchups where Underlord makes enemy players want to uninstall.
1. Phantom Assassin (55.9% Winrate FOR Underlord)
PA relies entirely on base damage for last hits early and critical strikes late. Atrophy Aura at level 4 reduces her base damage by 32%, which is absolutely crippling. PA has no way to deal with Firestorm in lane (she cannot blink away from ground effects), and Pit of Malice prevents Phantom Strike engages. Late game, Crimson Guard and your natural armor stack make PA’s physical damage significantly less threatening.
2. Templar Assassin (59.3% Winrate FOR Underlord)
This is Underlord’s best matchup in the game. Firestorm instantly strips Refraction charges because it deals damage in multiple instances. Meld is useless when you know TA is rooted in your Pit of Malice. And Atrophy Aura reduces TA’s already fragile damage output. TA wants to pick off isolated targets — Underlord wants extended teamfights. You dictate the game’s pace.
3. Legion Commander (52.2% Winrate FOR Underlord)
LC wants to Duel isolated targets. Underlord ensures that never happens — you are always near your team, your aura is always active, and Fiend’s Gate means your team can always arrive quickly. During Duel, Atrophy Aura reduces LC’s damage, Firestorm ticks on her, and Pit of Malice roots her afterward. She gains minimal Duel damage from killing targets near you because their damage was already reduced.
4. Drow Ranger (49.5% Winrate FOR Underlord)
Drow’s Marksmanship bonus is disabled when Underlord (a melee hero) is within 400 range. Gust can push Underlord away, but Pit of Malice prevents Drow from creating distance. Atrophy Aura reduces Drow’s massive base damage. Frost Arrows slow does not help much against a hero who wants to stand and fight. Underlord wins the lane, wins the mid game, and his Pipe/Crimson timing neutralizes Drow’s power spike.
5. Wraith King (Strong Matchup)
WK has one ability that matters: his stun. Everything else is right-clicking, which Atrophy Aura decimates. WK’s slow attack speed means fewer Atrophy Aura stacks lost, and Firestorm’s percentage burn is devastating against WK’s large HP pool. When WK dies and uses Reincarnation, he comes back with reduced damage (Atrophy Aura is still active) into a Pit of Malice and ongoing Firestorm. He just dies again.
How Pros Play Underlord in the Current Patch
Underlord has seen steady pro play throughout 2025 and into 2026, particularly as a comfort pick for offlaners who prioritize reliability over flashy plays. The hero’s pickrate in professional matches has increased since the 7.41 patch buffed Firestorm’s wave damage from 30/50/70/90 to 30/55/80/105 and increased Atrophy Aura’s damage reduction from 6/14/22/30% to 8/16/24/32%.
Pro Build Trends
High-level pro players tend to follow a specific pattern with Underlord that differs from pub builds:
- Veil of Discord over Rod of Atos in many pro games. The reasoning is that pros trust their supports to provide lockdown, so they prioritize amplifying Firestorm’s magic damage (which benefits the entire team’s magical damage output) over personal catch.
- Early Aghanim’s Shard (usually 15-20 minutes) is prioritized higher in pro play than pubs. The Shard turns Underlord from a zone controller into a damage amplifier for the team’s initiator. Casting Firestorm on your Centaur or Mars who blinks in creates enormous damage zones.
- Overwhelming Blink is a late-game pickup in some pro builds. It gives Underlord initiation capability he otherwise lacks — Blink in, Pit of Malice, Firestorm, and the Overwhelming Blink slow stacks with everything.
Pro Skill Build
The standard pro skill build is: Q-E-Q-E-Q-R-Q-W-W-Talent-W-R-W-E-Talent-E-R. Notice that pros max Atrophy Aura second over Pit of Malice. The reasoning is that the damage reduction scaling (8% to 32%) has more impact on teamfight outcomes than additional root duration. Pit of Malice’s value comes from the root existing at all, not from the duration scaling.
Talent Choices in Pro Play
| Level | Preferred Talent | Pick Rate | Why |
|---|---|---|---|
| 10 | +15s Atrophy Aura Duration | ~63% | Sustains farming damage between fights, keeps stacks longer during rotations |
| 15 | Pit of Malice Slows by 20% | ~59% | Massively improves Pit’s zone control; enemies cannot walk out before re-root |
| 20 | +0.6% Firestorm Burn Damage | ~68% | Scales into late game; 3.6% max HP burn per wave is enormous |
| 25 | +0.4s Pit of Malice Root | ~79% | 2.2s root on a 3.6s interval is almost permanent lockdown inside Pit |
Rank-Specific Climbing Guide
Herald to Guardian: Foundation Basics
At this bracket, the single most important thing to learn on Underlord is Firestorm placement. Most Herald players either cast Firestorm randomly or directly on top of themselves. Instead, cast it slightly ahead of where the enemy is walking. The waves take time to land, and enemies walk through multiple waves if you predict their pathing.
Priority skills to develop:
- Last hitting with Atrophy Aura stacks — you have MORE damage than the enemy, so use it
- Using Soul Ring BEFORE casting Firestorm (never forget to activate it)
- Standing in the right spot — close enough for Atrophy Aura, far enough to avoid free harassment
- Using Fiend’s Gate to go back to fountain when low — do not walk back, you waste time
Common mistakes: Walking back to base instead of using Fiend’s Gate. Forgetting to use Soul Ring before spells. Standing too far from creeps and losing Atrophy stacks. Building damage items instead of aura/utility items.
Crusader to Archon: Adding Game Sense
At this bracket, you need to start thinking about wave management and jungle efficiency. Underlord farms incredibly fast once you understand the rhythm: Firestorm the creep wave, walk to the nearest jungle camp, stack or kill it, walk back for the next wave. You should be getting 70-80 last hits by the 10-minute mark.
Priority skills to develop:
- Farming patterns — alternate between lane and jungle every wave
- Understanding when to fight vs when to farm (if your team has a fight, TP in with Fiend’s Gate)
- Building the RIGHT aura item first (check enemy damage types)
- Using Pit of Malice to set up kills — ping your target, root them, Firestorm them
The Archon trap: Do not fall into the trap of building Radiance. It might seem logical on a hero that wants to stand in fights, but Radiance provides no tankiness and delays your critical aura items by 10+ minutes. Rod of Atos into Pipe/Crimson wins you significantly more games.
Legend to Ancient: The Macro Leap
This is where Underlord players need to transition from “I win my lane and fight” to “I control the entire map.” You should be using Firestorm to push out dangerous lanes from fog, stacking camps for your carry when timings allow, and using Fiend’s Gate to create pressure on multiple sides of the map.
Priority skills to develop:
- Fiend’s Gate usage for post-fight objectives (Roshan, towers, barracks)
- Understanding team composition — are YOU the frontliner, or is someone else tankier
- Smoke plays with Pit of Malice for pickoffs around Roshan
- Adapting your item build game-to-game (do not autopilot the same build)
- Watching the minimap and using Fiend’s Gate to save teammates being ganked
Ancient-bracket insight: At this level, enemies start buying Silver Edge specifically to break your Atrophy Aura. You need to start tracking enemy inventories and consider items like Lotus Orb to dispel the break debuff, or simply play more carefully when you know Silver Edge is on the map.
Divine to Immortal: What Separates the Top 1%
At Immortal, Underlord games are won or lost by tempo control and resource allocation. The hero does not need much farm to function, which means you can sacrifice your lane farm for your carry’s benefit in hard games. You might leave the lane entirely at level 6 to stack jungle camps and farm those instead, giving your carry solo XP.
Priority skills to develop:
- Optimizing Fiend’s Gate cooldown usage — never let it sit off cooldown without a plan
- Communicating aura item timings with your team (Pipe at 14 min, let us fight)
- Understanding draft implications — when to pick Underlord and when he is griefing (avoid him into heavy % damage lineups)
- Aghanim’s Shard timing on specific allied heroes — know who benefits most from the walking Firestorm
- Reading the game state and deciding between defensive (highground hold) and offensive (split push) Fiend’s Gate usage
Immortal insight: The best Underlord players in the world use the hero as a draft anchor — you pick him early and he is difficult to counter. His lane is stable enough to survive most matchups, his teamfight contribution is always relevant, and Fiend’s Gate provides strategic flexibility that no other hero can match. The hero’s ceiling is not about mechanical skill — it is about decision-making.
Tips and Tricks
Advanced Mechanics
- Firestorm + Shift-Queue: Cast Firestorm, then immediately shift-queue a move command. This minimizes the time you stand still after the cast animation, which is critical for dodging enemy spells during lane trades.
- Double-Tap Fiend’s Gate: Double-clicking Fiend’s Gate targets your fountain. This is your emergency escape button. Practice this until it is muscle memory — in a panic situation, you do not want to be clicking the minimap.
- Pit of Malice Vision: Pit of Malice provides ground vision of the area for its 12-second duration. Use it to scout Roshan pit, high ground, or juke spots when you lack wards.
- Atrophy Aura Stack Tracking: The buff icon shows your current bonus damage from Atrophy stacks. After clearing a large creep wave or winning a fight, check your bonus damage. If you have 80+ bonus damage, immediately hit a tower or Roshan — this damage is on a timer.
- Firestorm Fog Farming: You can cast Firestorm from fog on creep waves you cannot see, as long as you know the wave’s position from minimap timing. This lets you push lanes without revealing yourself on the map.
Common Mistakes to Avoid
- Building too greedy: Underlord is NOT a carry. Do not build Radiance, Assault Cuirass first, or any item that does not immediately help your team. Your job is aura items and utility.
- Forgetting Fiend’s Gate for objective taking: The most common mistake even at 6K+ MMR. You win a fight, everyone walks to the tower or Roshan instead of Fiend’s Gate-ing there. You lose 15-20 seconds of pushing time, which at high MMR means buybacks are up and the opportunity is gone.
- Standing too close in fights: You are tanky, but you are not an initiator. If you blink in and get stunlocked, your team loses their aura carrier and Pipe holder. Stay behind your initiator and apply pressure from the second row.
- Ignoring Silver Edge break: When an enemy has Silver Edge, your ENTIRE passive is disabled. This includes Atrophy Aura’s damage reduction AND the ability to gain stacks. One Silver Edge hit makes you a creep for 4 seconds. Buy Lotus Orb or position to avoid the initial hit.
- Not using Aghanim’s Shard effectively: The allied-targeted Firestorm is meant for your INITIATOR, not yourself. Cast it on your Mars, Axe, or Bristleback before they jump in. Casting it on yourself is suboptimal unless you are the one who has to frontline.
Frequently Asked Questions
Position 3 (offlane) is Underlord’s optimal role. He needs levels to function (maxed Firestorm and Atrophy Aura are critical), and he needs farm for aura items like Pipe and Crimson Guard. As a Position 4, he lacks the gold for these timings and falls behind in levels. You CAN play him as a 4 in low-bracket games where the offlaner does not take the role seriously, but it is suboptimal above Archon.
Avoid Underlord when the enemy has heavy percentage-based damage (Necrophos, Lifestealer), multiple Silver Edge builders, or extreme kiting ability (Drow + Sniper + Viper). Also avoid him when your team already has a slow, teamfight-oriented draft and needs a more mobile offlaner like Pangolier or Primal Beast. Underlord cannot create space through aggression the way those heroes can.
Cast Firestorm on the spot where the fight WILL happen, not where it IS happening. The 6-wave duration means you want enemies walking into your Firestorm, not moving out of it. In a highground defense scenario, cast it at the base of your ramp. In an aggressive fight, cast it behind the enemy team to cut off their retreat. Never cast it directly under your own feet unless you are being dove.
Yes, but as a late-game luxury (4th or 5th item, not before). Scepter adds Pit of Malice around both Fiend’s Gate portals and reduces cooldown. This is game-changing in combination with the level 25 talent (160 DPS around portals). However, Pipe, Crimson, and Aghanim’s Shard all provide more value earlier. Only rush Scepter if your team is playing a heavy push strategy where Fiend’s Gate aggression is the win condition.
Soul Ring solves everything. Rush it before boots if needed. The 150 mana on a 25-second cooldown covers your Firestorm cost entirely. Combine this with Fiend’s Gate fountain trips at level 6, and you should never have mana issues again. If you are struggling before Soul Ring, use Firestorm sparingly — only on the ranged creep and enemy hero, not randomly on the wave.
Both, depending on the game state. In the mid game (15-30 minutes), use it offensively — Fiend’s Gate to Roshan after kills, Fiend’s Gate to push highground with your team. In the late game (35+ minutes), save it defensively unless you have a clear numbers advantage. A wasted Fiend’s Gate at 40 minutes can lose you the game because the cooldown is 100 seconds at max level. Always communicate with your team before using it.
Underlord pairs best with heroes who benefit from prolonged teamfights and percentage-based damage: Necrophos (Heartstopper + Firestorm melts teams), Bristleback (Shard Firestorm on BB is disgusting), Mars (Arena of Blood traps enemies in your Firestorm), and Enigma (Black Hole into Firestorm + Pit is a teamwipe). Any hero with strong initiation synergizes well because you provide the sustained follow-up damage and lockdown after the initial engage.
Ready to Dominate with Underlord
Our Immortal-rank coaches can teach you the exact Firestorm placements, Fiend’s Gate timings, and teamfight positioning that separates 3K players from 7K players. Or skip the grind entirely and let our boosters carry your account through the bracket.


