How to Master Tidehunter in Dota 2: The Ultimate Guide for Every Rank (2026)

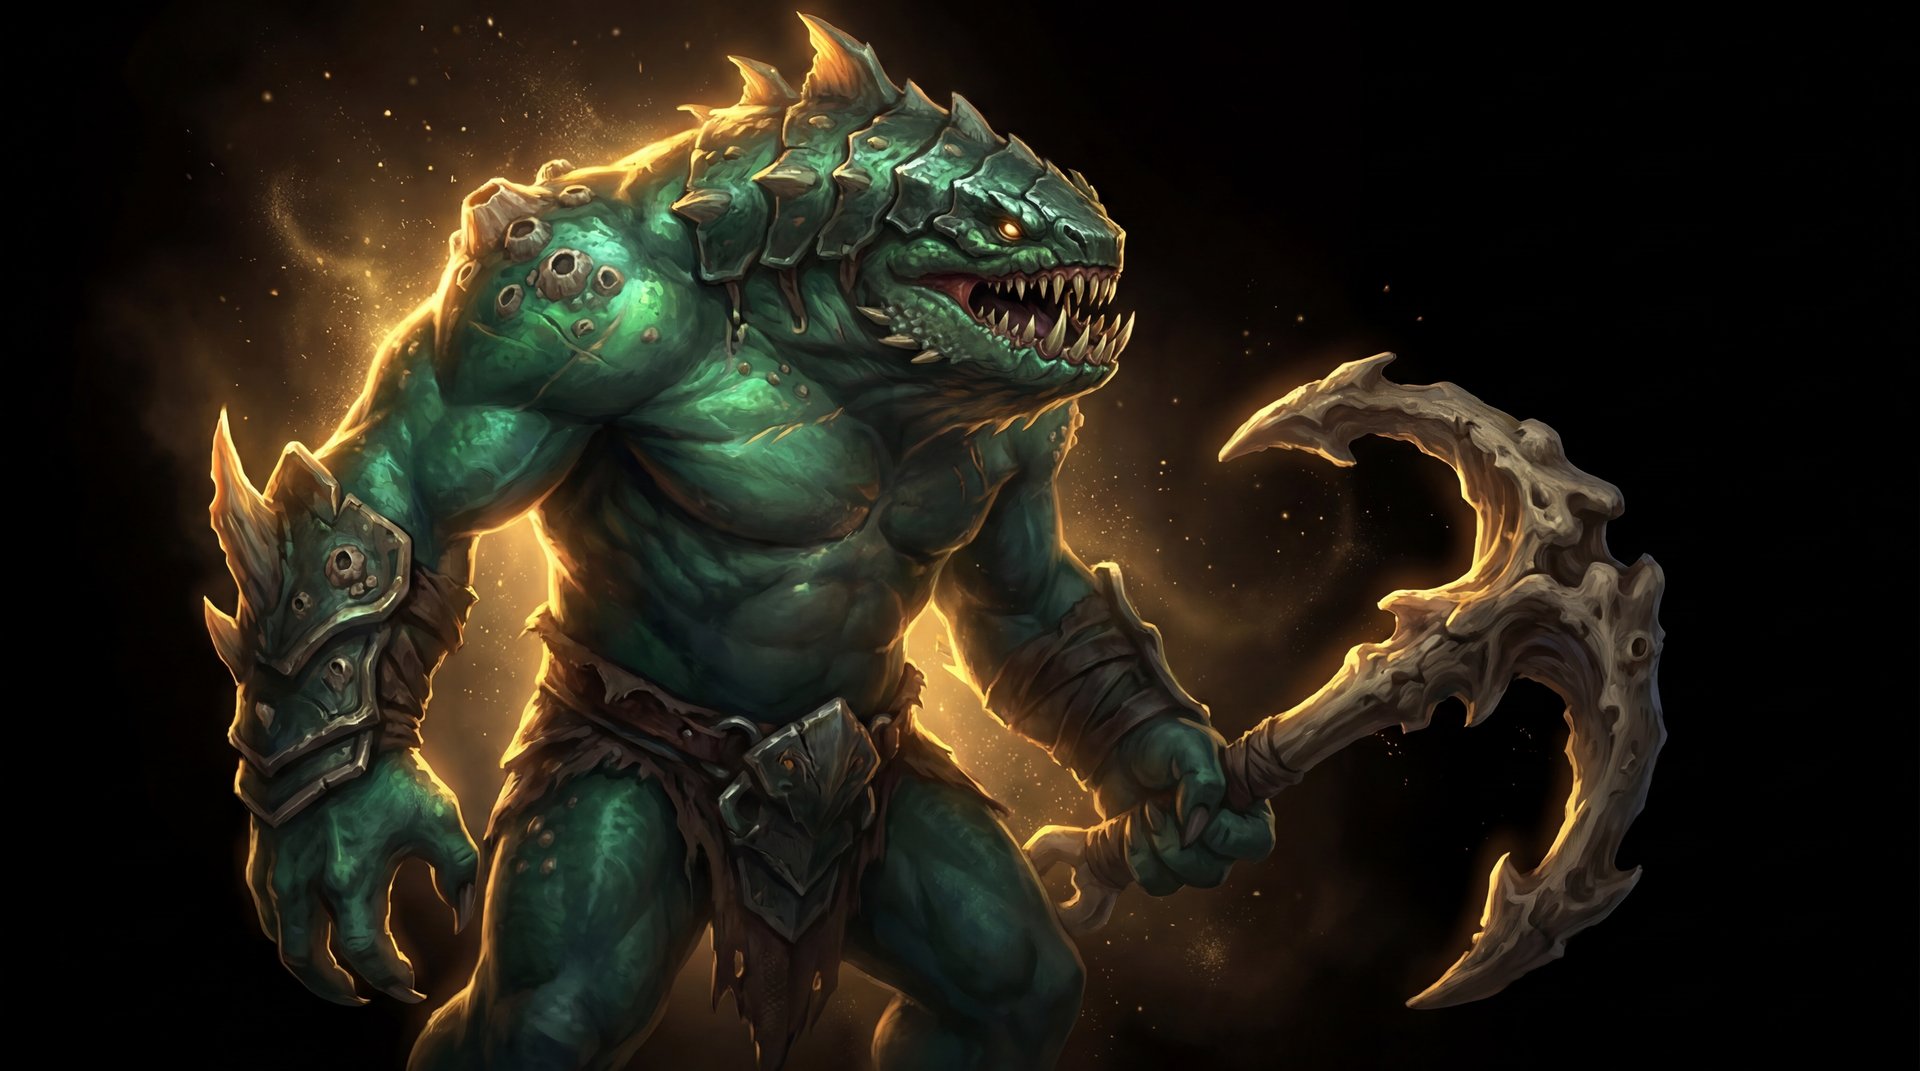
Few ultimates in Dota 2 can single-handedly decide a team fight the way Ravage can. Tidehunter has been a cornerstone of competitive and pub Dota since the earliest days of the game, and for good reason — this massive Leviathan combines bulletproof laning, devastating team fight initiation, and a level of durability that makes enemy carries question their item choices. Whether you are watching a TI grand final or grinding ranked in Archon, a well-timed Ravage followed by Anchor Smash spam can delete an entire team before they finish processing what just happened.
In this guide, we are going to break down everything you need to know about mastering Tidehunter in 2026. From ability mechanics most players get wrong, to rank-specific item builds, laning tricks, counter strategies, and the pro-level decision-making that separates a “press R and hope” Tidehunter from a game-winning offlaner. Whether you are picking him up for the first time or trying to refine your play at high MMR, this guide has you covered.
Table of Contents
Why Tidehunter Is Dota’s Most Feared Initiator
Tidehunter is a melee strength hero primarily played in the offlane (position 3), though he occasionally sees play as a position 4 support in specific drafts. His identity revolves around one of the most powerful ultimates in the game — Ravage — a massive AoE stun that hits every enemy in a huge radius. But reducing Tidehunter to just his ultimate is a mistake that costs games.
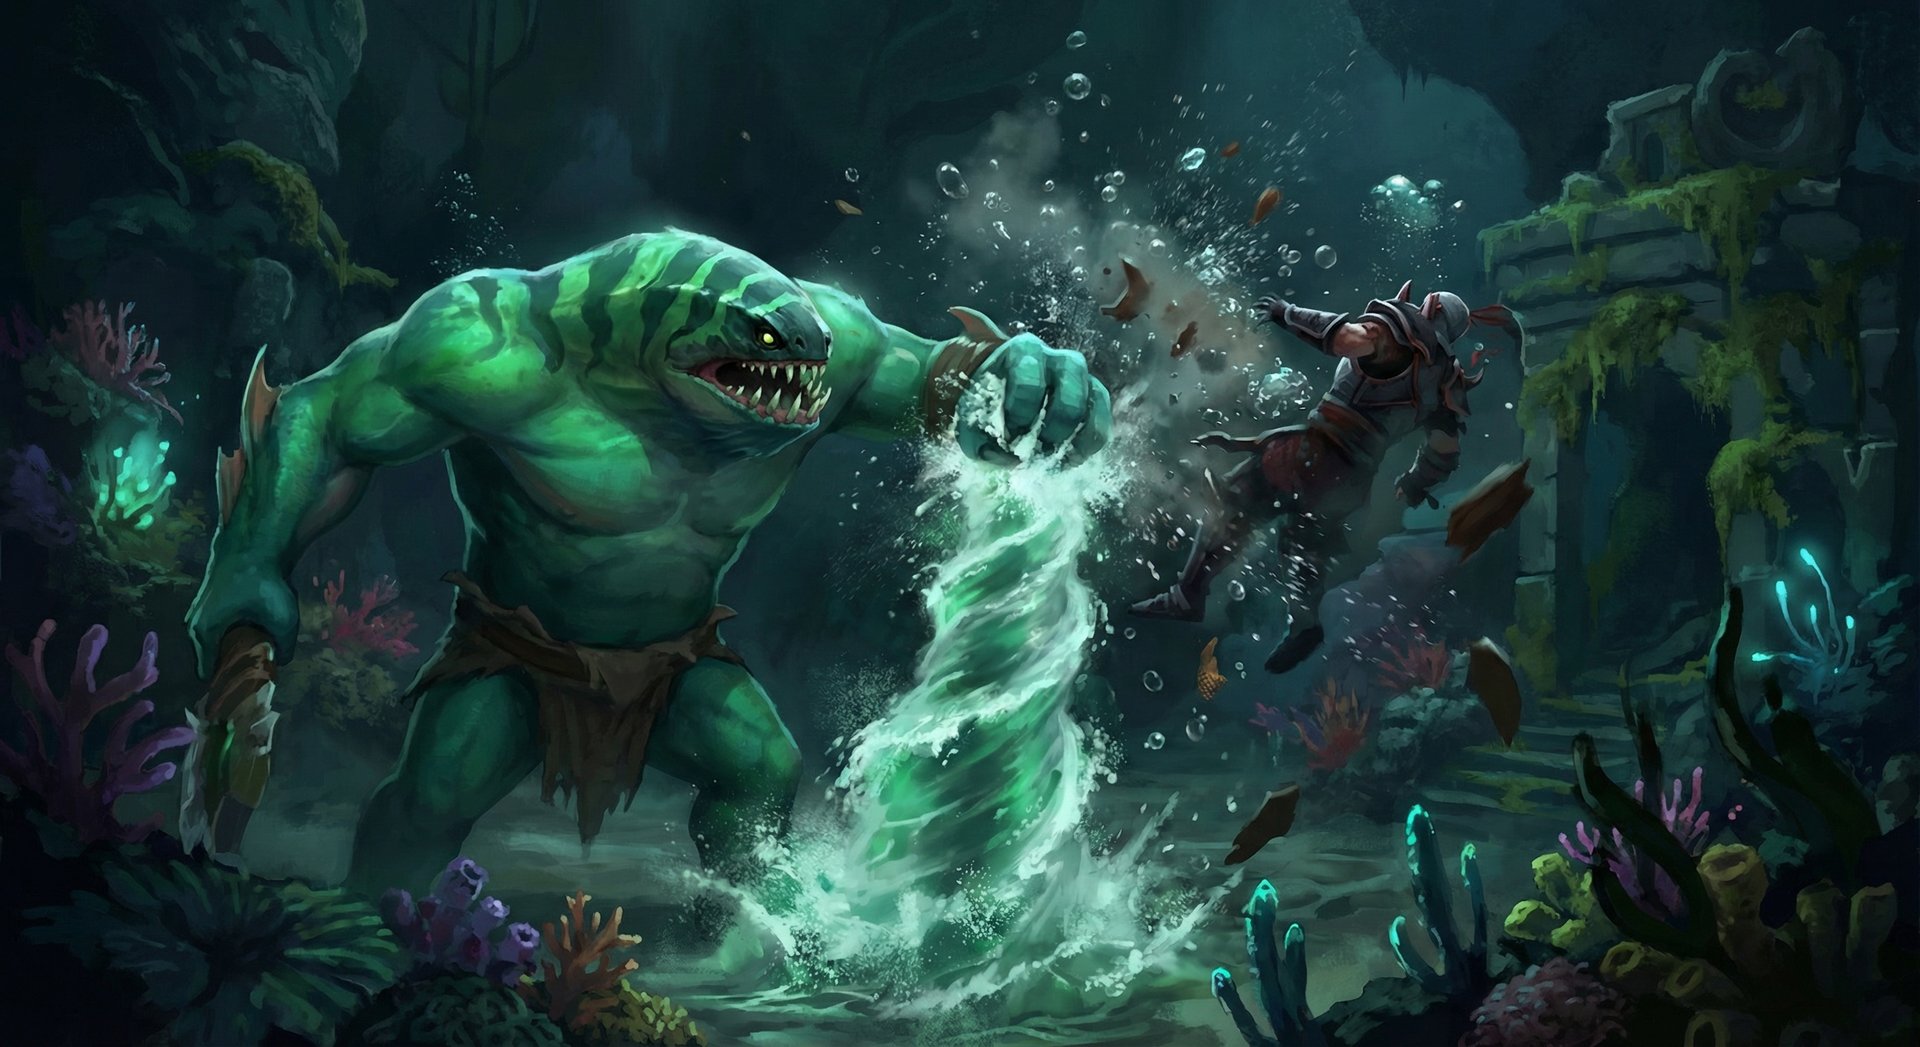
What makes Tidehunter truly oppressive is his complete laning package. Kraken Shell provides passive damage block and an automatic dispel when he takes enough damage, making him extraordinarily difficult to bully out of lane. Anchor Smash reduces enemy attack damage by a percentage, turning even the hardest-hitting carries into wet noodles. And Gush provides armor reduction and slow for kill setups and Roshan attempts.
According to Dotabuff, Tidehunter maintains a consistent 51-52% winrate across all brackets, with his winrate climbing above 53% in Herald through Archon — brackets where team fight coordination is less refined and a single Ravage can win the game outright. His pick rate hovers around 8-10%, making him one of the more popular offlaners in pub play.
The hero excels in drafts that want to fight as five early, take objectives after team fights, and end games before enemy carries reach full power. If your team has follow-up damage — think Skywrath Mage, Invoker, or any AoE-heavy lineup — Tidehunter turns from strong to nearly unbeatable in the mid game.
Abilities Deep Dive
Gush (Q)
Gush is a single-target nuke that deals 110/160/210/260 magic damage, reduces the target’s armor by 3/4/5/6, and slows movement speed by 40% for 4 seconds. At first glance, it seems like a simple spell, but the armor reduction is where Gush becomes genuinely scary.
A level 4 Gush removes 6 armor from the target. Against heroes with naturally low armor (most intelligence heroes, some agility heroes early on), this can push them into negative armor territory, amplifying all physical damage they take by 25-35%. This is why Gush into Anchor Smash hits significantly harder than you might expect from looking at the damage numbers alone.
Hidden mechanics: Gush is disjointable by abilities like Manta Style or Blink, but the projectile is relatively fast (2000 speed). The armor reduction applies before the damage, meaning the magic damage portion does not benefit from the armor reduction, but any physical damage following immediately does. Gush also provides vision of the target for its duration, which matters for fog-of-war plays.
Anchor Smash (W)
Anchor Smash deals 75/125/175/225 physical damage in an AoE around Tidehunter and reduces enemy attack damage by 30/40/50/60% for 6 seconds. This is the ability that wins lanes and makes Tidehunter the bane of every melee carry in Dota 2.
At max level, reducing an enemy carry’s attack damage by 60% is devastating. A Phantom Assassin with a Desolator hitting for 300 damage suddenly hits for 120. This single ability makes Tidehunter one of the best heroes in the game at contesting Roshan, as Roshan’s attack damage gets obliterated by the reduction.
Key interaction: Anchor Smash’s damage is physical, which means it synergizes perfectly with Gush’s armor reduction. A Gush followed by Anchor Smash on a squishy target deals massive burst — often 400+ effective damage at level 7. The damage reduction debuff also works on creeps, making Tidehunter an excellent farmer once he has a few levels.
Farming pattern: Max Anchor Smash lets you clear entire creep waves and jungle camps in seconds. The 4-second cooldown at max level means you can chain camps rapidly. Experienced Tidehunter players will push the wave with Anchor Smash, immediately rotate to the nearby jungle camp, Anchor Smash that, and return for the next wave — maintaining 7-9 CS per minute even in a contested lane.
Kraken Shell (E)
Kraken Shell passively blocks 20/40/60/80 damage from each instance of damage Tidehunter receives. When Tidehunter accumulates 300/350/400/450 damage after reductions, Kraken Shell triggers a strong dispel, removing most debuffs and stuns.
This is the ability that confuses lower-ranked players and makes higher-ranked players respect Tidehunter’s lane presence. The damage block alone is enormous early game — 40 damage block at level 2 means enemy heroes dealing 80 damage per hit effectively deal only 40. Against creeps, the block is even more impactful, which is why Tidehunter takes almost no creep damage.
The auto-dispel is incredibly powerful and understanding it separates good Tidehunter players from great ones. It removes stuns, slows, silences, and most debuffs. This means heroes who rely on chain-disabling Tidehunter need to burst through the damage threshold quickly or risk their disables being purged. Notably, the dispel does NOT remove hexes (Scythe of Vyse, Lion Hex, Shadow Shaman Hex) and does NOT trigger during the stun from abilities like Black Hole or Chronosphere.
Damage threshold trick: The 300+ damage threshold is calculated after all reductions, including Kraken Shell’s own damage block. This means the actual pre-reduction damage needed to trigger the dispel is significantly higher than the listed number. In practice, enemies need to deal roughly 500-700 raw damage to trigger the dispel at max level, depending on Tidehunter’s armor and other damage reductions.
Ravage (R)
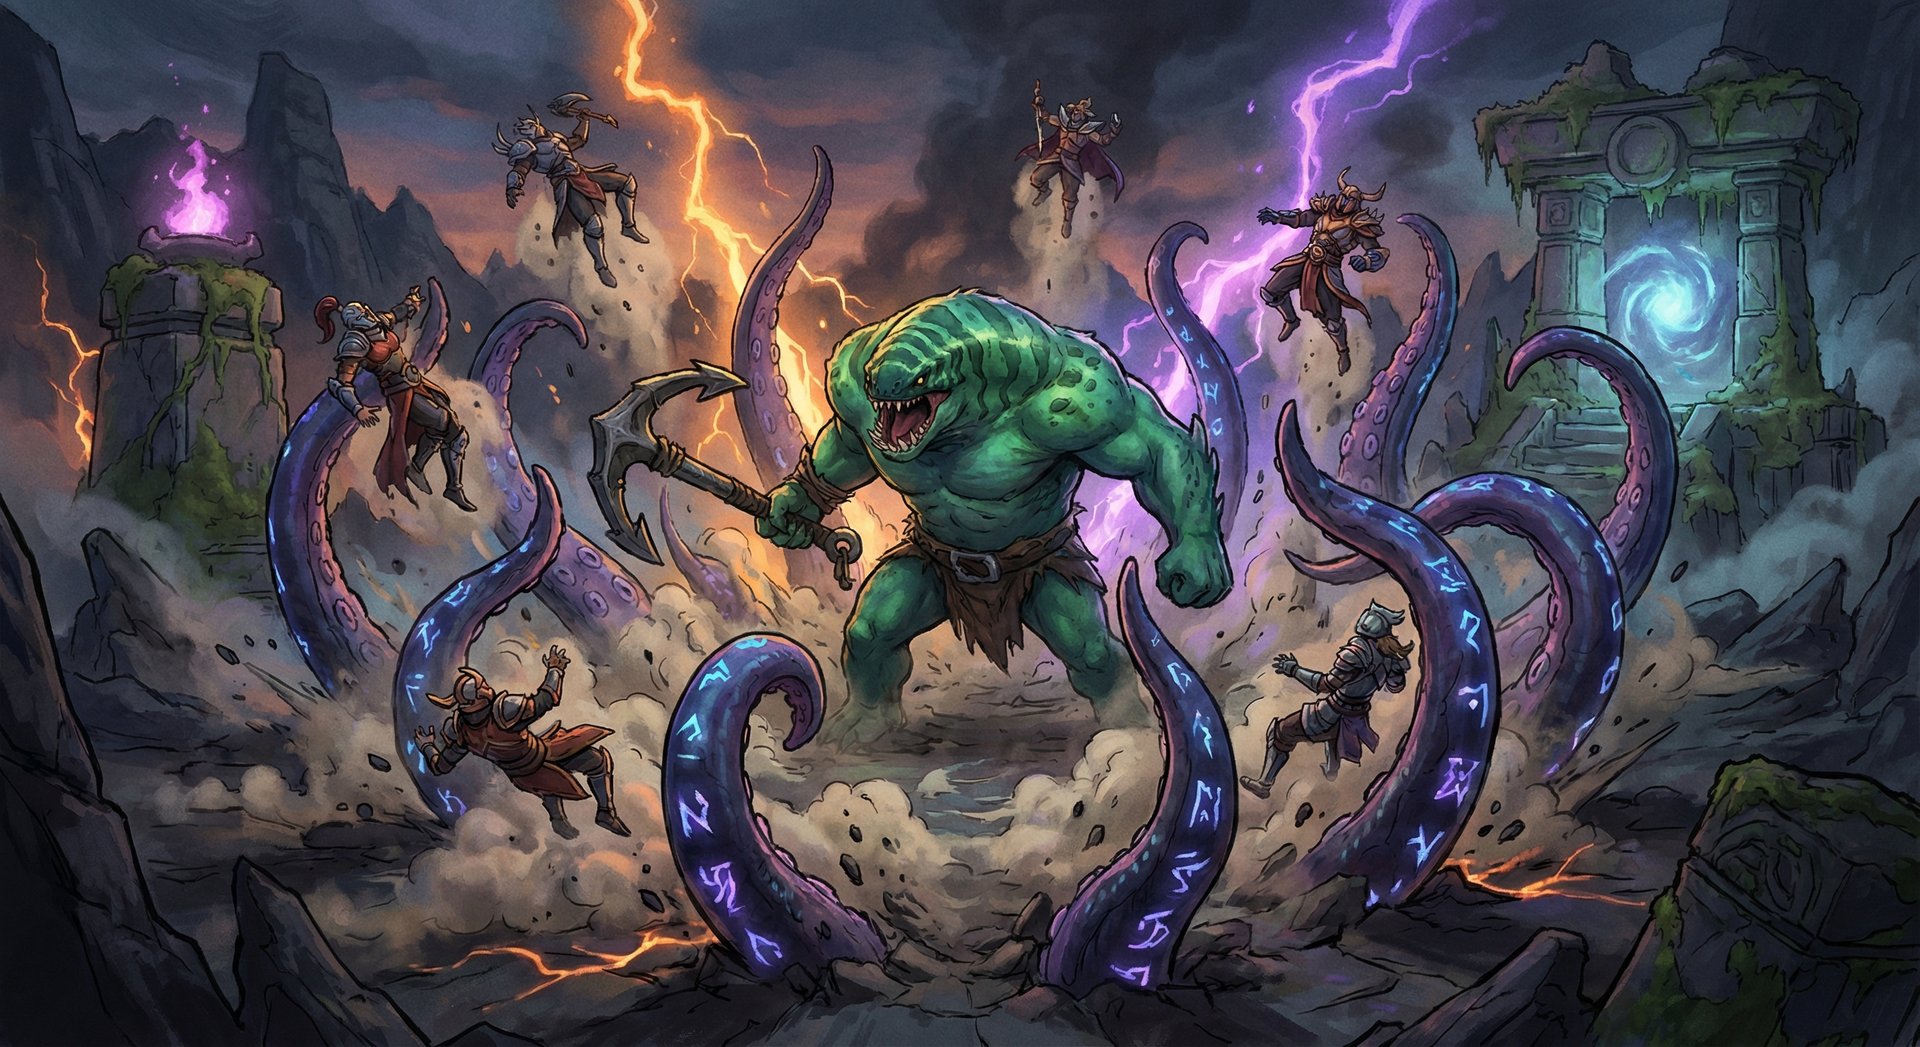
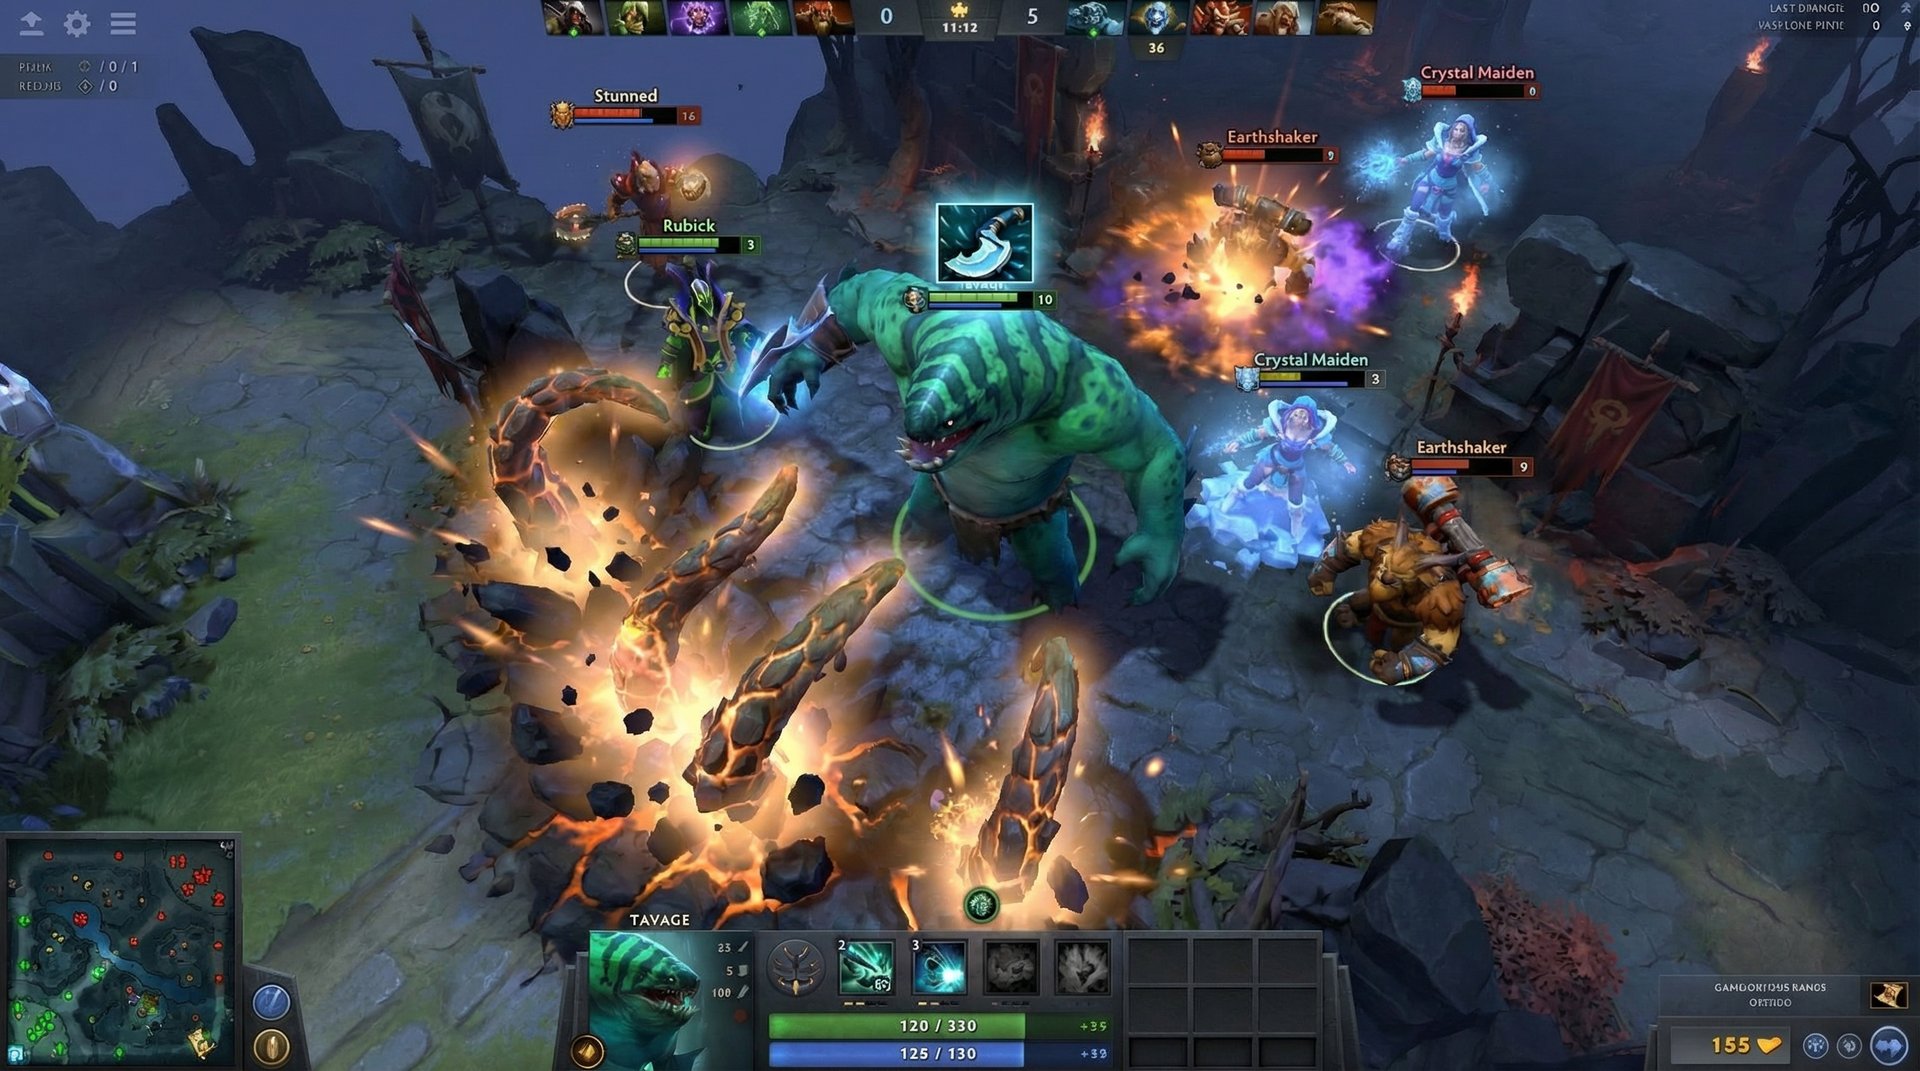
The big one. Ravage sends out tentacles in a 1250 radius around Tidehunter, dealing 200/290/380 magic damage and stunning all enemies hit for 2.0/2.4/2.8 seconds. The tentacles travel outward from Tidehunter at 725 speed, meaning enemies at the edge have a brief window to react.
At max level, a 2.8-second AoE stun across the entire enemy team is one of the most powerful abilities in Dota 2. For context, a perfect 5-man Ravage provides 14 total seconds of stun across the enemy team. That is more than enough time for your team to delete at least 2-3 heroes before anyone can respond.
Cast point: Ravage has a 0.3-second cast point. This matters because it means enemies have 0.3 seconds plus travel time to react. At point-blank range, heroes with instant escape abilities (Anti-Mage Blink, Queen of Pain Blink) can sometimes dodge it if they have god-tier reaction time. This is why Blink Dagger is essentially mandatory on Tidehunter — you need to be on top of your targets when you press R.
Cooldown management: Ravage has a long cooldown of 150 seconds at all levels. This means you get roughly one Ravage per major team fight. Wasting Ravage on a solo kill (unless it is on a critical target like the enemy mid or carry) is almost always wrong. The threat of Ravage is often as valuable as Ravage itself — enemies will play passively, avoid grouping, and give up map control just because your ult is off cooldown.
Interaction with BKB: Ravage does NOT pierce spell immunity. This is the single biggest counterplay to Tidehunter and why BKB timing is so critical in games involving him. However, enemies need to activate BKB BEFORE the tentacles reach them — you cannot BKB while stunned by Ravage to break the stun.
Item Builds by Rank Bracket
| Rank | Starting | Early (0-10 min) | Core (10-25 min) | Late (25+ min) |
|---|---|---|---|---|
| Herald – Crusader | Tango, Quelling Blade, Ring of Protection, Iron Branch x2 | Soul Ring, Arcane Boots, Magic Wand | Blink Dagger, Mekansm | Guardian Greaves, Shiva’s Guard, Refresher Orb |
| Archon – Legend | Tango, Quelling Blade, Ring of Protection, Gauntlets of Strength | Soul Ring, Phase Boots, Magic Wand | Blink Dagger, Pipe of Insight or Crimson Guard | Shiva’s Guard, Refresher Orb, Aghanim’s Scepter |
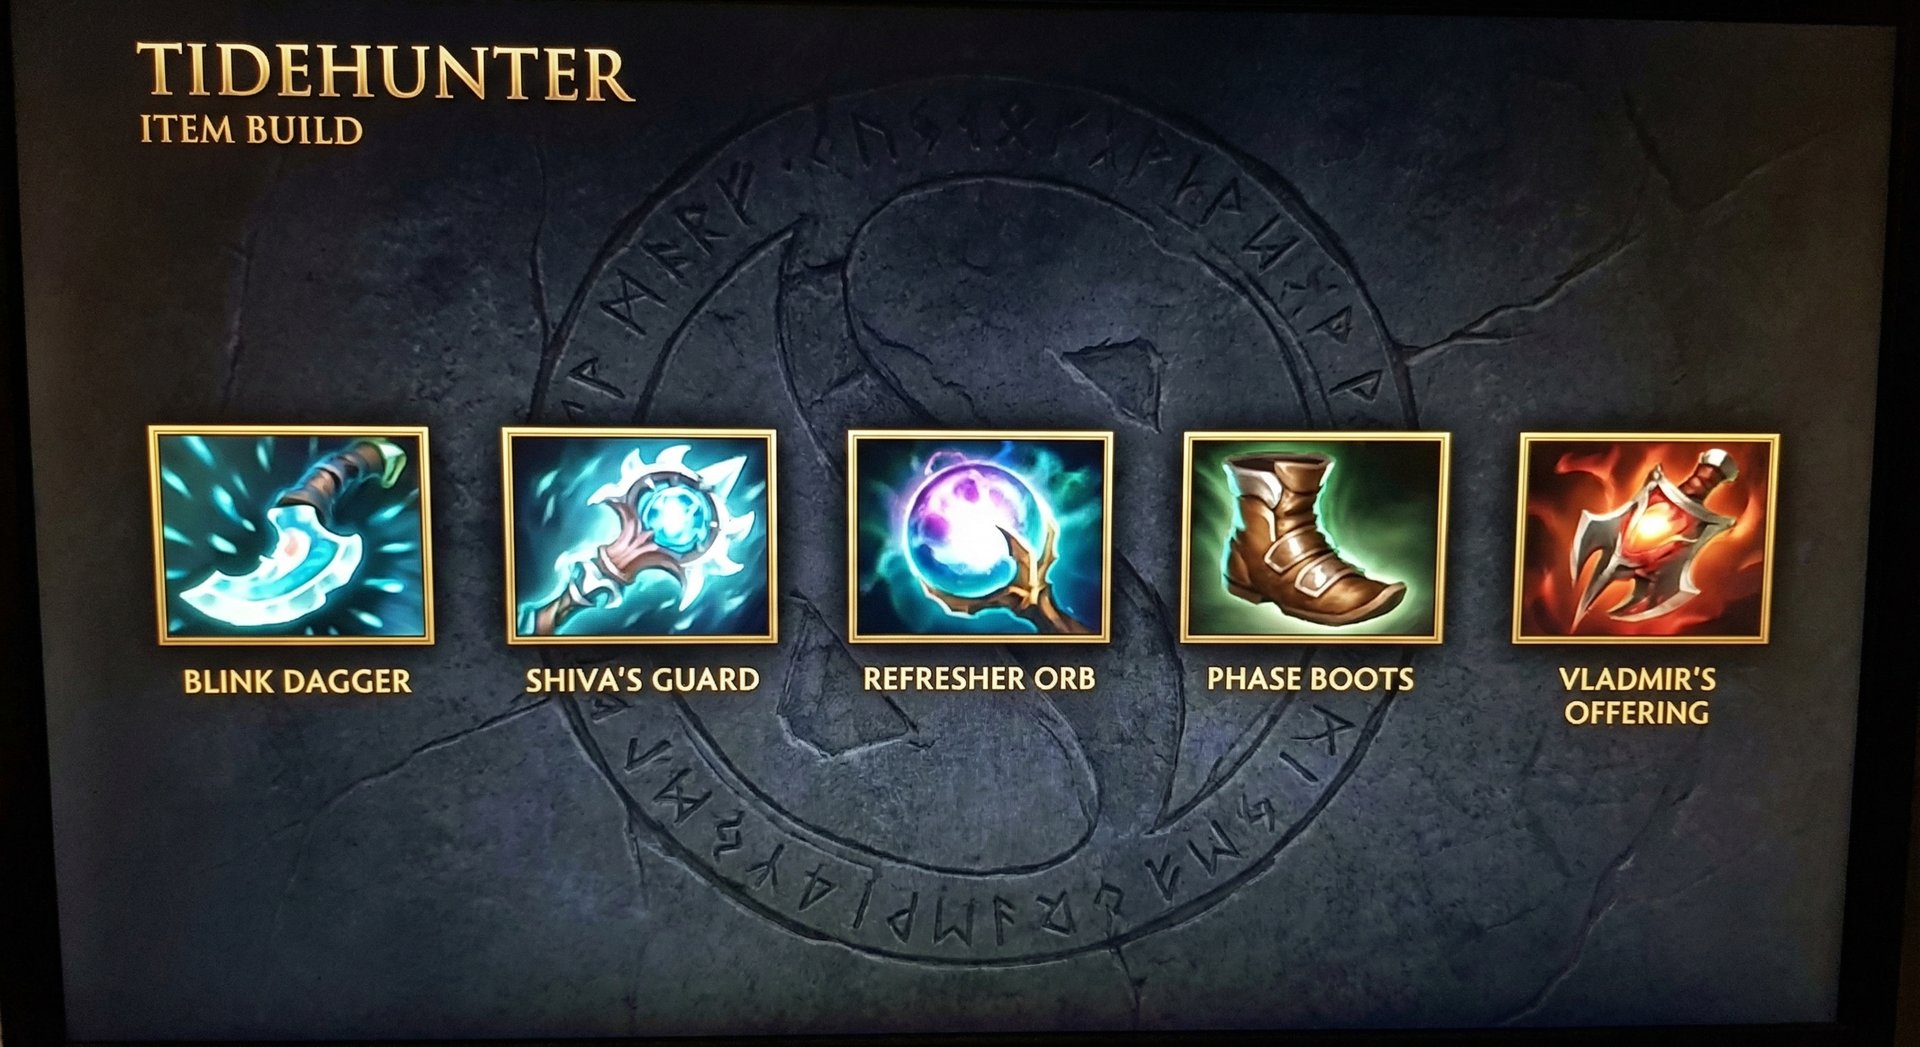
| Ancient – Divine | Tango, Quelling Blade, Ring of Protection, Circlet | Soul Ring, Phase Boots, Bracer | Blink Dagger, Vladmir’s Offering or Pipe | Shiva’s Guard, Refresher Orb, Lotus Orb |
| Immortal | Tango, Quelling Blade, Ring of Protection, Circlet | Soul Ring, Phase Boots, Wind Lace | Blink Dagger, Vladmir’s Offering | Shiva’s Guard, Refresher Orb, Aghanim’s Shard, Overwhelming Blink |
Why Item Builds Differ by Rank
Herald-Crusader: Games go longer in low ranks, so Guardian Greaves provides incredible sustain for prolonged fights and pushes. Mekansm rush is valuable because team fights are messy and extended — the burst heal wins fights that would otherwise be lost. Arcane Boots feed the mana-hungry Tidehunter early and build into Greaves later.
Archon-Legend: Players at this level start to itemize against enemy drafts. Pipe of Insight against heavy magic lineups, Crimson Guard against physical damage and summon heroes. Phase Boots become preferred because the active movement speed helps with positioning for Ravage.
Ancient-Divine: The aura-carrier build dominates. Vladmir’s Offering provides lifesteal, armor, mana regen, and damage in an aura for your team. Lotus Orb is bought to dispel critical debuffs off allies. The focus shifts from personal tankiness to team utility.
Immortal: The build is streamlined for early timing. Vladmir’s into Blink is the standard because Immortal games demand fast power spikes. Aghanim’s Shard (which upgrades Gush to be a wave with AoE) is prioritized as a mid-game damage amplifier. Overwhelming Blink replaces standard Blink in ultra-late games for the slow and bonus damage on initiation.
Laning Phase Masterclass
Tidehunter is one of the strongest laners in Dota 2, period. His combination of Kraken Shell damage block, Anchor Smash damage reduction, and natural strength growth makes him nearly impossible to kill in a 2v1 scenario unless the enemy commits multiple cooldowns and significant resources.

Skill Build for Lane
The standard skill build for offlane is: W-E-W-E-W-R-W-E-E-Q. You max Anchor Smash first for wave clear and damage reduction, take Kraken Shell second for survivability, skip Gush until level 10 (unless you have a kill lane with a strong support). The reasoning is simple — Anchor Smash wins the farm war and Kraken Shell keeps you alive. Gush costs too much mana early and does not contribute to survival or farming speed.
Exception: If you are in a kill lane with a support like Undying, Clockwerk, or Crystal Maiden, take Gush at level 1 or 3. The armor reduction combined with your support’s damage can secure first blood or early kills. However, this sacrifices farming speed and lane sustainability, so only do this when you are confident in kill potential.
Lane Matchups
Versus melee carries (Phantom Assassin, Anti-Mage, Spectre): You dominate. Anchor Smash reduces their damage to nothing, Kraken Shell blocks what little they do hit you for, and you can freely contest every last hit. Walk up, Anchor Smash the wave plus the carry, and watch them struggle. Most melee carries will need to jungle by minute 5-6 against a competent Tidehunter.
Versus ranged carries (Drow Ranger, Sniper): More challenging. Kraken Shell still helps, but you cannot walk up as freely without taking harass. Focus on using Anchor Smash from max range to secure ranged creeps and pull the creep equilibrium toward your tower. Ask your support to pull or create pressure so the ranged carry has to choose between hitting you and last hitting.
Versus aggressive dual lanes (Juggernaut + CM, Ursa + Undying): These lanes can threaten kills. Against Juggernaut, Kraken Shell does not dispel damage from Blade Fury since it is continuous damage that might not reach the threshold fast enough. Against Ursa, the raw damage output can overwhelm your damage block. Play safe, leech XP from distance, and wait for level 5-6 when Anchor Smash becomes strong enough to clear waves from a safe position.
Positioning and Creep Equilibrium
The ideal lane position for Tidehunter is between the enemy creep wave and the enemy heroes. This sounds aggressive, but Kraken Shell and Anchor Smash make it viable. By standing in front of the creep wave, you force the enemy carry to either attack you (which draws creep aggro and pushes the wave toward your tower) or give up last hits.
When the creep wave pushes past the river, use Anchor Smash to quickly shove it into the enemy tower, then immediately rotate to the nearby neutral camp. This “shove and farm” pattern is the most efficient way to gain a gold advantage in the offlane.
Mid and Late Game Transitions
Tidehunter’s game plan shifts dramatically once he gets Blink Dagger. Before Blink, you are a tanky offlaner who farms and shoves waves. After Blink, you are the most terrifying initiator on the map.
The Blink Timing Window (15-25 Minutes)
When you complete Blink Dagger, immediately start looking for fights. This is Tidehunter’s strongest timing in the entire game. At this point, most enemy cores do not have BKBs yet, meaning Ravage will hit every hero. Communicate with your team — smoke up, find the enemy grouped, Blink in, press R, and watch the kill feed light up.
The ideal Blink-Ravage combo is: Blink to the center of the enemy team, immediately Ravage, Anchor Smash, then Gush the highest priority target. The entire combo takes about 1 second and provides your team with nearly 3 seconds of free damage on the entire enemy lineup.
Shiva’s Guard synergy: If you have Shiva’s Guard, activate it DURING the Blink animation (before Ravage). Shiva’s active is an instant cast and does not interrupt Blink. This adds a slow and 200 magic damage AoE on top of Ravage, making it even harder for enemies to escape.
When to Use Ravage
This is where most Tidehunter players go wrong. The rules are:
- Use Ravage when you can hit 3+ heroes — a 3-man Ravage is almost always worth it
- Use Ravage on 2 heroes if both are core heroes (carry + mid) and your team can follow up
- Never use Ravage on 1 hero unless it is the enemy carry and your team can end the game off the resulting push
- Do not hold Ravage forever — if you are walking around for 2+ minutes with Ravage ready and not finding a target, smoke and force the issue. A Ravage used is better than a Ravage held while your team loses map control
Late Game (35+ Minutes)
As the game goes late, Tidehunter’s relative power decreases because enemy carries will have BKBs. Your role shifts from “press R to win fight” to a more nuanced approach:
- Bait BKBs first: Walk in without Blink, tank some spells, force BKB usage, then Blink back and wait for BKBs to expire before Ravaging
- Refresher Orb: Double Ravage is the ultimate late-game insurance. First Ravage forces BKBs, second Ravage catches them without BKB. This combo wins games that would otherwise be unwinnable
- Target selection: In late game, focus Gush and Anchor Smash on the enemy carry. The -6 armor and -60% damage reduction can neuter even a 6-slotted carry
Roshan
Tidehunter is one of the best Roshan heroes in the game. Anchor Smash reduces Roshan’s damage by 60%, and Gush reduces his armor. A Tidehunter with Vladmir’s Offering can practically solo Roshan after level 12-15. Always be the one to suggest Rosh to your team after winning a fight — Tidehunter makes it fast and safe.
Counters: Heroes That Destroy Tidehunter
1. Lifestealer
Lifestealer is Tidehunter’s hardest counter. Feast deals percentage-based damage that ignores Kraken Shell’s damage block, Rage provides spell immunity that blocks Ravage entirely, and the lifesteal means Lifestealer can sustain through Anchor Smash’s damage. In lane, Lifestealer will out-trade Tidehunter consistently. In team fights, a good Lifestealer activates Rage before Ravage connects and cuts through your HP pool regardless of armor.
How to play around it: Avoid Ravaging when Lifestealer has Rage available. Focus your Ravage on catching the rest of the enemy team while Lifestealer is separate. Build Heaven’s Halberd — the disarm is not blocked by Rage and significantly reduces his damage output.
2. Ursa
Ursa’s Fury Swipes stack rapidly and deal damage that quickly exceeds Kraken Shell’s block. Enrage provides 80% damage reduction and a strong dispel, which means even if Ravage lands, Ursa can Enrage through it and continue fighting. In lane, Ursa with an aggressive support can kill Tidehunter through Kraken Shell once Fury Swipes stack high enough.
How to play around it: Keep distance in lane — never let Ursa stack more than 2-3 Fury Swipes. In fights, Ravage when Enrage is on cooldown or from a position where Ursa cannot immediately jump you after.
3. Enigma
Black Hole goes through Kraken Shell’s dispel. Once Enigma catches Tidehunter in Black Hole, there is no escape. Additionally, Midnight Pulse’s percentage-based damage shreds Tidehunter’s massive HP pool. Enigma also has his own big team fight ultimate, meaning your team needs to respect two massive AoE ultimates.
How to play around it: Your job becomes Enigma-hunting. Save Ravage to cancel Black Hole. Position yourself away from your team so Enigma has to choose between catching you or your team. If Enigma catches your team, Blink-Ravage to cancel it immediately.
4. Juggernaut
Blade Fury provides spell immunity during its duration, dodging Ravage entirely. Omnislash can quickly burn through Tidehunter’s HP even with damage block since each slash deals fixed damage instances. In lane, Juggernaut’s Blade Fury plus a support’s slow creates reliable kill threat on Tidehunter.
How to play around it: Wait for Blade Fury to end before Ravaging. In team fights, if Juggernaut spins proactively, he removes himself from dealing right-click damage — your team can ignore him during Blade Fury and focus his teammates.
5. Ancient Apparition
Ice Blast prevents HP regeneration and shatters Tidehunter if he drops below the threshold. This completely negates Tidehunter’s strategy of tanking damage and sustaining through it. The global range means AA does not even need to be near the fight to counter Tidehunter.
How to play around it: Build status resistance items (Sange-based items) to reduce Ice Blast debuff duration. Avoid dropping low in fights — commit to either going all-in or staying out of range.
Heroes Tidehunter Destroys
1. Phantom Assassin
PA relies entirely on physical damage and has naturally low armor. Anchor Smash reduces her damage by 60%, and Gush removes 6 armor from an already squishy hero. Kraken Shell blocks her dagger harass. In team fights, Ravage stuns PA through Blur’s evasion (magic damage is unaffected by evasion), and the combo of Gush + Anchor Smash can burst PA before she can activate BKB.
2. Drow Ranger
Drow is slow, squishy, and relies on positioning. Ravage catches her regardless of position if she is within range, and she has no natural escape. Anchor Smash kills her Marksmanship damage output, and Gush’s slow makes her easy to chase down. Drow also loses Marksmanship when Tidehunter gets close in melee range.
3. Sniper
Sniper relies on standing far away and right-clicking. Blink-Ravage completely nullifies this gameplan. Sniper has no mobility, no BKB-piercing disable, and crumbles against physical burst after Gush armor reduction. A Tidehunter with Blink can solo kill Sniper at almost any stage of the game.
4. Medusa
Anchor Smash’s damage reduction affects Medusa’s Split Shot as well. Gush armor reduction is devastating against a hero that builds raw HP through Mana Shield rather than armor. Ravage stun goes through Stone Gaze timing. Most importantly, Tidehunter with proper coaching can force early fights before Medusa comes online, ending the game during Tidehunter’s power window.
5. Terrorblade
Terrorblade has notoriously low base HP and relies on Metamorphosis for damage. Anchor Smash reduces Metamorphosis damage by 60%, and Gush’s armor reduction tears through Terrorblade’s mediocre armor. Ravage stops Sunder attempts, and Tidehunter’s early-to-mid game dominance can shut Terrorblade down before he becomes a problem.
How Pros Play Tidehunter in the Current Patch
Tidehunter has seen consistent pro play throughout 2025-2026, particularly in drafts that prioritize early 5-man pushes. The hero has been picked in multiple tier 1 tournament grand finals, most notably in The International qualifiers and DPC seasons.
Collapse and Zai have been two of the most prolific Tidehunter players in recent competitive history. Collapse’s aggressive Blink timing — often completing Blink by minute 13-14 — sets the pace for early fights. His signature play involves smoking with his position 4 and mid, finding a 3-man Ravage on the enemy triangle, and immediately transitioning to Roshan off the back of the won fight.
The current pro build trend is Phase Boots into Soul Ring into Blink, skipping Mekansm or Pipe entirely. The reasoning is that in coordinated play, the earlier you get Blink, the more team fights you win during the critical 15-25 minute window. Aura items like Vladmir’s come second.
Notable pro trends:
- Aghanim’s Shard priority: Pros are buying Shard by minute 20 for the AoE Gush upgrade, which turns Tidehunter into a legitimate damage dealer in team fights
- Refresher timing: In games that go past 35 minutes, Refresher Orb is purchased almost 100% of the time. Double Ravage is too game-changing to skip
- Overwhelming Blink: Some pros are opting for Overwhelming Blink over Refresher in ultra-late games, as the 50% slow and 100 bonus damage amplify the Blink-Ravage initiation significantly
- Talent choices: The +150 Gush damage talent at level 15 is taken roughly 70% of the time in pro games over the Anchor Smash attack speed reduction, as it adds burst damage to the combo
For detailed match histories and statistics, check Liquipedia’s Tidehunter page for tournament appearances and the latest competitive data.
Rank-Specific Climbing Guide
Herald to Guardian: Build the Foundation
At this rank, games are chaotic and fights happen constantly without coordination. This is actually Tidehunter’s paradise. Your priorities:
- Farm Blink Dagger first — do not get baited into fighting before Blink. Without Blink, your Ravage is easy to dodge or poorly positioned
- Use Anchor Smash to farm — you should never have fewer than 4 CS per minute, even in a bad lane
- Ravage fights, not ganks — in Herald, team fights happen randomly. Be present, press R when enemies group, and your team will clean up
- Buy Mekansm after Blink — games go long at this rank, and the heal wins extended fights
- Do not die — Tidehunter’s biggest advantage at low ranks is that enemies do not know how to kill you. Abuse Kraken Shell and Anchor Smash to stay alive
Crusader to Archon: Add Game Sense
Players at this rank start to understand power spikes but still struggle with timing. Your focus:
- Track enemy BKBs — start paying attention to who has BKB and who does not. Ravage heroes without BKB first
- Communicate Ravage cooldown — use chat wheel or voice to tell your team when Ravage is ready. “Ravage ready, let’s smoke” wins games
- Itemize against the draft — build Pipe against magic-heavy lineups, Crimson Guard against physical or summon heroes
- Practice Blink-Ravage accuracy — in demo mode, practice Blinking to specific spots and immediately Ravaging. The combo should be muscle memory
Legend to Ancient: The Macro Leap
This is where Tidehunter players need to think about the game at a higher level. Raw mechanics are no longer enough.
- Ravage threat zones: Learn to control space with the threat of Ravage. Stand in fog near objectives (towers, Roshan, outposts) and let the enemy know you could be anywhere. A Tidehunter missing from the map with Blink and Ravage ready forces enemies to play scared
- Roshan timing: After every won team fight, immediately ping Roshan. You can take Rosh faster than almost any other offlaner thanks to Anchor Smash and Gush. Aegis on your carry plus Tidehunter’s team fight presence is nearly unbeatable
- Aura itemization: Start building for your team, not just yourself. Vladmir’s, Pipe, Assault Cuirass — these items multiply your team’s effectiveness
- Wave manipulation: Shove dangerous waves with Anchor Smash. Tidehunter can safely shove lanes that other heroes cannot because of Kraken Shell
Divine to Immortal: What Separates the Top 1%
At the highest level, Tidehunter play becomes about micro-decisions and timing windows.
- BKB baiting: Walk in without Blink, absorb cooldowns and force BKB activations, then Blink out. Come back 8-10 seconds later when BKBs have expired and Ravage the now-vulnerable enemy team
- Refresher mind games: Do not always double-Ravage immediately. Sometimes the threat of a second Ravage is more valuable than using it. If the enemy team saw you buy Refresher, they will scatter after the first Ravage — use the second Ravage 10-15 seconds later when they regroup
- Item timing adjustments: Immortal players buy Blink by minute 12-14 consistently. If you are hitting 16+ minute Blinks, you are farming too slowly. Optimize your jungle rotation, skip unnecessary items, and rush the Blink timing
- Drafting context: Know when NOT to pick Tidehunter. Against Lifestealer, Ursa, and multiple BKB-rushing heroes, consider alternative offlaners. Tidehunter is best when the enemy has 2+ heroes who do not want to build BKB (supports, certain mids)
Tips and Tricks
Animation Cancels and Hidden Mechanics
- Anchor Smash animation cancel: You can cancel the backswing of Anchor Smash by immediately issuing a move command. This lets you get an extra right-click in during trades
- Gush into Anchor Smash combo: Cast Gush, then immediately Anchor Smash. The armor reduction from Gush amplifies Anchor Smash’s physical damage. This combo is 30-40% more efficient than using them in the reverse order
- Kraken Shell dispel prediction: Track your own HP. When you know a dispel is about to trigger (you have taken roughly 400 damage), intentionally walk into an enemy stun or root. The auto-dispel will remove it almost instantly, wasting their cooldown
- Blink direction: Always Blink to the CENTER of the enemy team, not to the edge. Ravage’s radius is 1250 from your position — if you Blink to the edge, you are only hitting half the team
Common Mistakes to Avoid
- Panic Ravage: The number one Tidehunter mistake. Do not Ravage the moment you see an enemy hero. Wait for the right moment — a 5-man Ravage is worth 10 solo Ravages
- Skipping Soul Ring: Some players rush Blink without Soul Ring. This is wrong — you will run out of mana constantly and miss Anchor Smash farm, delaying your Blink by more than the Soul Ring cost
- Fighting without Blink: Unless your team is being dived on or you are defending high ground, avoid major team fights before Blink. Without it, you telegraph your Ravage and enemies scatter
- Ignoring Anchor Smash in fights: Many players focus only on Ravage and forget to spam Anchor Smash. The -60% damage reduction on the enemy carry is game-changing — keep hitting W in every fight
- Late Roshan: If you won a fight and Roshan is up, take it immediately. Tidehunter teams that skip Roshan after fights lose games they should win. Your MMR will climb faster once you develop this habit
Advanced Mechanics Only High-MMR Players Know
- Shiva’s mid-Blink: You can queue Shiva’s Guard active during Blink’s travel time. Press Blink, immediately press Shiva’s, then Ravage. The Shiva’s blast will hit simultaneously with Ravage, adding damage and slow
- Force Staff into Ravage: If Blink is on cooldown (from damage), Force Staff yourself into the enemy team and immediately Ravage. Less reliable than Blink but works in emergencies
- Kraken Shell + Armlet interaction: While not a standard build, toggling Armlet can manipulate the damage threshold for Kraken Shell’s dispel. The self-damage from Armlet’s HP drain contributes to the threshold
- Anchor Smash stacking: If you hit an enemy carry with Anchor Smash twice in 6 seconds, only the most recent application applies. The debuffs do not stack, so timing your casts matters — space them out to maintain maximum uptime rather than double-casting
Frequently Asked Questions
Position 3 (offlane) is Tidehunter’s optimal role in almost all scenarios. He needs levels for Anchor Smash and Kraken Shell to function, and he needs gold for Blink Dagger. As a position 4, he is too slow to come online and lacks the farm priority to get Blink at a reasonable time. Only consider position 4 Tidehunter if your team absolutely needs an offlaner who does something else and your draft specifically calls for Ravage as secondary initiation.
Pick Tidehunter when the enemy has multiple heroes who clump together in fights (teamfight-oriented drafts), when the enemy carry is melee and physical-damage dependent (PA, AM, Spectre), and when your team has follow-up AoE damage (Invoker, Skywrath, Witch Doctor). Avoid Tidehunter against Lifestealer, multiple BKB builders, and teams with strong dispels or spell immunity.
In Immortal games, aim for a 12-14 minute Blink. In Ancient-Divine, 14-16 minutes is acceptable. Below Ancient, anything under 18 minutes is solid. If you are hitting 20+ minute Blinks consistently, focus on farming efficiency — practice the shove wave into jungle camp rotation pattern until it becomes second nature.
No. Ravage does NOT pierce spell immunity. This is the primary counterplay against Tidehunter. Enemies who activate BKB before the tentacles reach them will be completely unaffected by Ravage. This is why timing, Refresher Orb (to Ravage after BKBs expire), and target selection are so important at higher ranks.
It depends on game state. Refresher Orb is better in most games because double Ravage is game-ending. Aghanim’s Scepter (which reduces Ravage cooldown and increases damage) is better when you are not the primary initiator and need more frequent Ravages in smaller skirmishes. In general, Refresher is the higher-impact purchase after Blink and one aura item.
Buy BKB early if you are a core hero. Spread out during team fights so Ravage cannot hit your entire team. Pick heroes with spell immunity or displacement (Lifestealer, Juggernaut, Anti-Mage). Pressure Tidehunter’s Blink timing by ganking him early — a Tidehunter without Blink is half a hero. Ward aggressively to track his movements and avoid getting caught by smoke ganks.
Three things will improve your Tidehunter dramatically: (1) Practice Blink-Ravage combos in demo mode until the timing is instant, (2) Focus on farming efficiency to hit Blink by 14-16 minutes consistently, and (3) Watch one replay of a pro Tidehunter player per day, focusing on when they use Ravage and when they choose to hold it. If you want personalized feedback, consider professional Dota 2 coaching from our Immortal-rank analysts.
Dominate Every Game with Tidehunter
Ready to turn your Ravage into a game-ending weapon Our Immortal-rank coaches will analyze your Tidehunter replays, fix your initiation timing, and help you climb to the rank you deserve.


