

Dota 2 Tormentor Guide 2026: Timing, Setup, Who Takes It

The Tormentor is the mid-game objective that hands a free Aghanim’s Shard to your lowest net worth hero. In 2026 there is only one Tormentor on the map at a time. It spawns at 20:00, moves between map corners on the day/night cycle, and grows harder to kill every 10 minutes you leave it up.
This guide covers the exact spawn windows, where the Tormentor is at any given moment, how the damage reflection formula works, who the game gives the shard to and why, and a hero-by-hero breakdown of who benefits most from an early shard in the current meta.
In This Guide
What Is the Tormentor?
The Tormentor is a neutral mini-boss introduced in the New Frontiers update (patch 7.33) alongside the expanded map. It does not attack heroes directly. Instead, it has two passive abilities that make it dangerous: a barrier system that regenerates health rapidly, and a damage reflection aura that redirects a growing percentage of all incoming damage back to every hero within range.
Killing the Tormentor is purely a team economy play. No gold drops from it directly. The reward is an Aghanim’s Shard — a 1,400-gold item upgrade — automatically granted to the hero or heroes on the killing team with the lowest net worth who do not already own one. For a support who cannot easily save 1,400 gold during mid-game, this is a massive free power spike. It is why professional teams and high-MMR pub players treat the 20-minute Tormentor as a mandatory objective in almost every game.
Because the Tormentor has no attack, it is technically possible to walk up to it without dying — but the reflection mechanic means that every point of damage you deal to it comes partially back at your own heroes. Bring more heroes and the reflected damage is split more ways. Bring fewer heroes and each one takes a larger share. At later timing windows the reflection percentage gets high enough that you genuinely need careful preparation or specific hero abilities to survive the fight.
Understanding the Tormentor is part of the macro game knowledge that separates players who climb consistently from those who stagnate. If your MMR is not where it should be, that gap often comes from objective decision-making rather than individual mechanics. High-MMR players execute Tormentor rotations almost automatically at the 20-minute mark — working with professional boosting services is one way to see this firsthand in your own replays.
Tormentor Spawn Time — Exact Windows
First Spawn and Respawn Schedule
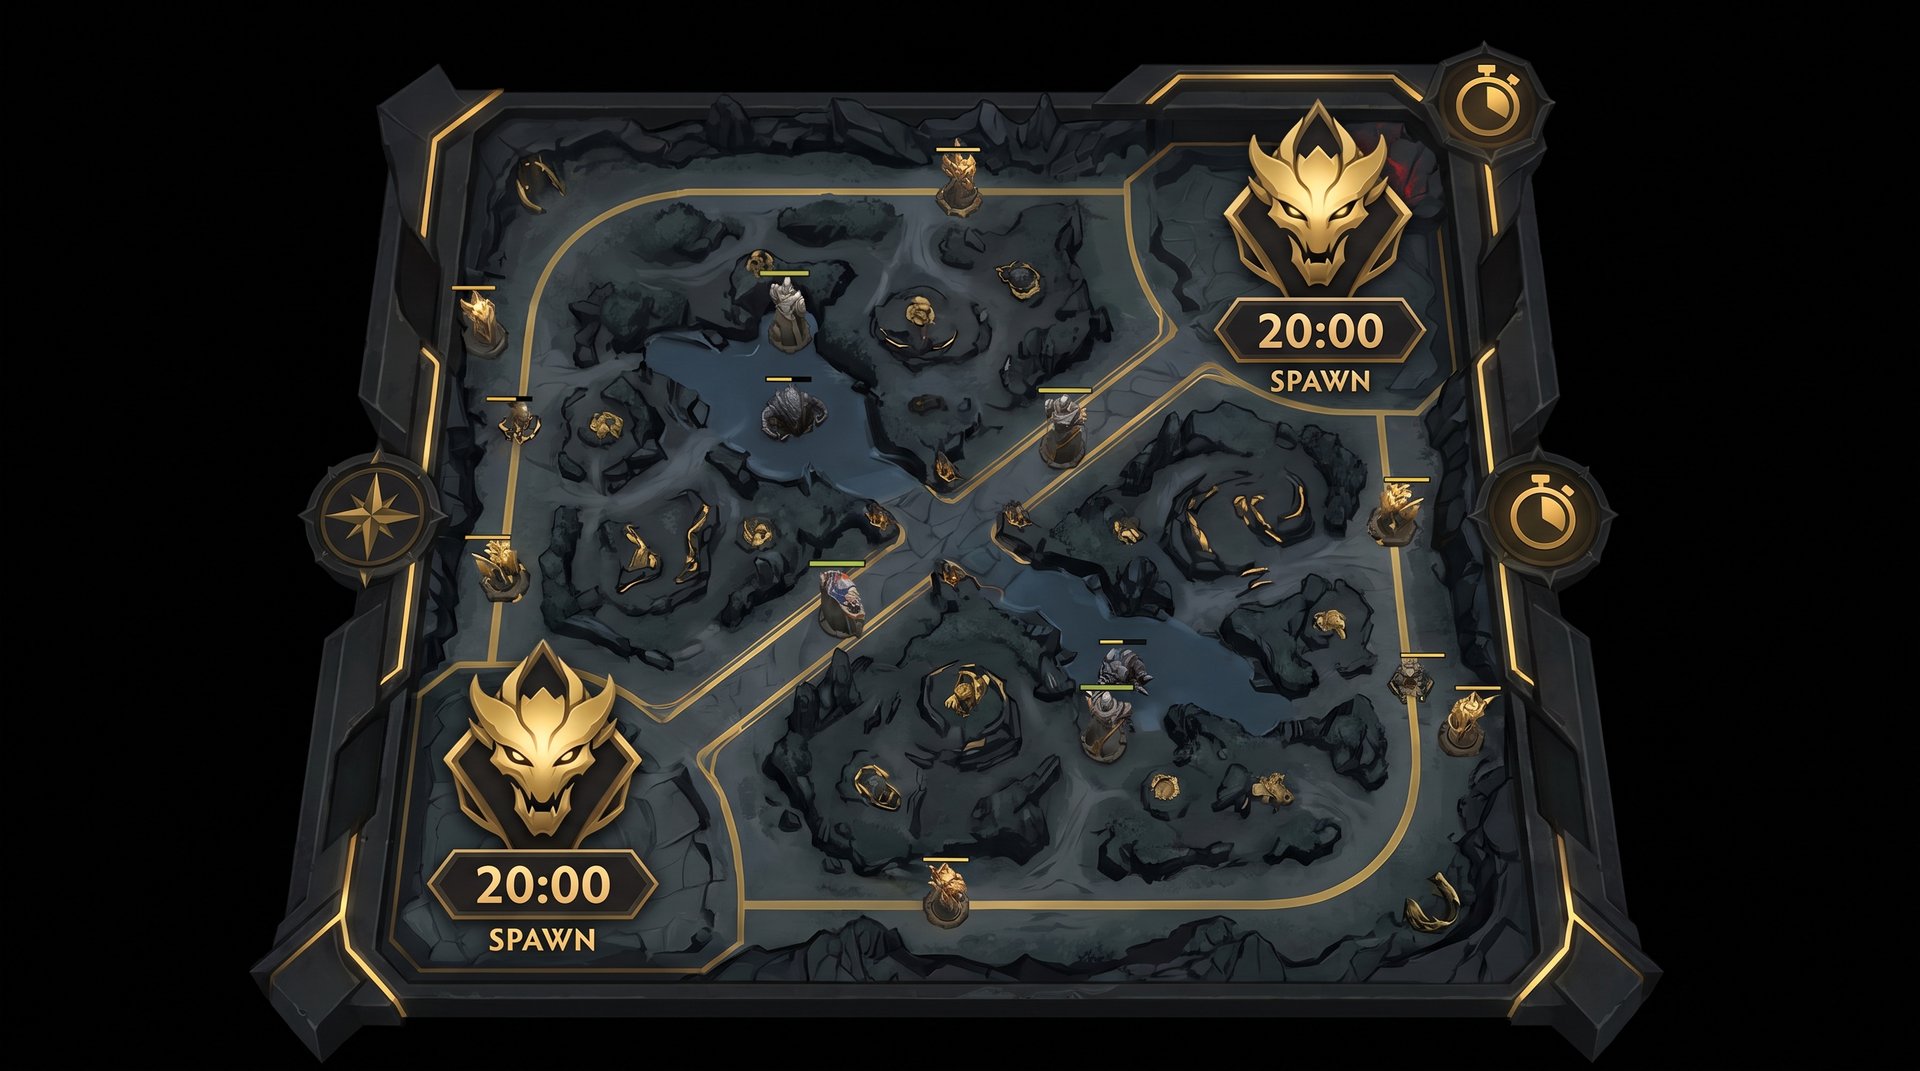
The Tormentor always spawns at exactly 20:00 game time in a standard match. It does not have a random window — you can set a mental timer at the start of every game and know with certainty when to begin rotating. In Turbo mode the first spawn is at 10:00.
After a team kills the Tormentor, it respawns exactly 10 minutes later. Nothing can prevent or accelerate this respawn. The key windows in a standard match are:
| Spawn Window | Barrier HP | Reflection % | Regen (HP/sec) |
|---|---|---|---|
| 20:00 (first spawn) | 4,000 | 60% | 120 |
| 30:00 (second) | 4,500 | 75% | 170 |
| 40:00 (third) | 5,000 | 90% | 220 |
| 50:00 (fourth) | 5,500 | 105% (capped) | 270 |
The 20-minute Tormentor is far easier than any later spawn. Barrier HP scales at 50 per game minute and regen at 5 per game minute. A team that lets the Tormentor go uncontested until 30 minutes is dealing with a noticeably harder fight for the same reward. At 40 minutes the reflection percentage approaches or exceeds 90%, which means burst heroes become nearly unusable and the fight requires careful execution.
The Minimap Timer
Since patch 7.40, the Tormentor has its own respawn timer on the minimap, displayed next to the Roshan timer. When the Tormentor is alive the minimap shows its icon at its current location. After it dies the timer counts down to the next spawn. You can ping the timer to call your team to rotate, just like pinging Roshan.
If you cannot see the minimap timer, the pit gate itself tells you the status: closed doors mean the Tormentor is dead and the respawn is pending, open doors mean it is alive and ready to fight. You do not need vision of the pit to know whether the Tormentor is up — the gate is visible through the fog of war.
Where Is the Tormentor? Day/Night Location Explained
Single Tormentor Since Patch 7.38
Before patch 7.38 (Wandering Waters, February 2025), there were two Tormentors — one near the Radiant base high ground and one near the Dire base high ground. That version of the game required each team to decide independently whether to contest the Tormentor on their own side or try to steal the enemy’s.
Patch 7.38 changed this entirely. There is now only one Tormentor on the map at a time. It spawns in one of two locations in the far corners of the map — the northwest corner and the southeast corner — and switches between them based on the day/night cycle. This means both teams are always fighting over the same single objective, making every Tormentor kill a potential fight flashpoint.
Patch 7.41 then relocated the Tormentor pits from high ground to low ground, placing them closer to the Lotus Pools. The current spawn positions have three stairways leading into the pit: one connects to the Lotus Pool, one connects to the lane, and one leads up toward the Twin Gate area. This low-ground position changes the angles teams can use to approach and contest.
Daytime vs. Nighttime Positions
The Tormentor’s location at any given moment depends on whether it is currently day or night in the game:
- Daytime: The Tormentor is in the southeast corner of the map, on the Radiant side.
- Nighttime: The Tormentor is in the northwest corner of the map, on the Dire side.
The first spawn at 20:00 is during daytime, so the Tormentor always starts on the southeast side. When the day/night cycle flips, the Tormentor moves to the opposite corner. During this transition it disjoints all projectiles — meaning attacks and most targeted projectiles in the air are cancelled as it repositions. Do not try to snipe it down with ranged heroes just before a day/night change.
What “Always Opposite Roshan” Means
The Tormentor and Roshan are always on opposite sides of the map. Roshan also follows a day/night cycle, roaming between a northern pit (daytime) and a southern pit (nighttime). Since the Tormentor is always opposite, you can quickly figure out where the Tormentor is by looking at where Roshan currently is: if Roshan is in the north, the Tormentor is in the southeast. If Roshan is in the south, the Tormentor is in the northwest.
This design creates a deliberate choice at 20 minutes: you can contest Roshan or contest the Tormentor, but not both simultaneously. Teams that try to do both typically concede one to the enemy. Understanding which objective is higher-value for your draft is one of the key strategic decisions of the mid-game in 2026 Dota.
Tormentor Stats and Mechanics
Barrier HP — Not Traditional Health
The Tormentor does not use a standard HP pool. It has an Unyielding Shield barrier with its own HP value, and it regenerates constantly. All damage types — physical, magical, and pure — count equally against the barrier. There is no way to deal bonus damage based on damage type. The barrier must be fully destroyed for the Tormentor to die.
Barrier HP at 20 minutes: 3,000 base + 50 per game minute = 4,000 HP. Regeneration at 20 minutes: 20 base + 5 per minute = 120 HP per second. At 20 minutes your team is racing to deal 4,000 damage while the barrier heals 120 HP every second — which translates to roughly 7,200 HP of regen per minute if you take too long. Speed matters. A slow, cautious approach that drags the fight out to 90 seconds means regeneration alone recovers more than 10,000 HP.
The Tormentor also has 25% status resistance, meaning disables applied to it last 25% shorter than listed. It no longer damages neutral creeps near the pit, which was changed in patch 7.41 — neutral camps in the area are now safe during the fight.
Damage Reflection Formula
Every point of damage dealt to the Tormentor triggers a reflection effect. The reflected damage is distributed equally among all heroes on both teams within 1,200 units of the Tormentor at the moment of the hit. The reflection percentage scales with game time.
The formula is: 30% + 1.5% per game minute. At 20 minutes: 30 + (1.5 x 20) = 60% reflection. At 30 minutes: 75%. At 40 minutes: 90%.
Key mechanical points about the reflection:
- Reflected damage is split among all heroes in range, including enemy heroes who wander into the area.
- BKB does not block the reflection. Debuff immunity does not apply to passive AoE reflection damage.
- Linken’s Sphere does not help — it only blocks targeted spells.
- Attack range does not help. Sniper attacking from maximum range still receives reflected hits if still within the 1,200-unit radius.
- Bringing more heroes reduces the per-hero reflection damage — five heroes sharing 60% reflection take 12% each per hit, while two heroes sharing 60% take 30% each.
- Physical damage block items (Vanguard, Crimson Guard) and ability-based absorption (Templar Assassin’s Refraction) do mitigate reflected damage because they reduce the total damage instance received.
The Shining Aura
The Tormentor also has a passive damage aura called The Shining. All units within 1,200 radius — heroes and creeps — take 30 damage per second from this aura. Unlike the reflection, this is not split. Every hero in range takes the full 30 damage per second. Healers in the area can offset this, but at higher game-time windows the combination of Shining damage and reflected damage makes standing near the Tormentor increasingly dangerous for unsupported heroes.
Who Gets the Aghanim’s Shard?
The Net Worth Rule
When the Tormentor dies, the game automatically grants an Aghanim’s Shard to one of the two heroes on the killing team with the lowest net worth who do not already possess a shard. Net worth is calculated as total item gold value plus unspent gold. You cannot manually choose which hero receives it. The assignment happens at the moment of the kill, based on net worth at that exact second.
This design is intentional: the shard is meant to reach your most economically behind players, generally supports and utility heroes who struggle to accumulate gold through farm. A carry who has been farming efficiently will typically have higher net worth than a position 4 or 5 support, so the shard naturally flows to where it provides the most catch-up value.
If All Five Heroes Already Have a Shard
If every hero on the killing team already owns an Aghanim’s Shard, the Tormentor kill instead provides 240 team bounty gold and 280 XP per player. This is a meaningful reward but far less impactful than the shard itself, which is why in games where your whole team has shards the Tormentor becomes lower priority unless you want to deny it from the enemy or claim the gold.
Gaming the System — Controlling Which Hero Gets It
Because the shard goes to the lowest net worth heroes, you can influence who receives it in advance. If your Witch Doctor needs the shard and your Crystal Maiden does not yet have one, but CM has slightly less net worth at the moment of the kill, CM will receive it. The way to route it correctly is:
- Have your shard-priority heroes hold unspent gold before the Tormentor kill to raise their net worth above the other candidates.
- Alternatively, have the heroes you do NOT want to receive the shard spend their gold on items just before the kill, pushing their net worth above the priority heroes.
- Do not shop for items or pick up bounty runes immediately before the Tormentor kill if you are the intended recipient — that gold increase could disqualify you.
This coordination is simple to execute once your team knows the rule. At lower MMR, most players are unaware of the net worth mechanic and the shard ends up on a random hero. Planning ahead puts your team at a systematic advantage. Macro coordination like this is part of what the MMR boosting meta is built on — the gap between brackets is often knowledge gaps rather than mechanics gaps.
Who Should Take the Tormentor Shard? Hero Priority List 2026
Not every Aghanim’s Shard is created equal. Some heroes transform their kit with a shard at 20 minutes; others gain a minor convenience upgrade. The heroes below have shard effects strong enough to meaningfully change teamfight outcomes when received at the 20-minute window.
Supports That Transform With an Early Shard
These heroes should be your first priority for the shard. If they are on your team, route the shard to them in the draft phase and maintain their net worth below other low-priorities going into the 20-minute mark.
- Witch Doctor: Death Ward no longer goes on cooldown when WD takes damage. Before the shard, any reliable disable stops the ultimate entirely. After the shard, WD channels through almost anything, making it one of the strongest teamfight ultimates in the game.
- Crystal Maiden: Arcane Aura begins granting mana regeneration to allied heroes anywhere on the map. This turns CM from a lane utility support into a team-wide resource generator at 20 minutes — a timing when mana costs spike significantly.
- Silencer: Global Silence extends its duration and the silence also takes effect from a larger radius. In teamfights Silencer’s shard-upgraded ult is a near-guaranteed teamwipe setup at this timing.
- Undying: Tombstone now spawns an additional zombie from each skeleton in the area when summoned. More zombies means more slows, more threat, and more chaos in mid-game fights where heroes cannot easily burst down every target.
- Ancient Apparition: Ice Blast gains a Cold Snap component that applies freeze on contact. AA’s ultimate was already a powerful cut-off against heal-heavy lineups; the shard makes it genuinely terrifying against heroes like Huskar or Bristleback who rely on regen.
Cores Worth Prioritizing for the Shard
These carry and offlane heroes gain meaningful combat upgrades from an early shard, though typically the shard reaches them only when the support roster already has shards or when their net worth happens to be lowest.
- Juggernaut: Blade Fury gains phased movement while active. Before the shard, Blade Fury roots Juggernaut in place unless he walks normally; after the shard he can pass through units freely during the spin, which dramatically improves chase and escape during the spin window.
- Spirit Breaker: Charge of Darkness now goes through buildings. This unlocks a new category of plays: charging through the base, using the fountain area, or going through towers to close unexpected angles. Combined with Shard the Breaker’s rotation game expands substantially.
- Zeus: Lightning Bolt now calls down a lightning storm on the target location dealing pulses of damage over a short duration. This upgrades Zeus from a poke hero to a burst-plus-zone hero — the storm alone can secure fleeing targets and zone enemies from ideal positions.
- Brewmaster: Primal Split’s Earth panda gains the Pulverize ability, allowing a slam that knocks enemies up and deals heavy damage. This makes the split into a legitimate teamfight tool rather than just an ult to avoid focus fire.
- Dragon Knight: Dragon Blood now provides passive lifesteal in addition to health regeneration. In a 20-minute game state where DK is starting to come online, free lifesteal from the shard adds meaningful fighting sustain that he otherwise needs an item to match.
| Hero | Role | Shard Effect | Priority |
|---|---|---|---|
| Witch Doctor | Support | Death Ward channels through damage | S-tier |
| Crystal Maiden | Support | Global Arcane Aura for all allies | S-tier |
| Silencer | Support/Core | Global Silence extended duration | S-tier |
| Ancient Apparition | Support | Ice Blast Cold Snap component added | A-tier |
| Undying | Offlane/Support | More zombies per Tombstone | A-tier |
| Juggernaut | Carry | Phased movement during Blade Fury | A-tier |
| Spirit Breaker | Offlane | Charge goes through buildings | A-tier |
| Zeus | Core/Offlane | Lightning Bolt calls down storm | A-tier |
| Brewmaster | Offlane | Earth panda gains Pulverize | B-tier |
| Dragon Knight | Carry/Offlane | Dragon Blood adds lifesteal | B-tier |
Routing the shard to an S-tier shard hero is a free 1,400-gold-equivalent power spike. Letting it land on a carry with a mediocre shard is not catastrophic, but it means you extracted a fraction of the available value from the kill. Think about shard priority in the draft phase and assign a specific hero — then manage net worth in the minutes before the fight.
If your rank is stuck and you want to understand how to consistently execute this kind of macro decision, exploring Dota 2 boosting options can give you games to review where high-MMR players execute these exact scenarios.
How to Set Up the Tormentor Kill
Minimum Number of Heroes Needed
At 20 minutes, the minimum recommended setup is two heroes: one dedicated tank who stays inside the reflection radius and takes the damage, and at least one — ideally two — heroes standing outside the 1,200-unit boundary dealing damage from a safe distance. The tank must be able to survive 60% reflection at 20 minutes while also taking 30 damage per second from The Shining aura.
Heroes that can solo-tank or even solo-kill the 20-minute Tormentor:
- Templar Assassin: Refraction charges absorb reflected damage. TA can solo the 20-minute Tormentor with a good start because each charge absorbs a full damage instance before passing through to health.
- Ursa: Fury Swipes plus Enrage combine to kill the barrier very fast while Enrage’s damage reduction cuts reflection significantly.
- Troll Warlord: Battle Trance dramatically boosts attack speed to kill the barrier quickly, reducing the time spent in the reflection aura.
- Abaddon: Borrowed Time converts incoming damage to healing when activated, making Abaddon nearly unkillable during the kill window.
For a team that does not have these heroes, a 3-hero rotation with a tanky offlaner or support inside the radius and two heroes attacking from outside the 1,200 boundary is the safest and fastest approach.
Tank Inside, Attackers Outside
The split-distance setup is the core skill of Tormentor execution. The tank stands as close to the Tormentor as possible and attacks it. Their attacks trigger reflection but the reflection is only split among heroes inside the 1,200 radius. If the other two heroes are attacking from outside that radius, the reflection hits only the tank — who should be built to handle it.
Heroes with strong ranged attacks that can deal meaningful damage from beyond 1,200 units are valuable here. Sniper is the classic example — his maximum attack range exceeds 1,000 units and with Aghanim’s Scepter it reaches 1,030, but Sniper’s attack range does not exceed 1,200, so Sniper still receives reflection if he attacks normally. The actual safe distance is beyond 1,200 units from the Tormentor’s center, not its edge. Position carefully.
Ability Interactions to Know
Several hero abilities interact with the reflection mechanic in ways that catch teams off-guard:
- Blade Mail: If a hero inside the radius activates Blade Mail and takes reflected damage, that damage is reflected back. This can create a damage loop. Do not activate Blade Mail while inside the Tormentor radius.
- Bristleback: Quill Spray triggered by Bristleback’s passive is classified as reflected damage in the current patch. An enemy Bristleback in the area generates cascading reflection damage.
- Spectre: Dispersion reflects damage passively. Spectre standing near the Tormentor during the kill reflects incoming reflected damage back outward, spreading the damage further across heroes in range.
- Heals and sustain: Heroes with strong passive healing (Abaddon, Undying, Bristleback) can sustain through the Shining aura while tanking reflection. Pairing them with a healer standing just outside the radius is an efficient setup.
What to Avoid
Common mistakes in pub games:
- Stacking your whole team inside the radius: Five heroes inside the radius sounds like it splits the reflection five ways, but you are also providing five targets for The Shining. The net result is not better than 2-3 heroes at varied distances.
- Attacking with high-burst abilities: If a mage nukes the Tormentor for 600 damage and 60% reflects, that is 360 damage back — potentially lethal at 20 minutes on a support.
- Starting the fight without a healer: Even a single Bloodstone hero, Crystal Maiden or Warlock standing outside the radius and casting spells provides meaningful regen for the tank.
- Contesting without buybacks: The enemy team often shows up at the 20-minute Tormentor. If your tank dies during the kill attempt and you have no buyback, the enemy can swoop in and contest the shard.
Tormentor Strategy by Rank Bracket
Herald to Archon (Under 2,000 MMR)
At the lowest brackets, the Tormentor is almost never contested by the enemy. The biggest mistakes at this MMR are simple: everyone walks into the radius, no one appointed a tank, and the whole team takes lethal reflected damage from a single nuke. The fix is equally simple — learn the 1,200-radius rule and designate one hero to stand inside while the rest attack from outside.
Do not overthink the timing. At 20 minutes, ping the Tormentor icon on the minimap and type “tormentor” in chat. Even if only two teammates respond, two heroes with a designated tank can usually kill it by the current 20-minute stat window. The 60% reflection is completely manageable with a resilient hero inside the radius.
One thing to watch: the location. Since there is only one Tormentor and it is on one specific side at any given time, make sure your rotation goes to the right corner. Check whether it is day or night at 19:30 — if daytime, go southeast; if nighttime, go northwest.
Archon to Legend (2,000–3,500 MMR)
At this bracket the enemy team will sometimes try to contest or steal the Tormentor. The fight over the objective frequently determines the mid-game tempo. Before rotating, check whether your team has the right heroes for the kill and whether the enemy has a hero that can disrupt it (Earthshaker, Magnus, or any hero with a strong teamfight ultimate who could jump in mid-kill).
The ping-at-19:30 habit still applies. If your team does not group early enough, they will run to the Tormentor one by one after it spawns instead of arriving together and executing cleanly. Group up on the side of the map where the Tormentor is spawning. Use the nearby Twin Gate to rotate if you are on the wrong side of the map.
Start thinking about shard routing here. If you have a Crystal Maiden or Witch Doctor who desperately needs the shard, remind them to hold gold before the kill and remind the other supports to spend excess gold on stats. It costs nothing and can result in a dramatically better power spike. If your team consistently struggles to climb at this bracket, reviewing how Dota 2 MMR boost services work is worthwhile — the boost often comes from seeing macro habits practiced at scale.
Ancient to Immortal (4,000+ MMR)
At Ancient and above, both teams contest the Tormentor actively. The fight over it is frequently the catalyst for major mid-game teamfights and can decide the gold and experience lead for the next 10 minutes. Preparation is everything: vision on both the Tormentor pit and the paths into it, knowledge of who the enemy is sending, draft-phase awareness of which heroes benefit from the shard, and buyback availability for the fight.
High-MMR teams often designate a solo killer for the Tormentor — typically Templar Assassin, Ursa, or Troll Warlord — who takes the Tormentor alone at 20:00 while the rest of the team applies pressure elsewhere on the map. The rest of the team creates a distraction on the other side, preventing the enemy from contesting. If your rank is not yet where you want it, understanding this kind of split-map pressure is exactly the knowledge that separates Ancient from Immortal play. Boosting services at this level often function more as coaching through demonstration — watching the decision-making live accelerates learning far faster than reading about it.
Frequently Asked Questions
Want to See Tormentor Control at High MMR?
Objective execution like Tormentor control is one of the highest-leverage habits in Dota 2 — but it requires coordination, game-state awareness, and macro decision-making that is genuinely hard to develop in solo queue. Our Dota 2 ranked boosters execute these decisions at every MMR level. You can review replays of your own account and see exactly how they read the 20-minute window, route the shard, and set up the kill while the rest of the team applies pressure elsewhere.
Get a Dota 2 MMR Boost Book a Coaching Session



