

The Support Item Priority List for the Current Patch

Support players lose more games to bad itemization than to bad positioning. You can have perfect ward coverage, land every stun, and rotate faster than anyone on the map — and still throw the game because you bought Force Staff when you needed Glimmer Cape, or rushed Aether Lens when your team was getting blown up in teamfights. The item you build second matters just as much as the item you build first.
This guide is the support item priority list for patch 7.41d. It covers every phase of the game — starting items through lategame — and gives you a decision framework you can apply to any matchup in any game state. Every item recommendation is grounded in how the patch actually plays at high MMR: the tempo, the aggression patterns, and what kills supports before they can impact the game.
If you want to understand why your winrate stalls on pos 4 and pos 5, the answer is almost always in your item choices between the 10-minute and 25-minute mark. That is what this guide focuses on.
Contents
Why Item Priority Beats Item Choice
Most support guides list items and explain what they do. That is not the problem. The problem is that players already know what Force Staff does — they just do not know whether to build it before or after Glimmer Cape, or whether they should skip both and rush Aether Lens because their carry is farming safely and their team needs poke range. The sequence is the strategy.
In patch 7.41d specifically, support gold income is tight. The laning phase ends earlier due to tower aggro changes that reward diving and aggression. Supports who misallocate their first 2,500 to 3,500 gold lose tempo they cannot recover. You can win your lane, get good rotations, and still hit 25 minutes with a half-built kit that does nothing in fights — because you bought the right items in the wrong order.
There are three variables that should determine your item priority every single game:
- What kills your team right now — crowd control, burst, sustained damage, or pickoffs
- What your carry needs from you — peel, setup, healing, or aura
- What the game clock says — whether you are winning and need to press, or losing and need to stall
Every item recommendation in this guide is framed through those three lenses. The best Dota 2 boosting services consistently report that high-MMR supports itemize reactively, not from memory — they read the game and adjust. That is the habit this guide is designed to build.
Starting Item Rules for Patch 7.41d
Starting items set your trajectory for the first 8 minutes. In 7.41d, the meta has pushed toward aggressive dual-offlane matchups and early harassment, which means survivability starting items outperform utility ones in most games.
Pos 5 (Hard Support) Starting Build
The standard pos 5 start is: 2x Tango, 2x Clarity, 1x Faerie Fire, 1x Sentry Ward, with the 6th item slot flexible. The Clarity gives enough mana for 3-4 spells in lane, the Faerie Fire saves you when you get caught, and the Sentry Ward answers any first-blood setup the enemy may have placed. The 6th item depends on the matchup — another Tango if they have strong lane harassment, a Wind Lace component if you need early movement speed to dodge skillshots, or a Null Talisman if you need stat support for your early abilities.
Do not start Magic Stick on pos 5 in 7.41d. The stick is good but it delays your core items too much when finished as an early priority. Buy it with leftover gold after your first back, not as a starting item.
Pos 4 (Soft Support) Starting Build
Pos 4 starting items focus more on early harassment and kill threat. The recommended start is: Tango, Clarity, Faerie Fire, Null Talisman or Bracer components depending on whether you are stat-hungry, and a Sentry Ward. Pos 4 supports in 7.41d are expected to deal damage in the early game — the meta rewards lane dominance from the 4 position — so you need stat items that boost your early damage, not just survival tools.
Wraith Band is underrated as a starting purchase for pos 4 agility heroes. It gives attack damage, armor, movement speed, and agility for 505 gold. The damage boost makes your lane harassment significantly more threatening and the armor helps you trade back.
Universal Starting Rules
- Always buy at least 1 Sentry Ward at start if you have any reason to suspect a first blood setup
- Tango share early — start with at least 2 tangos regardless of your hero so you can give your carry one if they get harassed
- Mango (Enchanted Mango) is worth buying instead of a Clarity if your hero has high-value single spells — one mango = one extra Thunder Clap or Shallow Grave that saves the game
- Never start Boots as pos 5 — you will not finish them before the laning phase ends anyway, and gold spent on boots is gold not spent on survivability items that keep you alive to farm those boots
The Boots Decision Tree
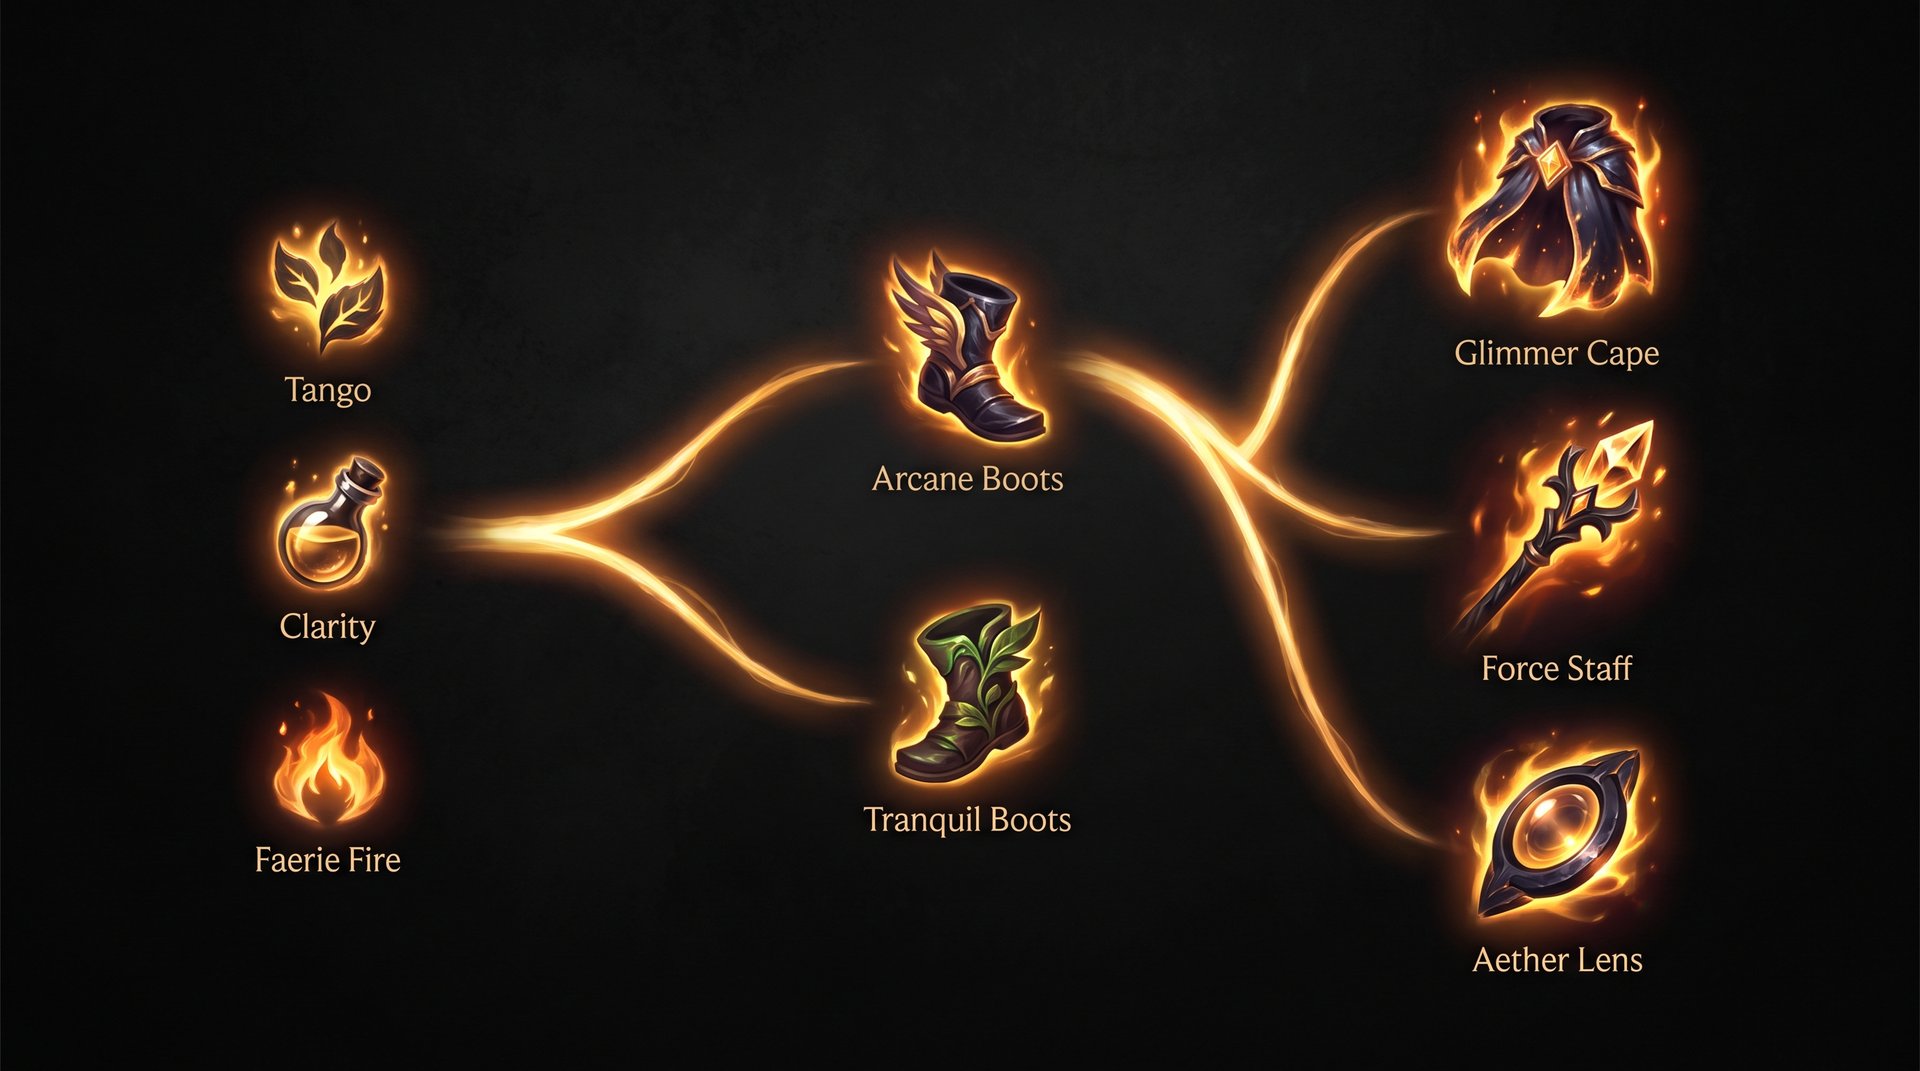
Boots are the first major item decision every support makes, and it is also where most players go wrong. The choice is usually between Tranquil Boots, Arcane Boots, Phase Boots, and Power Treads. Here is how to think about each one.
| Boots | Best For | Cost | Skip When |
|---|---|---|---|
| Tranquil Boots | Pos 5 who stays outside fights, roaming, high regen needs | 925g | Your hero needs mana or you are pos 4 with kill threat |
| Arcane Boots | Mana-hungry pos 4 or pos 5, team lacks mana, builds into Guardian Greaves | 1300g | You have enough mana from Clarity spam and team has other mana supports |
| Phase Boots | Pos 4 with strong kill threat — Crystal Maiden, Lion, Shadow Shaman | 1500g | You are the passive hard support who needs sustain over damage |
| Power Treads | Pos 4 who farms a lot, transitioning to a semi-carry role | 1400g | Standard pos 5 — the stat switching is wasted on a hero not fighting constantly |
In patch 7.41d, Tranquil Boots is the default for pos 5 in most games. The passive HP regen lets you stay in lane longer, the movement speed is exceptional for roaming, and you do not spend the extra 375 gold over Arcane Boots unless your hero is genuinely mana-starved. Heroes like Witch Doctor, Shadow Demon, Omniknight, and Oracle all run Tranquil effectively.
Arcane Boots is correct when you plan to build Guardian Greaves. If you are going to be the team’s primary healer and want to upgrade into Greaves by 20-22 minutes, start Arcane so you have the Boots of Travel component ready. Arcane is also the right call on heroes who run out of mana constantly — Dazzle, Ancient Apparition, Pugna support, and Keeper of the Light all want the mana pool.
Phase Boots on pos 4 is underused in pubs but extremely strong on kill-threat supports. Crystal Maiden with Phase Boots has enough movement speed to land Frostbite from positions enemies do not expect. Lion with Phase can close distance to cast Hex and combo before targets escape. If your pos 4 has a kill combo that requires closing 200-300 range, Phase beats Arcane every time.
Tier 1: The Core Must-Builds
These are the items every support should be working toward in every game that does not have a very specific reason to deviate. They are the backbone of support itemization in 7.41d.
Force Staff
Force Staff is the single most impactful item a support can build in the current patch. The repositioning it provides — for yourself or any ally — is worth more gold than its cost. It saves carries who blink into bad positions. It cancels Blink Daggers from enemies mid-jump. It pushes allies through walls to safety. It repositions enemies into your follow-up damage. At 2,200 gold, it is also one of the most gold-efficient defensive utility items in the game.
In 7.41d, Force Staff is mandatory before your second major item in most games. The only exceptions are games where Glimmer Cape is needed immediately because the enemy has heavy magical burst and your team has zero magic resistance. Even then, you often want Force Staff by the 18-minute mark at latest.
Glimmer Cape
Glimmer Cape is your best answer to magical burst in the current meta. At 1,950 gold, it provides 45 magic resistance on cast and grants invisibility that can be used on any ally. The active’s 2-second cast window before invisibility triggers means you can channel-protect allies — save a Witch Doctor during Death Ward, protect a hero casting Black Hole, or pull yourself invisible while casting a heal.
Buy Glimmer Cape first if the enemy team has heavy magical damage (Storm Spirit, Lina, Skywrath, Lion) or if their primary kill threat is magical. The 45% magic resistance on activation can be the difference between a kill and a survival, and the 20% passive makes your HP pool significantly more durable against spell casters throughout the game.
Aether Lens
Aether Lens extends your spell cast range by 200 units and increases the mana pool. It belongs in Tier 1 for any support whose primary impact comes from abilities — stuns, heals, disables, nukes. The extended range means you can affect fights from positions where you are not in danger, which is critical when your hero dies the moment an enemy looks at you.
The lens is especially potent on Shadow Shaman (Hex from farther, harder to dodge), Lion (Hex and Mana Drain from safety), Crystal Maiden (Frostbite at unexpected range), and Pugna (Nether Ward and Decrepify from backline). Most pos 5 supports should have Aether Lens by 15-18 minutes if they are not being slammed in the laning phase.
Tier 2: Transition Items (10-20 Minutes)
Tier 2 items are the ones you build after your core Tier 1 purchase to address specific game states. They are the gap between “surviving” and “winning.”
Solar Crest
Solar Crest is the top winrate item for pos 5 supports in 7.41d when used correctly. It provides an armor buff to allies and armor debuff to enemies, both at 12 armor differential — the highest single item swing in the game for physical damage. It upgrades from a Medallion of Courage (875 gold), which means you can have the component active for utility from very early on.
Solar Crest is priority when your team has a right-clicking carry who is winning games or when you are fighting Roshan. A carry with +12 armor deals significantly more physical damage because the target has -12 armor, and your carry takes less physical damage with the buff. In tower pushing games and Roshan contests, Solar Crest is the support item with the highest ceiling for physical-damage teams.
Do not build it into heavy magical damage or blink-heavy enemies who will dodge the cast.
Pavise
Pavise is chronically underbuilt in pubs and it costs only 1,975 gold. It provides a 250 HP shield on a 12-second cooldown that can be applied to any ally. In the current patch where burst kills happen fast, a 250 HP shield on your carry at the moment of a dive is the difference between a kill and a trade. The shield also provides 2 armor and 3 regen, making the component (Ring of Regen + Cloak + Platemail) efficient even before the active.
Pavise is especially valuable in games where your carry is being focused and you need a personal Force Field equivalent. It builds into Buckler, which is decent, but the Pavise active itself is better than Buckler in almost every use case — the targeted shield beats the team armor in burst-heavy environments.
Eul’s Scepter
Eul’s Scepter is the best solo-save item for supports who can afford it. The 2.5-second cyclone it applies makes you or your ally untargetable, which cancels almost every type of danger in the game: Doom, Black Hole, Ravage, right-click burst chains, and any targeted kill attempt. It also dispels all debuffs on the target, which is a full-cleanse on demand.
Build Eul’s when the enemy team’s primary kill threat is a targeted combo that your Force Staff cannot outrun. Eul’s active is slower to reach than Force Staff (it takes 3.5 seconds total: 1 cast + 2.5 cyclone before you land), but when you need to buy your carry full immunity for 2.5 seconds, nothing else does that at this price point. The movement speed bonus of 25 is also excellent for roaming supports.
Tier 3: Team-Dependent Situationals
These items are correct in specific circumstances and wrong in general. The mistake most pub support players make is building them by default instead of reading what the game actually needs.
Lotus Orb
Lotus Orb reflects targeted spells back at the caster for 6 seconds after activation. Against single-target stun heroes (Beastmaster Roar, Lion Hex, Doom, Shadow Shaman Hex), it completely nullifies the enemy’s primary disable. The catch is that it costs 4,000 gold — expensive for any support. It is worth it when the enemy has 2-3 targeted spells that win teamfights for them and your team has no other answer.
Lotus Orb is also a strong team-fight tool because you can cast it on any ally during the fight, not just pre-emptively. If you are at 4K gold and the enemy team revolves around Lion and Shadow Shaman, Lotus is priority over almost everything else. You can also use the active on yourself when you are the target — Lotus reflects the spell back and you become nearly impossible to lock down.
Pipe of Insight
Pipe of Insight provides a global magical damage barrier for your whole team. The team-cast active gives 400 HP magic shield to all allies in a 1,200 AoE, and the passive provides 10% magic resistance. Build this when the enemy team does heavy area magical damage — Leshrac, Jakiro, Pugna, Skywrath stacks, Enigma — and your team lacks any other magic resistance aura.
Pipe is frequently the right item to build on a support who has survivability already handled. If you have Force Staff and Glimmer Cape and the enemy team is heavy magic, Pipe is the natural third item. The 3,725 gold cost is significant but the team-wide 400 HP barrier is a 2,000+ gold value swing in a single fight if used correctly.
Mekansm and Guardian Greaves
Mekansm heals 250 HP to all nearby allies and gives +2 armor aura. Guardian Greaves — the upgrade — adds a 350 HP barrier and restores 200 mana and removes debuffs from nearby allies on use. The Greaves are one of the highest gold-value items in the game for the support role, and if you are on Arcane Boots and your team does not already have a Mekansm, this should be your first major item goal in most games.
The window for Greaves to matter most is between minutes 15 and 30. Before 15 minutes the fights are too small for the AOE heal to be transformative. After 30 minutes enemies have enough burst to kill targets before you can cast it. In the 15-30 window, a well-timed Greaves saves multiple allies simultaneously and gives your team the momentum to take towers or Roshan.
Vladmir’s Offering
Vlad’s is underrated on support heroes who stay in fights. The aura provides lifesteal, damage, armor, and mana regen to all nearby allies. In a hard-fighting lineup with multiple right-clickers, Vlad’s can be more impactful than any of the defensive items listed above. It requires your team to be grouped, but in close-quarters teamfights, the 18% lifesteal aura often sustains your carry through damage that would otherwise kill them.
Build Vlad’s as a support when your carry asks for it, when your team has 3+ right-clicking heroes, or when you are playing an aggressive pos 4 who is also right-clicking in fights. Do not build it as a default pos 5 item — the gold is better spent on direct utility unless you are specifically in a physical right-click lineup.
Crimson Guard
Crimson Guard is the best team item against physical-damage lineups with multiple right-click carries or summons. The active provides a 325 HP physical barrier to all nearby allies for 9 seconds, with a 2-second radius cast. Against a 5-hero Juggernaut spin, a Phantom Lancer illusion army, or any lineup that deals most damage through attack damage, Crimson Guard is the support item with the highest teamfight ceiling at its price point.
It builds from Buckler (which you may already have) and Ring of Health, making it reachable by a support in the early-mid transition. In the right matchup, Crimson Guard active can make your whole team effectively invincible for 9 seconds against physical attacks — which is a fight win by itself.
Late-Game Support Itemization
Most support guides end at Tier 3. This section covers what to build when you are 40+ minutes into a game and have real gold to spend.
Aghanim’s Shard
At 1,400 gold, Aghanim’s Shard should be purchased by almost every support who reaches 25 minutes with good economy. The upgrades vary wildly by hero, but the ones that matter: Shadow Shaman Shard makes Wards unkillable for 2.5 seconds — devastating in teamfights. Crystal Maiden Shard lets you move during Freezing Field — which completely changes her viability. Lion Shard adds Finger of Death to a random enemy near your target. Witch Doctor Shard adds extra chains on Voodoo Restoration. Check your hero’s Shard upgrade before you buy it, but most supports should have this by 22-26 minutes if not earlier.
Aghanim’s Scepter
At 4,200 gold, Scepter is a late-game support luxury purchase. The decision depends entirely on whether your hero’s Scepter upgrade changes the game. Oracle Scepter makes Fortune’s End apply a delayed stun to all enemies in the AoE — one of the best teamfight tool upgrades in the game. Dazzle Scepter makes Shallow Grave apply to all nearby allies and reduces Bad Juju armor debuff. Shadow Demon Scepter adds an additional Disruption charge. If your hero’s Scepter upgrade is significant, it deserves priority over raw defensive items at the 35-40 minute mark when you have the gold.
Scythe of Vyse
Hex is the hardest disable in Dota 2. Scythe of Vyse is a 35-second cooldown single-target Hex that cannot be dispelled, blocked, or reflected. At 5,675 gold, it is expensive for a support but the impact per cast is enormous — you effectively remove one enemy from a teamfight for 3.5 seconds with no counterplay. In games that go past 45 minutes, Scythe should be the primary purchase target for any support with real gold income. It is also one of the items that makes staying on pos 5 worth it in extended games.
Refresher Orb
Refresher Orb is a high-risk high-reward lategame purchase. It resets all your cooldowns, allowing you to double-cast every ability. For supports with high-impact ultimates — Ravage, Black Hole, Freezing Field, Wrath of Nature — Refresher doubles your teamfight output. The 5,000 gold cost means you need genuine income sources to reach it, and the 195-second cooldown means you get one reset per fight. Build it when you are winning games and want to close them faster, not when you are behind and need survivability first.
The Decision Framework — How to Prioritize Every Game
Here is the decision framework that should guide your item order from the moment you load into the game until the game ends.
| Game State | Primary Priority | Secondary Priority | Defer |
|---|---|---|---|
| Winning lane, ahead on gold | Force Staff or Glimmer Cape (whichever enemy needs) | Aether Lens or Solar Crest | Survival items — you are not dying yet |
| Losing lane, behind on gold | Glimmer Cape (magic) or Pavise (physical burst) | Force Staff for repositioning | Damage items — you need to survive first |
| Team is getting burst in teamfights | Glimmer Cape + Pipe if magic / Crimson Guard if physical | Lotus Orb if single-target disables are the problem | Auras — not the priority when the team dies in 3 seconds |
| Carry needs farm protection | Force Staff + Pavise | Solar Crest to make their attacks more lethal | Team items if carry is solo farming — they do not benefit yet |
| Even game, objective-focused | Guardian Greaves if on Arcane / Solar Crest for Roshan | Eul’s for fight control | Expensive lategame items |
| Winning game, late game closing | Aghanim’s Shard (if not bought) + Scepter | Scythe of Vyse | Survivability items — you should be dictating fights |
The rule above all other rules: if the enemy has a hero or item combo that kills one of your teammates instantly every fight, your first item after boots should counter that specific threat. Every game has a biggest problem. Item priority is about solving the biggest problem first, not building your preferred item list from memory. If you want to climb consistently on support, checking the MMR boosting guide for mindset strategies is a useful companion read — the itemization habits described there mirror the reactive approach described in this guide.
Common Priority Mistakes That Cost Wins
These are the most common itemization timing errors at sub-Divine MMR on support heroes. If any of these match your habit, fixing them will give you immediate winrate improvement.
Building Force Staff Before Boots
Force Staff is an amazing item but not before boots. Without boots, you do not have the movement speed to be in position to use it. You need to walk to allies to reposition them. Force Staff with no boots means you get caught out of position and die before you can cast it. Always buy your boot choice first, even if you are planning to rush Force Staff.
Defaulting to the Same Build Every Game
The hardest habit to break. Most support players have a default build they learned on a hero and repeat it regardless of the game. They buy Tranquil Boots into Force Staff into Glimmer Cape and never deviate. Sometimes that is correct. Sometimes the game needs you to buy Pipe at 15 minutes because the enemy Leshrac is ending every fight. Reading what the game needs is a skill that takes practice, and practicing it is what separates high MMR supports from everyone else.
Buying Aether Lens When You Are Dying Every Fight
Aether Lens does nothing if you are dying before you can cast spells. Players who are getting bursted in fights often have the habit of buying offense — Lens, Veil of Discord — before addressing survival. If you die in 2 seconds before you can cast spells, Aether Lens gives you 0 spell casts. If you buy Glimmer Cape first, you survive long enough to cast your Lens-range spells without even having the Lens. Build survival before range.
Skipping Aghanim’s Shard
At 1,400 gold, Shard is one of the highest-value purchases any support can make. It consistently gets skipped because players forget about it or prioritize bigger items. Set a reminder for 22 minutes: if you are on a support hero with a meaningful Shard upgrade and you have 1,400 gold, you should buy Shard before building toward your next major item. The value it provides per gold spent is higher than almost anything else in the game.
Building Mekansm Without Arcane Boots
If you want Guardian Greaves, buy Arcane Boots. If you did not buy Arcane Boots, do not build Mekansm. The Greaves upgrade requires Arcane Boots. Buying Mekansm on Tranquil Boots means you either stay with a raw Mekansm (fine but not optimized) or you sell your Tranquil Boots and buy Arcane to upgrade — which is a major gold loss. Plan the Arcane-into-Greaves path from the start of the game if that is your goal.
Frequently Asked Questions
Skip the Guesswork — Get a High-MMR Support Coach
If you want to apply everything in this guide to your specific hero pool and bracket, a coaching session is the fastest path. Our coaches are Ancient-to-Immortal rank specialists who will review your replays, identify your specific itemization patterns, and give you a build priority framework tailored to how you actually play.
Or if you want to climb first and optimize later, check out our Dota 2 MMR Boost service and come back to refine your item choices at your target rank.
Book a Coaching Session View Boost Packages



