How to Climb from Guardian to Crusader as Pos 5 Hard Support in Dota 2 (2026 Guide)

Position 5 hard support is the most selfless role in Dota 2 — and at Guardian (770–1,540 MMR), it’s arguably the most painful role to play. You buy wards, you buy sentries, you sacrifice your own farm so your carry can get items, you babysit a carry who doesn’t know how to last hit, and at the end of the game, your team blames you for the loss because “support diff.”
If you’re stuck in Guardian as a Pos 5 player, this guide is your escape plan. We’ll cover why hard support is the hardest role to climb with (and why it’s still possible), the best heroes for maximizing your impact, the critical mistakes that keep Guardian supports stuck, and a realistic assessment of what the climb actually looks like.
Let’s be upfront: climbing as Position 5 is the slowest path out of Guardian. Your win rate will be lower than core players who are the same skill level above their bracket. The grind will be longer. The frustration will be higher. But if this is your role and you love it, this guide will help you make it work — and if the grind proves too much, we’ll cover alternatives that save you months.
Table of Contents
- Understanding the Pos 5 Role at Guardian
- Top 5 Heroes to Climb from Guardian to Crusader as Pos 5
- 10 Critical Mistakes Guardian Pos 5 Players Make (And How to Fix Them)
- Phase-by-Phase Guide: Playing Pos 5 from Guardian to Crusader
- The Teammate Problem: The Pos 5 Dilemma
- Realistic Timeline for Climbing as Guardian Pos 5
- Frequently Asked Questions
- The Fast Path: Escaping Guardian as Pos 5
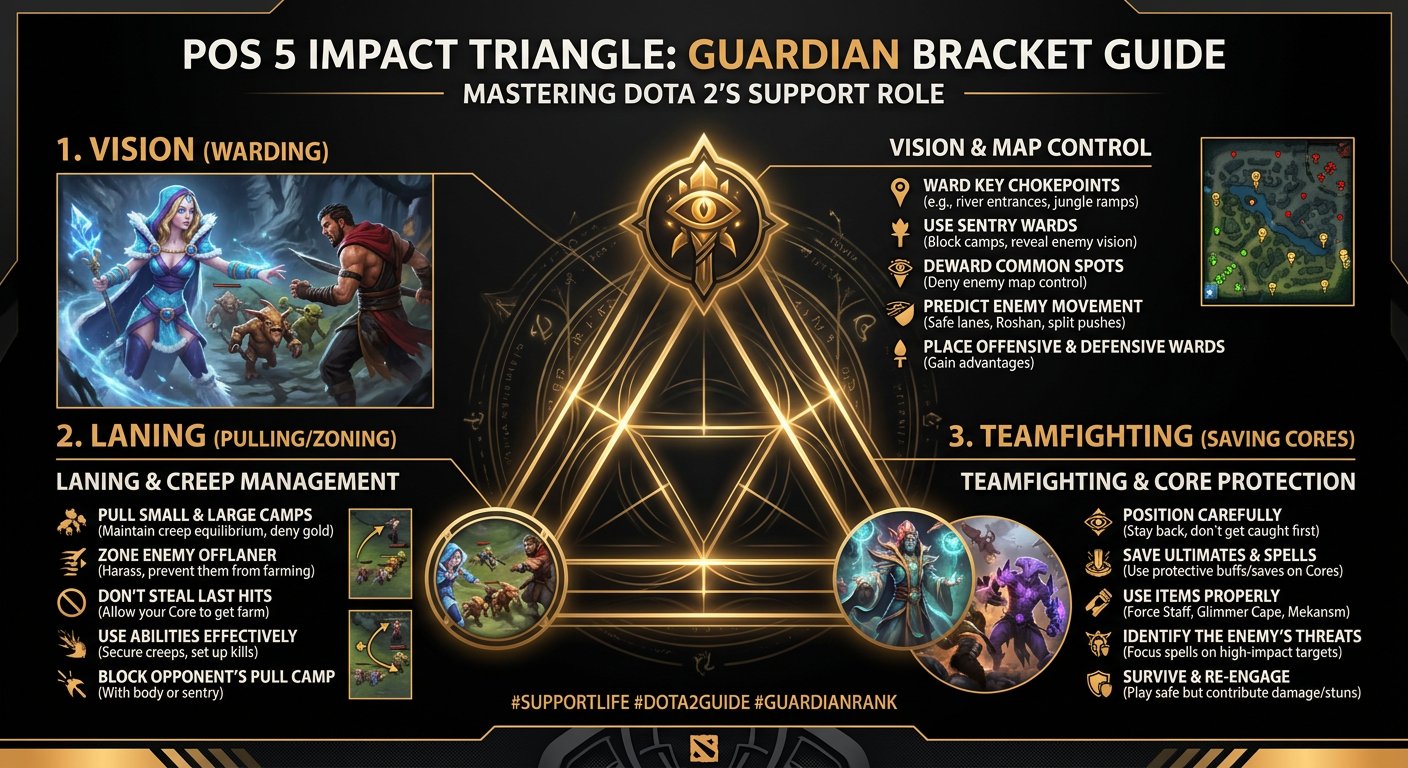
Understanding the Pos 5 Role at Guardian
The Hard Truth About Playing Pos 5 at Low MMR
Here’s what nobody tells aspiring support mains: at low MMR, support is the hardest role to gain MMR with. Not because it requires the most skill, but because your impact is entirely filtered through your team’s ability to use the space and vision you create.
Consider this scenario: you play a perfect lane as Crystal Maiden. You zone the offlaner, pull at the right times, stack three camps, and your Juggernaut carry has 70 CS at 10 minutes. That’s an objectively great laning phase. Now your Juggernaut uses his farm advantage to… fight the enemy team at minute 12 with just Maelstrom and no BKB. He dies three times, throws his lead, and the game spirals. Your perfect laning phase amounted to nothing because your carry couldn’t convert the advantage.
This happens constantly at Guardian. You can be the best Pos 5 in the lobby and still lose because your cores make bad decisions with the resources you gave them. Over hundreds of games, your consistently good play will produce a positive win rate. But the variance is enormous, and the climb is slow.
Why Some Players Still Choose to Climb as Pos 5
Despite the challenges, some players prefer Pos 5 for climbing because:
- You control the laning phase. The Pos 5 has more influence over the safelane than the carry does in the first 5 minutes. Your pulls, zone control, and harassment determine whether your carry gets a good or bad start.
- Vision is a superpower at Guardian. When nobody buys wards, the team with wards has an enormous information advantage. You provide that advantage simply by buying and placing Observer Wards consistently.
- You’re never “hard countered.” Unlike mid or carry, where a bad matchup can lose you the lane, Pos 5 heroes are flexible and contribute regardless of the enemy draft.
- Queue times are instant. Nobody wants to play hard support at Guardian, so you’ll find games in seconds. More games per hour = faster climbing, even at a lower win rate.
Top 5 Heroes to Climb from Guardian to Crusader as Pos 5
The best Pos 5 heroes for climbing at Guardian balance lane dominance, teamfight impact, and the ability to function on virtually zero gold. You want heroes whose abilities are impactful at all stages of the game regardless of items.
1. Crystal Maiden
Why She’s Perfect for Guardian: Crystal Maiden provides everything a team needs: a reliable root (Crystal Nova slow into Frostbite root), an AoE teamfight ultimate (Freezing Field), and — most critically — a global mana regeneration aura (Arcane Aura) that benefits your entire team passively. At Guardian, where players constantly complain about being “out of mana,” Crystal Maiden’s aura silently wins games by enabling your cores to use their abilities more frequently.
CM’s strength at Guardian is her simplicity. Her spells are straightforward, her lane presence is strong, and her ultimate in a teamfight deals enormous damage if the enemy doesn’t interrupt it — and at Guardian, they often forget to stun the channeling CM.
Skill Build:
- Levels 1-4: Q-W-E-W
- Max Frostbite (W) first for long root duration and jungle camp farming
- Max Crystal Nova (Q) second for AoE slow in teamfights
- Take Arcane Aura (E) at level 3 — one early point gives the team noticeable mana regen
- Take Freezing Field at 6 if you’re fighting, or delay to 8-10 if you’re focused on laning
Item Build:
- Starting: Observer Ward, Sentry Ward, Tango x2, Healing Salve, Clarity x2, Blood Grenade
- Early Game: Tranquil Boots Magic Wand Wind Lace
- Mid Game: Glimmer Cape (use during Freezing Field to channel safely) Force Staff
- Late Game: Aghanim’s Shard Aghanim’s Scepter Blink Dagger
Playstyle Tips: In lane, use Frostbite on the enemy offlaner whenever they step forward — the 3-second root at max level is brutal and lets your carry get free hits. Pull the small camp at X:15 and X:45 to control lane equilibrium. Between pulls, harass the enemy with right clicks (CM has decent base attack range). Use Frostbite on large jungle creeps to farm them yourself when you’re not needed in lane — this is your primary income source. In teamfights, position behind your team and wait 2-3 seconds before channeling Freezing Field. If you channel immediately, you’ll get stunned. Wait for the enemy to blow their stuns on your cores, then channel and destroy everyone.
2. Warlock
Why He’s Perfect for Guardian: Warlock is possibly the highest-impact Pos 5 in Guardian, and here’s why: Chaotic Offering (his ultimate) summons a massive golem that stuns in an AoE. At Guardian, this golem is essentially an extra hero on your team — it tanks, it deals damage, and enemies don’t know whether to focus it or your cores. Fatal Bonds spreads damage across linked enemies, which means AoE damage in teamfights is amplified massively. And Shadow Word provides lane sustain that keeps your carry alive through any harassment.
Skill Build:
- Levels 1-4: W-E-W-Q
- Max Shadow Word (W) first for strong laning heal/damage
- Max Fatal Bonds (E) second for teamfight damage amplification
- Take Upheaval (Q) at level 4 — one point for the slow is enough
- Take Chaotic Offering at 6 — this is your game-changer
Item Build:
- Starting: Observer Ward, Sentry Ward, Tango x2, Healing Salve, Clarity x2
- Early Game: Arcane Boots Magic Wand
- Mid Game: Aghanim’s Scepter (two golems — this is a game-winning upgrade at Guardian)
- Late Game: Refresher Orb (FOUR golems — yes, this wins games) Glimmer Cape Holy Locket
Playstyle Tips: In lane, use Shadow Word offensively on the enemy offlaner (it deals damage over time) or defensively on your carry (it heals over time). It’s incredibly versatile. Fatal Bonds in teamfights should link as many enemies as possible — cast it first before your team’s AoE damage. Chaotic Offering should target the enemy’s cluster in teamfights. At Guardian, enemies group up in every fight, making 4-5 man Chaotic Offerings common. With Aghanim’s Scepter, you drop TWO golems, creating absolute chaos. Guardian teams simply do not know how to deal with this. Refresher Orb as a late-game luxury gives you FOUR golems in one fight — it’s absurd and wins almost every teamfight at this bracket.
3. Jakiro
Why He’s Perfect for Guardian: Jakiro is a lane bully with massive AoE teamfight presence. Dual Breath slows and damages in a line, Ice Path is a 1.5-2.5 second AoE stun (one of the longest non-ultimate stuns in the game), Liquid Fire provides free tower damage and attack speed reduction, and Macropyre creates a wall of fire that deals enormous damage over time. At Guardian, enemies walk through Macropyre because they don’t respect the damage. They also stand in Ice Path range constantly.
Skill Build:
- Levels 1-4: E-Q-Q-W
- Max Dual Breath (Q) first for lane harass and slow
- Max Liquid Fire (E) second for tower pushing and lane harass
- Take Ice Path (W) at level 4 — even one point gives 1.25 seconds of stun
- Take Macropyre at 6 for zone control in fights
Item Build:
- Starting: Observer Ward, Sentry Ward, Tango x2, Clarity x2, Wind Lace
- Early Game: Arcane Boots Magic Wand
- Mid Game: Eul’s Scepter (setup for guaranteed Ice Path) Aghanim’s Shard
- Late Game: Aghanim’s Scepter Octarine Core Glimmer Cape
Playstyle Tips: In lane, use Liquid Fire (auto-attack modifier) on the enemy offlaner and on the enemy tower whenever you can. It’s free harass and free tower damage. Dual Breath combined with right clicks forces the enemy out of lane. In teamfights, lead with Ice Path for the stun, then Macropyre on the stunned enemies, then Dual Breath. The combo deals enormous damage. With Eul’s Scepter, you can Eul’s an enemy and time Ice Path to land exactly when they come down — a guaranteed stun combo. At Guardian, Jakiro can often have the highest damage in the game from a Pos 5 position because enemies stand in his AoE abilities.
4. Lich
Why He’s Perfect for Guardian: Lich is the easiest Pos 5 to play effectively. Frost Blast deals damage and slows, Frost Shield gives an ally massive damage reduction plus AoE slow, Sinister Gaze controls an enemy (channeled disable), and Chain Frost bounces between enemies for massive total damage. At Guardian, enemies clump together in teamfights, which means Chain Frost bounces 5-8+ times and deals 2,000+ total damage. It’s devastating when enemies don’t spread out.
Skill Build:
- Levels 1-4: Q-W-Q-W
- Max Frost Blast (Q) first for damage and slow in lane
- Max Frost Shield (W) second for defensive utility
- Take Sinister Gaze (E) at level 5 — one point for the disable
- Take Chain Frost at 6 — in Guardian fights, it wins on its own
Item Build:
- Starting: Observer Ward, Sentry Ward, Tango x2, Healing Salve, Clarity x2, Enchanted Mango
- Early Game: Tranquil Boots Magic Wand Medallion of Courage
- Mid Game: Glimmer Cape Force Staff
- Late Game: Aghanim’s Shard Aghanim’s Scepter Aeon Disk
Playstyle Tips: In lane, cast Frost Blast on the enemy offlaner every time it’s off cooldown. The damage + slow lets your carry get 2-3 free hits. Frost Shield on your carry during trades makes them nearly unkillable in 1v1s. In teamfights, wait for enemies to group up (they always do at Guardian), then drop Chain Frost into the middle of them. It bounces between all of them, dealing escalating damage. Frost Shield on your initiator (Axe or Tide) as they jump in makes them extremely tanky during their initiation window. Lich’s strength is simplicity — his abilities are straightforward but devastatingly effective when used at the right time.
5. Shadow Shaman
Why He’s Perfect for Guardian: Shadow Shaman does something no other Pos 5 can: take towers by himself. Mass Serpent Ward drops a ring of wards that shred buildings in seconds. At Guardian, where teams never push after winning fights, Shadow Shaman forces the issue — you kill someone, drop wards on the tower, and it melts before the enemy can respawn. This objective-taking ability is game-winning at a bracket where games drag on for 50 minutes because nobody pushes.
On top of that, Shackles is a 5-second disable (at max level!) that completely removes a hero from the fight. At Guardian, enemies don’t have the coordination to interrupt your Shackles channel, so it’s often a full-duration lockdown on the enemy carry.
Skill Build:
- Levels 1-4: Q-W-E-Q
- Max Ether Shock (Q) first for wave clear and nuke damage
- Max Shackles (W) second for disable duration
- Take Hex (E) at level 3 — instant disable
- Take Mass Serpent Ward at 6 — use it on towers, Roshan, or to trap enemies
Item Build:
- Starting: Observer Ward, Sentry Ward, Tango x2, Healing Salve, Clarity x2, Wind Lace
- Early Game: Arcane Boots Aether Lens (longer cast range on all abilities)
- Mid Game: Blink Dagger (Blink Hex Shackles combo removes a hero for 8+ seconds) Aghanim’s Scepter
- Late Game: Refresher Orb Black King Bar Octarine Core
Playstyle Tips: In lane, use Ether Shock to harass (it hits multiple targets) and secure ranged creep last hits your carry will miss. Hex + Shackles is a 7+ second disable chain on one target — use this on the enemy carry in fights to effectively make it a 4v5. After winning a fight, immediately drop Mass Serpent Ward on the nearest tower. The wards deal physical damage and will destroy a tower in 5-8 seconds. At Guardian, you can solo take towers after teamfights while your team farms jungle — this single habit can win games that would otherwise stall for 20 more minutes. With Aghanim’s and Refresher, double Serpent Ward wipes buildings instantly and can even shred barracks before the enemy respawns.

10 Critical Mistakes Guardian Pos 5 Players Make (And How to Fix Them)
Mistake #1: Not Zoning the Offlaner
Guardian Pos 5 players stand behind their carry, doing nothing. The enemy offlaner walks up, contests last hits, and the carry has to split the farm with an aggressive enemy. Your job is to make the offlaner’s life miserable — not to stand there passively.
Fix: Position between the enemy offlaner and your creep wave. Right-click the offlaner whenever they approach the wave. Use your spells aggressively in the first 3-4 minutes. If you keep the offlaner at 50% HP, they can’t contest last hits. If they come anyway, your carry gets a free kill. This is the single most important thing a Pos 5 does in the laning phase.
Mistake #2: Auto-Attacking the Creep Wave
Hitting enemy creeps pushes the wave toward the enemy tower. This makes it harder for your carry to last hit, puts them in a dangerous position, and gives the enemy offlaner safe XP under their tower. Guardian Pos 5 players do this constantly.
Fix: Never hit enemy creeps unless you’re intentionally pushing the wave (which is rarely correct in the first 5 minutes). Only deny your own creeps. If you want to harass the enemy, right-click the HERO, not the creeps. Learn the creep aggro rules: right-clicking an enemy hero draws creep aggro, so do it smartly.
Mistake #3: Not Pulling
Creep pulling is how you control lane equilibrium, deny the enemy offlaner XP, and get yourself gold/XP without taking your carry’s farm. Guardian Pos 5 players pull maybe once per game — if ever.
Fix: Pull the small camp at X:15 or X:45 every minute when the lane is pushed toward the enemy tower. If the small camp pull would create a double wave (enemy creeps push in with no allied creeps to tank), do a “pull-through” by pulling the small camp AND connecting it to the large camp. This denies an entire creep wave of XP and gold from the enemy offlaner.
Mistake #4: Buying Wrong Items
Guardian Pos 5 players buy damage items. Crystal Maiden with Aghanim’s Scepter rush. Lich with Dagon. Shadow Shaman with Desolator. These builds are actively game-losing because they sacrifice utility (Glimmer Cape, Force Staff, wards) for damage that doesn’t matter from a Pos 5.
Fix: Your first “real” item after boots should almost always be Glimmer Cape or Force Staff. Glimmer Cape: buy this when the enemy has magic burst damage or you need to save allies. Force Staff: buy this when the enemy has heroes that jump on your carry (Slark, PA, Ursa). These items save lives. A Force Staff that pushes your carry out of danger wins more games than a Dagon that does 400 damage to a support.
Mistake #5: Neglecting Observer Wards
Wards are free. They provide vision. Vision wins games. At Guardian, the ward stock sits at maximum while both teams play in the dark. This is inexcusable.
Fix: Buy Observer Wards the moment they’re in stock. Place them on high ground near mid, on the approach to your jungle from the enemy side, and near Roshan as the game progresses. Deward enemy wards with Sentries. A team with vision has a 15-20% higher win rate than a team without — at Guardian, where neither team wards consistently, being the one team with wards is an enormous advantage.
Mistake #6: Standing in Teamfights Instead of Using Abilities
Guardian Pos 5 players walk into a teamfight, cast one ability, and then stand there auto-attacking for 10 seconds until they die. Your auto-attacks deal 50 damage. Your abilities deal 300-500. Your items (Glimmer, Force) save lives. USE THEM.
Fix: In a teamfight, your priority is: (1) Cast all your abilities on the right targets, (2) Use your items to save allies or disable enemies, (3) Position safely so you can cast abilities again when they come off cooldown. Your auto-attacks are irrelevant. Your ability to cast spells twice in a fight (by surviving the first rotation) is what matters.
Mistake #7: Dying to Provide “Vision”
Walking into the enemy jungle to ward alone, getting caught, and dying. “I was trying to ward!” is the Guardian support motto. Dead supports provide no vision, no abilities, and no impact.
Fix: Ward with your team, not alone. If you need to place a deep ward, smoke first or go with at least one teammate. If it’s not safe to ward an area, ward a less ideal but safer location. A ward on your side of the river that you placed safely is better than a ward on their side that cost you a death.
Mistake #8: Not Using Smoke of Deceit
Smoke is 50 gold. It makes your team invisible to wards. At Guardian, nobody buys it, nobody uses it, and the Smoke stock sits at maximum all game. Smoke ganks at Guardian have nearly a 90% success rate because the enemy doesn’t expect them.
Fix: Buy a Smoke every 5-7 minutes. Ping your team, gather 2-3 heroes, smoke up, and walk into the enemy jungle. Kill whoever you find. Take a tower or Roshan afterward. This simple routine — smoke, kill, objective — wins games at Guardian more reliably than almost any other strategy.
Mistake #9: Never Stacking Camps
Stacking jungle camps is free money for your carry. Hit a camp at X:53-X:55 to pull the creeps out and create a stack. A triple-stacked camp gives your carry 400-600 gold in one farming rotation. Guardian Pos 5 players never stack.
Fix: Stack the large camp or ancient camp nearest to your carry’s farming path. Do this whenever you’re walking past a camp between X:50 and X:00. Even 2-3 stacks per game gives your carry a meaningful gold advantage over the enemy carry (whose support isn’t stacking either).
Mistake #10: Tilting and Giving Up
Your carry has 25 CS at minute 10 despite your perfect lane. Your mid is 0-3. The game looks lost. You type “gg end” and stop trying. The thing is, at Guardian, games are never lost until the Ancient falls. The enemy team is just as bad at closing games as your team is at playing from behind.
Fix: Never give up. Ward defensively, smoke gank to catch enemy overextensions, and enable your strongest core to farm safely. Games that look lost at 15 minutes are won at 40 minutes in at least 30% of Guardian matches. Your consistent effort in “lost” games is the difference between a 52% and 55% win rate — which over hundreds of games translates to hundreds of MMR.
Phase-by-Phase Guide: Playing Pos 5 from Guardian to Crusader
Phase 1: Pre-Game and Laning (Minutes -1:30 to 8)
Before the horn: Buy your starting items (wards, tangos, salve, clarities). Place an Observer Ward on the safelane highground or near the rune. Walk to lane with your carry. Check the enemy lineup — is their offlaner a lane bully (Axe, Bristle) or a passive farmer (Tide, Underlord) This determines how aggressively you need to zone.
Minutes 0-3: Zone the enemy offlaner. Stand between the enemy hero and the creep wave. Right-click them when they approach. Use abilities to harass. If you force them to use two sets of tangos in the first 3 minutes, you’ve won the lane. Pull at X:15 or X:45 to control equilibrium.
Minutes 3-5: If your lane is dominant, keep zoning. If the lane is stable, start pulling regularly to get yourself XP and gold while denying the enemy. Stack the large camp when pulling the small camp (connect the pull). If the lane is bad, play defensively and focus on keeping your carry alive rather than harassing.
Minutes 5-8: Transition out of lane. Rotate to secure a rune, stack a camp for your carry, or make a play mid if the opportunity exists. Don’t leave your carry if they’re still being pressured — use judgment. By minute 8, the laning phase is effectively over and you should be moving around the map.
Phase 2: Mid-Game Support (Minutes 8-20)
Your focus shifts from laning to map control and enabling your team.
Priority list:
- Vision: Place Observer Wards on key locations — enemy jungle entrance, Roshan area, mid highground. Deward enemy wards with Sentries.
- Smoke ganks: Buy Smoke, gather 2-3 teammates, gank enemy cores. Do this every 5-7 minutes.
- Stacking: Stack camps for your carry when walking between lanes.
- Staying alive: Don’t feed. A dead Pos 5 provides zero value. Stay on the edge of fights, cast abilities from safety, and retreat when the fight is lost.
Item goals by minute 20: Boots, Glimmer Cape OR Force Staff, Magic Wand, wards always in stock. If you’ve achieved this, you’re playing better than 90% of Guardian Pos 5 players.
Phase 3: Teamfighting (Minutes 20-32)
Teamfights become frequent. Your role: disable priority targets, save your carry, provide utility.
Teamfight checklist:
- Cast your stun/disable on the enemy carry or the most dangerous enemy hero
- Use Glimmer Cape on your carry or mid when they’re being focused
- Use Force Staff to reposition allies (push them out of danger) or enemies (push them into your team)
- Stay alive to cast your abilities a second time when they come off cooldown
- After the fight, immediately push an objective (tower, Roshan)
Positioning rule: Stand behind your cores. Way behind. Your goal is to be the last one alive so you can clean up with abilities or save your cores with items. If you’re dying first in teamfights, you’re too far forward.
Phase 4: Late Game (Minutes 32+)
Late game as Pos 5 is about vision, utility, and not throwing the game by getting caught out.
Key responsibilities:
- Maintain ward coverage — Roshan, enemy base approach, and defensive wards near your base
- Carry Dust of Appearance and Sentry Wards for invis heroes
- Stick with your team — never walk alone on the map
- Use your buyback wisely — if you die and the enemy pushes, your buyback might save the game
- Keep your carry alive at all costs — if your carry is alive and fighting, you’re winning
The Teammate Problem: The Pos 5 Dilemma
Let’s have an honest conversation about what it’s like to be a Pos 5 at Guardian.
You sacrifice everything. You buy wards so your team has vision. You give your carry farm priority. You die so your carry can live. You stack camps, pull lanes, zone offlaners, smoke gank, and provide all the invisible work that makes Dota 2 function as a team game.
And at Guardian, nobody appreciates it. Your carry has no idea that you pulling the camp saved the lane equilibrium. Your mid doesn’t notice the ward that revealed the incoming gank. Your offlaner doesn’t realize the smoke gank you organized was the reason they got a 3-kill streak.
Worse, your cores actively waste the advantages you create. You give your carry a perfect lane, and they miss 40% of the last hits. You deward the enemy jungle so your cores can farm it, and they farm their own jungle instead. You smoke gank and get a kill, and your team retreats to farm instead of pushing the tower.
The frustration compounds over hundreds of games. You know you’re playing well. You know you’re providing value. But your MMR doesn’t reflect it because your impact is filtered through teammates who don’t — or can’t — convert your work into wins.
This is the mathematical reality of playing Pos 5 at Guardian: your win rate ceiling is lower than any other role. A great Pos 5 at Guardian might achieve 53-55% win rate. A great mid player at Guardian achieves 58-62%. That difference means the Pos 5 player needs twice as many games to gain the same MMR.
Let’s put real numbers on this:
| Role | Typical Win Rate (skilled player at Guardian) | Games to gain 500 MMR | Time (3 games/day) |
|---|---|---|---|
| Mid | 60% | 100 games | ~5 weeks |
| Carry | 57% | 143 games | ~7 weeks |
| Offlane | 56% | 167 games | ~8 weeks |
| Pos 4 | 55% | 200 games | ~10 weeks |
| Pos 5 | 54% | 250 games | ~12 weeks |
Twelve weeks. Three months. That’s the realistic timeline for a dedicated Pos 5 player climbing from mid-Guardian to Crusader. Three months of thankless support play where your teammates don’t understand what you’re doing and frequently waste the advantages you create.
If that timeline sounds reasonable to you, the tips in this guide will get you there. If it doesn’t — if three months of grinding as Pos 5 at Guardian sounds like a cruel punishment — you have alternatives.
Team Smurf’s MMR boost can move your account to Crusader in 1-3 days. No grinding, no frustrating carries, no wasted effort. You start your next session at a bracket where your teammates actually understand what good support play looks like — where your pulls are appreciated, your wards are used, and your smoke ganks are followed up on.
Realistic Timeline for Climbing as Guardian Pos 5
| Win Rate | Games Needed (500 MMR gain) | Time (3 games/day) |
|---|---|---|
| 52% | 500 games | ~5-6 months |
| 53% | 333 games | ~4 months |
| 54% | 250 games | ~3 months |
| 55% | 200 games | ~10 weeks |
| 57%+ | 143 games | ~7 weeks |
The 57%+ tier is rare for Pos 5 climbers and usually indicates a player who is multiple brackets above Guardian playing support. For most dedicated Pos 5 players implementing this guide, 53-55% is realistic.
Frequently Asked Questions
The Fast Path: Escaping Guardian as Pos 5
If you’ve read this entire guide, you understand the reality: climbing as Pos 5 at Guardian is a marathon, not a sprint. It requires patience, consistency, mental fortitude, and the willingness to play hundreds of games where your impact feels invisible.
Some players thrive on this challenge. They love the support role, they’re patient enough for the long climb, and they find satisfaction in the subtle victories — the perfectly timed pull, the ward that saved a teammate, the smoke gank that turned the game. If that’s you, this guide has given you everything you need. Go climb.
For everyone else — the players who know they’re better than Guardian but don’t have three months to prove it through Pos 5 grinding — there are faster options:
MMR Boost: The fastest route. Professional boosters climb your account to Crusader (or higher) in 1-3 days. You skip the entire grind and start playing at a bracket where your support play is valued. No more wasted wards, no more unappreciated pulls, no more carries who don’t understand what you’re doing for them.
Coaching: The learning route. An Immortal coach analyzes your Pos 5 play, identifies your biggest weaknesses, and gives you a personalized plan to climb faster. Most coached Pos 5 players gain 2-3% win rate from targeted improvements, which can cut months off the climb.
Recalibration: The fresh start. If your current MMR is lower than your actual skill level, professional recalibration gives you the best possible starting point for your climb.
No matter which path you take, remember: the fact that you play Pos 5 and care enough about improving to read a 4,000-word guide puts you ahead of the vast majority of Guardian players. Your dedication to the most thankless role in Dota 2 says something about your character as a player. Now let’s get that character out of Guardian and into a bracket where it’s appreciated. Good luck, hard supports.
Ready to Climb Start Your Boost Today
Team Smurf’s Immortal-rank boosters can help you reach your target rank quickly and safely. Professional service, competitive pricing, 24/7 support.
Written by Team Smurf’s Immortal-rank analysts — Rankings last verified February 2026


