How to Climb from Crusader to Archon as Pos 5 Hard Support in Dota 2 (2026 Guide)

Let’s get the uncomfortable truth out of the way first: Position 5 hard support is the hardest role to climb with in Dota 2. Not because it’s less impactful — a great Pos 5 can single-handedly win the laning stage — but because your impact is indirect. You don’t get kills, you don’t take towers, you don’t show up on the scoreboard in ways that feel like you’re “carrying.” You enable others to carry, and if those others aren’t good enough, your enabling doesn’t matter.
That said, climbing from Crusader to Archon (1,540 to 2,310 MMR) as a Position 5 is absolutely possible. It just requires a different mindset than climbing on a core. You’re not going to outfarm the enemy team. You’re going to outmanage them — better warding, better pulls, better saves, better lane setups, and better teamfight positioning than the enemy support, who in Crusader is probably an auto-filled core player counting the seconds until they can queue for their “real” role.
This guide is comprehensive: the five best heroes with complete builds, the ten mistakes that trap Crusader supports, a phase-by-phase guide, the honest math on how long this takes, and options to accelerate the climb if you’d rather not spend six months doing it.
Table of Contents
- Understanding Position 5 in the Crusader Bracket
- Top 5 Pos 5 Heroes for Climbing from Crusader to Archon
- The 10 Mistakes Keeping You in Crusader as Pos 5
- Phase-by-Phase Guide: How to Play Pos 5 from 0 to 50 Minutes
- The Teammate Problem: Why Pos 5 Is the Hardest Climbing Role
- Realistic Timeline: The Pos 5 Climb in Numbers
- Advanced Pos 5 Techniques for Archon-Level Play
Understanding Position 5 in the Crusader Bracket
Position 5 is the “selfless” role. You have the lowest farm priority on the team, you’re expected to buy wards and support items, and your hero relies on abilities rather than items to contribute. In higher brackets, Position 5 players are highly respected because everyone understands how much skill the role requires. In Crusader, they’re flamed for having no items.
What Crusader Teams Actually Need from a Pos 5
Forget what you’ve read about high-level support play. Crusader teams need specific things:
- Win the carry’s lane. This is your #1 job for the first 10 minutes. If your carry has a good lane, they get farm, they get items, they carry the game. If your carry has a bad lane, they tilt, they jungle at level 3, and the game becomes extremely difficult.
- Provide vision. Crusader games are played almost entirely without wards. Both teams wander the map blind. A Pos 5 who consistently places 4-6 wards at a time gives their team an advantage that literally doesn’t exist on the other side.
- Keep people alive. Glimmer Cape, Force Staff, heals, saves — keeping your carry or mid alive for 3 extra seconds in a fight often means they get one more spell off or one more attack, which is the difference between winning and losing.
- Don’t feed. This sounds obvious, but Crusader supports have the highest death counts of any role. A Pos 5 with 12 deaths has given the enemy team roughly 3,000-4,000 gold in kill bounties. That’s an item and a half for the enemy carry.
Why Pos 5 Is Hard to Climb With (And Why People Do It Anyway)
The fundamental challenge: you depend on your carry being competent enough to use the space you create. You can win the lane perfectly — zone the offlaner, pull correctly, stack the triangle — and your carry might still have 30 last hits at 10 minutes because they’re bad at last hitting.
But people climb as Pos 5 for several reasons:
- Fast queue times. Support queues are 1-3 minutes. Core queues can be 5-15+.
- Less mechanical pressure. You don’t need 80 last hits at 10 minutes. Your contribution is decision-making and positioning.
- Compounding advantage. A good Pos 5 makes their entire team better. If you boost all four teammates by 10% effectiveness, that’s a huge aggregate impact.
- Low competition. Most Crusader Pos 5 players are auto-filled. If you actually want to play support and study the role, you’re already above the bracket average.
Top 5 Pos 5 Heroes for Climbing from Crusader to Archon
1. Warlock — The Teamfight Insurance Policy
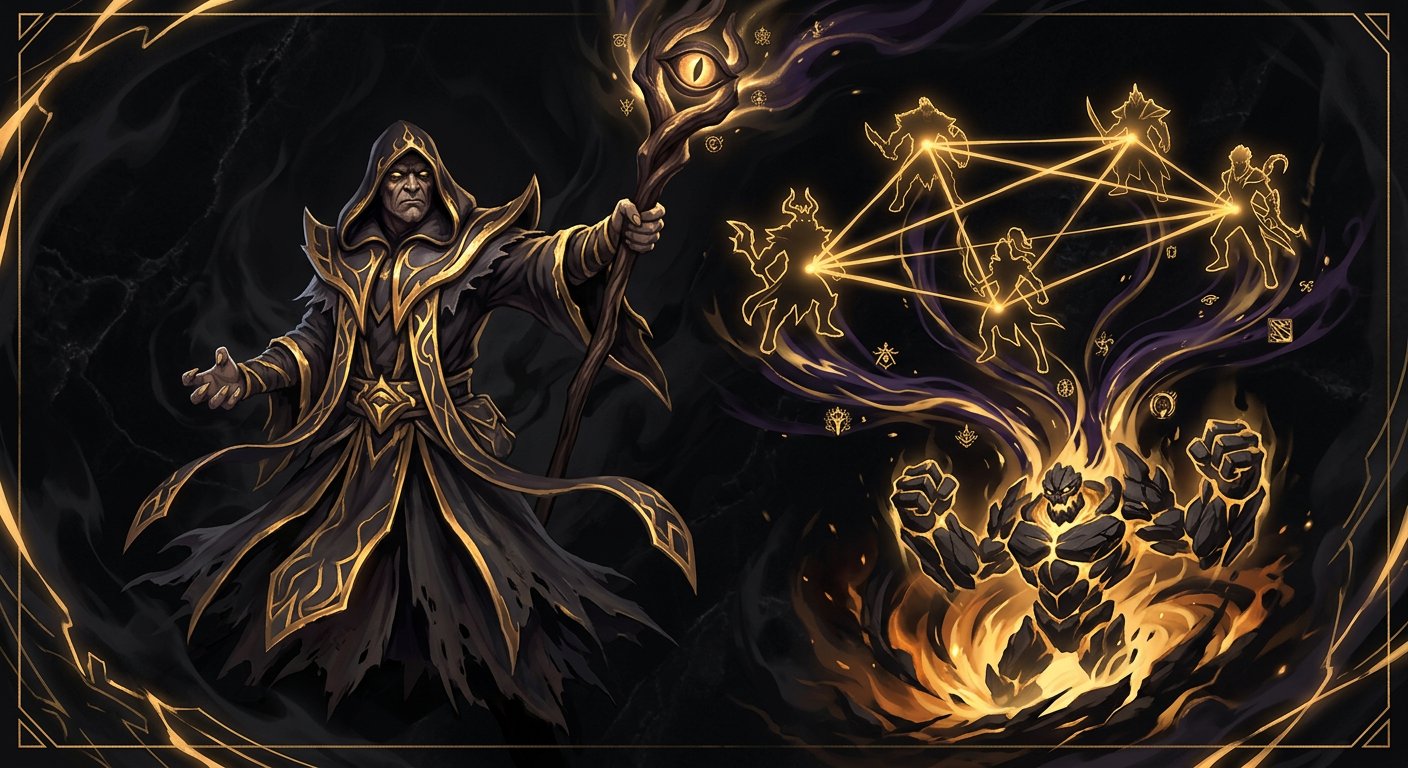
Why he’s #1: Warlock has the single most impactful teamfight ultimate among all Pos 5 heroes: Chaotic Offering summons a golem that stuns everyone in an area, deals massive damage, and then keeps fighting. In Crusader teamfights — which are sloppy, grouped-up brawls — Chaotic Offering is devastating. Fatal Bonds amplifies all damage to bonded targets by 25%, which means your team does 25% more damage in every fight just because you pressed W. And Shadow Word heals your carry in lane, removing the need for them to buy regen.
Skill Build:
- Levels 1-4: E-W-E-Q (Shadow Word at 1 for lane sustain/harass, Fatal Bonds at 2, second Shadow Word at 3, Upheaval at 4)
- Max Shadow Word first — it’s a 300-damage nuke OR a 300-HP heal, both useful in lane
- Take ult at 6, 12, 18
- Max Fatal Bonds second — 25% damage share in teamfights is enormous
- Upheaval last — one value point for the massive slow area
Item Build:
- Starting: Observer Ward x2, Tango (shared), Blood Grenade, Clarity x2, Iron Branch
- Early: Boots of Speed Magic Wand Urn of Shadows
- Core: Arcane Boots Glimmer Cape OR Force Staff Aghanim’s Scepter
- Late: Refresher Orb (double Golem!), Holy Locket, Aether Lens, Octarine Core
- Situational: Spirit Vessel (vs healers), Ghost Scepter (vs right-clickers), Solar Crest (for Roshan speed and carry buffing)
Playstyle tip: Warlock’s game plan is beautifully simple. In lane, heal your carry with Shadow Word and use Shadow Word offensively on the offlaner when they trade. In teamfights: Fatal Bonds the enemy team Chaotic Offering on the bonded targets Upheaval to slow anyone running away Shadow Word your carry. With Refresher Orb, you summon TWO golems, which in Crusader is effectively an instant teamfight win. The golems also push towers after the fight — free objectives.
2. Crystal Maiden — The Lane Winner
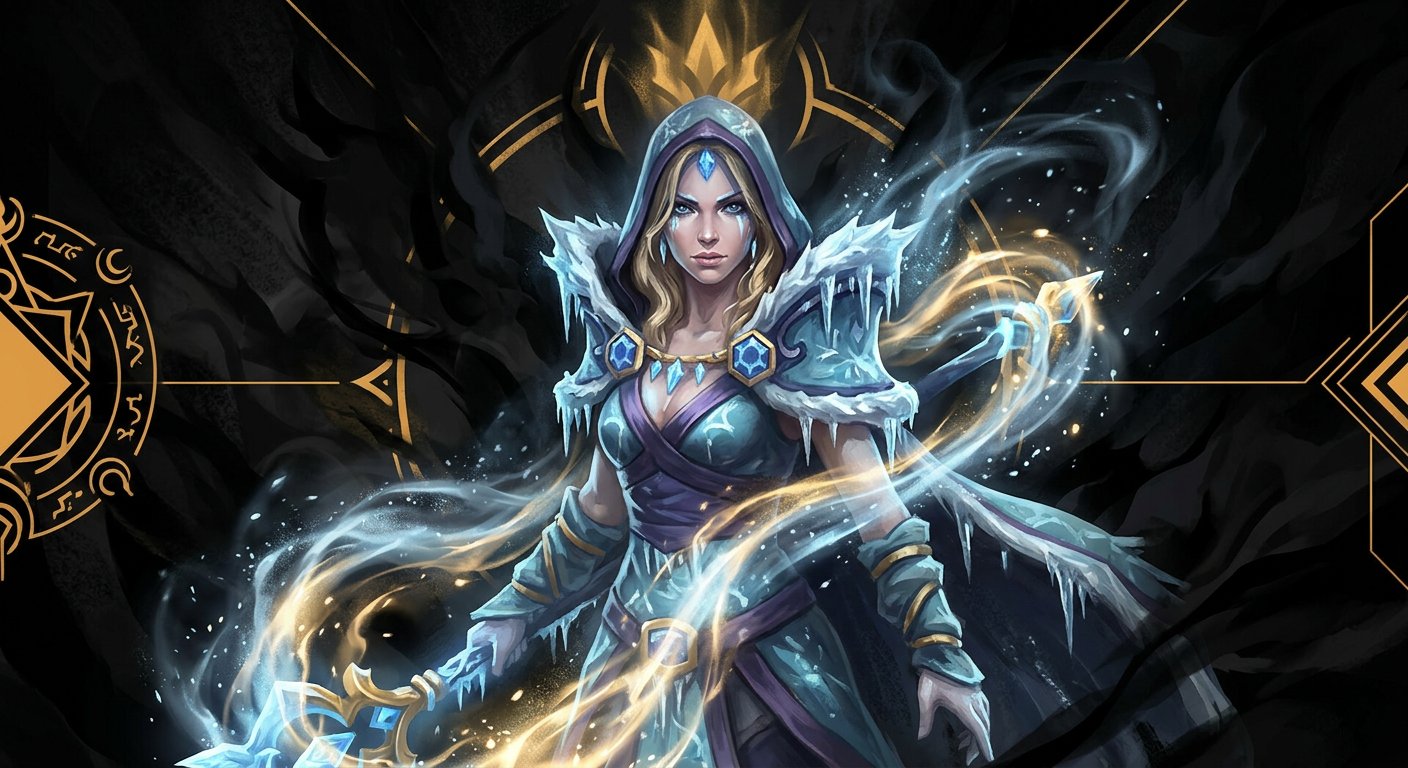
Why she’s classic for Pos 5: Crystal Maiden’s Arcane Aura gives mana regeneration to her entire team, globally. This means your mid never runs out of mana, your offlaner can spam spells, and your carry always has enough mana for their abilities. It’s a passive that literally makes all four teammates better, which is exactly what Pos 5 is about. Her Crystal Nova and Frostbite also give her excellent laning — Nova is an AOE slow/nuke, and Frostbite is a root that locks enemies in place for 3 seconds.
Skill Build:
- Levels 1-4: Q-W-E-Q (Crystal Nova at 1 for AOE harass, Frostbite at 2 for kill setup, Arcane Aura at 3, second Nova at 4)
- Max Crystal Nova first for the damage and slow in fights
- Take ult at 6, 12, 18
- Max Frostbite second for root duration
- Arcane Aura last — one early value point gives the global mana regen
Item Build:
- Starting: Observer Ward x2, Tango (shared), Blood Grenade, Clarity x2, Iron Branch
- Early: Tranquil Boots Magic Wand Wind Lace
- Core: Glimmer Cape Force Staff Black King Bar (yes, BKB on CM)
- Late: Aghanim’s Shard (Frostbite upgrade), Aeon Disk, Ghost Scepter, Aghanim’s Scepter
- Situational: Spirit Vessel (vs healing), Blink Dagger (for Freezing Field positioning), Lotus Orb (for dispels)
Playstyle tip: In lane, use Crystal Nova to harass both the offlaner and the Position 4 simultaneously — it’s AOE, so hit as many targets as possible. Frostbite + auto attacks from you and your carry kills most offlaners at level 2-3. After laning, your priority is Glimmer Cape — this one item saves your carry’s life 2-3 times per game in Crusader because enemies don’t buy detection. Glimmer + BKB lets you channel Freezing Field in teamfights, which does absurd damage if enemies don’t interrupt you (and in Crusader, they often don’t because they panic and run instead of stunning you).
3. Jakiro — The Objective Enabler

Why he’s underrated: Jakiro does everything. Dual Breath slows and damages in a cone. Ice Path is a line stun that catches multiple enemies. Liquid Fire attacks burn towers, making him the best tower-pushing support in the game. And Macropyre creates a massive damage zone that controls where enemies can stand in fights. In Crusader, where fights happen in tight spaces and nobody dodges ground AOE, Jakiro’s damage output rivals some cores.
Skill Build:
- Levels 1-4: E-Q-E-W (Liquid Fire at 1 for free harass on the offlaner with no mana cost, Dual Breath at 2, second Liquid Fire at 3, Ice Path at 4)
- Max Liquid Fire first — it’s free harass and it destroys towers
- Take ult at 6, 12, 18
- Max Dual Breath second for the damage and slow
- Ice Path last — one value point is enough since the stun duration at level 1 is already decent
Item Build:
- Starting: Observer Ward x2, Tango (shared), Blood Grenade, Clarity x2, Iron Branch
- Early: Arcane Boots Magic Wand Wind Lace
- Core: Eul’s Scepter Aghanim’s Shard Force Staff
- Late: Glimmer Cape, Aghanim’s Scepter, Aeon Disk, Refresher Orb
- Situational: Rod of Atos (for Atos Ice Path guaranteed stun combo), Spirit Vessel, Pipe of Insight (if offlaner doesn’t build it)
Playstyle tip: Liquid Fire the offlaner every time it’s off cooldown — it costs zero mana, deals damage over time, and slows their attack speed. This one ability wins lanes by itself because most Crusader offlaners don’t know how to play around the debuff. After laning, use Liquid Fire on every tower your team pushes. Jakiro accelerates tower kills by 30-40%, which is massive for taking objectives. Eul’s Scepter enables a guaranteed combo: Eul’s enemy Ice Path where they’ll land Dual Breath Macropyre under them. In Crusader, this combo kills squishy heroes outright.
4. Ogre Magi — The Unkillable Support
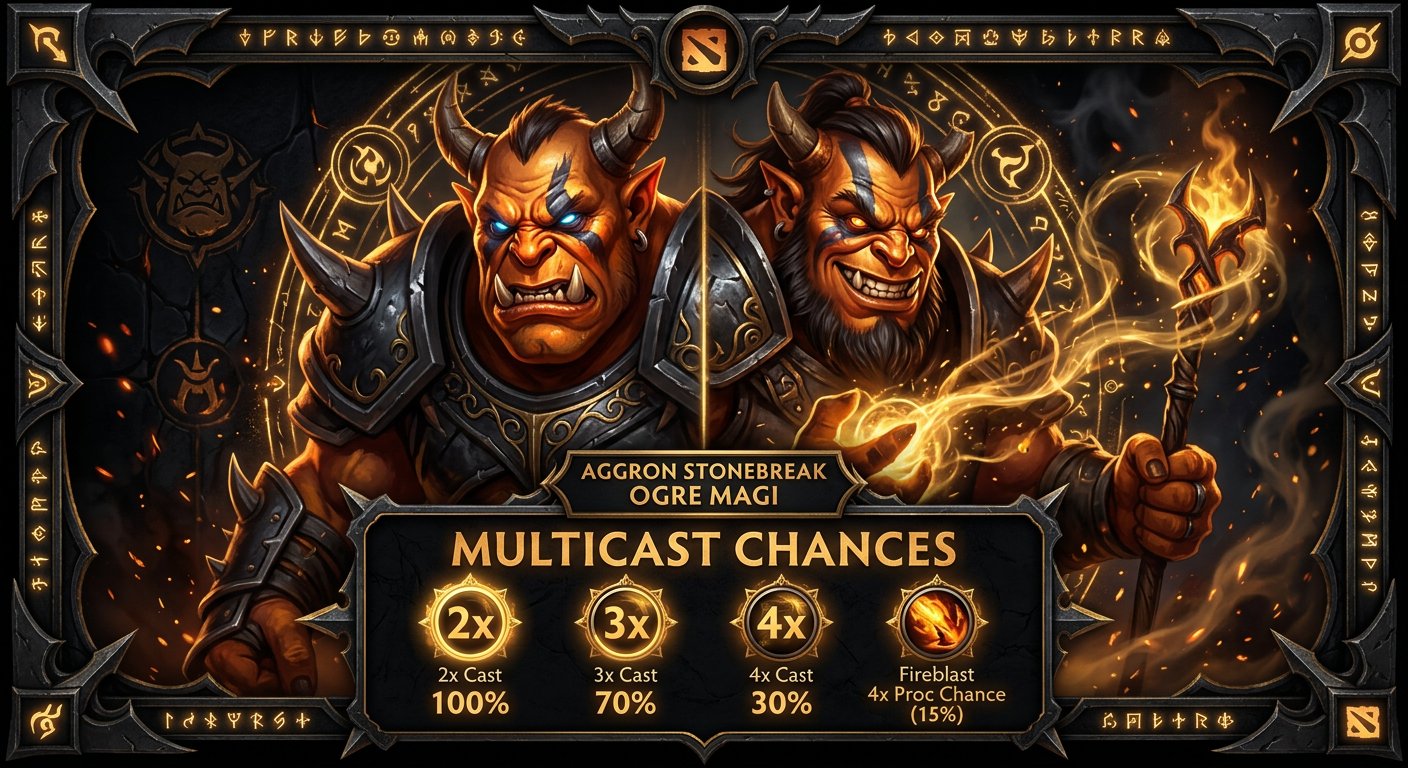
Why he’s perfect for Crusader: Ogre Magi has the highest base armor and HP of any support in the game. In Crusader, where enemy offlaners try to kill the support first (because they think supports are free kills), Ogre just tanks everything and hits back harder. Ignite is the best laning harass in the game (a long-duration DOT + slow), Fireblast is a reliable point-and-click stun, and Bloodlust makes your carry hit faster. Multicast procs are pure joy.
Skill Build:
- Levels 1-4: W-Q-W-E (Ignite at 1 for lane harass, Fireblast at 2 for stun, second Ignite at 3, Bloodlust at 4)
- Max Ignite first — the DOT and slow dominate lanes
- Take ult at 6, 12, 18
- Max Fireblast second for stun damage
- Bloodlust last — one early value point to buff your carry’s attack speed
Item Build:
- Starting: Observer Ward x2, Tango (shared), Blood Grenade, Clarity x2, Gauntlet of Strength
- Early: Boots of Speed Magic Wand Orb of Venom
- Core: Arcane Boots Aether Lens Force Staff OR Glimmer Cape
- Late: Aghanim’s Shard, Hand of Midas (if you get it early enough), Scythe of Vyse, Aeon Disk
- Situational: Spirit Vessel (vs healing), Ghost Scepter (vs physical), Solar Crest (for Roshan and carry buffing)
Playstyle tip: In lane, walk at the enemy offlaner and right-click them. Yes, really. Ogre has 8 base armor and 700+ HP at level 1. Most offlaners can’t trade with you. While right-clicking, use Ignite for the slow + DOT. Your carry should be free-farming while the offlaner deals with you. If the offlaner ignores you and tries to hit your carry, stun them with Fireblast and you both kill them. Ogre wins lanes by being impossibly tanky and annoying. In teamfights, your priority order: Bloodlust your carry Fireblast the highest-priority target Ignite as many enemies as possible.
5. Dazzle — The Save Machine
Why he’s high-impact: Shallow Grave prevents your ally from dying for 5 seconds. In Crusader, where carries routinely position poorly and take unnecessary damage, having a “get out of death free” card every 15 seconds is insanely valuable. Shadow Wave heals and damages simultaneously, Poison Touch is an excellent laning tool with slow and damage, and Bad Juju reduces all cooldowns and armor on enemies. Dazzle keeps idiots alive, and in Crusader, that’s a full-time job.
Skill Build:
- Levels 1-4: Q-W-Q-E (Poison Touch at 1 for lane harass, Shallow Grave at 2 for saves, second Poison Touch at 3, Shadow Wave at 4)
- Max Poison Touch first — it’s a 7-second slow + damage that dominates lanes
- Take ult at 6, 12, 18
- Max Shadow Wave second for heal and damage output
- Shallow Grave last — one point is enough because the save mechanic doesn’t scale with levels (cooldown does, but the save is the save)
Item Build:
- Starting: Observer Ward x2, Tango (shared), Blood Grenade, Clarity x2, Iron Branch
- Early: Arcane Boots Magic Wand Medallion of Courage
- Core: Solar Crest Holy Locket Glimmer Cape
- Late: Aghanim’s Shard, Aeon Disk, Force Staff, Refresher Orb
- Situational: Spirit Vessel, Ghost Scepter, Lotus Orb (for dispels), Mekansm Guardian Greaves
Playstyle tip: Dazzle’s Shallow Grave requires one crucial skill: watching your teammates’ HP. You need to Grave them when they’re about to die, not after. Keep the camera unlocked and frequently glance at your carry’s health bar during fights. A well-timed Grave on your carry at 5% HP means they get to attack for another 5 seconds — with lifesteal, they might heal back to full HP during Grave. Crusader enemies will keep hitting the Graved target, wasting damage, while your carry heals up. It’s incredibly tilting for the enemy team.
The 10 Mistakes Keeping You in Crusader as Pos 5
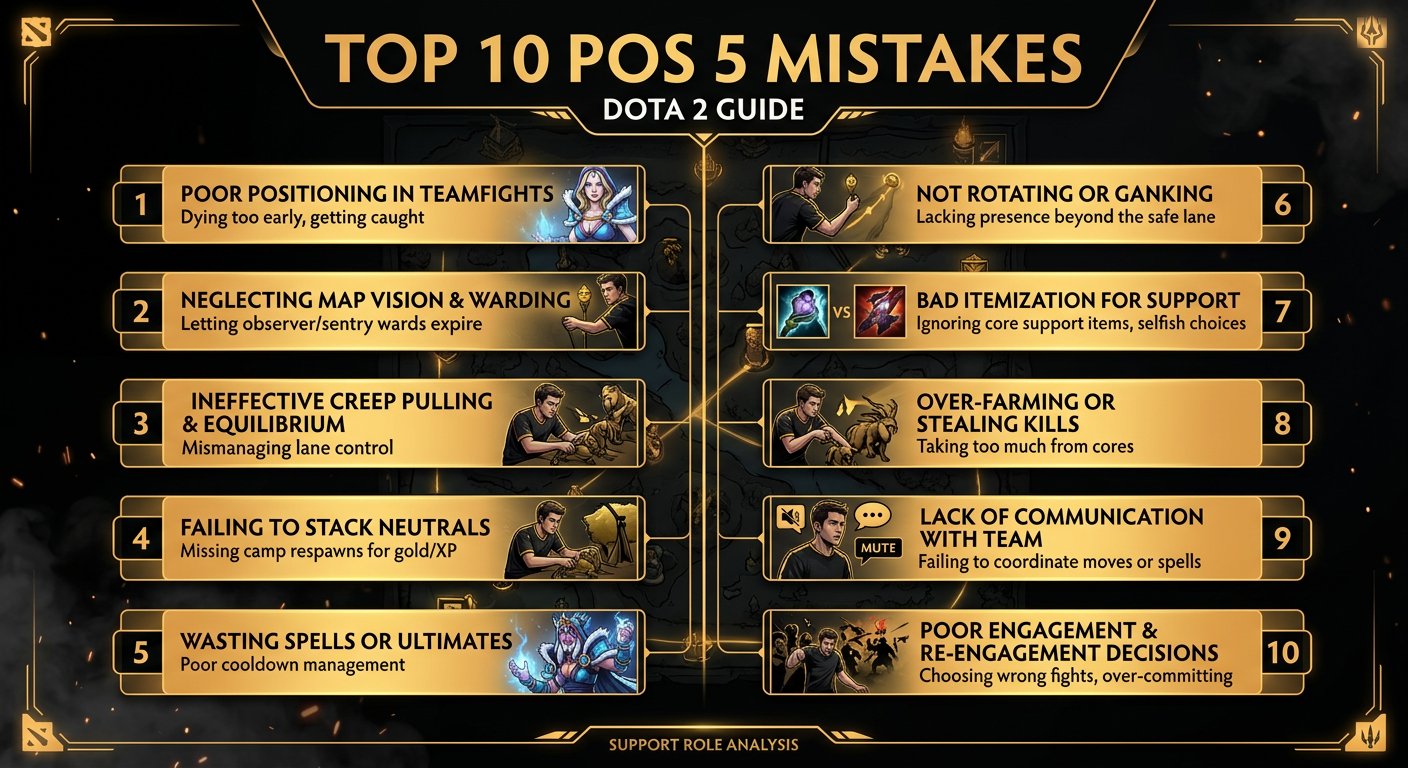
Mistake #1: Contesting Your Carry’s Last Hits
You auto-attack the creep wave. You use spells on creeps to “help push.” You take last hits with right-clicks when the carry was about to get them. Every last hit you steal is 40-80 gold your carry doesn’t get. Over the laning stage, this adds up to hundreds of gold — the difference between a 12-minute and a 16-minute Battle Fury.
The fix: Never attack enemy creeps in lane unless your carry is dead, gone, or you’re pushing for a tower. Your job is to harass the enemy, pull camps, and zone — not hit creeps.
Mistake #2: Standing Behind the Carry Doing Nothing
You stand behind your carry, soaking XP, occasionally right-clicking the enemy once, and contributing nothing. Your carry is now sharing XP with you (making them level slower) and getting no benefit from your presence because you’re not zoning, pulling, or stacking.
The fix: If you’re in the lane, be active — zone the offlaner, pull the small camp, harass constantly. If there’s nothing to do, leave lane entirely and stack the triangle, gank mid, or place deep wards. Standing in lane doing nothing is literally worse than being AFK at base (at least at base, your carry gets solo XP).
Mistake #3: Never Pulling
The lane is pushing toward the enemy tower. Your carry is overextended trying to last hit near the enemy tier 1. The enemy offlaner is getting free denies. The wave equilibrium is destroyed.
The fix: Pull the small camp at :17 or :47 to drag the creep wave into the camp. This resets the wave back toward your tower (where your carry can farm safely) and gives you gold and XP from the camp. If you stack the small camp first (at :55), the single pull will fully kill the wave instead of creating a double wave. Master pulling and you’ll win 60%+ of your lanes.
Mistake #4: Not Zoning the Offlaner
The enemy Bristleback is standing next to the creep wave, happily last-hitting, and you’re doing nothing about it. He gets levels, he gets items, and by minute 10, he’s unkillable.
The fix: Stand between the enemy offlaner and the creep wave. Right-click them when they approach. Use your spells to harass. You’ll take some creep aggro — that’s fine, click an allied creep or walk back to reset it. The goal: the offlaner should have to choose between taking damage and getting a last hit. If you’re doing your job, the enemy offlaner has half your carry’s last hits at 10 minutes.
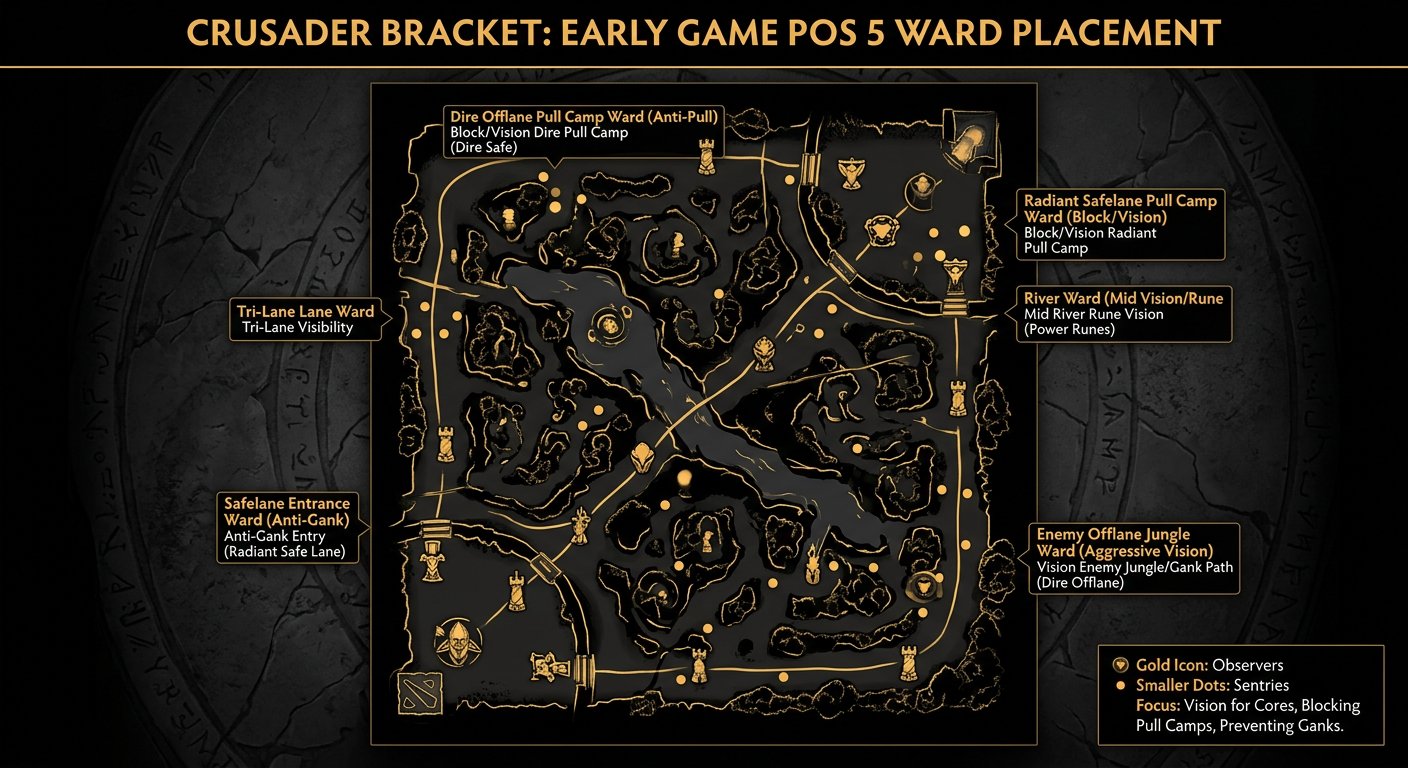
Mistake #5: No Wards After the Initial Placement
You place two wards at the start of the game. Those wards expire at 6-7 minutes. You don’t place new ones because you “don’t have gold.” The map goes dark. Your team dies to ganks. You lose the game.
The fix: Observer Wards are free. You literally get them for free from the shop. There is zero excuse for not having wards on the map at all times. Set a mental timer: every 6 minutes, place two new wards. If your current wards haven’t expired, place the new ones in different spots for more coverage. A team with 4 wards on the map at all times beats a team with 0 wards every single time.
Mistake #6: Buying Only Damage Items
You’re Crystal Maiden with a 20-minute Aghanim’s Scepter, no Glimmer Cape, no Force Staff, and brown boots. Your carry gets jumped by the enemy and dies because you have zero save items. But hey, your Freezing Field does 50% more damage — in the fights where you survive long enough to channel it (you usually don’t).
The fix: Your first 2-3 items should be saves and utility. Glimmer Cape (makes an ally invisible + magic resistant), Force Staff (pushes an ally out of danger), Spirit Vessel (heals an ally or counters enemy healing) — these items save lives and win fights. You can buy damage items after your team has utility covered, which usually means 30+ minutes.
Mistake #7: Dying to Ward
It’s minute 25. You walk alone into the enemy jungle to place a ward. Three enemies are missing from the map. You die. The ward you placed gets dewarded 30 seconds later. Net result: you fed 200+ gold to the enemy and lost your ward.
The fix: Ward with your team, or ward where it’s safe. Use Smoke of Deceit for deep warding. If you can’t safely place a ward somewhere, place it somewhere you CAN safely reach — a suboptimal ward that you survive placing is infinitely better than an optimal ward that gets you killed.
Mistake #8: Wrong Pull Timing
You pull the small camp at the wrong time. The creeps don’t die in the camp. Now there’s a double wave pushing into the enemy tower, the offlaner gets a huge creep wave of XP, and your carry has to last hit under the enemy tower where they might die.
The fix: Stack the small camp first (at :55), THEN pull the next wave into the stacked camp (at :17 or :47). The double camp will kill the entire creep wave. Alternatively, do a “pull-through” — pull the small camp, then aggro the medium camp nearby and chain-pull. This takes practice but it’s a core Pos 5 skill.
Mistake #9: Leaving Lane Too Early
Your carry is level 3, the lane is contested, and you leave to “roam.” Your carry immediately gets zoned, dies, and tilts. The lane is lost because you left before your carry could handle solo pressure.
The fix: Don’t leave lane until your carry can safely farm solo. This usually means level 5-6 and/or after the enemy offlaner has left lane (which usually happens when their tower falls or they decide to roam). If you must leave early, push the wave under the enemy tower first so your carry has a safe 30-second window to farm alone.
Mistake #10: Not Using Smoke of Deceit
The most underused item in Crusader Dota. You’ve played 100 games and you’ve used Smoke maybe 5 times total. Meanwhile, Smoke ganks have a 70%+ success rate at Crusader because nobody buys Sentries and nobody expects it.
The fix: Buy Smoke. Use it. Ping your mid or offlaner, pop Smoke together, walk into enemy territory, and kill someone. Do this every 5-7 minutes starting from minute 10. In Crusader, you’ll get a kill almost every single time because enemy vision is non-existent and their positioning is terrible.
Phase-by-Phase Guide: How to Play Pos 5 from 0 to 50 Minutes
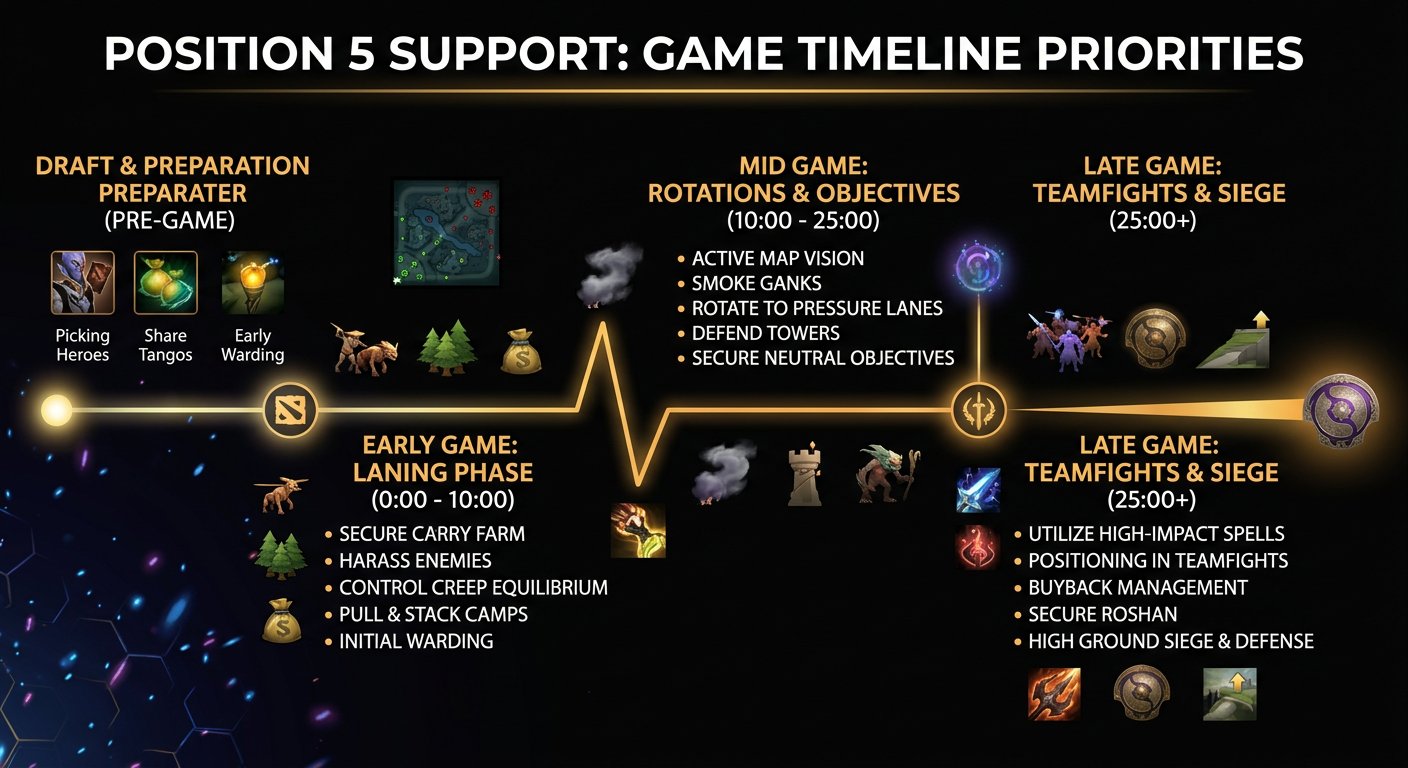
Pre-Game (Draft Phase)
Pick your Pos 5 early in the draft (first or second pick) to let your cores counter-pick. Choose heroes that pair well with your carry:
- Carry needs sustain Warlock (Shadow Word) or Dazzle (Shadow Wave + Grave)
- Carry needs kill setup Crystal Maiden (Frostbite root) or Ogre Magi (Fireblast stun + Ignite slow)
- Enemy offlaner is tanky Jakiro (Liquid Fire DOT ignores tankiness) or Dazzle (armor reduction)
- Your team has no stun Ogre (Fireblast), Crystal Maiden (Frostbite is a root, not a stun, but still locks them), or Jakiro (Ice Path)
Phase 1: Laning (0-10 Minutes)
This is the most important phase for Pos 5. Your performance here determines whether your carry has a good or bad game.
- Place initial wards wisely. One Observer in the safelane to protect your carry from ganks. One Observer mid or on a rune spot to help your mid. Don’t place both wards in the same area.
- Share tangos with mid. Buy two tango sets, give one tango to your mid at the start. This costs you 25 gold and gives your mid sustain they might not buy for themselves.
- Zone the offlaner (0-4 min). Stand aggressively and right-click the offlaner whenever they approach the creep wave. Use your spells for harass (Ignite, Crystal Nova, Poison Touch). Make the lane painful for them.
- Pull correctly (4-10 min). When the wave pushes toward the enemy side, pull the small camp to reset it. Stack pull for clean wave kills. This keeps the wave near your tower where your carry is safest.
- Secure kills when possible. If the offlaner overextends, commit your spells and body for the kill. A dead offlaner means 30+ seconds of free farm for your carry.
Phase 2: Transition (10-18 Minutes)
Your carry should now be able to farm solo (level 7-8 with a farming item). This is when you become a free agent:
- Stack the triangle. Walk to the ancient camp and hard camp near your carry’s farming area. Stack at :55. Double and triple stacks give your carry huge gold injections when they clear them.
- Rotate to other lanes. Help your mid or offlaner push a tower. Your presence in a lane — even just for one fight — can result in a tower kill that benefits the entire team.
- Ward for the next phase. As the map opens up, move your wards. Place them around Roshan, in the enemy jungle, and near the mid lane. These wards will enable your team to play aggressively.
- Build your first utility item. Glimmer Cape or Force Staff — whichever your team needs more. If the enemy has heavy magic burst, Glimmer first. If the enemy has Clockwerk, Pudge, or gap-closers, Force Staff first.
Phase 3: Mid Game (18-30 Minutes)
- Play with your cores. Position yourself near your carry or mid at all times. Your job is to keep them alive. If they get jumped, use your save item immediately — don’t hesitate.
- Smoke for ganks. Every 5-7 minutes, buy Smoke and organize a gank with your team. Even one successful Smoke gank can lead to a tower, Roshan, or both.
- Deward aggressively. Buy Sentries and deward the enemy’s vision. A single deward costs 50 gold but can prevent a crucial gank on your carry. Carry Sentry Wards in your inventory at all times.
- Die productively. If someone has to die in a fight, it should be you — not the carry. Use your body to block skillshots, tank tower hits during dives, and draw enemy attention. A Pos 5 death that saves the carry is always worth it.
Phase 4: Late Game (30+ Minutes)
- Ward the high ground. Whether you’re pushing or defending, vision around tier 3 towers and the enemy/your base is critical. Place wards on cliffs, behind towers, and in tree lines.
- Stay alive in fights. Counterintuitively, at 30+ minutes, your life becomes very valuable because your save items and spells are crucial. Stand far back, use items on your carry, and stay alive to cast spells.
- Buyback for defense. If your base is under siege and you die, buy back immediately. A Pos 5 with Glimmer + Force Staff defending high ground is often enough to hold against a push.
- Track Roshan timer. Roshan respawns 8-11 minutes after being killed. Track when he was killed (alt-click the timer) and ward the pit 1-2 minutes before the earliest respawn.
The Teammate Problem: Why Pos 5 Is the Hardest Climbing Role
We need to be brutally honest here. Position 5 is the hardest role to climb with, and it’s not even close.
Here’s the fundamental problem: your entire game plan revolves around enabling your carry. You win the lane — carry doesn’t capitalize. You stack the triangle — carry doesn’t clear it. You buy Glimmer Cape — carry dies because they don’t wait for you to use it. You pull the wave perfectly — carry pushes it back out immediately.
The Pos 5 teammate dependency is brutal:
- Carry who can’t last hit. You create a perfect lane — enemy offlaner is zoned, wave is near your tower, stacks are ready — and your carry has 25 CS at 10 minutes because they miss half the last hits.
- Cores who don’t use the space. You gank mid, take the tower, and open up the entire enemy jungle for farming. Your cores farm your own jungle instead.
- Team that doesn’t group for objectives. You ward Roshan, smoke your team, and ping Rosh. Two people come. The other three farm jungle.
- Carry who doesn’t wait for saves. You have Glimmer Cape and Force Staff, but your carry blinks into 5 enemies and dies before you can react.
The win rate ceiling for Pos 5 in Crusader is lower than other roles. Realistic expectations:
- 52-55% win rate for a genuinely better player
- At 53% win rate: ~513 games, ~342 hours, ~171 days (nearly 6 months)
- At 55% win rate: ~308 games, ~205 hours, ~103 days (about 3.5 months)
Six months. That’s potentially six months of enabling teammates who may not deserve the enabling. Six months of dying to save carries who don’t use the extra life. Six months of placing wards that nobody watches.
This is why MMR boosting is particularly popular among support players. A professional booster doesn’t need teammates to cooperate — they play whatever role is needed and carry the game regardless. For Pos 5 players, boosting isn’t about skipping the learning; it’s about skipping the RNG of teammate quality.
Coaching is also exceptionally valuable for supports because the role’s impact is subtle and hard to self-evaluate. A coach watching your replays can spot warding patterns, pull timings, and positioning errors that you’d never notice on your own.
Realistic Timeline: The Pos 5 Climb in Numbers
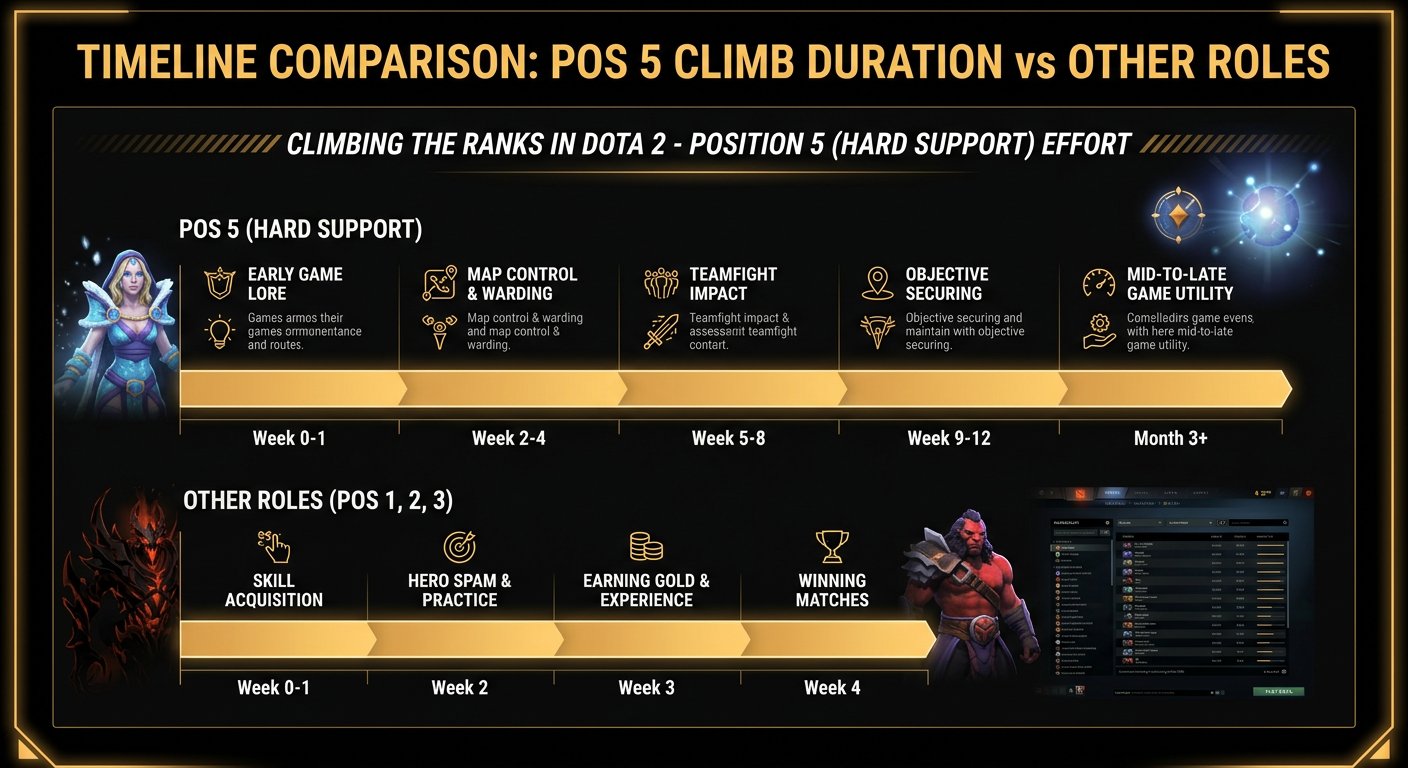
| Win Rate | Net MMR/Game | Games Needed | Hours (42 min avg) | Days (3 games/day) |
|---|---|---|---|---|
| 51% | +0.5 | 1,540 | 1,078 | 513 |
| 53% | +1.5 | 513 | 359 | 171 |
| 55% | +2.5 | 308 | 216 | 103 |
| 57% | +3.5 | 220 | 154 | 73 |
| 60% | +5.0 | 154 | 108 | 51 |
At a realistic 53-55% win rate for a climbing Pos 5, you’re looking at 3.5-6 months. That’s significantly longer than mid (2-3 months at similar skill differential) and longer than carry or offlane.
The faster alternatives: MMR boosting (3-7 days) or calibration services (start a new account directly at Archon). For players who love the support role but hate the grind, these options save months of frustration.
Advanced Pos 5 Techniques for Archon-Level Play
The “Sacrifice” Pull
When the lane is pushed dangerously toward the enemy tower, pull the large camp (not the small camp) directly. The creeps will kill you faster, but the wave resets dramatically. This is better than the standard small-camp pull when the wave is too far gone. You die once but your carry gets 2-3 waves of perfect farm — worth it every time.
Double-Stacking
At certain camps, you can stack two camps simultaneously by positioning between them and pulling at :54-:55. The ancient camp and the hard camp near the triangle can often be double-stacked. This takes practice but gives your carry double the bonus gold from a single stack timing.
Ward Placement Theory
Archon supports think about wards differently than Crusader supports. Instead of “where do I want vision,” think about “what does my team want to do, and what vision do they need to do it safely” If your team wants to farm the triangle, ward the entrances to the triangle. If your team wants to push mid, ward both sides of the mid lane. If your team wants Roshan, ward the pit and the path enemies would take to contest. Purposeful warding > random warding.
Positioning in Teamfights
You should be the furthest-back hero in every fight. Stand behind your carry, behind your mid, behind everyone. Cast spells from maximum range. Use items on allies the moment they take damage. If an enemy runs past your frontline to reach you, run — don’t fight them. You’re not a damage dealer; you’re a force multiplier. A Pos 5 who survives the entire fight and uses all their spells and items twice is worth more than a Pos 5 who trades their life for one stun.
The “Carry Babysitter” Approach
In Crusader, the most effective Pos 5 strategy might be the simplest: glue yourself to your carry for the entire game. Walk with them. Ward where they’re farming. Save them when they get jumped. Stack camps for them. Secure runes for them. Be their personal bodyguard. This works because your carry is the win condition — keeping them alive and farming is literally all you need to do to win most games.
Frequently Asked Questions
Ready to Climb Choose Your Path
Position 5 is the most selfless role in Dota 2. It’s also the most rewarding when played well — you’re the reason your carry survived that fight, the reason your team had vision for that gank, the reason the enemy offlaner was useless at 20 minutes. You just won’t always see that reflected in your MMR as quickly as you’d like.
The grind path: Spam Warlock or Ogre Magi, master lane control, buy wards obsessively, and climb over 3-6 months. It’s slow but you’ll become an excellent support player in the process.
The fast path: Team Smurf’s MMR boosting skips the grind entirely. Reach Archon in days, then play support at a level where your teammates actually use the advantages you create.
The investment path: Professional coaching from a high-MMR support player. They’ll review your warding, your pulls, your positioning, and give you a targeted improvement plan that accelerates your climb. Combine with a calibration boost for the fastest possible results.
Support players don’t get the glory. They don’t get the rampages, the highlight clips, or the commends (usually). But they get something better: the knowledge that every win was built on their foundation. Now go hit Archon.
Team Smurf has helped thousands of Dota 2 players reach their desired rank. Check out our MMR boosting packages or book a coaching session to start your climb today.
Ready to Climb Start Your Boost Today
Team Smurf’s Immortal-rank boosters can help you reach your target rank quickly and safely. Professional service, competitive pricing, 24/7 support.
Written by Team Smurf’s Immortal-rank analysts — Rankings last verified February 2026


