
Earthshaker Guide Dota 2: Win More Fights | TeamSmurf

Few sounds in Dota 2 are as satisfying — or as terrifying — as the deep rumble of Earthshaker slamming his totem into the ground. Whether you have just watched a pro player delete an entire team with a five-man Echo Slam or you have been on the receiving end of a perfectly placed Fissure that cut off your entire escape route, you already know that Earthshaker is one of the most impactful heroes in the game.
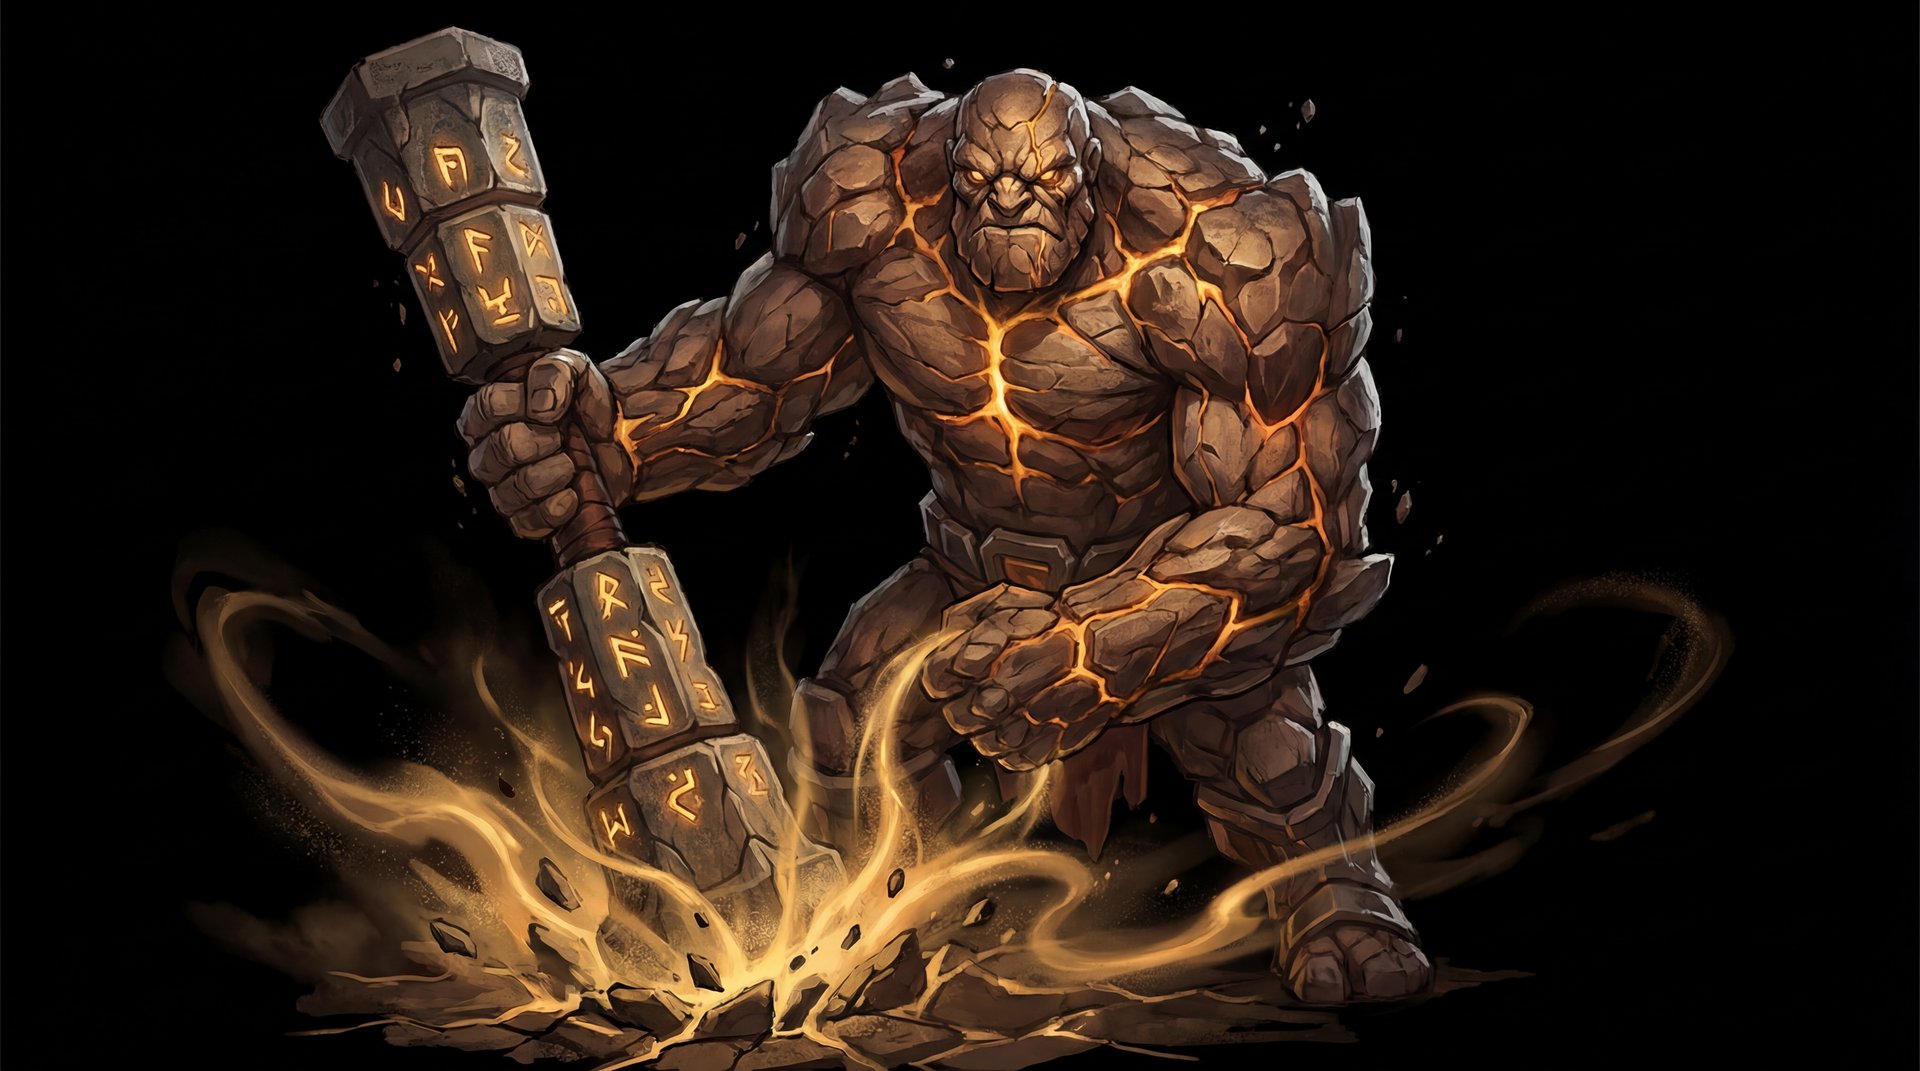
Raigor Stonehoof, the Earthshaker, has been a Dota staple since the earliest days of the game. He is the hero that turns lost team fights into highlight-reel victories. He is the reason supports check their inventories for Blink Dagger every time they hear that totem charge up. And in the current 7.40 patch, Earthshaker sits at a 51.8% winrate across all ranks with a 12.4% pick rate — proof that players at every skill level understand his potential.
This guide breaks down everything you need to dominate with Earthshaker. From ability mechanics most players never learn, to item builds that change based on your rank bracket, to the exact timing windows that separate a good Earthshaker from an Immortal-level playmaker. Whether you are a Herald learning the basics or a Divine player trying to break into Immortal, this is the only Earthshaker resource you will ever need.
Table of Contents
Why Earthshaker Is the Ultimate Playmaker
Earthshaker occupies a unique position in Dota 2. He is primarily played as a position 4 roaming support, but he can flex into position 3 offlane or even position 5 hard support depending on the draft. What makes Earthshaker special is that no other hero in the game can single-handedly win a team fight the way he can. A well-timed Echo Slam into a clumped enemy team deals damage that scales with the number of nearby units — meaning the more enemies group up, the harder Earthshaker punishes them.
In the current meta, Earthshaker thrives because of the emphasis on team fight-oriented Dota. Push strategies that rely on summons and grouped-up heroes are punished mercilessly by Echo Slam. His Fissure provides one of the longest-range stuns in the game and creates impassable terrain that can split fights in half. Enchant Totem gives him surprising burst damage that can delete fragile carries in one hit late game.
Here is what makes Earthshaker worth mastering:
- Game-changing ultimate — Echo Slam can deal 2,000+ damage in the right situation
- Terrain manipulation — Fissure creates a wall that blocks movement for 6.4 seconds at max level
- Scaling burst damage — Enchant Totem multiplied by Aftershock makes him a legitimate threat at every stage
- Flexible roles — Playable as position 3, 4, or 5 with different build paths
- High skill ceiling — The difference between a mediocre and an Immortal Earthshaker is massive
According to Dotabuff, Earthshaker maintains a consistent 51-53% winrate across patches because his kit is fundamentally strong regardless of meta shifts. When he is good, he is oppressive. When the meta does not favor him, he is still solid.
Abilities Deep Dive
Fissure (Q)
Fissure is what separates Earthshaker from every other initiator in Dota 2. On the surface, it is a long-range line stun that deals damage. But its true power lies in the impassable terrain it creates along its path. This wall lasts 6.4 seconds at max level and blocks all ground movement — allies and enemies alike.
Key mechanics most players miss:
- The stun and the wall are separate effects. BKB blocks the stun damage but heroes still cannot walk through the terrain. This means Fissure remains useful even against BKB carries.
- Fissure has a 0.69-second cast animation. This is significant — experienced players can dodge it on reaction. Cancel the animation by shift-queuing movement after cast to reduce predictability.
- The terrain persists even if you die. Dying mid-fight after landing a crucial Fissure still traps enemies for the full 6.4 seconds.
- Fissure can trap Roshan. Position it across the Rosh pit entrance to lock enemies inside or keep them from entering.
- The stun duration is 1.0/1.2/1.4/1.6 seconds — leveling it up matters more for the stun than the damage.
Skill interaction: Every time you cast Fissure, Aftershock triggers, creating an additional 1.4-second stun in a 300 radius around Earthshaker. This means if you Blink in and Fissure, enemies near you get stunned by both Fissure AND Aftershock — that is up to 3 seconds of lockdown from a single spell.
Enchant Totem (W)
Enchant Totem is Earthshaker’s most underrated ability. It amplifies your next attack by 100/200/300/400% of your base damage. Combined with Aftershock, it becomes both a damage tool and a stun on a short 5-second cooldown.
Hidden mechanics:
- The damage bonus applies to base damage only, not bonus damage from items. This means stats-based items (like Crystalys or Daedalus) that add to base damage are amplified, but raw +damage items are not.
- Enchant Totem can crit. A Daedalus crit on a 400% Enchant Totem hit deals absurd damage — often 1,500+ physical damage in a single right-click.
- The empowered attack has no expiration timer. You can charge it before a fight, hold it, and release it whenever you want.
- With Aghanim’s Scepter, Enchant Totem becomes a short leap that lets Earthshaker jump to a target location. This gives him a second mobility tool beyond Blink Dagger and triggers Aftershock on landing.
- The leap from Aghanim’s Scepter has a 0.5-second air time during which you are invulnerable to ground-targeted spells.
Aftershock (E) — The Passive That Makes Everything Work
Aftershock is why Earthshaker is Earthshaker. Every time you cast any ability, Aftershock triggers a 1.0/1.2/1.4/1.4-second stun and 75/100/125/150 damage in a 300 radius around you. This passive converts every spell into a stun, which means your full combo locks enemies down for an extremely long time.
The full combo stun chain:
- Blink in — Enchant Totem (W): 1.4s Aftershock stun
- Hit the empowered attack for burst damage
- Echo Slam (R): 1.4s Aftershock stun
- Fissure (Q): 1.6s Fissure stun + 1.4s Aftershock stun (overlapping)
That is roughly 4+ seconds of stun from a single hero, plus massive damage. No other support in the game delivers this kind of lockdown.
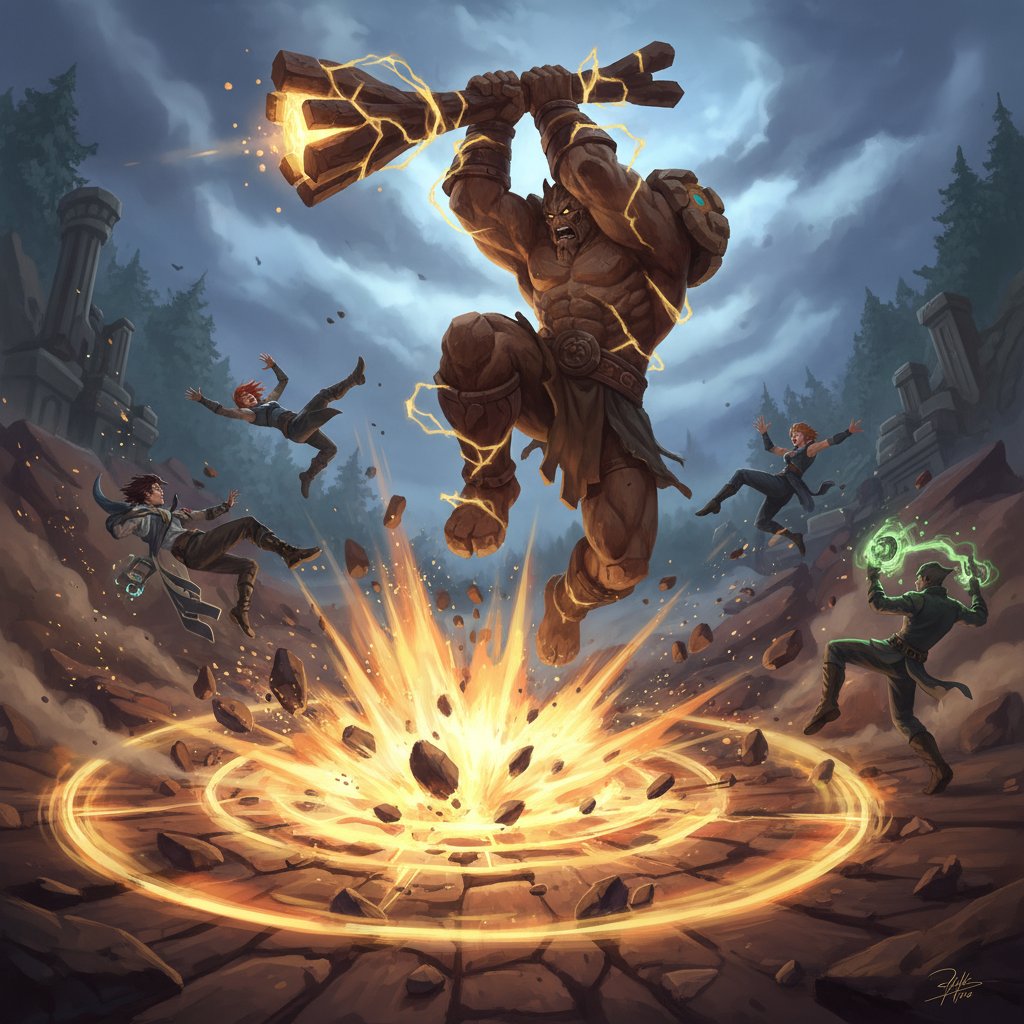
Echo Slam (R) — The Team Fight Winner
Echo Slam is arguably the most devastating team fight ultimate in Dota 2. It sends out an initial shockwave dealing 100/150/200 damage, and then every enemy unit hit creates echo waves that bounce to all other nearby enemies. Each echo deals 70/90/110 damage.
Why it scales with enemy numbers:
- Against 1 hero: 100/150/200 initial damage + 0 echoes = mediocre
- Against 3 heroes: 200 initial + each hero generates echoes hitting the other 2 = 200 + (3 x 2 x 110) = 860 damage
- Against 5 heroes: 200 + (5 x 4 x 110) = 2,400 damage per hero
- Against 5 heroes + summons/illusions: potentially 3,000+ damage
This is why Earthshaker absolutely destroys heroes like Phantom Lancer, Meepo, Broodmother, and Nature’s Prophet. Their summons and illusions multiply Echo Slam’s damage to lethal levels.
Skill Build Order
| Role | Level 1-3 | Level 4-7 | Priority | Notes |
|---|---|---|---|---|
| Position 4 (Standard) | Q-E-Q | Q-R-Q-E | Q > E > W > R | Max Fissure for stun duration and damage |
| Position 3 Offlane | W-E-Q | W-R-W-E | W > E > Q > R | Max Totem for lane trading and farm speed |
| Position 5 Hard Support | Q-E-W | Q-R-E-Q | Q > E > W > R | Early value point in W for Aftershock procs |
| Greedy Roamer | Q-E-W | E-R-E-Q | E > Q > W > R | Max Aftershock for chain-stun duration |
Item Builds by Rank Bracket
Earthshaker’s item build revolves around one core truth: Blink Dagger is non-negotiable. Everything else is situational. But the order you build items and what you prioritize after Blink changes dramatically based on your rank bracket.
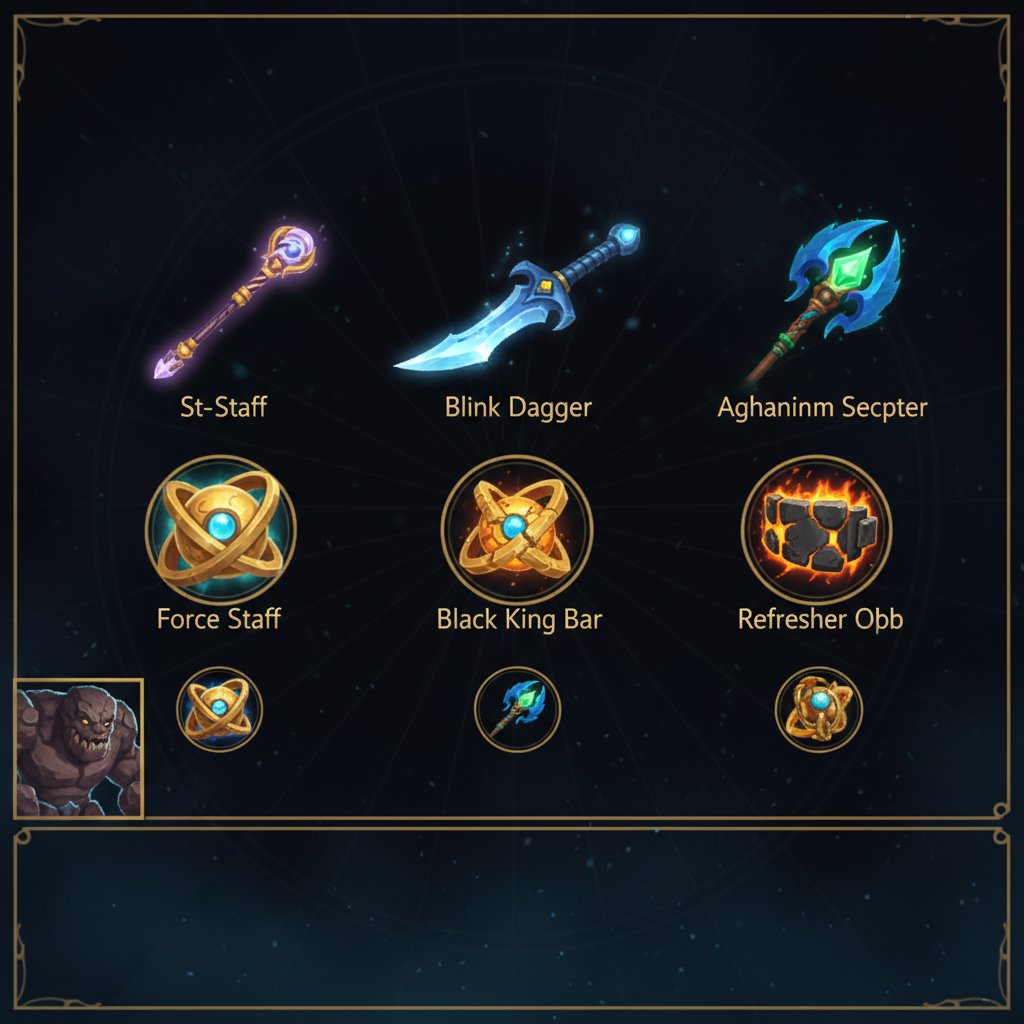
| Rank | Starting Items | Early Game | Core | Late Game |
|---|---|---|---|---|
| Herald – Crusader | Tango, Clarity x2, Orb of Venom, Iron Branch x2 | Arcane Boots, Magic Stick | Blink Dagger, Aghanim’s Scepter | BKB, Refresher Orb |
| Archon – Legend | Tango, Clarity x2, Wind Lace, Iron Branch, Smoke | Tranquil Boots, Soul Ring, Magic Wand | Blink Dagger, Force Staff | Aghanim’s Scepter, BKB, Octarine Core |
| Ancient – Divine | Tango, Clarity x2, Smoke, Observer Ward, Iron Branch | Tranquil Boots, Soul Ring, Wind Lace | Blink Dagger, Force Staff, Glimmer Cape | Aghanim’s Scepter, BKB, Refresher |
| Immortal | Tango, Clarity x2, Smoke x2, Sentry Ward, Iron Branch | Tranquil Boots, Soul Ring | Blink Dagger, Force Staff or Ghost Scepter | Aghanim’s Shard, BKB, Octarine or Refresher |
Why Builds Differ by Rank
Herald-Crusader: At lower ranks, fights are chaotic and enemies group up constantly. Rushing Aghanim’s Scepter after Blink gives you a second initiation tool and lets you chase kills. Enemies at this bracket rarely buy BKB, so your full combo lands almost every time. Arcane Boots help with the mana problems you will face since Soul Ring timing is harder to optimize at lower ranks.
Archon-Legend: Players at this rank start understanding Earthshaker’s threat but still position poorly in fights. Force Staff gives you a second escape after Blink initiation and lets you save allies. Tranquil Boots + Soul Ring is the efficiency combo — you toggle Soul Ring before spells for mana and Tranquils heal you between fights.
Ancient-Divine: Enemies actively play around your Blink range at this rank. Glimmer Cape becomes essential for surviving after initiation because players will focus you immediately. The build is more defensive because you need to stay alive long enough for your team to follow up on your stuns.
Immortal: At the highest level, Earthshaker’s item build is hyper-situational. Ghost Scepter might replace Force Staff if the enemy carry is physical-heavy. Aghanim’s Shard (which gives Enchant Totem a ground-targeted leap without requiring Scepter) is prioritized for cost efficiency. Getting coaching from Immortal players can teach you when to deviate from standard builds based on specific game states.
Laning Phase Masterclass
Earthshaker’s laning phase is his weakest point, and how you handle it determines whether you hit your Blink Dagger timing at 12 minutes or 20 minutes. As a position 4, your job is to create pressure through roaming while securing enough experience to hit level 6.
Level 1-3: Establish Lane Presence
Start in the offlane with your position 3. Your level 1 Fissure is a powerful trading tool — 110 damage plus the stun lets your offlaner get in free right-clicks. But do not spam Fissure mindlessly. You have a tiny mana pool (291 base mana) and Fissure costs 125. You get roughly two casts before you are completely dry.
Use your first Fissure aggressively at level 1 when:
- The enemy carry goes for a last hit under pressure and is out of position
- You can stun both the carry and support simultaneously
- Your offlaner has a follow-up stun or slow to chain with
The level 2 power spike is massive. With Fissure and Aftershock, your single Fissure now stuns for 1.0s (Fissure) + 1.0s (Aftershock) and deals 185 total damage. Pair this with a strong offlaner like Mars, Axe, or Centaur and you can secure kills from full HP.
Level 3-5: Roaming Window
Once your offlaner can survive solo (usually after level 3), start roaming mid. Earthshaker’s Fissure is devastating in the mid lane because the lane is narrow — your terrain wall can completely block retreat paths toward the tower.
How to gank mid effectively:
- Smoke from the offlane and approach from behind the enemy mid’s tower (the side they expect to be safe)
- Wait for them to use a spell on the creep wave so they are committed to a position
- Fissure diagonally across the lane to cut off retreat to their tower
- Your mid follows up while they are walled off
Blink Dagger Timing Benchmarks
| Timing | Rating | How to Achieve It |
|---|---|---|
| 10-12 minutes | Excellent | Multiple successful ganks, kill participation above 60% |
| 13-15 minutes | Average | Standard laning, some ganks, occasional stacking |
| 16-18 minutes | Below Average | Died multiple times early, missed roaming windows |
| 19+ minutes | Recovery Mode | Lane went badly, need to stack camps and catch-up farm |
Tip for accelerating your Blink timing: Stack the large or ancient camp near your offlane whenever you walk past it. At level 5 with two points in Fissure, you can clear a stacked camp with Fissure + Enchant Totem + a few right-clicks. Two triple-stacked camps can fund half your Blink.
Mid and Late Game Transitions
Earthshaker’s game fundamentally changes the moment Blink Dagger completes. Before Blink, you are a laning support who throws Fissures from range. After Blink, you become the most feared initiator on the map.
The Blink Dagger Power Spike (12-20 Minutes)
The moment you finish Blink, tell your team. Seriously. Ping it, type it in chat, do whatever you need to do. Your team needs to play around your initiation window. Here is how to maximize this timing:
- Carry a Smoke of Deceit at all times. Blink + Smoke lets you walk past wards and initiate from angles enemies cannot predict.
- Look for fights near creep waves. Remember — Echo Slam echoes bounce off all enemy units, including lane creeps. Fighting near a creep wave can add 400-600 bonus damage to your ultimate.
- Prioritize Roshan fights. The Rosh pit is Earthshaker’s playground. Enemies clump inside the pit, and Fissure can wall off the entrance, trapping them inside with your team.
The Combo: Blink-Totem-Echo-Fissure
This is the bread-and-butter sequence. Here is the exact execution:
- Pre-cast Enchant Totem before you Blink in (so the empowered attack is ready)
- Blink into the enemy group — aim for the center of the largest cluster
- Immediately cast Echo Slam — Aftershock stuns everyone in 300 range
- Right-click the most important target with your Enchant Totem-empowered attack
- Cast Fissure to extend the stun chain and block escape routes
The reason you pre-cast Enchant Totem is that using it after Blink wastes time on the cast animation. By having it ready, you Blink-Echo instantly, and the Aftershock from Echo serves as your AoE stun while you deliver the empowered hit.
Late Game (30+ Minutes): Staying Relevant
Earthshaker does not fall off as hard as other supports in the late game. His stuns are always valuable, and Echo Slam’s damage scales with enemy unit count, not with his own farm. However, surviving long enough to get your combo off becomes the challenge.
Key late-game decisions:
- BKB timing: Once enemy cores have lockdown that can interrupt your combo (Hex, instant stuns), BKB becomes mandatory. You need to BKB before Blinking in so you cannot be interrupted.
- Refresher Orb: The dream item. Double Echo Slam, double Fissure, double everything. A Refresher combo in a team fight is usually an instant team wipe. Prioritize this if your team needs you to be the primary damage source.
- Aghanim’s Scepter: Provides a second gap closer with Enchant Totem leap. This means you can initiate with Blink, then chase with Totem leap if enemies scatter after your initial combo.
Late game, your positioning is everything. Stay hidden in trees or fog until the fight starts. Never show on the map before a fight. The moment enemies see Earthshaker, they will spread out and your Echo Slam goes from 2,400 damage to 400. Your presence is your power — the threat of Echo Slam forces enemies to play spread out, which benefits your team even without casting it.
Counters: Heroes That Destroy Earthshaker
Even the best Earthshaker players struggle against certain heroes. Understanding your counters lets you draft better and play around them when you cannot avoid the matchup.

Top 5 Counters
1. Lifestealer
Rage makes Lifestealer spell immune, meaning your entire combo — Fissure, Aftershock, Echo Slam — does nothing to him. He can Rage through your Fissure terrain, walk up to you, and kill you with right-clicks while you have no way to stop him. In team fights, Lifestealer pops Rage before you can initiate, then runs at your backline. How to play around it: Wait for Rage to expire before initiating, or focus your combo on his teammates instead.
2. Silencer
Global Silence shuts down Earthshaker harder than almost any other hero. Your entire value comes from casting spells rapidly in sequence. If you get Silenced after Blinking in, you just delivered yourself to the enemy team with no way to fight back. Last Word also punishes you for casting or forces you to eat a 6-second silence. How to play around it: Buy Eul’s Scepter to dispel silence, or BKB before initiating. Always track Global Silence cooldown.
3. Nyx Assassin
Spiked Carapace reflects your stuns back at you. If Nyx times Carapace to your Echo Slam, you stun yourself while the rest of his team escapes. Vendetta lets him find and kill you before fights since you are often hiding alone in trees. How to play around it: Check for Nyx before initiating. If you see Spiked Carapace activate, hold your spells for 2.5 seconds.
4. Anti-Mage
Counterspell reflects single-target components and, more importantly, Mana Void punishes your mana-hungry kit. After you dump all your spells, your mana pool is nearly empty — a perfect Mana Void target that can kill you and deal AoE damage to your team. Blink lets Anti-Mage dodge your Fissure easily. How to play around it: Never stand near teammates after using your combo if AM is alive.
5. Pugna
Nether Ward deals damage based on mana cost every time you cast a spell. Echo Slam costs 145/205/265 mana, Fissure costs 125/140/155/170, and Enchant Totem costs 20/30/40/50. Casting your full combo near a Nether Ward can deal 400+ damage to yourself. Decrepify also prevents your Enchant Totem empowered attack from landing since it is physical damage. How to play around it: Always scout for Nether Ward placement before initiating. Kill it first or initiate from outside its radius.
Heroes Earthshaker Destroys
Earthshaker’s kit naturally punishes specific hero archetypes. If you see these heroes on the enemy team, pick Earthshaker with confidence.
Top 5 Favorable Matchups
1. Meepo
The ultimate Earthshaker victim. Every Meepo clone counts as a separate unit for Echo Slam echoes. Against a level 25 Meepo with 4 clones, Echo Slam deals 200 + (5 x 4 x 110) = 2,400 damage to every Meepo. Combined with Aftershock and Fissure, you can solo-kill a farmed Meepo from full HP. Meepo players genuinely consider abandoning the game when they see Earthshaker picked.
2. Phantom Lancer
PL creates dozens of illusions in extended fights. Every illusion generates Echo Slam echoes, turning your ultimate into a 3,000+ damage nuke. The more illusions PL has, the more damage he takes. Fissure also stuns through the illusion army, and Aftershock hits all nearby illusions, helping your team identify the real PL.
3. Broodmother
Broodmother relies on her Spiderling army for damage and push. Echo Slam treats every spider as a separate unit. A Brood pushing with 15+ Spiderlings gets hit for catastrophic echo damage. Fissure also walls off her escape into trees since she cannot path through terrain regardless of web movement.
4. Nature’s Prophet
Treant summons from Nature’s Call are Echo Slam fuel. NP pushing a tower with Treants grouped around him is one of the easiest multi-kill setups in the game. Even his Sprout cannot save him since Fissure breaks tree-created terrain.
5. Chaos Knight
Phantasm creates strong illusions that all count as Echo Slam echo generators. CK wants to rift into your team with all his illusions — which is exactly where Earthshaker wants them. A CK engaging with 3 Phantasm illusions is taking 1,500+ bonus echo damage.
How Pros Play Earthshaker in the Current Patch
Earthshaker has remained a consistent pick in professional Dota 2 throughout 2025 and into early 2026. His ability to turn fights is simply too valuable to ignore in coordinated play.
Key pro trends in 7.40:
- JerAx-style position 4: The legendary Finnish support popularized the aggressive roaming Earthshaker playstyle, and it remains the standard. Pros prioritize Blink Dagger above all else, often completing it by 10-11 minutes through efficient stacking and kill participation.
- GH’s Aghanim’s Scepter timing: Team Liquid’s GH pioneered the fast Aghanim’s build in games where Earthshaker has a farming advantage. The Enchant Totem leap gives him unmatched mobility and lets him play more aggressively without relying solely on Blink.
- fy’s defensive Earthshaker: In Chinese professional play, fy has demonstrated a more defensive approach — using Fissure primarily to save allies by walling off chasing enemies rather than initiating aggressively. This style works in drafts where the team has another initiator.
In recent tournaments, pros have started skipping Force Staff in favor of Ghost Scepter as a second item after Blink. The reasoning: at the pro level, the enemy carry will immediately focus Earthshaker after his combo. Ghost Scepter prevents physical damage for 4 seconds, which is enough time for your team to clean up while the enemy carry cannot right-click you.
One notable build from recent tournament play is the position 3 Earthshaker with Echo Sabre into Blink. This build gives Earthshaker lane sustain and farming speed, and the slow from Echo Sabre stacks with Enchant Totem for devastating ganks even before Blink completion.
Rank-Specific Climbing Guide
What works at Herald does not work at Divine. Here is exactly what to focus on at each rank bracket to climb with Earthshaker.
Herald to Guardian: Foundation Basics
At this rank, focus on these fundamentals only:
- Do not die. This sounds obvious, but Herald Earthshakers average 8+ deaths per game. Stay behind your cores, use Fissure from maximum range, and never walk into the enemy team without Blink Dagger.
- Land Fissure. Practice the cast range and animation in demo mode. At this rank, just landing consistent Fissures wins fights.
- Buy Blink Dagger before anything else. No exceptions. Not Aghanim’s first, not Shadow Blade, not Desolator. Blink Dagger.
- Use Echo Slam when 3+ heroes are together. Do not waste it on a single hero unless it is a guaranteed kill on a key target.
Common Herald mistakes: Building damage items (Desolator, Crystalys) instead of utility. Earthshaker is not a right-click carry — he is a spell-based initiator. Your damage comes from your spells, not your auto-attacks.
Crusader to Archon: Adding Game Sense
At this bracket, mechanical execution is usually fine. The difference is decision-making:
- Track enemy Blink-canceling abilities. If the enemy has instant stuns (Lion Hex, Shadow Shaman Shackle), you need to initiate on them first or wait for their spells to be on cooldown.
- Learn Smoke timings. Buy Smoke of Deceit every time it is in stock. Smoke ganks with your mid or carry win games at this rank because enemies rarely buy detection.
- Stack camps for your carry. A triple-stacked ancient camp is worth 400+ gold for your carry. Earthshaker can stack while roaming between ganks.
- Ward the enemy jungle. Place aggressive wards in the enemy triangle to track their carry’s farming patterns. Then Smoke and kill them.
Legend to Ancient: The Macro Leap
This is where most Earthshaker players plateau. The jump from Legend to Ancient requires understanding macro strategy:
- Force objectives after kills. You just landed a 3-man Echo Slam and wiped the enemy team. Push a tower immediately. Do not go farm jungle. Earthshaker’s kill potential means nothing if it does not translate to map control.
- Understand your win condition. Is your team stronger in 5v5 fights Group up and force fights. Is the enemy deathball stronger Split the map and use Fissure to defend towers while your carry splits.
- Play the fog of war. At Legend+, enemies check the map for Earthshaker before grouping up. Stay hidden. If you show on the map, enemies will spread out and your Echo Slam value drops massively.
- Itemize reactively. Stop building the same items every game. Check what the enemy is building and adapt. BKB Earthshaker into a spell-heavy lineup Force Staff against Clockwerk or Riki Lotus Orb against single-target lockdown
If you are stuck at Legend and struggling to break through, an MMR boost can get you into the bracket where you learn the most — Ancient and Divine games teach you more per match than 10 Legend games.
Divine to Immortal: What Separates the Top 1%
The difference between a Divine and an Immortal Earthshaker is not mechanical — it is informational:
- Perfect Blink timing in fights. You do not just Blink when you see enemies grouped. You Blink at the exact moment when the most enemy spells are on cooldown, when their BKBs are either not yet activated or about to expire.
- Fake initiation threats. Show yourself briefly, force enemies to spread out, then retreat. Do this 2-3 times. By the fourth time, they stop respecting your presence — that is when you actually go in.
- Fissure angles over Fissure stuns. At Immortal, the terrain wall is often more valuable than the stun. Cutting a fight in half with Fissure so 2 enemies are isolated from their team creates a 5v2 situation that wins the fight regardless of Echo Slam.
- Aftershock chain optimization. Space your spells 0.1 seconds apart so Aftershock stuns chain perfectly without overlap. This extends your total lockdown time by 1-2 seconds compared to mashing all spells instantly.
Tips and Tricks
These are the details that separate good Earthshaker players from great ones. Most of these you will only learn from watching Immortal replays or getting coached by high-MMR players.
Animation Cancels and Hidden Mechanics
- Fissure + Move cancel: After casting Fissure, immediately issue a move command to cancel the backswing animation. This saves 0.4 seconds — enough to get off an extra right-click or dodge a return spell.
- Enchant Totem pre-cast: Cast Enchant Totem before Blinking so the empowered attack is ready. This lets you Blink-attack-Echo in rapid succession instead of Blink-Totem-attack-Echo.
- Echo Slam in Rosh pit: If the enemy team is doing Roshan and grouped in the pit, Blink to the edge of the pit (inside) and Echo Slam. The enclosed space means maximum echo bounces.
- Fissure as a scouting tool: Fissure provides vision along its path. Use it to check Roshan, high ground, or tree juke spots before walking in.
- Totem leap cliff escape (with Aghanim’s): Enchant Totem leap can jump onto cliffs, giving you escape routes that normal movement cannot access.
Common Mistakes to Avoid
- Using Echo Slam on 1-2 heroes. Unless it secures a critical kill on a key target, save Echo Slam for 3+ hero situations. The cooldown is 110/95/80 seconds — wasting it on one hero means you cannot fight for another minute.
- Fissuring your own team. Remember, Fissure terrain blocks allies too. A misplaced Fissure can trap your carry inside the enemy team or prevent your team from chasing. Always think about ally pathing before casting.
- Showing on the map before fights. The moment enemies see Earthshaker, they spread out. Stay hidden until you commit to initiation.
- Buying Shadow Blade instead of Blink. Shadow Blade has a fade time and is countered by detection. Blink Dagger is instant. There is no debate — Blink is superior on Earthshaker in every scenario.
- Not buying Clarities or Soul Ring. Earthshaker is one of the most mana-hungry heroes in the game. Running out of mana before a fight is an automatic loss. Always carry Clarities and build Soul Ring.
Advanced Tricks Only High-MMR Players Know
- Aftershock + TP scroll interaction: Using Town Portal Scroll triggers Aftershock when the channel completes. This means TPing to a tower where enemies are diving gives you a free 1.4-second AoE stun on arrival.
- Fissure + Force Staff combo: Fissure an enemy, then Force Staff yourself over the terrain to position on the other side. This traps the enemy between you and the wall with no escape.
- Echo Slam damage calculation: Against illusion heroes, prioritize Echoing when the maximum number of illusions are present. Against PL, wait until he has 8+ illusions before going in — the damage difference between 5 illusions and 12 illusions is enormous.
Frequently Asked Questions
Position 4 is the standard and most effective role for Earthshaker. He gets more value from roaming and creating space than from farming the offlane. Position 3 Earthshaker can work in specific matchups where you need a tanky frontliner with initiation, but it requires faster item timings that are harder to achieve consistently. Stick with position 4 unless you have a specific draft reason to go offlane.
Pick Earthshaker when the enemy has illusion or summon-based heroes (Phantom Lancer, Meepo, Broodmother, Chaos Knight, Nature’s Prophet). He is also strong into melee-heavy lineups that want to group up for fights. Avoid picking him into Silencer, Lifestealer, or heavy-dispel lineups that can negate your stun chain.
Aim for 12-14 minutes as a position 4. Anything under 12 minutes means you had excellent ganks and farm priority. Between 14-16 minutes is acceptable. Above 16 minutes means the laning phase went poorly and you need to accelerate by stacking camps and participating in any fight happening on the map.
It depends on the game. Aghanim’s Scepter gives you mobility and a second initiation tool — great for games where enemies scatter after your first combo. Refresher Orb doubles your entire combo, which is better for games where enemies group up and you need maximum burst damage in a single fight. In most pub games, prioritize BKB or Force Staff before either of these luxury items.
Absolutely. In Herald through Archon, enemies constantly group up without thinking about Echo Slam. A single 4-5 man Echo Slam can swing an entire game. The key is landing your Blink timing early and being present at every fight. Earthshaker is one of the best heroes for climbing out of low ranks because a single good play wins the fight regardless of how your team is performing.
This is the number one problem for Earthshaker players. Solutions include: BKB before initiating so you cannot be interrupted, Ghost Scepter immediately after your combo to prevent right-click damage, Glimmer Cape to go invisible after combo, or Aeon Disk as a panic button. The best solution is positional — initiate from angles where the enemy cannot easily turn on you, and always have an escape path planned.
Earthshaker has been viable in virtually every Dota 2 patch since the game launched. His kit is fundamentally strong — AoE stuns, terrain manipulation, and scaling damage never go out of style. Some patches favor him more than others (illusion metas are his best), but he is never truly bad. His winrate has stayed between 49-53% across all major patches.
Ready to Shake the Earth
Master Earthshaker’s combos with personalized coaching from our Immortal-rank players, or let us boost your MMR while you learn from the replays.


