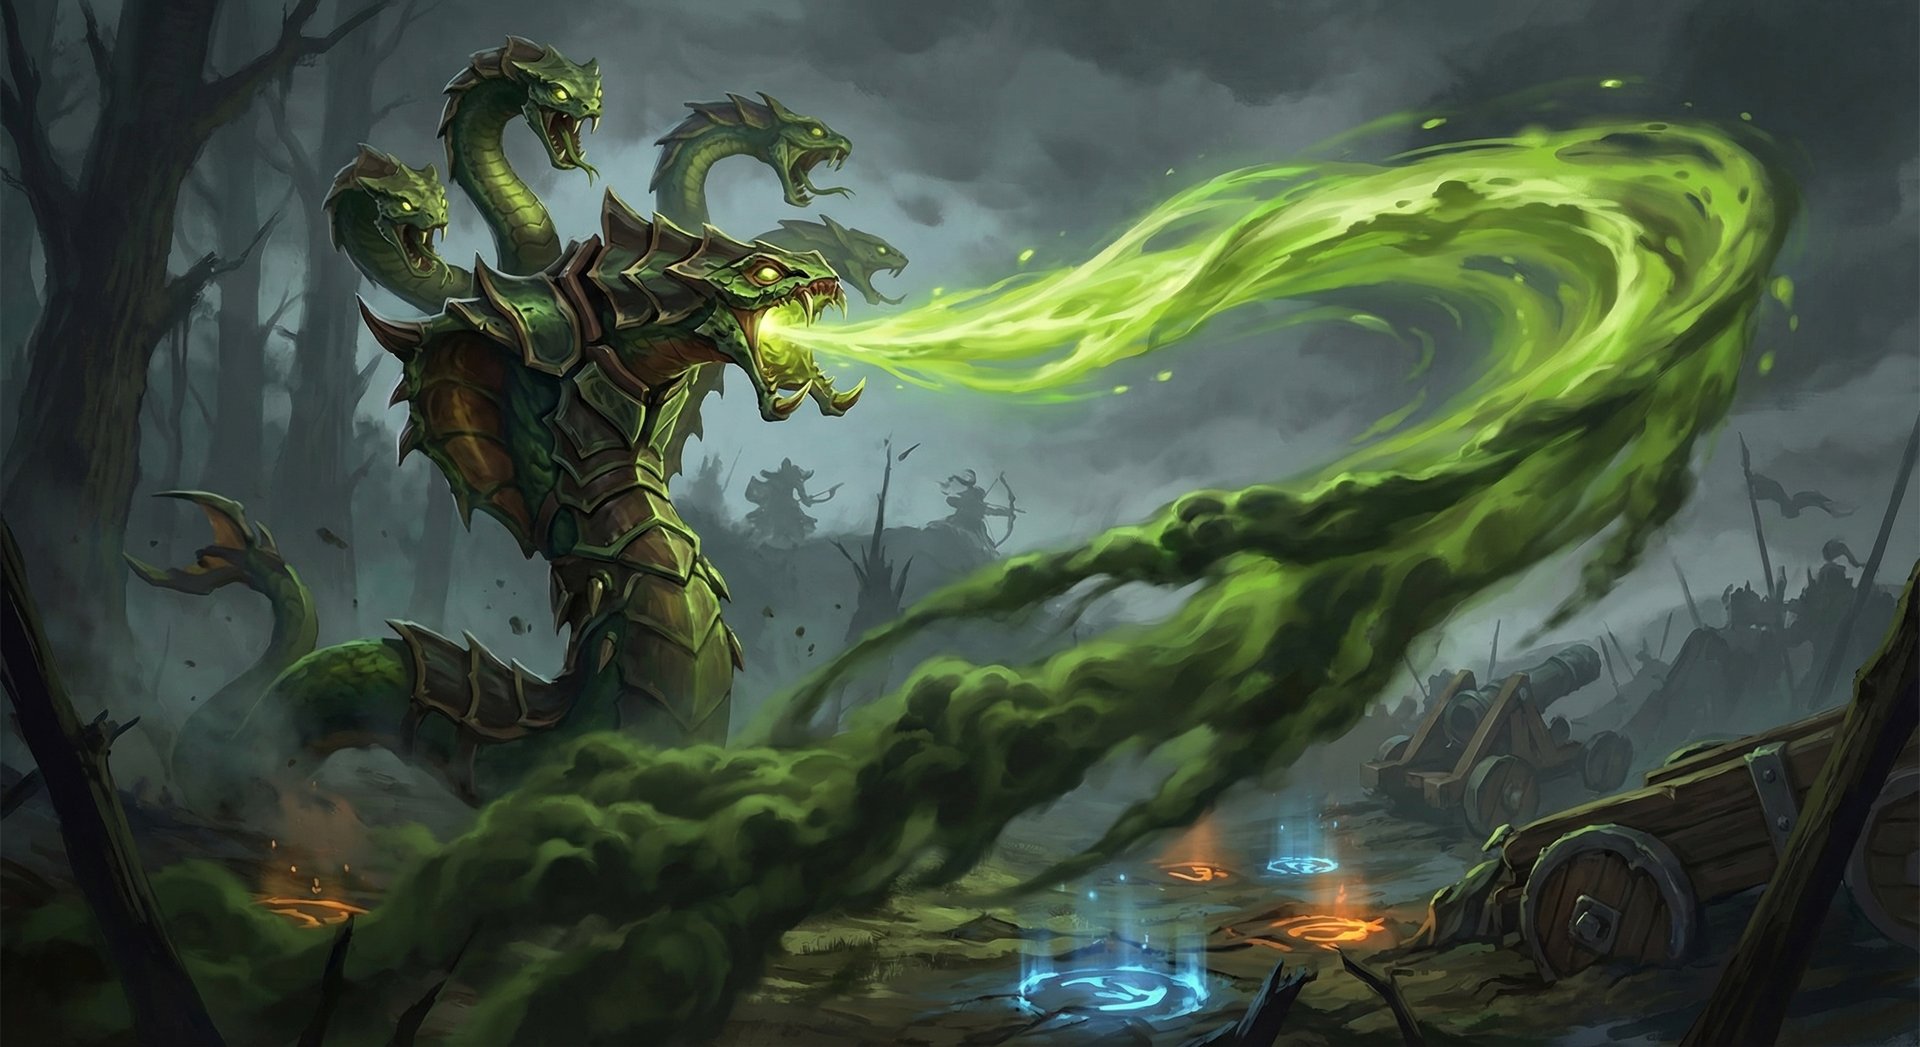
How to Master Venomancer in Dota 2: The Ultimate Guide for Every Rank (2026)

Venomancer is one of the most oppressive laners in all of Dota 2 — and one of the most underrated heroes for climbing MMR at every bracket. This green menace dominates lanes through relentless damage-over-time, zones out entire teams with Plague Wards, and turns team fights into slow, agonizing wipeouts with Poison Nova. Whether you play him as a hard support laying down vision, an offlaner bullying carries out of lane, or even a greedy position 2/3 pushing machine, Venomancer rewards smart positioning and patience with devastating results.
In this guide, we break down everything you need to master Venomancer in the current patch. From ability interactions most players never discover to item builds that shift between ranks, laning strategies that win lanes before the horn even sounds, and the exact ward placements that turn you from “annoying support” into an unstoppable pushing force. Whether you are Herald or Immortal, this is the definitive Venomancer resource for 2026.
Table of Contents
Why Venomancer Is Dota’s Ultimate Lane Bully
Venomancer sits in a unique space in Dota 2. He is not flashy. He does not have a highlight-reel stun or a game-winning Black Hole. What he does have is the ability to make every second of the laning phase miserable for whoever stands across from him — and then scale that misery into team fights that enemy supports simply cannot sustain through.
Current patch stats paint a clear picture. Venomancer maintains a solid 51-52% winrate across all brackets on Dotabuff, with his winrate climbing significantly in lower MMR brackets where players lack the discipline to buy regen and respect his damage-over-time. His pick rate hovers around 6-8%, making him a common but not oversaturated choice.
What makes Venomancer special is versatility. He can be played in positions 2 through 5 depending on the draft, and his ability to farm with Plague Wards means even an underfarmed Venomancer can contribute massive team fight damage. His Aghanim’s Scepter upgrade turns Plague Wards into a pushing and fighting nightmare that can single-handedly control entire map quadrants.
The hero excels when your team needs lane dominance, tower pressure, and sustained team fight damage. He struggles against burst lineups that can kill him before his damage-over-time matters — but with the right positioning and itemization, even those matchups become manageable. If you want a hero that punishes greedy drafts, controls the map through wards, and forces enemies to invest gold in regen they would rather spend elsewhere, Venomancer is your pick.
Abilities Deep Dive
Venomous Gale (Q)
Venomous Gale is Venomancer’s primary active nuke and arguably his most impactful non-ultimate ability. It launches a projectile in a line that strikes all enemies it passes through, applying an initial burst of damage followed by damage-over-time ticks every 3 seconds for 15 seconds. It also applies a 50% movement slow that decays over the duration.
Hidden mechanics most players miss:
- Gale’s initial damage is separate from the DoT. The initial impact deals 50/100/150/200 damage, and each tick deals 20/40/60/80 damage. At max level, the total damage potential is 50+200+(6 ticks x 80) = 730 magic damage before reductions — from a single spell.
- The projectile speed is 1200, which is relatively slow. High-MMR players side-step it consistently, so you need to cast it from fog or during a fight when enemies are occupied.
- Gale applies a separate instance of Poison Sting on hit. This means it interacts with your passive, stacking the slow and damage for even more oppressive output.
- The slow is frontloaded. The 50% slow at cast decays to 0% by the end of the duration. Your first 3-6 seconds after landing Gale are the kill window — do not chase past that.
Poison Sting (W — Passive)
Poison Sting is what makes Venomancer’s laning phase so brutal. Every single right-click applies a damage-over-time and movement slow debuff. At max level, it deals 24 damage per second for 7 seconds and slows by 18%. This adds up fast.
Key interactions:
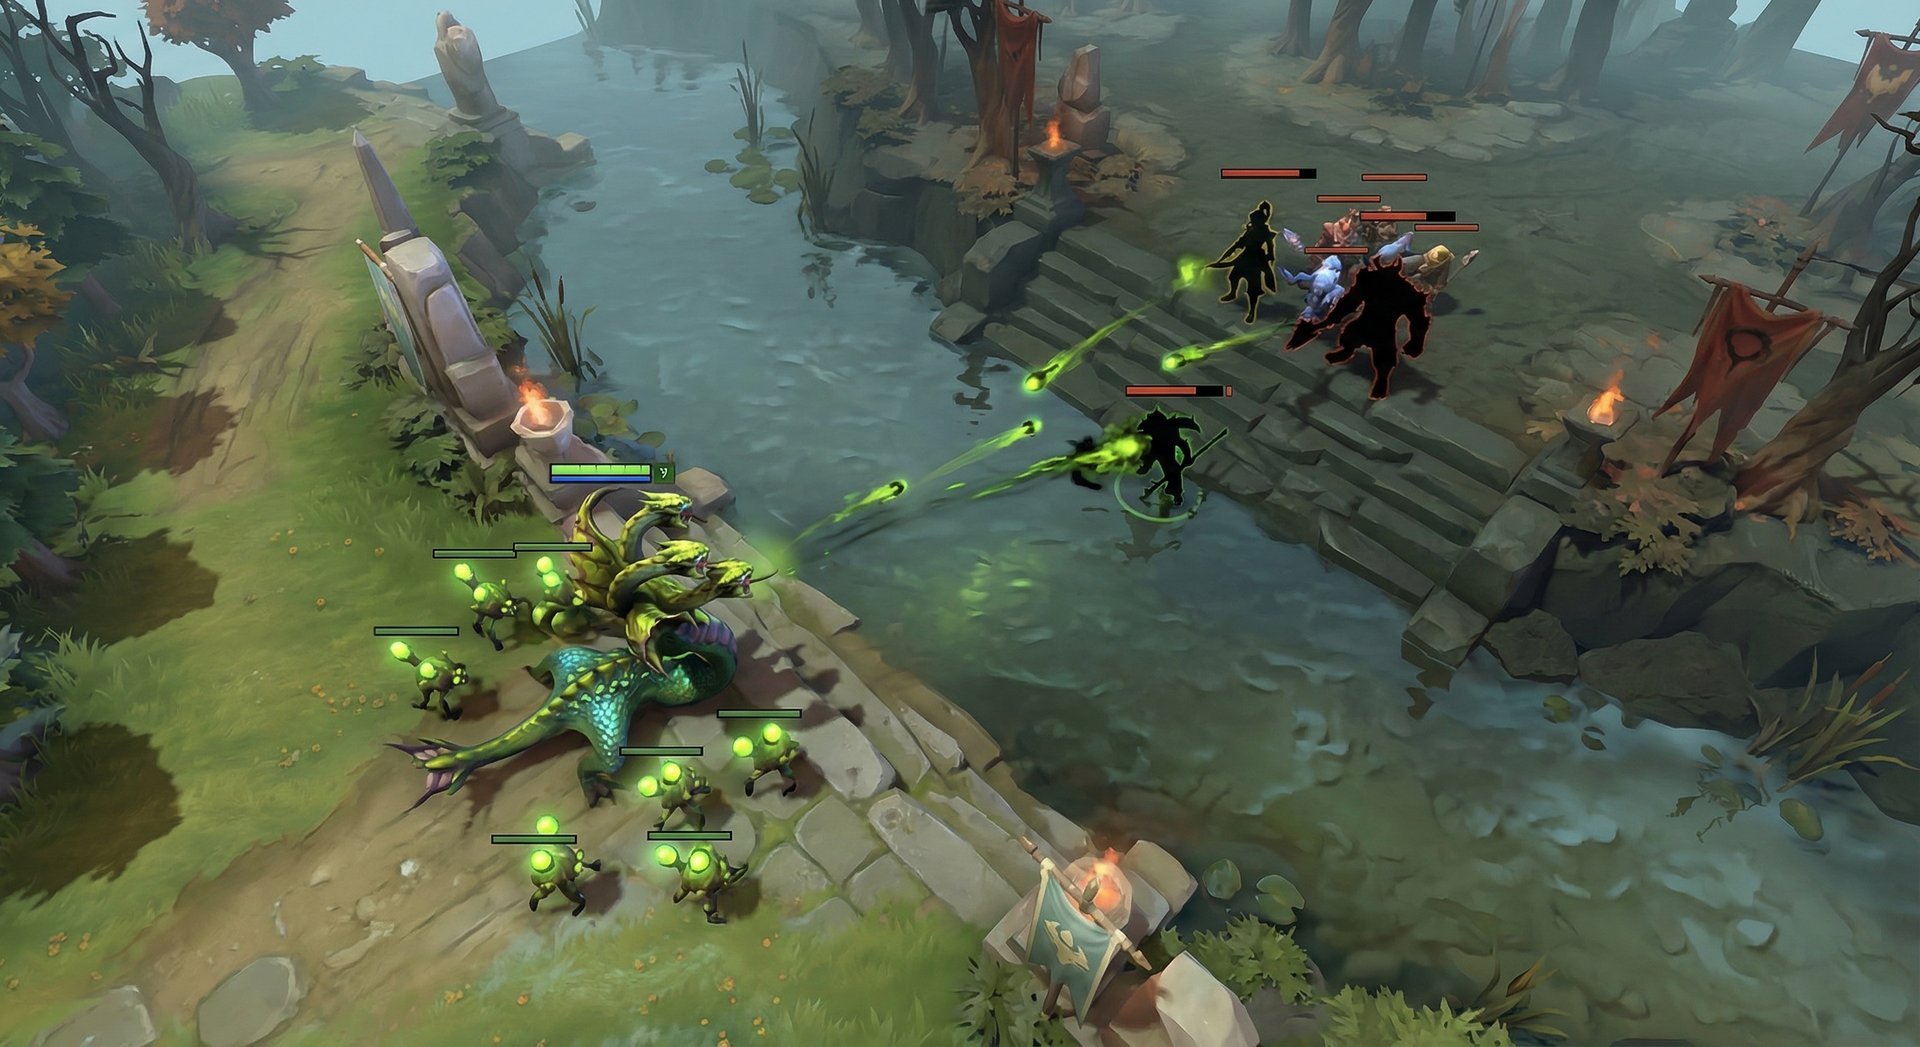
- Plague Wards also apply Poison Sting. Each ward attack applies the full debuff. With 5-6 wards attacking a target, the damage stacks through refreshing the duration and applying ward-level Poison Sting simultaneously.
- The damage does not stack from multiple Venomancer attacks — it refreshes the duration. But ward Poison Sting is a separate, weaker instance that does stack with your hero attacks.
- The slow pierces spell immunity. Even BKB’d heroes get slowed by Poison Sting, making Venomancer relevant even in late-game fights against magic-immune carries.
Plague Ward (E)
Plague Ward is what separates a good Venomancer from a great one. These summoned wards have their own health, deal damage, apply a weaker version of Poison Sting, and last 40 seconds. At max level, you can place a new ward every 5 seconds, meaning you can have up to 8 active wards simultaneously.
What makes Plague Wards broken:
- Vision. Each ward grants 800/800 day/night vision. Used correctly, you can light up the entire enemy jungle without spending gold on Observer Wards.
- They push lanes automatically. Drop wards in a lane and walk away. The wards will push the wave, deal chip damage to towers, and force enemy rotations.
- They body-block. Experienced Venomancer players use wards to block choke points, trap enemies in Rosh pit, and cut off retreat paths. The wards have a physical collision, meaning heroes must path around them.
- Aghanim’s Scepter interaction: With Aghs, Plague Wards become significantly stronger — gaining bonus HP, damage, and the ability to apply your full-level Poison Sting. This is a game-changing upgrade that turns wards into legitimate fighting units.
- Tower damage: Plague Wards deal 75% damage to buildings. With 6+ wards hitting a tower, they chunk it surprisingly fast, especially in the mid-game before enemies can efficiently clear them.
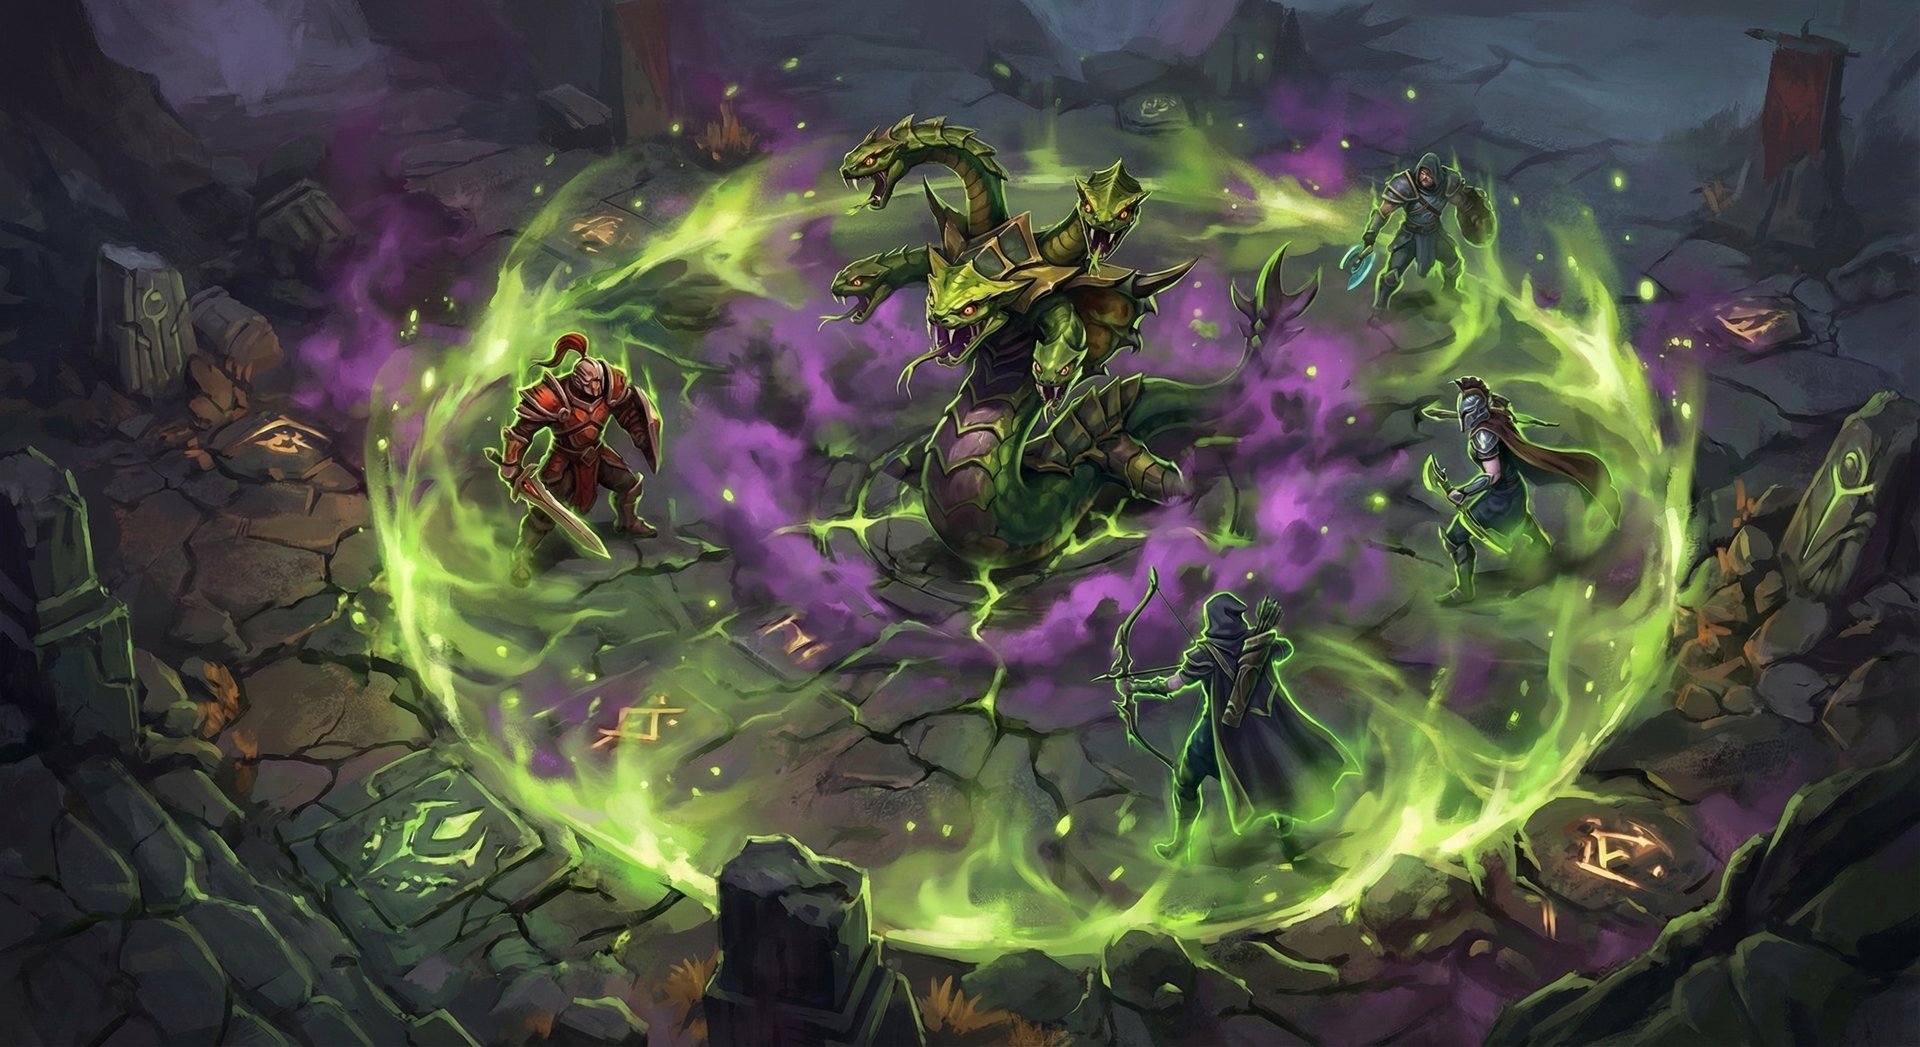
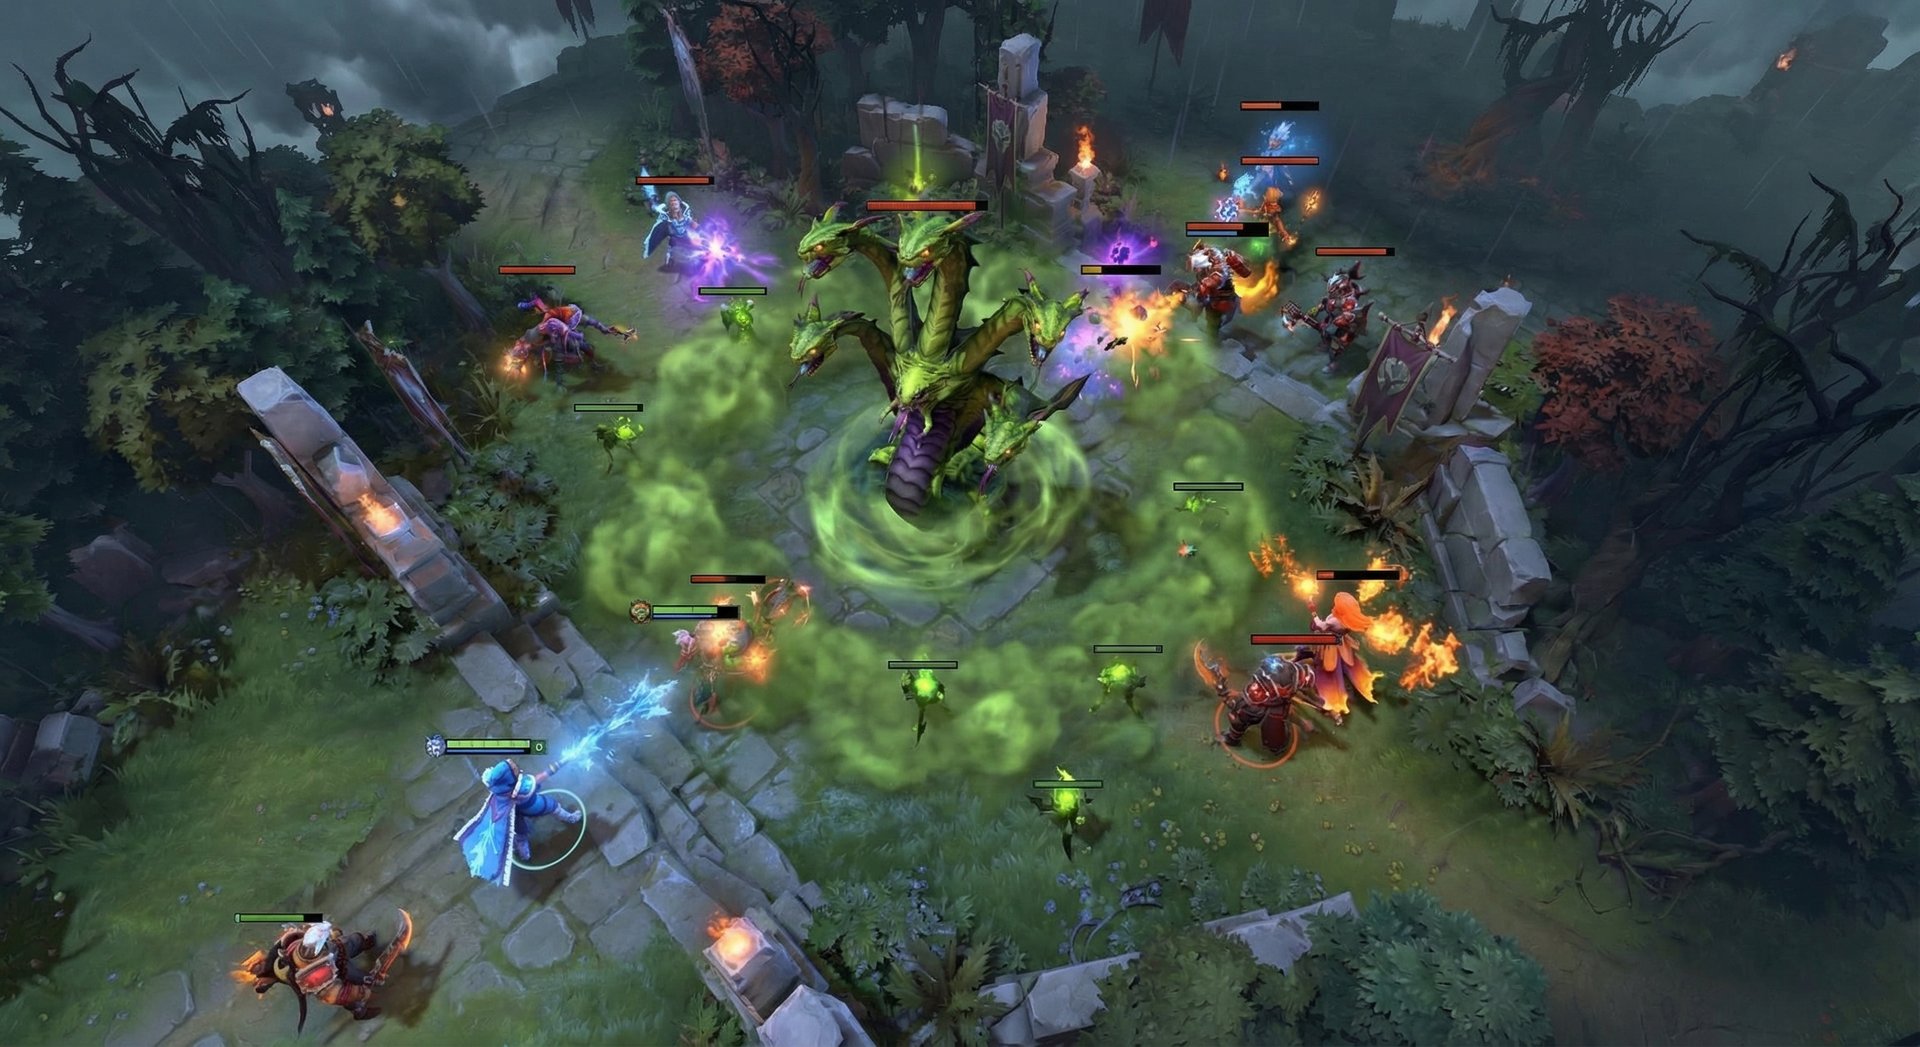
Poison Nova (R — Ultimate)
Poison Nova is the reason entire teams lose fights against Venomancer. It releases a ring of poison that expands outward from Venomancer, hitting every enemy hero in a massive 830 AoE. It deals damage per second for 18 seconds (20 with talent) and cannot kill on its own — targets are left at 1 HP.
Critical mechanics:
- The damage is enormous. At level 3, Poison Nova deals 80/120/160 damage per second. Over 18 seconds, that is 1440/2160/2880 magic damage before reductions to every enemy hero in range. With Aghanim’s Shard, it gains an additional 60 DPS, bringing the total to 2160/2880/3960.
- It cannot be dispelled. Manta Style, Lotus Orb, and basic dispels do not remove Poison Nova. Only death removes the debuff. This is massive — heroes like Slark and Legion Commander who normally dispel debuffs cannot escape it.
- BKB blocks the initial application but does NOT remove existing Nova damage. If you cast Nova before the enemy pops BKB, the damage continues ticking through immunity.
- Cast point is 0. Poison Nova is instant-cast, meaning you can use it while stunned in the animation… wait, no. The important part is that the cast animation is very quick (0.0 second cast point), making it nearly impossible to interrupt with stuns.
Skill Build Variations
| Role | Levels 1-4 | Max First | Max Second | Notes |
|---|---|---|---|---|
| Offlane (Pos 3) | W-E-W-Q | Plague Ward | Poison Sting | Wards push lane, Sting harasses |
| Support (Pos 4/5) | W-Q-W-E | Poison Sting | Venomous Gale | Max harass, Gale for kill setup |
| Mid (Pos 2) | E-W-E-W | Plague Ward | Poison Sting | Ward spam to control runes and farm |
| Greedy Push | E-W-E-E | Plague Ward | Poison Sting | Max wards ASAP for tower pressure |
Item Builds by Rank Bracket
Venomancer’s item build varies dramatically by bracket because lower-rank players tend to undervalue regen and utility in favor of damage, while higher-rank players prioritize survivability and team fight impact. Here is the breakdown:
| Rank | Starting | Early | Core | Late |
|---|---|---|---|---|
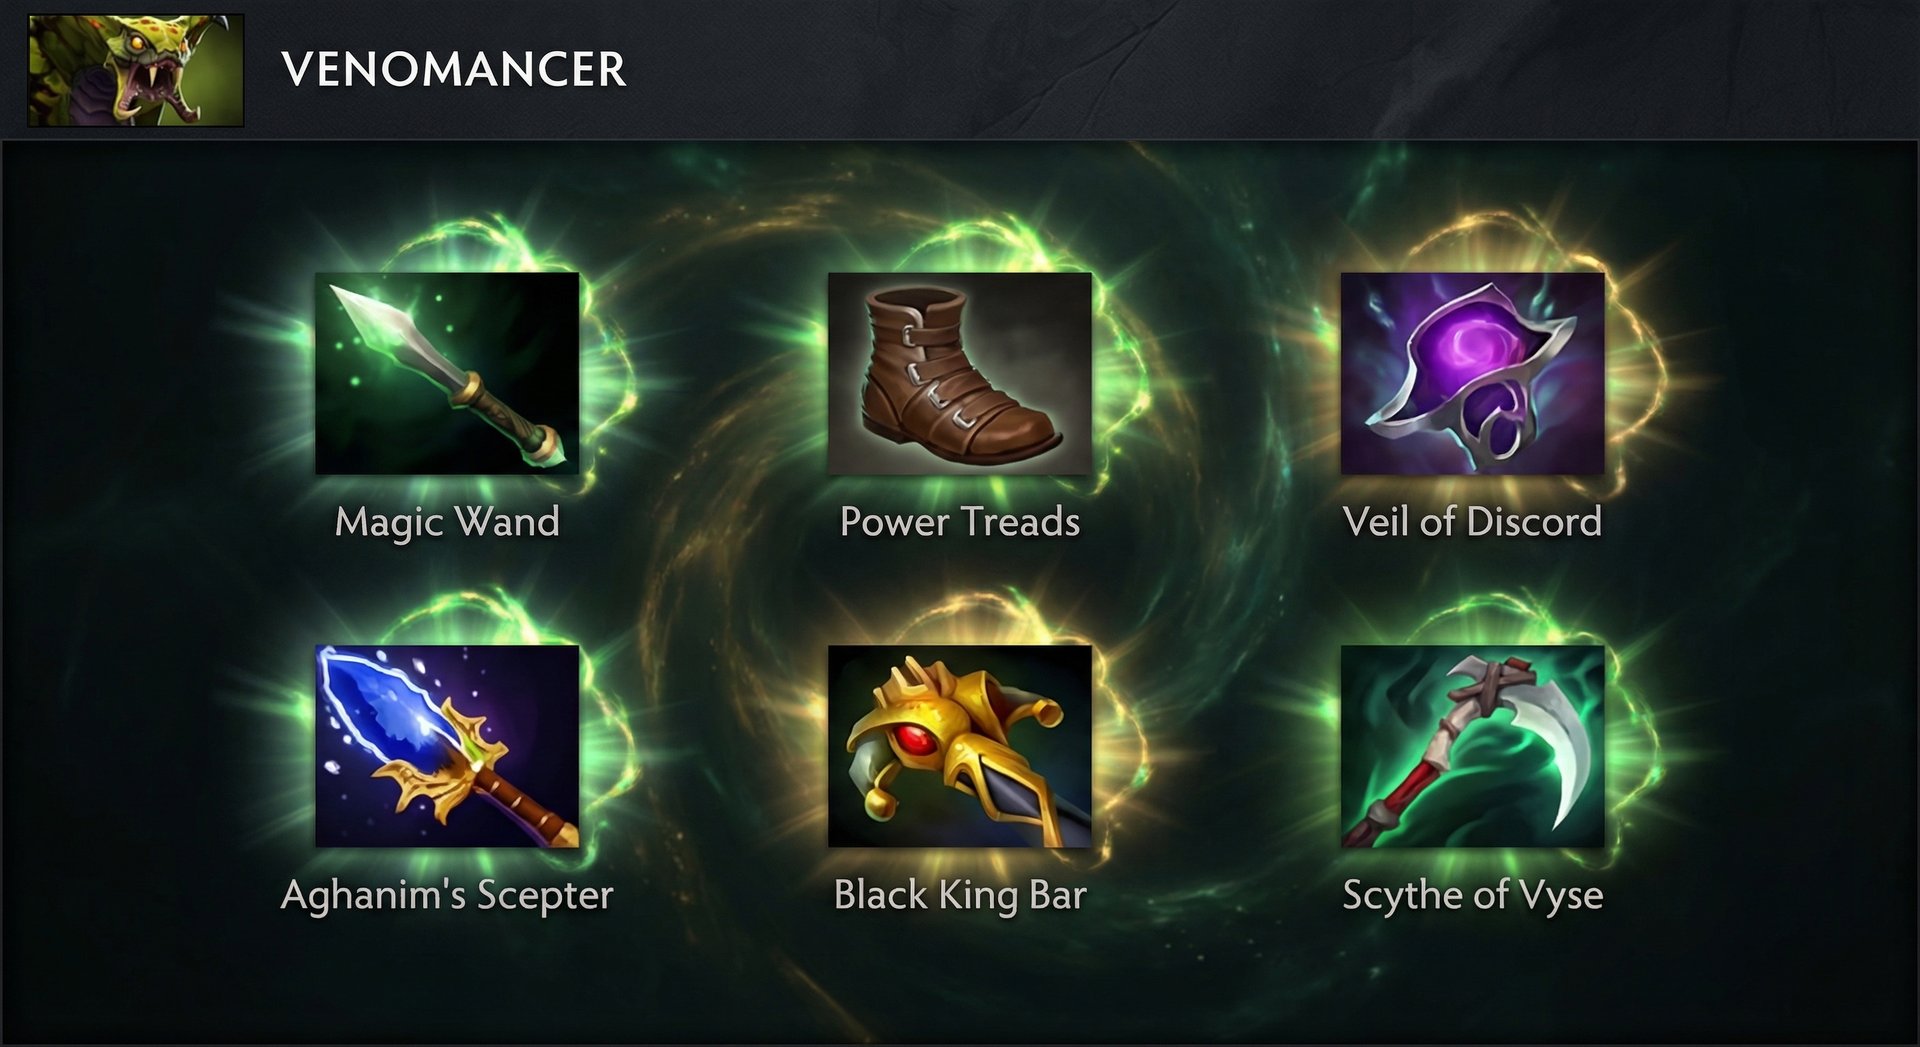
| Herald-Crusader | Tango, Sage’s Mask, Branches x3 | Magic Wand, Arcane Boots, Wind Lace | Veil of Discord, Aghanim’s Scepter | Shiva’s Guard, Refresher Orb |
| Archon-Legend | Tango, Sage’s Mask, Branches x2, Ward | Magic Wand, Power Treads, Blight Stone | Veil of Discord, Aghanim’s Scepter, Force Staff | Scythe of Vyse, BKB, Octarine Core |
| Ancient-Divine | Tango, Sage’s Mask, Branches, Ward, Sentry | Magic Wand, Power Treads, Urn of Shadows | Spirit Vessel, Aghanim’s Scepter, BKB | Octarine Core, Scythe of Vyse, Blink Dagger |
| Immortal | Tango, Sage’s Mask, Branches, Ward, Sentry | Magic Wand, Power Treads, Wind Lace | Spirit Vessel, Aghanim’s Shard, BKB | Aghanim’s Scepter, Octarine Core, Blink |
Why Builds Differ by Rank
Herald-Crusader: At this bracket, games go late and farm is inefficient. Veil of Discord is the best damage amplifier because enemies do not buy magic resistance early. Aghanim’s Scepter is game-winning here because low-rank players do not know how to deal with empowered Plague Wards. Skip BKB — enemies rarely chain-stun effectively at this level.
Archon-Legend: Players start understanding lane pressure and team fight timing. Force Staff becomes essential because enemies begin to focus you once they realize your damage output. Veil remains strong, but you need mobility to survive the initial burst. BKB becomes situational depending on enemy disables.
Ancient-Divine: Games are faster and more coordinated. Spirit Vessel replaces Veil as the preferred utility item because it provides healing reduction (critical against Lifestealers, Alchemists, and Strength cores that dominate this bracket). BKB is almost always necessary because enemies will stun-lock and burst you immediately. Blink Dagger in the late game lets you initiate with a surprise Poison Nova from fog.
Immortal: The Aghanim’s Shard rush is the meta at this level. Shard upgrades Poison Nova’s DPS significantly and costs only 1400 gold, giving you an enormous power spike at the 15-minute mark. Immortal players prioritize BKB early because team fights are tight and getting off your full combo — Blink in, Nova, Gale, drop wards — requires 2-3 seconds of uninterrupted action. Aghanim’s Scepter comes later as a luxury that enables high-ground pushes.
Situational Items Worth Knowing
- Eul’s Scepter: Underrated pickup against silences (Skywrath, Silencer). Also sets up Gale perfectly — Eul’s an enemy and Gale them as they land.
- Aether Lens: Extends Gale cast range, letting you stay even further from danger. Strong on pos 4/5 Venomancer.
- Rod of Atos: The root guarantees a Gale hit and keeps melee heroes locked in your ward nest. Surprisingly effective in Ancient bracket.
- Lotus Orb: When the enemy has single-target lockdown aimed at you (Doom, Legion Commander duel setup). The reflect forces them to think twice.
- Pipe of Insight: If you are playing offlane Venomancer, Pipe can be your team fight contribution alongside your damage. Counter-intuitive but effective.
Laning Phase Masterclass
Venomancer’s laning phase is where he earns his reputation as one of the most hated heroes to play against. His combination of Poison Sting harass and Plague Ward zoning creates a suffocating environment for any melee carry and most ranged cores.
First 5 Minutes: Establishing Dominance
Level 1 with Poison Sting: Your first right-click on the enemy carry sets the tone. At level 1, Poison Sting deals 8 DPS for 7 seconds — that is 56 bonus damage from a single auto-attack. If you land 3-4 attacks in the first wave, the enemy carry has already burned through their starting regen before the second wave arrives.
The trading formula is simple: You hit them once, they take 56 damage over time. They hit you once, they take whatever your creeps deal. The math always favors you because Poison Sting is free damage that requires no mana.
Ward placement timing: Start placing Plague Wards at level 2 if you skilled E, or level 3 if you went Q second. Place them behind the creep wave, not in front. Wards placed behind the wave harass the enemy when they go for last hits, while wards in front just get killed by the enemy support. The ideal position is on the high ground near the trees — they gain vision and attack from safety.
Lane Partner Synergies
Venomancer works best with heroes who have reliable stuns or slows to stack with his damage:
- Crystal Maiden: Frostbite hold + Gale = guaranteed first blood at level 2. The combined slow is inescapable.
- Ogre Magi: Fireblast stun into Gale. Ogre’s tankiness means the lane can play aggressively without fear of trading poorly.
- Mars: Spear of Mars pin + Venomous Gale is a death sentence. Arena of Blood at level 6 traps enemies inside a ward nest.
- Grimstroke: Ink Swell provides the stun setup Venomancer lacks, and Phantom’s Embrace synergizes with the slow from Gale.
- Undying: Decay spam + Venomancer’s Poison Sting creates the most oppressive dual lane in pubs. Enemies lose STR while ticking down from DoT.
Positioning Advice
Venomancer has 285 base movement speed — one of the slowest in the game. This means positioning is everything. You cannot afford to be caught out because you will not outrun anyone.
- Always have Plague Wards behind you. They serve as an early warning system and slow pursuers.
- Play on the high ground side of the lane. This forces enemies to walk uphill into your wards to trade with you.
- Do not over-commit for kills. Your damage is over time. Hit them, back off, let the poison do the work. Chasing under tower at level 3 with 285 MS is how you feed first blood.
- Against trilanes: Focus on Plague Ward farming. Drop wards in the jungle camps near your lane to secure farm even if the lane is unplayable.
Mid and Late Game Transitions
Timing Windows: When Venomancer Peaks
Venomancer has two major power spikes that you need to exploit:
Spike 1: Level 6-12 (Minutes 8-18). This is when Poison Nova is at its most impactful relative to enemy HP pools. At level 6, Nova deals 1440 total magic damage before reductions. Most heroes have 800-1200 HP at this point. Combined with Gale and Sting, a single rotation from Venomancer can wipe a support or force any core to retreat and heal for 30+ seconds.
Spike 2: Aghanim’s Scepter completion (Minutes 20-28). Once you have Aghs, your Plague Wards become real units. They push lanes without your presence, control Roshan pit, and turn team fights into ward-infested nightmares. The timing of this spike depends on your role — a farming offlane Venomancer hits it around minute 22, while a pos 4 support may not get it until 30+.
Team Fight Positioning
The golden rule: You need to get Poison Nova off on 3+ enemy heroes. That is your entire job in a team fight. Everything else is secondary.
- With Blink Dagger: Wait in the trees. Let your team initiate. Blink onto the enemy cluster, Nova, Gale, drop wards, and then retreat or commit based on whether you can survive.
- Without Blink: Stay at the edge of the fight. Walk in when you see enemies grouping. Use Gale from max range, drop wards in the fight area, and look for a Nova window when 3+ heroes are within 830 units.
- BKB timing: Pop BKB before or simultaneously with your Blink-Nova. The biggest mistake Venomancer players make is trying to get Nova off without BKB and getting stunned mid-cast. Yes, the cast point is 0, but the Blink animation gives enemies a brief window to react.
Staying Relevant in the Late Game
Venomancer falls off in the ultra-late game (45+ minutes) because enemy cores have BKBs, Pipes, and enough HP to tank through Nova. Here is how you stay relevant:
- Split push with wards. Drop Plague Wards in side lanes and let them push while your team pressures elsewhere. This forces the enemy to split resources.
- Roshan control. Place a triangle of Plague Wards inside the Rosh pit 30 seconds before your team goes for it. The wards provide vision, damage Roshan, and make it nearly impossible for enemies to steal.
- Octarine Core. This item is your late-game lifeline. It reduces Plague Ward cooldown, Nova cooldown, and Gale cooldown, meaning you can output more wards and more damage per fight.
- Refresher Orb. Double Poison Nova is 5760 magic damage (before reductions) to every enemy hero in range. That is enough to swing any late-game fight, even against tanky lineups.
Counters: Heroes That Destroy Venomancer
Understanding your weaknesses is just as important as understanding your strengths. These five heroes make Venomancer’s life extremely difficult:
1. Oracle
Oracle is Venomancer’s hardest counter. False Promise completely negates Poison Nova’s damage by doubling all healing received and delaying damage. Even if Nova brings a hero to 1 HP, False Promise can save them. Fate’s Edict grants 100% magic resistance, making the target immune to Nova and Gale damage entirely. Fortune’s End also purges Venomous Gale’s slow. Oracle singlehandedly invalidates Venomancer’s entire kit.
How to play around it: Focus Oracle first. If he casts False Promise on someone, switch targets. Buy Spirit Vessel — the healing reduction partially offsets False Promise’s healing bonus. Never commit Nova if Oracle has False Promise ready.
2. Juggernaut
Healing Ward completely counters Venomancer’s sustained damage, healing Juggernaut’s entire team through Poison Nova over time. Blade Fury grants magic immunity, allowing Juggernaut to ignore Gale and Nova during the spin. Omnislash also kills Plague Wards easily during bounces.
How to play around it: Kill Healing Ward immediately — it only has 1 HP. Draft allies with AoE to destroy it. Bait Blade Fury before committing Nova.
3. Anti-Mage
Anti-Mage’s Counterspell reflects Venomous Gale back at you, and his Blink allows him to escape Plague Ward nests instantly. Mana Void also punishes Venomancer for having a large mana pool. But the real problem is that AM farms so fast he simply out-scales your damage with BKB + Manta.
How to play around it: Pressure towers early before AM comes online. Use wards to scout his jungle and delay his farm. End the game before 35 minutes.
4. Abaddon
Aphotic Shield purges Venomous Gale instantly. Borrowed Time heals Abaddon through Poison Nova damage, effectively making him unkillable during its duration. Mist Coil also provides sustained healing for allies ticking down from DoT.
How to play around it: Do not waste Gale on a hero with Aphotic Shield active. Time your Nova after Borrowed Time expires. Spirit Vessel is mandatory to reduce Borrowed Time healing.
5. Huskar
Huskar’s innate magic resistance at low HP means Poison Nova deals significantly reduced damage when he needs it least. Inner Fire disarms and pushes you away, dismantling your attack-based Poison Sting harass. Burning Spears also out-trades Venomancer in lane due to Huskar’s higher attack speed and HP regen.
How to play around it: Build Vessel early. Do not trade right-clicks in lane — use wards to harass from distance. Coordinate burst physical damage from your team to kill Huskar before he reaches low HP thresholds.
Heroes Venomancer Destroys
Now for the fun part — the heroes that absolutely crumble when facing Venomancer:
1. Spectre
Spectre needs a peaceful laning phase to farm. Venomancer’s Poison Sting and Plague Wards make that impossible. Spectre’s Dispersion does not help against sustained DoT, and she lacks any ability to kill Plague Wards efficiently early. By the time Spectre wants to fight with Haunt, Venomancer’s wards have already pushed out lanes, denying her farm.
2. Phantom Lancer
Plague Wards shred illusions. Poison Nova hits every single illusion on the map. Venomous Gale applies to the real PL if you can identify him. PL relies on swarming you with illusions, but Venomancer’s AoE damage turns every illusion wave into free gold and a lot of ticking damage on the real hero.
3. Broodmother
Plague Wards destroy Broodmother’s spiderlings for free. Poison Sting applies to every spiderling you right-click. Venomous Gale hitting the spider wave is devastating. Broodmother relies on her summons to overwhelm lanes, and Venomancer is one of the few heroes who turns that strength into a weakness.
4. Alchemist
Alchemist needs to farm freely in lane. Venomancer’s harass is too relentless for Alchemist to sustain through, even with Chemical Rage’s regen (which is not available until level 6). Spirit Vessel on Venomancer specifically counters Chemical Rage’s healing. The sustained damage also stacks Alchemist’s misery during Acid Spray farming patterns.
5. Medusa
Medusa is immobile and relies on Mana Shield to tank damage. Poison Nova drains her mana pool through the shield, and she cannot clear Plague Wards efficiently without spending mana on Mystic Snake. In lane, Poison Sting forces Medusa to either buy excessive regen or abandon last hits entirely.
How Pros Play Venomancer in the Current Patch
Venomancer has seen consistent professional play in 2025-2026, primarily as a position 3 offlaner and occasionally as a position 4 support. Here are some notable examples from recent tournaments:
Collapse (Team Spirit) has played offlane Venomancer in several DPC matches, using the hero’s lane dominance to shut down enemy carry farm and then transitioning into an Aghanim’s Scepter push build. His typical game plan: win lane, secure first tower, place wards in enemy jungle to take map control, then group for Roshan around the Aghs timing.
fy (various teams) demonstrated support Venomancer at its finest during qualifiers, maxing Poison Sting first and playing the hero as a pure lane bully. His build skips Plague Ward levels early in favor of Gale + Sting max, focusing entirely on making the enemy carry’s life impossible before transitioning to a Spirit Vessel + utility build.
Key pro-level trends to replicate:
- Aghanim’s Shard at 15 minutes is the standard timing in competitive play. The Shard’s damage boost makes Poison Nova significantly more threatening in the mid-game fights that decide most pro games.
- BKB is non-negotiable at the pro level. Every Venomancer build includes BKB because getting stunned before Nova lands means your team fight contribution is zero.
- Ward placement patterns: Pros place wards in triangular formations around objectives. Three wards at Roshan, three at the enemy T2 tower, three behind the enemy T3 for high-ground push vision. This systematic approach is what separates pro Venomancer from pub Venomancer.
- Target selection: Pros cast Nova on supports and squishy cores, not on the bristling Bristleback with 4K HP and Pipe. If they can hit 2 supports and 1 core, that is a won fight.
For detailed stats and recent competitive appearances, check Venomancer on Liquipedia.
Rank-Specific Climbing Guide
Herald to Guardian: The Basics That Win Games
At this bracket, most players do not understand Venomancer’s strengths. They skill Plague Ward first (wrong for lane dominance), stand still while attacking (getting out-traded), and forget to use Venomous Gale entirely.
What to focus on:
- Skill Poison Sting level 1. Right-click the enemy carry every time they go for a last hit. This alone wins lanes in Herald.
- Place Plague Wards in lanes, not random jungle spots. Wards on the lane push waves and create space. Random jungle wards do nothing at this level.
- Use Venomous Gale in fights. The slow is enormous and most Herald players do not have the movement items to escape it.
- Build Veil of Discord every game. It amplifies all your magic damage and is cheap enough to finish by minute 15-18.
Crusader to Archon: Adding Game Sense
Players at this level understand basic laning but lack mid-game map awareness. Venomancer excels here because his Plague Wards provide the vision that this bracket’s players never buy.
What to focus on:
- Ward the enemy jungle. After winning your lane (which you will with Venomancer), place Plague Wards at the entrances to the enemy jungle. This gives your team vision of rotations and forces enemies into predictable farming patterns.
- Push towers after winning lanes. Do not farm jungle after getting first blood. Drop 4-5 Plague Wards and hit the enemy T1 tower. Converting lane wins into tower gold is how you climb.
- Learn Spirit Vessel timing. At this bracket, start building Vessel if the enemy has any healing core (Lifestealer, Alchemist, Huskar). The anti-heal stacks with your damage for devastating effect.
- Position before Nova. Walk to the side of a fight, not the front. Wait for enemies to commit, then walk in for Nova. Patience wins team fights.
Legend to Ancient: The Macro Leap
This is where Venomancer games become about map control, not just lane dominance. Legend-Ancient players understand how to farm around vision, so your ward placement needs to be more strategic.
What to focus on:
- Split the map with wards. Place Plague Wards on both sides of the map to create dual pressure. When the enemy responds to one lane’s wards, your team pushes the other. This macro play wins more games than any item build.
- Time your BKB usage. At this bracket, enemies will save stuns for you. Pop BKB preemptively, not reactively. A 10-second BKB Nova is worth more than a 5-second BKB after already being chain-stunned.
- Roshan ward triangle. Place 3 Plague Wards inside the Rosh pit before your team starts Roshan. The wards provide vision, deal damage to Rosh, and alert you to enemy steals.
- Draft awareness: Start picking Venomancer only when the enemy draft lacks strong purges (Oracle, Abaddon, Legion). Counter-picking properly is worth 500 MMR at this bracket.
Divine to Immortal: What Separates the Top 1%
At this level, Venomancer is a precision instrument. Every ward has a purpose, every Gale has a target, and Poison Nova timing can win or lose the game in a single cast.
What to focus on:
- Pre-place wards 30 seconds before objectives. Immortal players know a fight is coming and have 8 wards already set up before the enemy arrives. Wards at choke points, behind trees, and in fog positions that give you information advantage.
- Shard at 15, BKB at 20, Aghs at 28. These are the benchmarks. If you are behind these timings, you are not farming efficiently enough between fights.
- Track enemy Pipe timing. The biggest counter to your team fight damage is a well-timed Pipe of Insight. Watch the enemy offlaner or support’s inventory. If Pipe is up, consider split-pushing instead of forcing a fight.
- Use wards to deward. Place a Plague Ward on a high ground ward spot to check if the enemy has an Observer Ward there. The ward costs 0 gold (just a cooldown), and the information it provides is worth more than a Sentry.
- Buyback timing: In close games, keep buyback gold after minute 30. Venomancer with Refresher + buyback can contribute two full Poison Novas in a single fight, which is often enough to swing a base defense from impossible to won.
Climbing with Venomancer takes patience and discipline. If you want to boost your MMR more quickly, our Immortal-rank boosters can help you skip the grind. Or consider Dota 2 coaching to learn these strategies with a personal mentor.
Tips and Tricks

These are the details that separate a 3K Venomancer from a 7K Venomancer. Memorize them.
Ward Placement Tricks
- Cliff wards: Plague Wards can be placed on cliffs and elevated terrain. A ward placed on the Dire jungle cliff gives unobstructed vision of 3 jungle camps and the mid lane. The enemy needs to spend time climbing or using ranged abilities to kill it.
- Body-block retreat paths: When chasing, place wards directly in the path of fleeing enemies. The collision box forces them to path around, buying your team 0.5-1 second of extra chase time. Over a long pursuit, 3-4 wards can add up to 3+ seconds of delay.
- Rosh pit ward triangle: Place wards at the three corners inside Roshan’s pit. They attack Rosh for chip damage, provide full pit vision, and cannot be killed by enemies without entering the pit. This setup lets your team start Rosh faster and safer.
- Tower siege ward line: When pushing high ground, place wards in a line behind the creep wave, not in front of the tower. Front-line wards get killed by tower shots. Back-line wards attack the tower from safety and force enemies to walk forward to clear them, putting themselves in gank range.
Combat Tricks
- Nova before Gale, not after. Cast Poison Nova first (instant cast point), then follow with Venomous Gale. Nova is harder to dodge because it has no projectile, while Gale can be side-stepped. Starting with Nova guarantees at least your ultimate’s damage lands.
- Gale through creep waves. Venomous Gale hits all enemies in a line. In lane, fire Gale through the creep wave to hit the enemy hero behind it. The gale damages creeps too, helping you push.
- Attack-move after Gale. After landing Gale, right-click the slowed target once, then issue an attack-move command toward them. This ensures your hero keeps attacking while moving forward, maximizing Poison Sting uptime during the slow window.
- Ward during stuns. If you get stunned in a fight but survive, immediately start dropping Plague Wards while the stun animation plays out. You cannot cast spells during stuns, but you can queue ward placement to fire the instant the stun ends.
Common Mistakes to Avoid
- Skipping BKB. The number one Venomancer mistake in all brackets below Immortal. You NEED BKB to guarantee Poison Nova in team fights. Without it, you get stunned and die before contributing anything.
- Chasing kills. Your damage is over time. Hit them with Gale, auto-attack twice for Sting, and walk away. If they die to DoT, great. If they survive at low HP, they are out of the fight for 30 seconds regenerating. Either outcome is a win — chasing and dying is not.
- Placing wards on cooldown in random spots. Every ward should have a purpose: lane push, vision, body-block, or damage. Placing wards just because you can wastes the cooldown for when you actually need them.
- Not buying detection. As a support or utility Venomancer, carrying Dust and Sentries is your job. Plague Wards do not reveal invisible heroes (despite providing vision). You need real detection to deal with Riki, Bounty Hunter, and smoke ganks.
Frequently Asked Questions
Both work, but offlane Venomancer (position 3) is generally stronger in the current meta. Offlane gives you guaranteed farm for your Aghanim’s Scepter timing, which is the item that turns Venomancer from annoying to game-winning. Support Venomancer works well in lanes where you need to shut down an enemy carry, but you sacrifice your own item progression significantly. If your team already has a strong offlaner, play support. If they need lane dominance and push, play offlane.
No. Poison Nova cannot reduce an enemy below 1 HP by itself. However, Venomous Gale, Poison Sting, Plague Ward attacks, and any ally damage can finish the job. In practice, enemies rarely survive at 1 HP because your other abilities and auto-attacks are ticking alongside Nova. The “cannot kill” mechanic mainly matters against heroes with strong passive regen or healing — they might survive the Nova tick and regenerate above 1 HP before your other damage finishes them.
Talent choices depend on your role. Generally, take the Plague Ward HP talent at level 10 (keeps wards alive longer for pushing), the Gale damage talent at level 15, the Poison Nova duration talent at level 20 (extra 2 seconds of ticking damage is massive), and the Plague Ward damage or attack range talent at level 25. The level 25 talent is the most debated — ward damage is better for pushing, while range is better for team fights.
Pipe is the single biggest counter-item to Venomancer’s team fight impact. The barrier absorbs a huge chunk of Nova and Gale damage. Your options: (1) bait the Pipe by feigning engagement, wait for it to expire (12 seconds), then fight for real; (2) split push with wards instead of forcing fights; (3) buy Refresher Orb — the first Nova eats the Pipe barrier, the second Nova deals full damage. At higher ranks, tracking the enemy Pipe cooldown (60 seconds) and fighting when it is down is the best counter.
Absolutely. Venomancer thrives in low brackets because players do not buy enough regen, do not respect DoT damage, and do not destroy Plague Wards. His winrate in Herald-Archon brackets is consistently 2-3% higher than his average across all ranks. The hero punishes the most common low-rank mistakes: standing in lane at low HP, not carrying TPs, and ignoring objectives. If you want to climb from Herald to Archon, Venomancer is one of the most consistent heroes you can pick.
Shard first in almost every game. At 1400 gold, the Shard provides an immediate power spike to Poison Nova’s DPS that far exceeds the value-per-gold of any other item at that price point. Aghanim’s Scepter (4200 gold) is the better overall item, but the Shard timing at 15 minutes is more impactful than Aghs at 22 minutes. The only exception is if you are playing a pure push strategy where Aghs ward empowerment matters more than Nova damage — but that is rare in the current meta.
Venomancer is one of the best heroes at playing from behind because Plague Wards cost no gold and provide farm, vision, and map control for free. When behind: (1) use wards to farm jungle camps safely without showing on the map; (2) place wards defensively around your base to spot ganks; (3) avoid fighting and focus on split-pushing lanes with ward spam; (4) wait for your Aghanim’s Shard timing — even a behind Venomancer deals massive team fight damage with Shard-boosted Nova. Your job when behind is to stall the game until your damage catches up with enemy HP pools.
Dominate Every Lane with Venomancer
Want to climb MMR with the most oppressive laner in Dota 2 Our Immortal-rank coaches will teach you the exact ward placements, fight timings, and build paths that make Venomancer unstoppable in your bracket.
Get Venomancer Coaching
Boost My MMR Instead


