How to Master Snapfire in Dota 2: The Ultimate Guide for Every Rank (2026)

Snapfire is one of those heroes who looks adorable on the surface — a cookie-baking grandma riding a fire-breathing dragon toad — but plays like an absolute menace in the right hands. Since her release, Beatrix “Snapfire” has carved out a permanent spot in the Dota 2 meta as one of the most versatile support heroes in the game. She can play position 4 or 5, transition into a core role with the right items, and single-handedly win teamfights with a well-timed ultimate.
In the current patch, Snapfire sits at a 52.3% winrate across all brackets on Dotabuff, with her pick rate climbing steadily in both pub and pro play. Her kit offers something for every situation: burst damage, crowd control, initiation for allies, and one of the most devastating channeled ultimates in the game. Whether you are a Herald learning your first support or a Divine player looking to refine your positioning, this guide breaks down everything you need to dominate with Snapfire.
We are going deep. Ability interactions most players never notice, item builds that shift based on your rank bracket, laning tricks that win lanes before the horn sounds, and the exact teamfight positioning that separates a feeding Snapfire from one that carries the game. Let us get into it.
Table of Contents
Why Snapfire Is the Most Underrated Support in Dota 2
Snapfire occupies a unique space in Dota 2. She is technically a support, but her damage output rivals many cores throughout the game. Her identity revolves around three things: lane dominance through Scatterblast, playmaking through Firesnap Cookie, and teamfight destruction through Mortimer Kisses. That combination makes her one of the few supports who stays relevant from minute zero to minute sixty.
What makes Snapfire truly special is her flexibility. She can be drafted as a position 4 roaming support, a position 5 lane support, or even a greedy position 3 offlaner in certain matchups. Her Aghanim’s Scepter upgrade — Gobble Up — adds another dimension entirely, letting her swallow an ally and spit them into the enemy team for a devastating initiation. Very few heroes offer this kind of draft flexibility while also being mechanically accessible.
In ranked play, Snapfire thrives because she punishes the most common mistakes players make across all brackets. In low ranks, enemies clump together — perfect for Scatterblast and Mortimer Kisses. In high ranks, her Cookie initiations create catch opportunities that force split-second reactions. She rewards good positioning and game sense more than raw mechanical skill, making her an ideal hero for climbing MMR as a support player.

Abilities Deep Dive
Scatterblast (Q)
Snapfire unloads her massive shotgun in a cone in front of her, dealing 100/180/260/340 damage to all enemies hit. Enemies caught at point-blank range (within 450 units) take 50% bonus damage and are slowed by 100% for 0.5 seconds. This ability is the backbone of Snapfire’s laning presence and remains a powerful nuke throughout the game.
Hidden mechanics most players miss:
- The point-blank bonus applies in a smaller cone within the main cone. You need to be nearly hugging the target to trigger it.
- Scatterblast hits invisible units. If you suspect a Riki or Bounty Hunter is nearby, firing into the area can reveal their position through the damage numbers.
- The slow at point-blank range is a 100% movement speed slow — effectively a mini-root for 0.5 seconds. This is enough to guarantee a follow-up right-click or Cookie stun.
- Scatterblast destroys trees in its cone. Use this to deward tree lines or create juke paths during chases.
- The ability has a 0.3 second cast point. You can shift-queue it after Cookie for faster combos.
Skill build: Max Scatterblast first in almost every game. The damage scaling is too good to pass up for laning. The only exception is if you are playing a dedicated position 5 with a carry who needs Cookie saves constantly — even then, most high-MMR players still prioritize Q.

Firesnap Cookie (W)
Snapfire feeds a cookie to an allied hero, creep, or herself. After a short delay, the target hops forward a short distance and stuns enemies in a small radius on landing for 1.6/2.0/2.4/2.8 seconds dealing 90/160/230/300 damage. This is one of the most versatile abilities in Dota 2 — it functions as an initiation tool, a save mechanism, and a stun all in one.
Hidden mechanics and interactions:
- Cookie can be cast on any allied unit, including creeps and summons. Feeding a Cookie to a Beastmaster boar or Lycan wolf that is chasing an enemy is a legitimate high-level play.
- The hop direction is always toward where the target is facing. This means you can Cookie an ally who is running away from a fight and they will hop further away — a built-in save.
- Targets are invulnerable during the hop. This dodges projectiles including Sniper’s Assassinate, Zeus’s Lightning Bolt, and most targeted stuns mid-flight.
- You can self-cast Cookie (double-tap W or Alt+W) for a quick self-stun initiation.
- Cookie stun goes through BKB if the target lands on a spell-immune enemy. The stun itself is not blocked by magic immunity.
- The landing radius is 250 units — roughly the size of a Centaur stomp. Enemies caught on the edge are still fully stunned.
Skill build: Take one value point at level 2 or 3. Max second after Scatterblast. In rare games where you need early saves (against aggressive dive lineups like Tusk + Ursa), consider two early points for the increased stun duration.
Lil’ Shredder (E)
Snapfire loads her gun with a special ammo clip, gaining 6 rapid-fire attacks with fixed damage and bonus attack range (100/200/300/400). Each shot applies an attack speed slow to the target. During Lil’ Shredder, your attack damage is fixed at 35/50/65/80 per shot, but each shot also applies your attack modifiers.
Why this ability is secretly broken:
- Lil’ Shredder shots proc all attack modifiers: Maelstrom, Desolator, Skadi, Diffusal, Orb of Corrosion. Six rapid-fire Maelstrom procs melt entire teams.
- The attack speed slow stacks with each hit, reaching -120 attack speed at max level after all 6 shots. This completely neuters right-click carries in fights.
- Lil’ Shredder shots fully damage towers. This makes Snapfire an excellent tower pusher, especially with items like Desolator.
- The fixed damage means the ability is not reduced by armor in the same way as normal attacks — the 6 shots ignore your base damage entirely and deal a flat amount per hit plus whatever modifiers you have.
- You can animation-cancel between shots for slightly faster burst if you spam-click the target.
Skill build: One point at level 4 is standard. The value comes from the attack speed slow and modifier procs, not the base damage. Max last unless you are playing a core Snapfire with Maelstrom rush.
Mortimer Kisses (R) — Ultimate
Snapfire rears up on Mortimer, who begins spitting massive fire globs at an area you target. Each glob deals 150/225/300 impact damage plus 50/75/100 DPS burn in the area for 3 seconds. The ultimate lasts 5.5 seconds and fires up to 8 globs. This is one of the highest total-damage ultimates in Dota 2 when fully channeled.
Key mechanics:
- Total potential damage per target (all 8 globs): 1200/1800/2400 impact + 400/600/800 burn = 1600/2400/3200 magical damage before reductions. That is enough to kill most heroes from full health at level 3 ultimate.
- The burn zones stack. Overlapping globs create zones of absurd damage. Enemies standing in two overlapping burns take double the DPS.
- You can freely aim each glob — the cursor controls where Mortimer spits. This means you can spread damage across a teamfight or focus one target.
- The channel can be cancelled early with a stop command. You do not need to fire all 8 globs.
- Snapfire has free pathing during Mortimer Kisses — she can walk through terrain and over cliffs while channeling. Use this to reposition to high ground or escape ganks.
- Allies can force-staff Snapfire during the channel without interrupting it. This is a key interaction for coordinated play.
- BKB does not interrupt the channel. If you pre-cast BKB then ult, you are immune during the entire channel. At higher ranks, this is nearly mandatory.

Gobble Up (Aghanim’s Scepter)
Snapfire swallows an allied hero (or a non-ancient enemy creep), then can spit them out at a target area. Allied heroes land with a stun and damage in an AoE, while enemy creeps are simply spit out for damage. This ability transforms Snapfire from a backline support into a terrifying initiator.
- The swallowed ally is invulnerable inside Mortimer for up to 3 seconds.
- Landing AoE stun is 1.5 seconds with a 400 radius — larger than most AoE stuns in the game.
- You can spit allies over terrain and up cliffs. Gobble a Sven, spit him onto the enemy backline, and watch the cleave delete everyone.
- The spit range is 2500 — slightly longer than a Blink Dagger.
- Enemies cannot target or damage the swallowed ally. This doubles as a save: Gobble your carry when they are about to die, then spit them to safety.
Recommended Skill Build Order
| Level | 1 | 2 | 3 | 4 | 5 | 6 | 7 | 8 | 9 | 10 |
|---|---|---|---|---|---|---|---|---|---|---|
| Standard (Pos 4/5) | Q | W | Q | E | Q | R | Q | W | W | W |
| Save-Heavy | Q | W | W | Q | Q | R | Q | W | W | E |
| Core Snapfire | Q | E | Q | E | Q | R | Q | E | E | W |
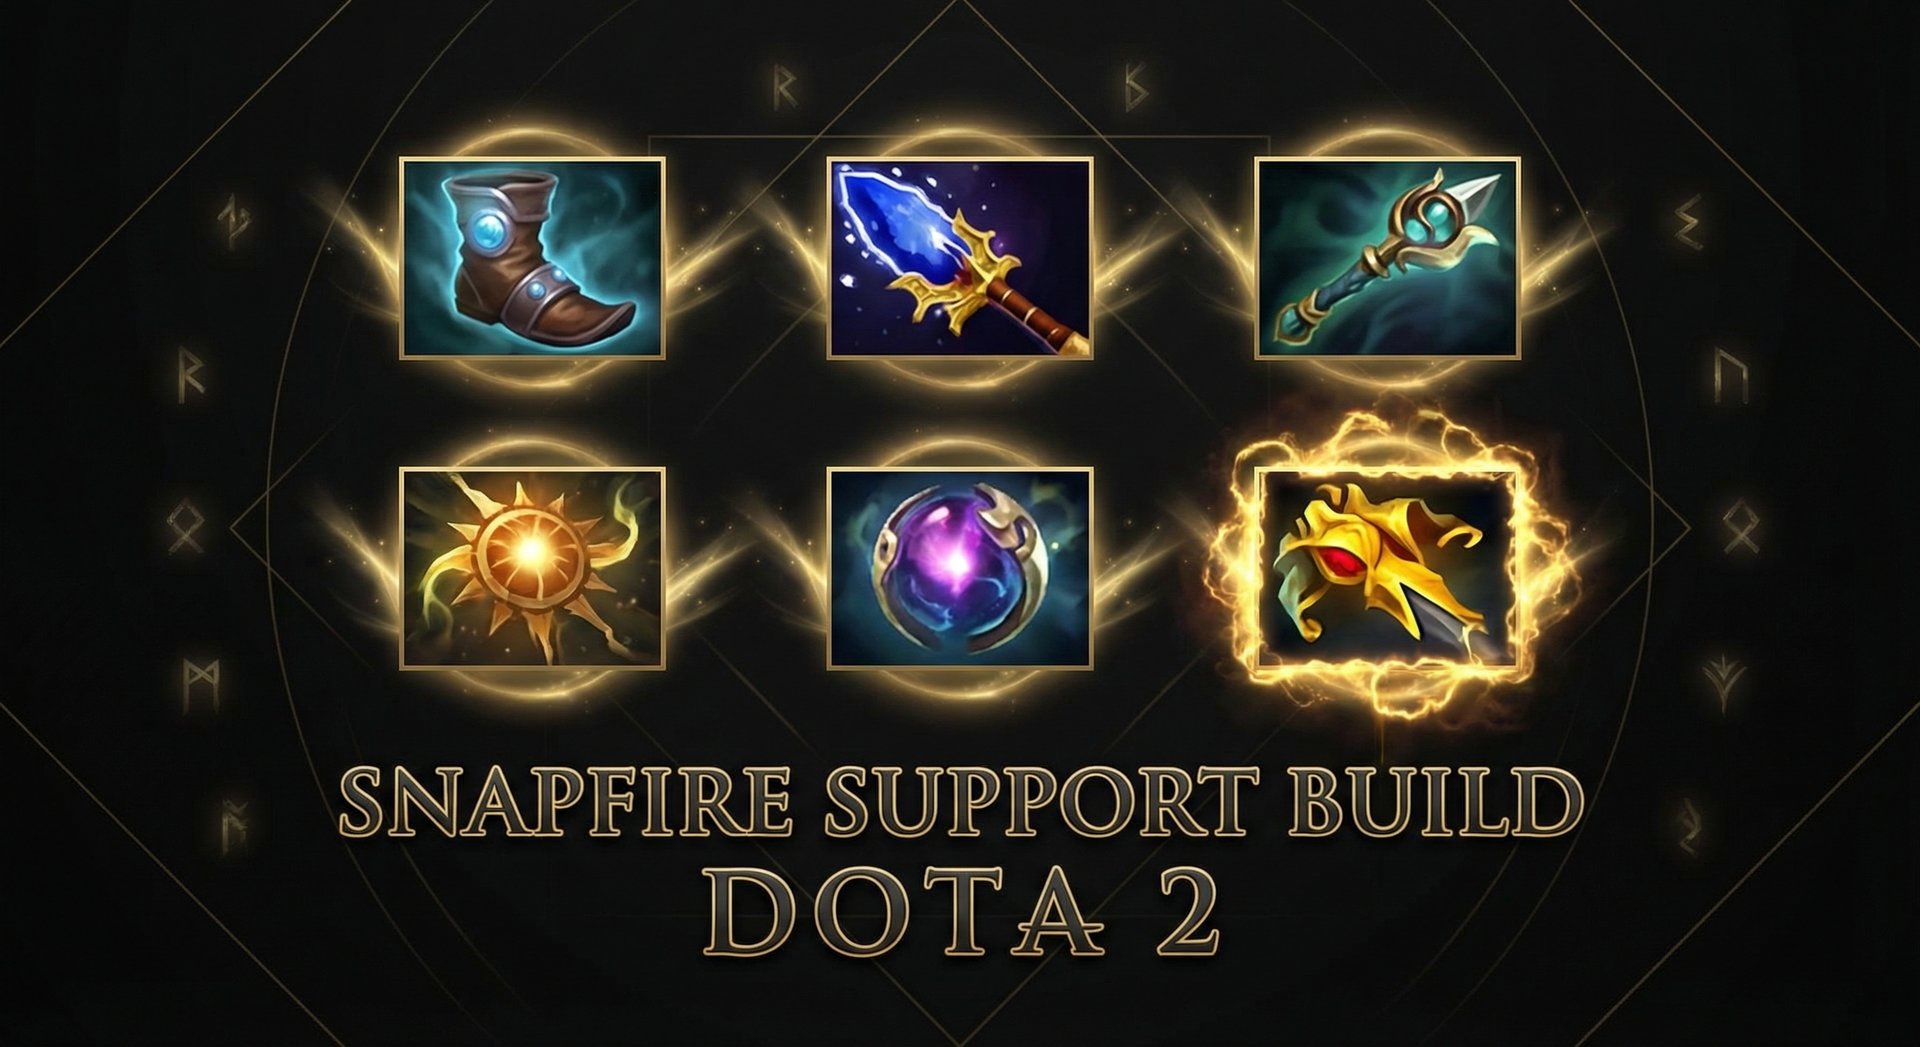
Item Builds by Rank Bracket
Snapfire’s item builds shift dramatically based on your rank bracket. Low-rank games last longer and favor greedy builds, while high-rank games demand utility and timing. Here is what works at each level.
| Rank | Starting | Early (0-15 min) | Core (15-30 min) | Late (30+ min) |
|---|---|---|---|---|
| Herald – Crusader | Tango, Blood Grenade, Sage’s Mask, Branches x2 | Arcane Boots, Magic Wand, Wind Lace | Aghanim’s Scepter, Aether Lens | Refresher Orb, Octarine Core |
| Archon – Legend | Tango, Blood Grenade, Sage’s Mask, Clarity | Tranquil Boots, Urn of Shadows, Magic Wand | Force Staff, Aghanim’s Scepter | Solar Crest, Lotus Orb |
| Ancient – Divine | Tango, Blood Grenade, Sage’s Mask, Sentry Ward | Arcane Boots, Force Staff | Aghanim’s Scepter, BKB | Refresher Orb, Shiva’s Guard |
| Immortal | Tango, Blood Grenade, Sage’s Mask, Sentry Ward | Arcane Boots (disassemble), Aether Lens, Force Staff | BKB, Aghanim’s Scepter | Refresher Orb, Scythe of Vyse |
Why Builds Differ by Rank
Herald to Crusader: Games in this bracket tend to run 40-50 minutes. Players do not punish greedy item choices, so rushing Aghanim’s Scepter is actually viable because you will have time to farm it. Focus on damage items because your team probably will not protect you — you need to contribute kills on your own.
Archon to Legend: Games start getting faster. You need utility to help your team take objectives. Force Staff is essential because it saves allies (and yourself) from common threats like Clockwerk cogs and Slark pounce. Urn gives you sustain in fights and pairs perfectly with your aggressive laning.
Ancient to Divine: Timing matters. You need BKB before you press ultimate in most fights, or you will get stunned out of it instantly. Aghanim’s Scepter becomes a mid-game power spike rather than a luxury. Solar Crest helps your carry take Roshan faster.
Immortal: The Arcane Boots disassemble into Aether Lens is standard. Every item has a purpose tied to a specific timing window. BKB is often purchased before Aghanim’s because surviving your ultimate channel is more valuable than having Gobble Up. Coaching from Immortal players can help you understand these timing decisions in real-time.
Laning Phase Masterclass
Snapfire is one of the strongest laners in Dota 2 at the support position. Her combination of high base damage (52-58), long attack range (550), and Scatterblast makes her a nightmare for enemy offlaners and carries alike. Here is how to dominate every lane.

Position 5 (Safe Lane Support)
Your primary job is making the enemy offlaner’s life miserable. Snapfire excels here because Scatterblast punishes heroes who try to stand near the creep wave.
- Level 1 aggression: Stand between the enemy offlaner and the creep wave. Right-click them on cooldown. Your 550 attack range outranges most melee offlaners, and your base damage is high enough to trade favorably.
- Scatterblast positioning: Wait until the offlaner moves close to last-hit a creep, then walk up and blast them at point-blank range for 150 damage at level 1 (with the 50% bonus). Two of these and they are at half health.
- Cookie kills: At level 2, you have kill threat. If the offlaner drops below 60% health, feed your carry a Cookie toward them. The stun plus your follow-up Scatterblast plus right-clicks from your carry is usually enough for a kill.
- Pulling: Snapfire is an excellent puller because Scatterblast clears small camp quickly. Pull the small camp at :15/:45 and use Q to speed up the clear.
Position 4 (Offlane Support)
As a position 4, Snapfire plays more aggressively. Your goal is to bully the enemy carry and set up kills for your offlaner.
- Cookie the creep: One of the most underused tricks. Feed a Cookie to your own ranged creep when it is in melee range of the enemy carry. The creep hops and stuns the carry, giving your offlaner a free trade window.
- Rune control: Snapfire is strong at contesting runes. Scatterblast deals enough burst to zone enemies away from bounty runes, and Cookie gives you an escape if you get collapsed on.
- Level 3 kill combo: With 2 points in Scatterblast and 1 in Cookie, your burst damage is 360 + 90 = 450 magical damage. Add your offlaner’s damage and a couple of right-clicks, and most carries die from full health.
Lane Partner Synergies
| Lane Partner | Synergy | Why It Works |
|---|---|---|
| Mars | Excellent | Cookie into Arena of Blood. The stun locks enemies inside the Arena for guaranteed spear combo. |
| Sven | Excellent | Cookie launches Sven into Storm Hammer range. The stun chain is nearly 5 seconds combined. |
| Juggernaut | Strong | Cookie stun into Blade Fury guarantees the full spin damage. Cookie also saves Jugg during Omnislash chases. |
| Ursa | Strong | Cookie into Earthshock. Ursa gets free Fury Swipes stacks during the 2.8 second stun. |
| Centaur Warrunner | Strong | Cookie into Double Edge. The combined burst from landing stun plus Centaur’s combo one-shots most supports. |
Mid and Late Game Transitions
Snapfire’s mid-game power spike hits around level 12-15 when she has maxed Scatterblast and Cookie with 2 points in her ultimate. This is when you want to be grouping with your team and forcing fights around objectives. Her late game depends almost entirely on whether she gets Aghanim’s Scepter and BKB.

Teamfight Positioning
This is where most Snapfire players go wrong. Your positioning changes dramatically depending on whether your ultimate is available.
When ultimate is ready:
- Stay 1200-1500 units behind your frontline. Mortimer Kisses has 3000 cast range — you do not need to be close.
- Position near high ground or behind trees. The free pathing during ult means you can channel from unconventional positions.
- Wait for the fight to start before channeling. If you ult first, enemies will simply walk away from the impact zones. Ult when they are committed.
- BKB before ulting if enemies have stuns. A cancelled Mortimer Kisses is a wasted ultimate.
When ultimate is on cooldown:
- Play more aggressively. Without your ult, you are a front-to-mid line support. Use Scatterblast to zone, Cookie to save or initiate, and Lil’ Shredder to shred the enemy carry’s attack speed.
- Stay near your carry. Your Cookie save is one of the best peel tools in the game — a 2.8 second stun on anyone who jumps your carry, plus the hop moves them to safety.
Key Timing Windows
- 10-15 minutes: Snapfire’s damage peaks relative to enemy HP pools. Force fights now. Scatterblast does 510 damage at point-blank with max level — most heroes have 1200-1500 HP at this point.
- 20-25 minutes: Aghanim’s Scepter timing. Once you have Gobble Up, you can initiate fights by spitting your tanky offlaner into the enemy team. This is your strongest timing.
- 30+ minutes: You transition into a utility role. Your damage falls off, but your saves and stuns remain valuable. Focus on Cookie saves, Lil’ Shredder debuff on enemy carries, and Gobble Up initiations.
BKB Timing Decision
One of the most impactful decisions for Snapfire is when to buy BKB. Here is the rule of thumb:
- Buy BKB before Aghanim’s if the enemy has 2+ reliable stuns that can cancel your ultimate (Nyx Assassin, Clockwerk, Spirit Breaker, etc.)
- Buy Aghanim’s first if the enemy lacks instant stuns or if your team has strong frontline that protects your channel.
- In Immortal games, BKB first is the default. Players at that level will always prioritize cancelling your ultimate.
Counters: Heroes That Destroy Snapfire
No hero is perfect. Snapfire has clear weaknesses that specific heroes exploit. Understanding these counters helps you either avoid bad drafts or play around them when you are stuck.
1. Nyx Assassin
Threat level: Extreme. Nyx is Snapfire’s worst nightmare. Spiked Carapace reflects Scatterblast damage and stuns you for 2.4 seconds. Vendetta’s break disables your passive components, and Mana Burn deletes most of your small mana pool. In lane, a good Nyx will time Carapace the moment you cast Scatterblast, turning your aggression against you. In teamfights, Nyx can Vendetta in and stun you out of Mortimer Kisses before you even know he is there.
How to play around it: Never cast Scatterblast when Nyx has Carapace available. Bait it with right-clicks first. Buy Sentry Wards obsessively to prevent Vendetta ganks during your ult channel. If possible, BKB before ulting to prevent Impale cancellation.
2. Clockwerk
Threat level: High. Hookshot into Power Cogs catches you from 3000 range and cancels Mortimer Kisses. Battery Assault spam inside Cogs prevents you from channeling anything. Clockwerk also counters your positioning because Rocket Flare gives global vision of where you are trying to hide.
How to play around it: Force Staff is mandatory. It lets you escape Cogs and reposition after a Hookshot. Stay behind vision-blocking terrain so Clockwerk cannot see you to Hookshot during your ultimate.
3. Spirit Breaker
Threat level: High. Charge of Darkness goes through BKB and bashes you out of your ultimate from across the map. Greater Bash applies through magic immunity, so even a BKB-protected Snapfire gets interrupted. Spirit Breaker also excels at hunting the backline position where Snapfire wants to stand.
How to play around it: Linkens Sphere is the only reliable counter to Charge. Alternatively, have a teammate with a stun ready to interrupt the charge before it lands. Position behind teammates so the charge hits them first.
4. Ancient Apparition
Threat level: Moderate-High. Ice Blast prevents healing and shatters targets below the threshold. Snapfire’s Cookie does not save allies if they are about to shatter. Cold Feet can catch you channeling your ultimate if AA positions correctly. More importantly, AA outranges Snapfire in teamfights, making it hard to find safe positions.
How to play around it: Time your engagements around Ice Blast cooldown. If AA just used ult, that is your window for the next 40-60 seconds. Avoid grouping tightly to minimize Ice Blast value.
5. Rubick
Threat level: Moderate. Spell Steal on Mortimer Kisses is devastating — Rubick gets your most powerful ability and uses it against you. Telekinesis cancels your ultimate from long range. Rubick also reduces your magic damage with Null Field aura, weakening all of your abilities.
How to play around it: After using Mortimer Kisses, immediately cast another spell (Scatterblast or Cookie) to push your ult off the steal queue. Never let Mortimer Kisses be the last spell you cast when Rubick is alive.
Heroes Snapfire Destroys
Snapfire is not just a victim — she hard counters several popular heroes. Draft her into these matchups and watch the enemy suffer.
1. Broodmother
Scatterblast annihilates Brood’s spiderlings. A single point-blank Q kills every spiderling in the wave and deals massive damage to Brood herself. The AoE slow prevents Brood from running with her webs. This matchup is so one-sided that picking Snapfire into Brood is considered a hard counter in pro play.
2. Meepo
Mortimer Kisses devastates Meepo because he has to keep all clones relatively close. The burn zones cover enough area that at least 2-3 Meepos will take damage. Lil’ Shredder’s attack speed slow applied to the main Meepo reduces all clones’ attack speed. Cookie stun catches clones that are trying to Poof away.
3. Phantom Lancer
Scatterblast’s AoE clears illusions efficiently. Point-blank Scatterblast one-shots most PL illusions past level 3. Mortimer Kisses zone control forces PL to either fight in the fire or run — both outcomes favor your team. Physical damage carries like PA struggle less, but illusion heroes get wrecked.
4. Huskar
Lil’ Shredder is the key here. The attack speed slow counters Huskar’s reliance on rapid Burning Spears stacking. Scatterblast at point-blank punishes Huskar’s aggressive playstyle of jumping on top of supports. And Mortimer Kisses forces Huskar to leave fights — something he hates doing because of Berserker’s Blood.
5. Undying
Snapfire outranges Undying in lane with Scatterblast. She can clear Tombstone zombies with Q. Cookie lets her carry escape Undying’s slow zone. The matchup is heavily Snapfire-favored in the laning stage, where Undying is supposed to be strongest.
How Pros Play Snapfire in the Current Patch
Snapfire has been a consistent presence in professional Dota 2 since her release. In recent tournaments, she has seen picks across multiple regions with varying builds and roles. Check Liquipedia for the latest tournament data.
Recent Pro Trends
- Position 4 is dominant. Over 70% of pro Snapfire picks are in the position 4 role. Pros value her roaming potential with Cookie initiations and her ability to stack camps with Scatterblast between rotations.
- BKB rush is standard. Nearly every pro Snapfire purchases BKB as their first or second major item. The logic is simple: Mortimer Kisses wins teamfights, and BKB guarantees the channel.
- Aghanim’s Scepter is situational, not core. Unlike pub play where everyone rushes Aghs, pros buy it about 55% of games. They prioritize BKB, Force Staff, and Glimmer Cape first.
- Level 15 talent choice: Pros almost universally take the Cookie stun duration increase over the Scatterblast damage talent. The utility of a longer stun outweighs raw damage in coordinated play.
Notable Pro Players on Snapfire
- Cr1t- (Team Liquid): Known for aggressive Cookie initiations on creeps. He feeds Cookies to ranged creeps near enemy heroes for unexpected stuns that set up ganks.
- fy (various teams): Pioneered the BKB-first build in professional play. His Snapfire positioning during Mortimer Kisses is a masterclass in using terrain for safety.
- Saksa: Demonstrated the Gobble Up save potential in high-pressure tournament games, using it defensively to save carries more often than for offensive initiations.
Rank-Specific Climbing Guide

Herald to Guardian: Building the Foundation
At this level, focus on one thing: dealing damage. Forget about saving teammates or complex Cookie initiations. Your goal is to be as annoying as possible in lane with Scatterblast spam and right-clicks, then use Mortimer Kisses to deal massive damage in every teamfight.
- Always max Scatterblast first. No exceptions. The damage is how you win lanes and get kills.
- Use ultimate on cooldown. Do not save it for “the perfect moment.” In Herald-Guardian, any Mortimer Kisses usage is better than a saved one.
- Buy items that help you survive. Magic Wand, Arcane Boots, and Force Staff. Do not try to play the hero without mana.
- Stand behind your team in fights. You are squishy. If you die before pressing R, you contributed nothing.
Crusader to Archon: Adding Game Sense
Players here are starting to understand timings. Use that to your advantage by being proactive with rotations and objective play.
- Rotate at level 3. After dominating your lane with Scatterblast, smoke mid or the offlane with Cookie stun ready. A level 3 Snapfire rotation is one of the strongest in the game.
- Stack camps between rotations. Scatterblast can stack two camps at once if you position between them. This accelerates your team’s farm.
- Learn Cookie saves. Start practicing feeding Cookies to allies who are being chased. The hop moves them away from danger, and the stun hits anyone following.
- Ward for your ultimate. Place a ward on high ground near where you expect fights. Channeling from high ground makes it nearly impossible for enemies to reach you.
Legend to Ancient: The Macro Leap
This is where Snapfire becomes a chess piece. You are not just pressing buttons — you are controlling space with your threat zones.
- Smoke timing with Aghanim’s Scepter. The moment you complete Aghs, smoke with your team. Gobble your offlaner, spit them onto the enemy carry, and win the fight before it starts.
- Ultimate zoning, not damage. At this level, Mortimer Kisses is more valuable as a zoning tool. Fire globs between the enemy frontline and backline to split their team. Even if you do not hit anyone, the burn zones force repositioning.
- Itemize reactively. Check the enemy lineup every 5 minutes and adjust your item build. Enemy has Orchid carriers Buy Lotus Orb. Enemy has right-click carry Solar Crest your own carry.
- Track enemy BKB timers. Once enemy BKBs drop to 6-7 seconds, your Mortimer Kisses becomes significantly stronger because the burn outlasts their immunity.
Divine to Immortal: What Separates the Top 1%
At the highest levels, Snapfire is a precision tool. Every Cookie, every Scatterblast, and every ult glob is calculated. If you are struggling to break into Immortal, our MMR boosting service can help bridge the gap while you refine these skills.
- Cookie on creeps for initiation. Feeding a Cookie to a ranged creep near an enemy hero is the most unexpected stun in Dota. It has a different animation than a hero jump, giving enemies less time to react.
- Scatterblast to secure ranged creeps. In contested lanes, use Q to guarantee the ranged creep deny or last-hit. The 340 damage at max level kills ranged creeps in one hit after a few minutes.
- Pre-position for Mortimer Kisses. Top players move to their channeling position 10-15 seconds before the fight starts. They pick a spot with vision, high ground advantage, and an escape route.
- Lil’ Shredder timing on Roshan. Use E when Roshan is at 50% HP to speed up the kill. The fixed damage ignores Rosh’s high armor, and the rapid fire hits proc on-hit effects from items your allies have.
- Draft awareness: Pick Snapfire when your team has heroes who benefit from Cookie initiation (Mars, Axe, Centaur) and avoid her when the enemy has multiple ult-cancelling abilities.
Tips and Tricks

Animation Cancels and Hidden Interactions
- Cookie into Scatterblast combo: Cast Cookie on yourself, then shift-queue Scatterblast. You will hop forward and immediately blast at point-blank range when you land. The stun guarantees the point-blank bonus damage.
- Lil’ Shredder tower damage: Snapfire is one of the best tower hitters in the game as a support. Six rapid-fire attacks on a tower adds up fast, especially with a Blight Stone or Desolator.
- Mortimer Kisses through Roshan pit: You can channel Mortimer Kisses outside the Roshan pit and fire globs inside. The terrain does not block the projectiles. This is devastating when the enemy team is doing Roshan.
- Cookie saves through trees: The Cookie hop can cross tree lines if the target is facing the right direction. An ally running into trees can Cookie-hop over a tree line to safety.
- Fog abuse during ultimate: Fire the first 2-3 globs at the enemy, then aim 1-2 globs into fog where enemies might retreat. The burn zone persists even if you lose vision, catching anyone who runs through it.
Common Mistakes to Avoid
- Using Cookie offensively when you need it defensively. If the enemy has a dive hero (PA, Storm, Slark), save your Cookie for peeling your carry. The 2.8 second stun is too valuable to waste on a risky initiation when your carry needs protection.
- Channeling ultimate at the start of fights. If you ult before the fight begins, enemies simply walk away. Wait until they are committed (2-3 seconds into the fight), then channel from a safe position.
- Standing too close during Mortimer Kisses. The ult has 3000 range. There is no reason to be within 1000 units of the fight while channeling. Position behind terrain, on high ground, or in trees.
- Ignoring Lil’ Shredder on towers. Many Snapfire players forget to use E on towers after winning a fight. Those 6 rapid shots chunk towers fast and can be the difference between getting a tower or leaving it at 10% HP.
- Building damage items as position 5. Unless you are snowballing hard, your job is utility. Force Staff saves more games than Maelstrom on a position 5 Snapfire.
Advanced Mechanics Only High-MMR Players Know
- Cookie direction manipulation: If you want to Cookie an ally forward but they are facing sideways, issue a move command for them first (ping or voice), then Cookie. The direction of the hop is determined at the moment the cookie is consumed, not when it is cast.
- Gobble Up cancel: You can cancel Gobble Up by pressing stop, which drops the ally at your feet instead of spitting them. Use this if the enemy repositions and the original spit target is no longer good.
- Force Staff during ult: Have your ally Force Staff you forward during Mortimer Kisses to reposition your channel. This does not interrupt the ultimate and lets you adjust your angle mid-fight.
- Scatterblast vision: Q provides brief vision of the area it hits. Use this to check Roshan pit, deward high ground, or scout fog.
Frequently Asked Questions
Position 4 is generally stronger because it gives Snapfire more farm priority for key items like BKB and Aghanim’s Scepter. However, she is perfectly viable as position 5 in lanes where her Scatterblast harass wins the lane for your carry. If your draft already has a greedy pos 4, Snapfire works well as a 5 who transitions into a second support core.
Snapfire is best picked in the first phase as a flex pick. She does not reveal your lanes (she works in any lane) and she does not have many hard counters. Avoid last-picking her into Nyx Assassin or Spirit Breaker. Draft her when your team has heroes who benefit from Cookie initiations — Mars, Axe, Centaur, Sven, and Tiny are excellent partners.
The talent choices depend on your role. For support Snapfire, take Cookie stun duration at level 15 and Mortimer Kisses damage at level 20. For core Snapfire, the Lil’ Shredder attack count talent and Scatterblast damage talents are stronger. At level 25, the Gobble Up cooldown reduction is almost always the pick because it doubles your initiation potential.
Three solutions: First, buy BKB — this is the most reliable answer. Second, position further back and use terrain. Channel from behind trees, on high ground, or from inside your base during defense. Third, bait out the interrupt abilities. Let the enemy use their stuns on your frontline before you start channeling. Timing your ult 3-4 seconds into the fight, rather than at the start, makes a massive difference.
No. Aghanim’s Scepter is a luxury in many games. If you need BKB, Force Staff, and Glimmer Cape to survive, those come first. Aghs shines in games where your team has a tanky initiator (Centaur, Axe, Tidehunter) you can Gobble and spit into the enemy. If your team is all squishy, the gold is better spent on utility items.
Yes, but it is situational. Core Snapfire (usually mid or offlane) maxes Lil’ Shredder with a Maelstrom rush for farming speed. The build focuses on right-click damage with Desolator, Gleipnir, and attack speed items. It works best against lineups that lack gap closers, because core Snapfire still lacks mobility. In MMR calibration games, core Snapfire can surprise enemies who do not expect the damage output.
Start in demo mode. Practice the self-Cookie into Scatterblast combo until it is muscle memory. Then practice feeding Cookies to allied bots and hitting the stun consistently. For Mortimer Kisses, practice tracking moving targets — lead your globs slightly ahead of where enemies are walking. Finally, if you have Aghs, practice Gobble Up spit ranges so you know exactly how far you can launch allies.
Ready to Climb with Snapfire
Our Immortal-rank coaches can review your Snapfire replays and teach you the exact positioning, timing, and combos that separate good Snapfire players from great ones. Or skip the grind entirely with our MMR boosting service.
Get Snapfire Coaching
Boost My MMR Instead


