How to Master Slardar in Dota 2: The Ultimate Guide for Every Rank (2026)

Slardar is one of those heroes that pub players drastically underestimate — until they get blink-crushed, melted in two seconds, and watch their armor disappear into negative territory. The Slithereen Guard has been a staple offlaner and position 3 initiator in Dota 2 for years, and in Patch 7.40, he remains one of the most efficient ways to single-handedly rip apart enemy carries.
What makes Slardar terrifying is his simplicity paired with devastating effectiveness. Corrosive Haze strips up to 20 armor at max level, turning even the tankiest heroes into paper. His Slithereen Crush provides reliable AoE stun, and Bash of the Deep gives him one of the highest physical damage outputs of any strength hero in the game. Combined with Guardian Sprint’s river bonuses, Slardar is a hero who punishes bad positioning harder than almost anyone else in the pool.
In this guide, we will break down every aspect of Slardar’s kit — from hidden mechanics most players never learn, to rank-specific strategies that will help you climb whether you are in Herald or pushing for Immortal. By the end, you will understand exactly when to pick Slardar, how to dominate your lane, and how to translate early aggression into a won game.
Table of Contents
Why Slardar Is the Ultimate Armor Shredder
Slardar occupies a unique niche in Dota 2: he is a strength-based initiator who scales with physical damage rather than relying on spell damage like most offlaners. His entire kit revolves around closing the gap, locking down targets, and reducing their armor so your team’s physical damage dealers can finish the job in seconds.
In the current meta, Slardar sits at approximately a 51-52% winrate across all brackets on Dotabuff, with his winrate climbing significantly in Ancient and Divine brackets where players understand how to capitalize on his armor reduction. His pick rate hovers around 8-10%, making him a consistently popular but not overpicked choice.
What makes Slardar unique:
- Minus armor stacking: Corrosive Haze combined with items like Assault Cuirass and Desolator creates armor values of -30 or lower on targets
- Reliable initiation: Blink + Crush is one of the most consistent stun combos in the game with a 1.6 second AoE stun
- River dominance: Guardian Sprint gives Slardar massive movement speed and status resistance in river, making him a nightmare for Roshan fights and river ward battles
- Vision utility: Corrosive Haze provides true sight on the target, countering invisibility heroes without needing detection items
- Low item dependency: Slardar comes online with just Blink Dagger and Power Treads, making him one of the cheapest initiators to get going
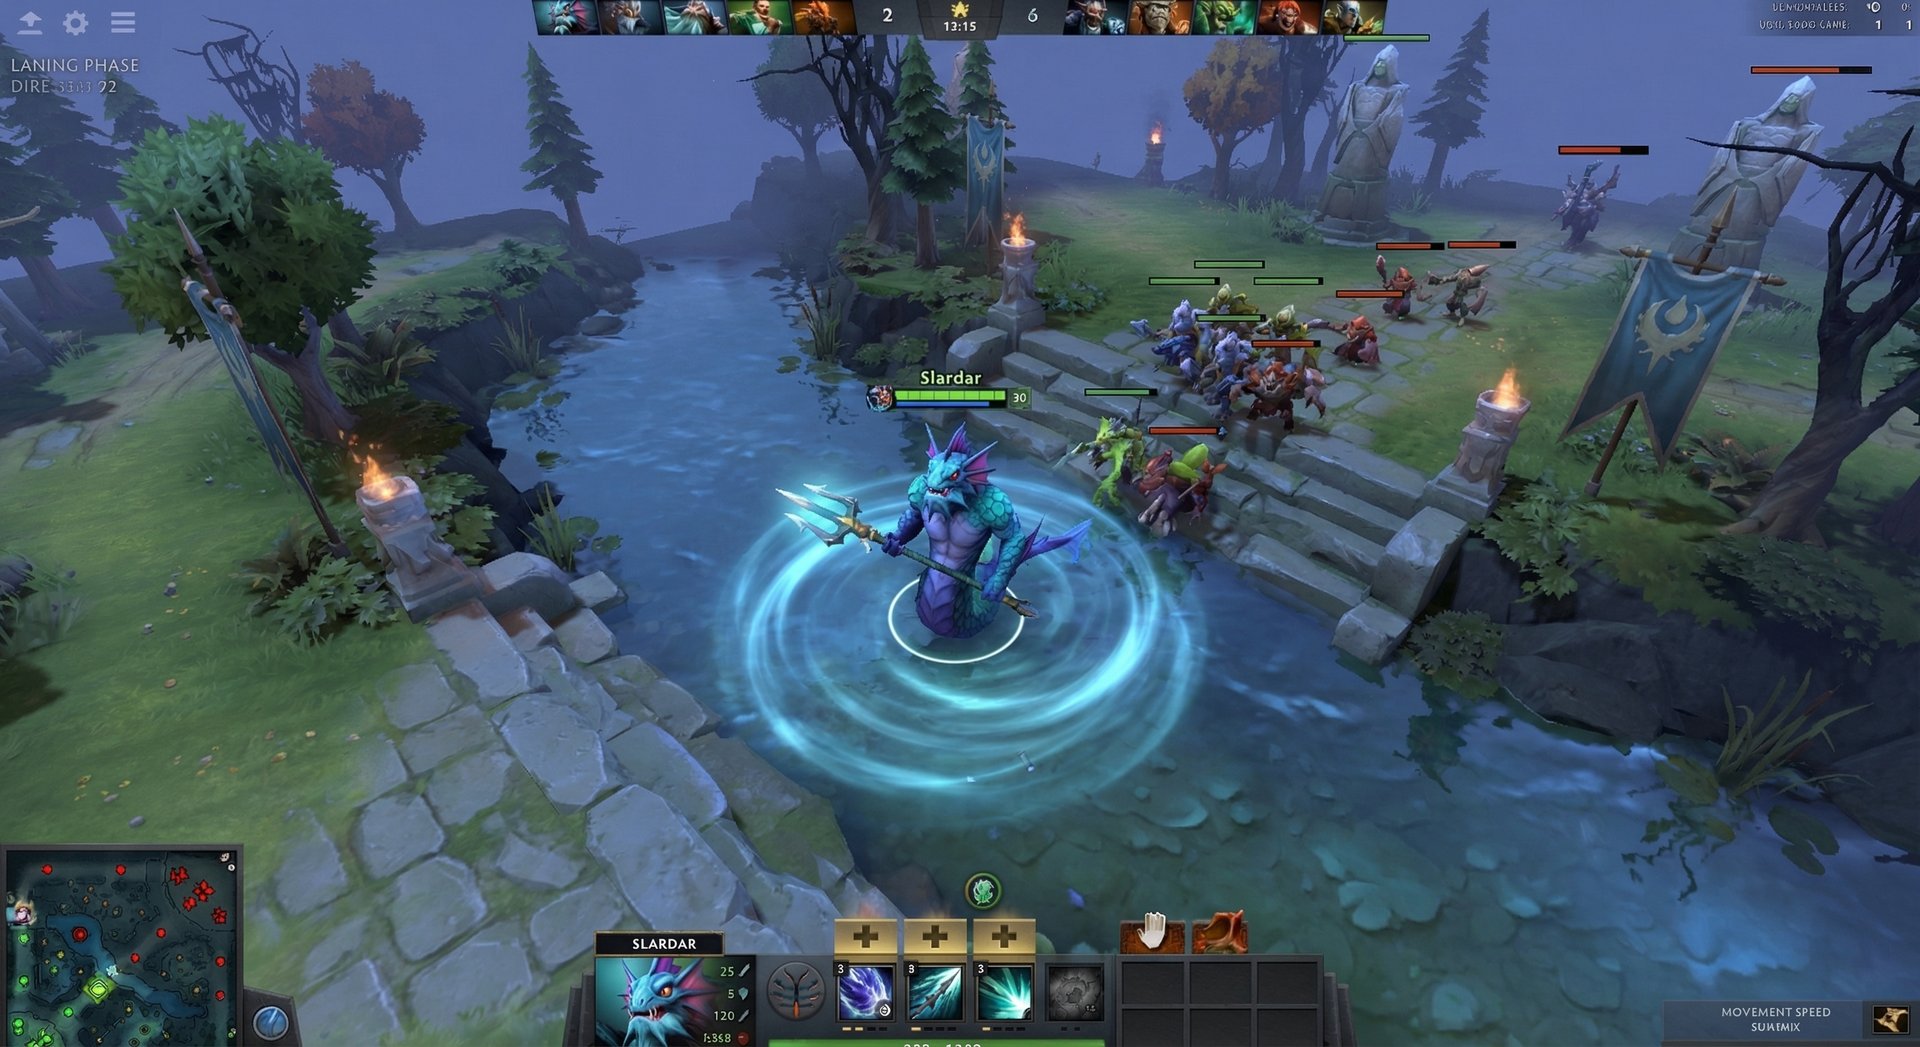
Slardar is primarily played as a position 3 offlaner, though he occasionally shows up as a position 4 roaming support in higher-level pubs. His strength lies in the early-to-mid game transition where his Blink + Crush timing (typically around 10-13 minutes) can completely take over the map.
Abilities Deep Dive
Guardian Sprint (Q)
Guardian Sprint is Slardar’s mobility spell and the ability that most players misunderstand. When activated, Slardar gains 18%/26%/34%/42% bonus movement speed for 10 seconds, but also takes 10% extra damage from all sources. However, when Slardar is in the river, the bonus doubles and he gains status resistance instead of the damage amplification penalty.
Hidden mechanics most players miss:
- The river bonus applies to ALL water areas on the map, including the small puddles near certain tower locations and the water in the Rosh pit area
- Status resistance in river stacks with items like Sange and BKB, making Slardar nearly un-stunnable during river fights
- The 10% damage amplification is applied before all reductions, so armor and magic resistance still apply normally — it is less punishing than it sounds
- Sprint has zero cast point and can be activated during other animations
Skill build note: Most players max Sprint last, taking one value point at level 2 or 4. In matchups where you need to chase (against heroes like Weaver or Windranger), consider a second point early.
Slithereen Crush (W)
This is Slardar’s bread and butter. Slithereen Crush is a 350 radius AoE stun that deals physical damage and stuns for 1.0/1.2/1.4/1.6 seconds. After the stun expires, enemies are slowed for 2 additional seconds.
Critical details:
- The damage is physical, not magical — this means it benefits from your armor reduction and gets amplified by Corrosive Haze
- The stun goes through BKB at Aghanim’s Scepter level — more on this below
- Cast point is 0.35 seconds, which is fast enough that most players cannot react to a Blink + Crush combo
- The AoE is centered on Slardar, not on a target point — you need to be on top of enemies
- Crush also provides a brief moment of vision in the area, useful for checking Rosh pit or high ground
Bash of the Deep (E)
Bash of the Deep gives Slardar a 10%/15%/20%/25% chance to bash on each attack, dealing 75/125/175/225 bonus physical damage and stunning for 1.0 second. This is a pseudo-random distribution (PRD) bash, meaning the actual proc chance starts low and increases with each non-proc hit.
Why this ability is stronger than it looks:
- The bash damage is physical and affected by armor — with Corrosive Haze reducing the target’s armor to nothing, those 225 damage procs hit like a truck
- PRD means you are almost guaranteed a bash within 4-6 attacks at max level
- Bash stun does NOT stack with Crush stun — they overlap. Time your attacks to chain Crush into Bash for maximum lockdown
- At 25% chance with attack speed from Treads and a few items, Slardar can perma-bash squishy heroes in the mid game
Corrosive Haze (R) — Ultimate
The ability that defines Slardar. Corrosive Haze is a targeted debuff that reduces the enemy’s armor by 10/15/20 and provides true sight on them for 18 seconds. It has a cast range of 700 and costs only 25 mana at all levels.
What makes Corrosive Haze elite:
- 25 mana cost: You can spam this on every enemy hero in a team fight with essentially zero mana cost
- True sight: Completely counters Riki, Bounty Hunter, Nyx Assassin, and any hero with Shadow Blade without needing dust or sentries
- 18 second duration on an 8 second cooldown: You can have Haze on multiple targets simultaneously
- Cannot be dispelled by basic dispels: Only strong dispels (Legion Commander’s Press the Attack, Oracle’s Fortune’s End with Aghs, Abaddon ult) remove it
- Stacks with other minus armor: Desolator (-6), Assault Cuirass (-5), Solar Crest (-6) — your target can easily hit -35 armor or more
At -20 armor, physical damage is amplified by roughly 55%. At -30 armor (Haze + Assault Cuirass + Deso), damage amplification reaches absurd levels. This is why Slardar’s team often runs multiple right-click cores — the armor reduction benefits everyone.
Recommended Skill Build
| Level | 1 | 2 | 3 | 4 | 5 | 6 | 7 | 8 | 9 | 10 |
|---|---|---|---|---|---|---|---|---|---|---|
| Standard Offlane | W | E | W | Q | W | R | W | E | E | E |
| Kill Lane | E | W | W | W | W | R | E | E | E | Q |
| Pos 4 Support | W | Q | W | E | W | R | W | Q | Q | Q |
Max Crush first in almost every game for the stun duration scaling. Bash second for damage. Sprint last unless you desperately need mobility early. Always take ultimate at 6, 12, and 18.
Item Builds by Rank Bracket

| Rank | Starting | Early Game | Core | Late Game |
|---|---|---|---|---|
| Herald – Crusader | Tango, Quelling, Gauntlets x2, Branch | Bracer, Boots, Soul Ring | Phase Boots, Blink, Echo Sabre | BKB, Desolator, AC |
| Archon – Legend | Tango, Quelling, Gauntlets, Circlet, Branch | Bracer, Power Treads | Blink, BKB, Aghs Scepter | AC, Refresher, Heart |
| Ancient – Divine | Tango, Quelling, Gauntlets, Branch x2 | Bracer, Power Treads | Blink, BKB, Aghs Scepter | AC, Refresher, Overwhelming Blink |
| Immortal | Tango, Quelling, Gauntlets, Branch, Mango | Bracer, Power Treads | Blink, BKB, Aghs Scepter | AC, Refresher, Shard |
Why Items Differ by Rank
Herald-Crusader: Lower rank players benefit from Echo Sabre because it guarantees bash procs more consistently and is a straightforward damage item. Phase Boots give chase potential that these players otherwise lack. Desolator is picked because the armor reduction concept is easy to understand and the damage spike is immediately visible.
Archon-Legend: Players at this level start understanding that Slardar’s job is initiation, not carrying. Power Treads replace Phase for the attack speed (more bash procs) and tread switching efficiency. Aghanim’s Scepter becomes core because the upgraded Crush piercing BKB changes team fights entirely.
Ancient-Divine: At this level, item timings matter. The focus is on hitting Blink by 10-12 minutes, BKB by 18-20, and Aghs by 24-26. Overwhelming Blink replaces standard Blink late game for the slow and extra damage on initiation.
Immortal: The highest-level Slardar players prioritize Refresher Orb as a luxury item because double Crush with Aghs means two BKB-piercing AoE stuns. Shard is picked up for the additional utility. Mango start gives early kill potential with the extra mana for Crush spam.
Situational Items
- Lotus Orb: Against heavy single-target spells. The armor bonus also synergizes with your kit.
- Halberd: Against right-click carries who pop BKB. Haze them, disarm before BKB, then Crush when it expires.
- Solar Crest: Budget option that stacks -6 armor on top of Haze. Great with a right-click heavy team.
- Shadow Blade: Alternative initiation for lower ranks where enemies do not buy detection. Not recommended above Legend.
- Force Staff: Rarely built but useful against Clockwerk or when you need to save teammates.
Laning Phase Masterclass
Slardar’s laning phase is straightforward but requires understanding his strengths and limitations. He is a melee hero with no ranged harass, which means he relies heavily on positioning, creep aggro tricks, and his support’s help to win the lane.
Level 1-3 Strategy
Start with Slithereen Crush at level 1. Your goal is not to get kills — it is to secure the ranged creep and trade efficiently. Use Crush when the enemy support steps forward to harass you, catching both the support and the carry if possible.
Key laning tips:
- Creep aggro at :53 and :23: Right-click an enemy hero while standing near your ranged creep to pull the enemy wave toward you. This lets you last hit safely near your tower.
- Crush to secure ranged creeps: If the enemy is denying your ranged creep, time Crush to deal the killing blow while also stunning them for a follow-up hit.
- Trade when Bash procs: At level 2 with a point in Bash, every attack has a 10% chance to stun. If you get a Bash proc while trading, immediately go aggressive — the stun gives you 1-2 free hits.
- Sprint for emergency escapes only: Do not Sprint aggressively in lane before level 6. The 10% damage amplification makes you food for tri-lanes and aggressive duals.
Level 4-6 Power Spike
Once you hit level 5 with maxed Crush at 3 (1.4 second stun), your kill potential spikes dramatically. Coordinate with your position 4 support for a kill: Sprint in, Crush, apply Haze at 6, and chain stun with Bash procs. Most safelane carries cannot survive this burst, especially with the armor reduction from Haze.
If the lane is unwinnable (against a Juggernaut + Disruptor type lane), focus on stacking and farming jungle camps between waves. Slardar clears stacks efficiently with Crush’s AoE damage, especially when you use Haze on the large creep to reduce its armor.
Lane Partner Synergies
- Tusk (S-tier): Snowball into Crush is one of the most lethal kill lane combos. Tag punch adds more stun time.
- Vengeful Spirit (A-tier): Wave + Crush = massive minus armor stack. The enemy literally has negative armor at level 3.
- Undying (A-tier): Tombstone + Crush forces enemies to choose between fighting zombies or running from Slardar.
- Shadow Demon (B-tier): Disruption setups Crush perfectly. Soul Catcher amplifies your physical damage.
Mid and Late Game Transitions
The Blink Timing Window (10-18 Minutes)
Slardar’s strongest window is the moment he completes Blink Dagger. At around 10-13 minutes with Treads and Blink, you become the most dangerous hero on the map. Your job during this window is to force fights, take towers, and suffocate the enemy carry’s farm.
How to use this window:
- Smoke and hunt: Slardar with Blink + Smoke is a guaranteed kill on any solo hero. Sprint gives you speed to cover ground; Blink closes the gap; Crush stuns; Haze strips armor; Bash finishes.
- Take Roshan early: Slardar is one of the fastest Roshan killers in the game. Haze reduces Rosh’s armor by 20, and Sprint gives massive speed in the pit’s river area. With your carry, you can take Rosh as early as 14-16 minutes.
- Ward aggressively: Use Crush to check areas safely. Plant offensive wards in the enemy jungle and punish anyone farming alone.
Mid Game Team Fights (18-30 Minutes)
Your role in team fights is simple: initiate, Haze the carry, Crush as many heroes as possible, and survive long enough for your team to follow up. The order of operations matters:
- Wait for the right moment — do NOT initiate until your team is close enough to follow
- Blink onto the highest-priority target (usually the enemy carry or mid)
- Immediately Crush (catches the target and any nearby heroes)
- Apply Corrosive Haze on the primary target during stun
- Pop BKB if they are focusing you
- Right-click for Bash procs while Crush is on cooldown
- Crush again when it comes off cooldown (8 second CD means you get 2 Crushes per fight)
Late Game (30+ Minutes)
Slardar does not fall off as hard as people think in the late game. While his right-click damage becomes less relevant, Corrosive Haze becomes MORE valuable as enemy carries stack armor items. A carry with 30 armor gets reduced to 10 armor — that is roughly 40% more physical damage for your entire team.
With Aghanim’s Scepter, your Crush pierces spell immunity, making you one of the few heroes who can reliably stun through BKB. This is a game-changer in late-game fights where every carry has BKB.
Your late game priorities:
- Haze every enemy hero before fights — it costs 25 mana and lasts 18 seconds, just run at them and apply it
- Save your BKB for crucial Crush initiations
- Aghs + Refresher = two BKB-piercing AoE stuns. This wins games by itself.
- Consider Dota 2 coaching if you struggle with late-game decision making as Slardar
Counters: Heroes That Destroy Slardar
1. Lifestealer
Rage makes Lifestealer spell immune, meaning your Crush does nothing (without Aghs). Feast heals through your damage, and Open Wounds lets him lifesteal through your minus armor. How to play around it: Get Aghs to pierce his Rage. Focus other targets and let your team deal with Naix.
2. Phantom Lancer
Slardar’s biggest nightmare. PL creates dozens of illusions, and you can only Haze one of them. Crush hits the area but illusions rebuild instantly. Doppelganger dispels Haze. How to play around it: Build Mjollnir or Gleipnir for AoE. Haze him repeatedly since it only costs 25 mana.
3. Oracle
False Promise completely negates your burst. Fortune’s End dispels Haze. Fate’s Edict disarms you and provides 100% magic resistance, though it does not help against your physical damage. How to play around it: Focus Oracle first with Blink + Crush, or wait for False Promise to expire and burst the saved target.
4. Weaver
Shukuchi makes Weaver hard to catch even with Sprint. Time Lapse dispels Haze and undoes your burst damage. Geminate Attack out-trades you in lane. How to play around it: Haze him for true sight and coordinate with teammates who have instant stuns. He cannot Time Lapse if he is dead.
5. Abaddon
Borrowed Time automatically triggers when Abaddon drops below 400 HP, healing him instead. Aphotic Shield dispels Haze and blocks Crush damage. How to play around it: Ignore Abaddon in fights. Focus his carries instead. Haze does not matter if you cannot kill through Borrowed Time.
Heroes Slardar Destroys
1. Riki
Corrosive Haze provides permanent true sight on Riki. No invisibility, no Riki. Crush also hits him during Tricks of the Trade if timed right. Slardar is Riki’s hardest counter in the game.
2. Templar Assassin
Haze removes all of TA’s armor (Refraction does not block the debuff). TA is naturally squishy once her Refraction charges are gone, and Crush strips them quickly since it deals multiple damage instances in the area.
3. Terrorblade
TB has the highest base armor in the game, which means Haze’s -20 is devastating to his effective HP. Sunder is useless if TB gets stunlocked by Crush + Bash. Metamorphosis illusions die fast under minus armor.
4. Drow Ranger
Drow relies on keeping distance. Blink + Crush closes the gap instantly and disables Marksmanship. Haze strips her already-modest armor. She melts under right clicks with Bash procs.
5. Sniper
Same concept as Drow. Sniper has zero escape, zero armor, and zero chance once Slardar Blinks on top of him. One Crush and he is dead before the stun ends if your team follows up.
How Pros Play Slardar in the Current Patch
Slardar has maintained a steady presence in professional Dota 2 throughout 2025 and into 2026. He is typically picked as a comfort offlaner when the team needs a reliable initiator paired with high physical damage cores.
Notable pro trends:
- Aghanim’s Scepter rush: Professional players increasingly skip BKB in favor of a fast Aghs (around 20-22 minutes) when the enemy team has early BKB timings. The BKB-piercing Crush changes the dynamic of fights entirely.
- Blink timing discipline: Pro Slardar players consistently hit Blink at 9-11 minutes, even in rough lanes. They achieve this by stacking jungle camps between waves and securing every possible creep kill.
- Roshan priority: Teams that pick Slardar take Roshan 20-30% faster than average thanks to Haze. Pros use this advantage to force Rosh at 15-18 minutes when the enemy is not prepared.
- Haze spam in fights: Watch any high-level Slardar replay — they Haze 3-4 heroes before the fight even starts. The 25 mana cost means there is no reason not to Haze every target you can reach.
Players like Collapse (Team Spirit) and zai have shown masterclass Slardar performances, particularly in tournaments like ESL One and The International qualifiers. Their game sense around when to initiate versus when to wait defines what separates pub Slardar from pro Slardar.
For more analysis on how professional players approach the offlane role, check out our Dota 2 coaching service where our Immortal-rank coaches break down pro replays with you.
Rank-Specific Climbing Guide
Herald to Guardian — Foundation Basics
At this rank, you win by simply not dying and hitting your Blink timing. Most Herald-Guardian players do not understand how Blink + stun initiators work, so the moment you have Blink, you will get 5+ kills before they start playing around it.
Focus on:
- Last hitting under tower — practice this in demo mode with Slardar specifically
- Not dying more than 3 times in lane. If the lane is hard, jungle with Crush
- Building Blink EVERY game. No exceptions. No Armlet rush, no Deso first.
- Using Haze on invisible heroes — you will instantly win games against Riki/BH pickers at this rank
Crusader to Archon — Adding Game Sense
This is where you start learning when to fight versus when to farm. Slardar falls off if you spend 20 minutes farming jungle instead of fighting.
Focus on:
- After getting Blink, immediately look for kills. Check the minimap — is anyone farming alone? Go there.
- Group with your team for tower pushes. Crush + Haze makes tower defense nearly impossible for the enemy.
- Start calling Roshan after successful fights. One Rosh advantage at this rank often wins the game.
- Buy BKB second item if the enemy has 2+ stuns. Initiating without BKB in fights with heavy disables is suicide.
Legend to Ancient — The Macro Leap
At Legend+, players start reacting to Blink initiations. You need to be smarter about your positioning and timing.
Focus on:
- Smoke usage: Smoke before ganks. Do not walk at enemies from obvious angles.
- Blink range optimization: Practice blinking at max range (1200 units). Getting an extra 200 units on your blink puts you in Crush range when walking would not.
- Fight selection: Do not fight when your BKB is on cooldown and the enemy has theirs. Wait for your window.
- Aghs timing: This is the rank where Aghs becomes crucial. Enemy carries start getting BKB at 20 min, and without Aghs your Crush is useless.
If you are stuck in this bracket, our MMR boosting service can help you break through the plateau while you work on improving your fundamentals.
Divine to Immortal — What Separates Top 1%
At this level, the mechanical execution of Slardar is assumed. What separates Divine from Immortal Slardar players is decision-making speed and map awareness.
Focus on:
- Pre-fight Haze application: Before every fight, run at enemies to Haze them. This costs 25 mana and gives your team massive damage advantage before the actual engagement.
- Initiation patience: The best Slardar players sometimes wait 5-10 seconds at the edge of a fight with Blink ready. They wait for the enemy to commit resources before engaging.
- Refresher timing: Double Crush with Aghs in a team fight is often GG. Time your Refresher usage when 3+ enemies are clustered.
- Itemization flexibility: Swap between Overwhelming Blink, Swift Blink, or keeping standard Blink depending on the game state. Overwhelming for damage, Swift for pickoffs.
Tips and Tricks
Advanced Mechanics Only High-MMR Players Know
- Shift-queue Crush after Blink: Hold Shift, click Blink location, then press W. This executes Crush at the exact moment you land, giving enemies zero reaction time. The difference between a 0.0s delay and a 0.2s delay is whether the enemy BKBs or not.
- Haze before Crush: In some scenarios (ganking a solo hero), it is better to run up and Haze first, THEN Blink + Crush after they react. This way they take amplified physical damage from Crush itself.
- River pathing awareness: The river bonus on Sprint is massive. When chasing enemies near river, always path THROUGH the river rather than around it. The double movement speed and status resistance can be the difference between a kill and a missed opportunity.
- Bash reset manipulation: Because Bash uses PRD, switching targets resets the counter. Stay on ONE target to maximize bash probability. Do not split your attacks between two heroes unless necessary.
- Rosh speed trick: When doing Roshan, Haze him immediately and pop Sprint. The river speed bonus in the pit area combined with -20 armor means your team shreds Rosh in under 30 seconds at the 20 minute mark.
Common Mistakes to Avoid
- Skipping Blink Dagger: There is no substitute. Shadow Blade is not the same. Blink gives instant, unreactable initiation. Always build it first.
- Using Sprint to initiate in lane: The 10% damage amplification means you take more damage during trades. Only Sprint for escapes or chases where the target cannot fight back.
- Forgetting to Haze in fights: At 25 mana, there is zero reason not to Haze every enemy in range. Many Slardar players Crush and right-click but forget to apply Haze to secondary targets.
- Initiating on the wrong target: Crushing the enemy support might feel good, but the team fight is won by Hazing and killing the carry. Prioritize your initiations.
- Not buying BKB when needed: Slardar NEEDS to live after initiation. If you die immediately after Crush, you contributed a 1.6 second stun and nothing else. BKB lets you survive and Crush again 8 seconds later.
Frequently Asked Questions
Position 3 offlaner is Slardar’s strongest role. He needs levels and a fast Blink Dagger to function. As position 4, he struggles to get Blink before the timing window closes (10-13 min). Only play Slardar as pos 4 if your pos 3 pick does not need farm and you have a roaming-heavy composition.
Pick Slardar when: (1) the enemy has high-armor carries like Terrorblade, Dragon Knight, or Morphling, (2) your team has heavy physical damage dealers who benefit from Haze, (3) the enemy has invisibility heroes you want to shut down, or (4) you need a reliable initiator with a fast game tempo. Avoid picking him into Lifestealer, PL, or Oracle.
Yes, fully. Corrosive Haze (-20) stacks additively with Desolator (-6), Assault Cuirass (-5), Solar Crest (-6), Vengeful Spirit’s Wave of Terror, and any other armor reduction. This is why Slardar teams often draft multiple physical damage heroes and armor reduction items for maximum effectiveness.
Aghs is worth rushing after Blink if the enemy team has early BKB buyers. The BKB-piercing Crush transforms your team fight presence. However, if you are dying before getting your Crush off, BKB should come first. The general rule: BKB first if they focus you, Aghs first if they ignore you.
Force Staff is strong against Slardar — it lets you reposition after his Blink + Crush. Linken’s Sphere blocks Haze (but he can just Haze someone else and re-apply on you). Heroes that kite well (Weaver, Puck, Storm Spirit) are natural counters. Most importantly, do not stand grouped — his Crush is AoE and he wants to stun 3+ heroes.
Slardar peaks between 15-30 minutes. His Blink + BKB timing at 18-22 minutes is his strongest point. He remains relevant late game due to Haze scaling (enemy armor values increase, so -20 becomes proportionally more impactful), but his right-click damage falls off compared to true carries. Aim to end games before 40 minutes if possible.
Always max Crush first. The stun duration scaling from 1.0s to 1.6s is too valuable to delay. Bash second for the damage scaling. The only exception is a pos 4 roaming build where you might take extra Sprint points for mobility, but even then Crush max comes first.
Master Slardar with Immortal-Rank Coaching
Want to hit your Blink timings consistently and dominate as Slardar? Our Immortal-rank coaches will analyze your replays, fix your initiation patterns, and help you climb faster than ever.


