
How to Master Riki in Dota 2: The Ultimate Guide for Every Rank (2026)

Riki is Dota 2’s most frustrating hero to play against — and one of the most rewarding to master. The Stealth Assassin has terrorized pubs since the earliest days of Dota, and in 2026’s meta he remains a nightmare for uncoordinated teams. With a 53% winrate in Herald-Crusader brackets and consistent presence in Dotabuff’s most picked heroes, Riki punishes every ward gap, every missing Dust, and every support who dares to walk alone.
But here is the thing most guides will not tell you: Riki is not just a noob stomper. In the hands of a player who truly understands his kit, Riki can dominate even Ancient and Divine games. The difference between a 2K Riki who runs around hoping for kills and a 6K Riki who systematically dismantles the enemy’s vision game and controls the map tempo is enormous. This guide bridges that gap.
Whether you are picking up Riki for easy MMR in low ranks or refining your Stealth Assassin play at higher levels, this guide covers everything: hidden ability mechanics, rank-specific item builds, laning strategies, counter play, and the advanced tricks that separate good Riki players from great ones. Let’s get invisible.
Table of Contents
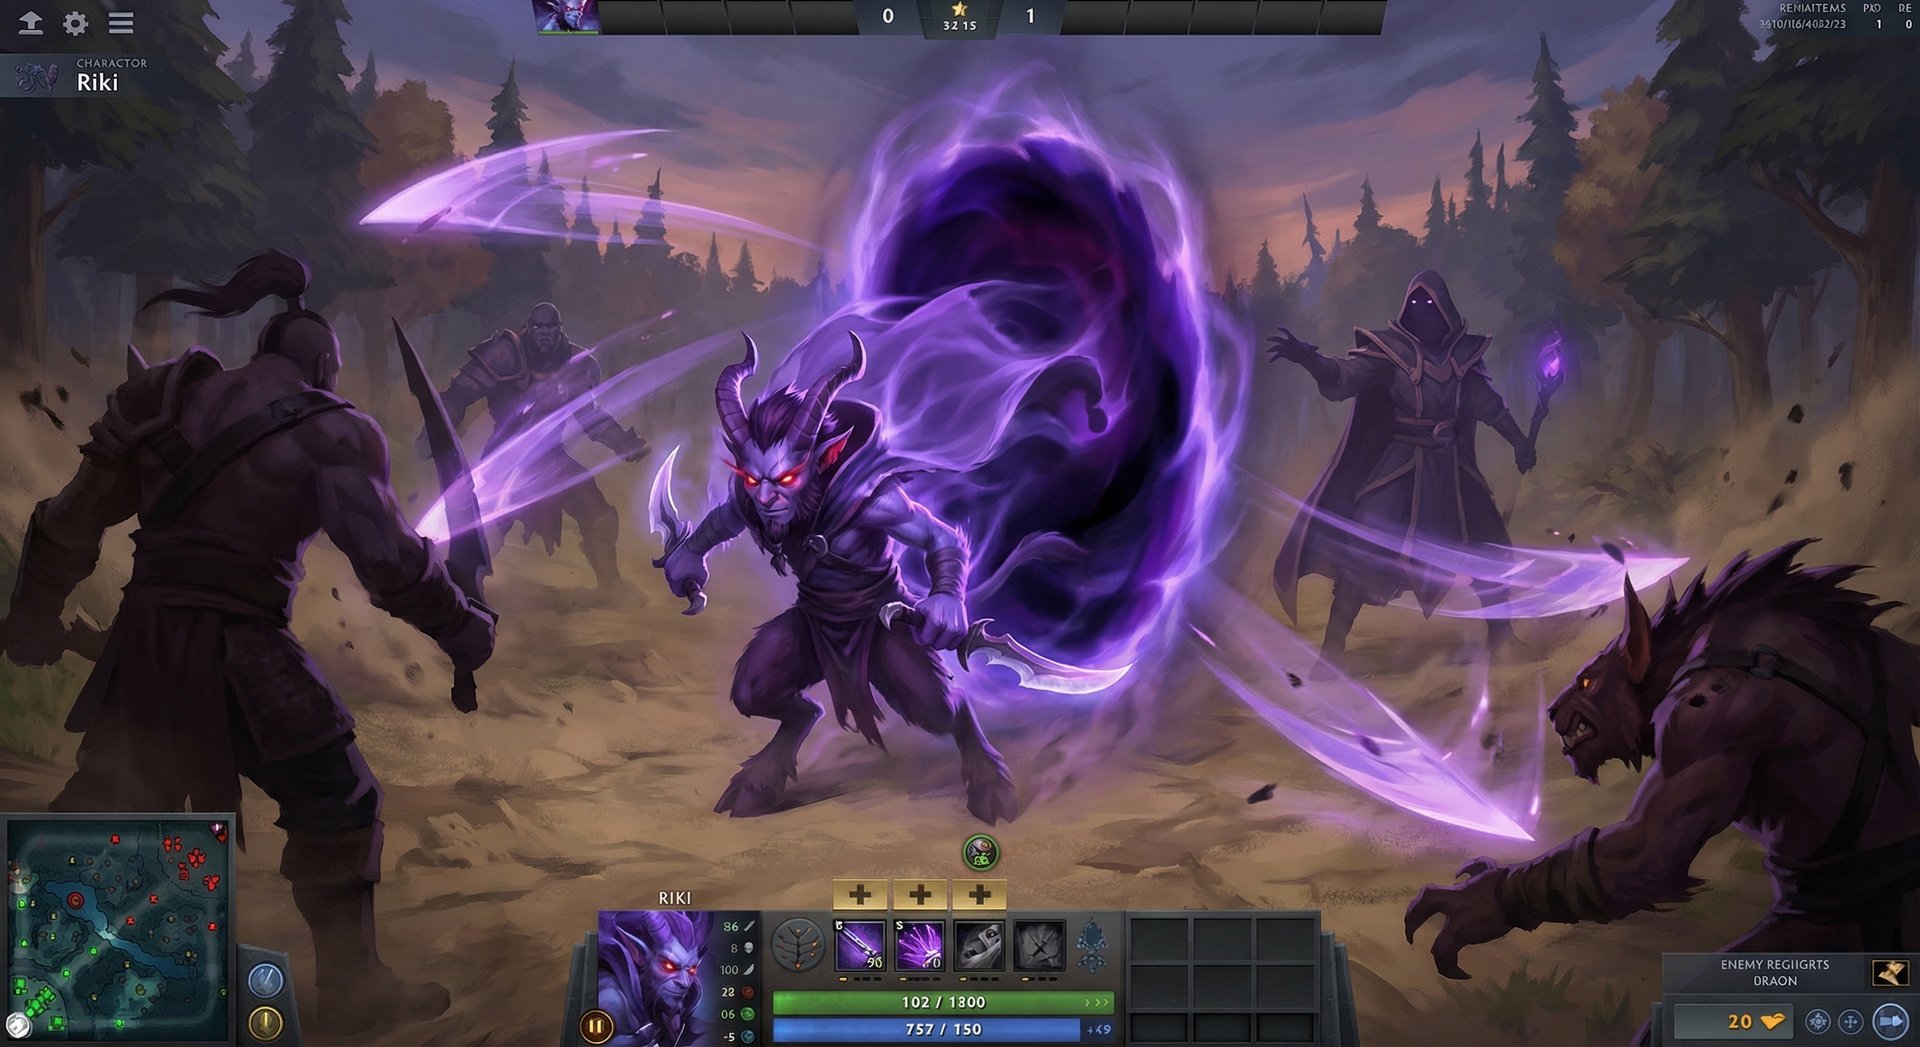
Why Riki Is Dota 2’s Ultimate Pubstomper
Riki occupies a unique space in the Dota 2 hero pool. He is a melee agility carry who can also function as a roaming position 4 support in the right drafts. His permanent invisibility from Cloak and Dagger fundamentally changes how the enemy team has to play — they must constantly invest gold in detection items, check every shadow, and never feel safe farming alone.
In the current patch, Riki sits at a 52-53% winrate across all brackets according to Dotabuff, with his winrate climbing even higher in Herald through Archon where detection usage is inconsistent. His pick rate remains high at roughly 10-12% in lower brackets, making him one of the most popular heroes in Dota 2 pubs.
What makes Riki special is his economic warfare. Every game against Riki forces the enemy team to spend 80-180 gold per Sentry Ward cycle, buy Dust of Appearance stacks, and potentially invest in a Gem of True Sight. Over a 40-minute game, a good Riki forces the enemy to spend 3,000-5,000 gold purely on detection — gold that could have gone toward items. That is Riki’s hidden power, and most players completely overlook it.
His kit revolves around assassination, disruption, and evasion. Smoke Screen silences and blinds enemies caught inside. Blink Strike closes gaps instantly. Tricks of the Trade lets him deal massive damage while being completely invulnerable. And Cloak and Dagger means he is always lurking, always a threat, always forcing the enemy to play scared.
[IMAGE_1]
Abilities Deep Dive
Smoke Screen (Q)
Smoke Screen is one of the most underrated abilities in Dota 2. Riki throws down a cloud of smoke that silences all enemies inside, causes them to miss 30%/40%/50%/60% of their attacks, and slows their movement speed by 10%/15%/20%/25%. The cloud lasts 6 seconds at all levels with a radius of 375 units.
Hidden mechanics most players do not know:
- Smoke Screen disables most items too — enemies cannot use BKB, Blink Dagger, Force Staff, or any active item while silenced inside the cloud. This makes it one of the strongest zoning tools in the game.
- The miss chance stacks with evasion — against a Phantom Assassin with Blur, the miss rate inside Smoke Screen becomes absurdly high.
- Smoke Screen provides no vision — you cannot use it to scout high ground or deward. But it does reveal invisible units who walk into it if you have detection nearby.
- Placement matters more than timing — dropping Smoke Screen on the enemy’s escape path is often better than dropping it directly on them. Force them to walk through it to retreat.
Skill build note: At lower ranks, max Smoke Screen second after Blink Strike. At higher ranks where you play Riki as position 4, consider maxing Smoke Screen first — the silence duration stays at 6 seconds but the miss chance and slow scale significantly.
[IMAGE_2]
Blink Strike (W)
Blink Strike teleports Riki directly behind the target, dealing 60/80/100/120 bonus damage and applying a brief slow. It has 2 charges with a 15-second charge replenish time at max level. The cast range is 800 units, and it works on both allies and enemies.
Critical interactions:
- Blink Strike places you behind the target — this is crucial because Cloak and Dagger’s backstab bonus requires attacking from behind. Every Blink Strike guarantees at least one backstab hit.
- You can Blink Strike to allies — use friendly creeps, summons, or allied heroes to escape. This is Riki’s primary escape mechanism since he has no built-in mobility besides this.
- Charges are everything — never waste both charges aggressively. Always keep one in reserve for escape or chasing. The cooldown between charges is your biggest vulnerability window.
- Blink Strike does not disjoint projectiles — if a stun is mid-air, blinking will not save you from it. Plan accordingly.
Cloak and Dagger (Passive / E)
Riki’s signature ability grants permanent invisibility with a fade time of 6/5/4/3 seconds after performing any action that breaks invis. Additionally, when Riki attacks a target from behind (within a 180-degree arc), he deals 1.0x/1.4x/1.8x/2.2x of his Agility as bonus backstab damage.
Advanced mechanics:
- The backstab angle is generous — you do not need to be directly behind the target. Anything within 180 degrees of their back counts. In practice, if you are anywhere behind or to the side-rear, you get the bonus.
- Backstab damage scales with Agility — this is why Agility items like Diffusal Blade, Butterfly, and Eye of Skadi are core on Riki. Every point of Agility increases your backstab damage.
- The fade time resets on every action — attacking, using items, casting spells all reset the fade timer. You need a full 3 seconds (at max level) of doing absolutely nothing to go invisible again during a fight.
- Invisibility is broken by most actions — but not by movement. You can walk freely while invisible, making Riki one of the best scouts in the game.
Tricks of the Trade (R / Ultimate)
Riki’s ultimate makes him phase out of the world for 2/2.25/2.5 seconds (4/4.5/5 seconds with Aghanim’s Scepter), attacking every enemy hero within a 500-unit radius with backstab damage every 0.5 seconds. During Tricks of the Trade, Riki is completely invulnerable and untargetable.
This ability is what elevates Riki from pub stomper to legitimate carry threat:
- All hits during Tricks of the Trade count as backstabs — regardless of Riki’s position relative to targets. This means guaranteed bonus damage on every strike.
- It hits all heroes in the AoE — in a teamfight where 3-4 enemies are clumped, Riki deals his full backstab damage to each of them every 0.5 seconds. The total damage output is staggering.
- Aghanim’s Scepter doubles the duration and allows Riki to cast it on an allied hero, creating the AoE around the ally instead. This turns any frontline hero into a Riki damage amplifier.
- You can be targeted before the animation completes — there is a brief cast point where Riki is still targetable. Fast stuns can cancel it.
- Tricks of the Trade applies on-hit effects — Diffusal Blade mana burn, Skull Basher procs, and other on-attack modifiers all work during the ultimate.
Item Builds by Rank
Riki’s itemization changes dramatically depending on your rank bracket. Lower-ranked games allow greedier builds because detection is inconsistent, while higher ranks demand faster tempo items and utility.
| Rank Bracket | Starting Items | Early Game | Core Items | Late Game |
|---|---|---|---|---|
| Herald – Crusader | Tango, Quelling Blade, Slippers of Agility x2, Iron Branch | Orb of Corrosion, Power Treads, Wraith Band | Diffusal Blade, Yasha, Skull Basher | Manta Style, Abyssal Blade, Butterfly |
| Archon – Legend | Tango, Quelling Blade, Slippers of Agility, Circlet, Iron Branch | Wraith Band, Power Treads, Orb of Corrosion | Diffusal Blade, Sange and Yasha, BKB | Abyssal Blade, Butterfly, Nullifier |
| Ancient – Divine | Tango, Quelling Blade, Slippers of Agility, Iron Branch x2 | Wraith Band, Power Treads, Magic Wand | Diffusal Blade, BKB, Aghanim’s Scepter | Nullifier, Butterfly, Eye of Skadi |
| Immortal | Tango, Quelling Blade, Iron Branch x2, Faerie Fire | Wraith Band, Power Treads, Magic Wand | Diffusal Blade, BKB, Aghanim’s Scepter | Nullifier, Abyssal Blade, Eye of Skadi |
Why Items Differ by Rank
Herald through Crusader: Players at these ranks rarely buy detection consistently. You can afford to skip BKB in many games and go straight for damage. Manta Style is excellent here because illusions confuse players who do not know which Riki is real. Skull Basher into Abyssal Blade gives you lockdown that compensates for teammates who may not follow up on your initiations.
Archon through Legend: Detection becomes more common but still inconsistent. BKB starts becoming necessary because enemy supports begin stacking disables. Sange and Yasha offers the status resistance and movement speed you need to survive longer engagements. Nullifier becomes a luxury option to dispel Ghost Scepter and Glimmer Cape from enemy supports.
Ancient through Immortal: Detection is constant. BKB is almost always mandatory. Aghanim’s Scepter transforms your teamfight contribution — casting Tricks of the Trade on an allied initiator like Mars or Axe while they are in the middle of the enemy team creates devastating AoE damage. Eye of Skadi provides the stats and slow to stay relevant in extended late-game fights. Nullifier is often built earlier to deal with save items like Force Staff and Eul’s.
[IMAGE_4]
Item Timing Benchmarks
Knowing when you should have your items is critical for evaluating your game performance:
- Diffusal Blade: 14-17 minutes (carry), 18-22 minutes (pos 4). If you have it before 14 minutes, you are ahead. After 20 minutes as carry, you are behind.
- BKB: 22-26 minutes. Getting BKB too late means you miss your power spike window.
- Aghanim’s Scepter: 28-32 minutes if it is your second big item after Diffusal.
Laning Phase Masterclass
Riki’s laning phase is his weakest period. With low base damage (around 53-57 with starting items), mediocre stats, and no farming ability, Riki relies heavily on his lane partner and positioning to survive the first 10 minutes.
Safe Lane Carry (Position 1)
As a safe lane carry, Riki wants a strong lane support who can harass and set up kills. His ideal lane partners include:
- Lion: Double disable (Hex + Earth Spike) into Riki’s Smoke Screen creates easy kills at level 3+.
- Shadow Shaman: Shackle holds enemies in place for backstab damage. Ether Shock adds burst.
- Crystal Maiden: Frostbite root + Crystal Nova slow lets Riki get multiple backstabs. Arcane Aura helps with mana.
- Grimstroke: Ink Swell’s AoE stun combined with Riki’s Smoke Screen is devastating in lane.
Laning priorities (first 5 minutes):
- Focus on last hits — every CS matters because Riki cannot jungle efficiently.
- Use Cloak and Dagger’s backstab for harass when the enemy carry goes for last hits. Walk behind them, hit once, and fade back into invis.
- Do not waste Blink Strike charges unless you are certain of a kill. Each charge is precious in the early game.
- If the lane is hard, ask your support to pull. Riki can last-hit under tower reasonably well with Quelling Blade.
[IMAGE_5]
Position 4 Roaming Riki
Riki position 4 has become increasingly popular in higher-ranked games. The idea is simple: start roaming from level 2-3, use Smoke Screen to set up kills in other lanes, and force the enemy to buy detection early when their gold is tightest.
Roaming Riki priorities:
- Level 1-2: Stay in your lane, soak XP, harass with backstabs. Get Smoke Screen and one point in Blink Strike.
- Level 3-4: Start roaming mid. Smoke Screen the enemy mid, let your mid laner get a free kill or force the enemy to retreat. Even if you do not get a kill, forcing a TP or salve usage is a win.
- Level 5-7: Rotate between mid and the enemy safe lane. Place aggressive wards since you are invisible and can walk past enemy sentries if they do not have detection in their inventory.
As pos 4 Riki, your starting items shift to: Orb of Venom, Tango, Observer Ward, Sentry Ward. Orb of Venom’s slow stacks with Smoke Screen’s slow, making it nearly impossible for enemies to escape your ganks.
Dealing with Aggressive Lanes
Against strong dual lanes (like Juggernaut + Crystal Maiden or Ursa + Io), Riki can struggle badly. If you are getting zoned:
- Go invisible and leech XP — even if you cannot last hit, stay in XP range. Levels are more important than gold for Riki in the first 5 minutes.
- Ask for a lane swap — sometimes moving Riki to the offlane with a strong partner is better than feeding in a lost safe lane.
- Stack and farm jungle at level 5-6 — once you have 2-3 levels in Cloak and Dagger, you can take small and medium camps with backstab damage.
Mid and Late Game Transitions
Riki’s power curve peaks in the mid-game (15-30 minutes) when he has Diffusal Blade and the enemy’s detection game is still developing. This is your window to snowball kills, take map control, and build an insurmountable advantage.
Mid-Game (15-30 Minutes)
Your job is simple: hunt. With Diffusal Blade completed, Riki can solo kill most supports and squishy cores. Here is your mid-game checklist:
- Identify the enemy’s ward game: Check where sentries are placed. If you see a sentry, that area is dangerous. Move to where detection is absent.
- Target isolated heroes: Riki excels at picking off heroes who are farming alone. Enemy carry farming the triangle Smoke Screen, Blink Strike, backstab, dead. Support warding Same thing.
- Carry Dust yourself: In the mid-game, you might face enemy Riki, Bounty Hunter, or heroes with Shadow Blade. Carrying your own Dust is a small investment that can win fights.
- Use Smoke Screen to zone in fights: In team fights, do not just drop Smoke Screen on the nearest enemy. Place it on the enemy backline — their supports and ranged carries — to silence their spells and items while your team fights the frontline.
[IMAGE_6]
Late Game (30+ Minutes)
Riki falls off relative to hard carries like Faceless Void, Phantom Assassin, or Medusa in the ultra-late game. However, he never becomes irrelevant if you adjust your playstyle:
- Shift from assassin to teamfighter: Your Tricks of the Trade becomes your primary damage tool. In a clumped teamfight, a 5-second Aghanim’s Tricks of the Trade deals more damage than 10 seconds of right-clicking.
- Nullifier is your late-game power spike: This item dispels everything — BKB, Ghost Scepter, Aeon Disk, Glimmer Cape. Without Nullifier, enemy supports can simply Ghost Scepter your damage. With it, nobody is safe.
- Play around Roshan: Riki is one of the best heroes for contesting Roshan. You can hide in the pit invisibly, scout enemy movements, and use Smoke Screen + Tricks of the Trade when the fight starts.
- Backdoor potential: With high agility and attack speed, Riki can chip at buildings while invisible between attacks. It is slow but can create pressure that forces enemy TPs.
BKB Timing Decisions
One of the most common questions about Riki is when to build BKB. The answer depends on the enemy draft:
- Rush BKB second item (after Diffusal): If the enemy has 3+ disables that pierce evasion and Smoke Screen (Lion, Shadow Shaman, Bane, etc.).
- Delay BKB to third item: If the enemy lacks instant disables and you can rely on Smoke Screen + Tricks of the Trade invulnerability to avoid damage.
- Skip BKB entirely: Only in low-rank games where enemies do not chain disables. Even then, consider it eventually.
Counters: Heroes That Destroy Riki
Every Riki player needs to know their worst matchups. Here are the top 5 heroes that make Riki’s life miserable, and how to play around them.
[IMAGE_7]
1. Bounty Hunter
Bounty Hunter’s Track reveals Riki through invisibility for a long duration, provides movement speed to the entire enemy team to chase you, and grants bonus gold on your death. A good Bounty Hunter makes Riki’s permanent invis nearly useless for half the game.
How to play around it: Do not fight when Tracked. Disengage immediately, wait for Track to expire (30 seconds), then re-engage. In the late game, Nullifier can dispel Track. Lotus Orb is another option — it reflects Track back onto Bounty Hunter.
2. Slardar
Corrosive Haze reveals Riki and reduces his armor significantly. Combined with Slardar’s stun and bash, Riki gets locked down and melted quickly. The armor reduction also makes Tricks of the Trade less effective since your physical damage is reduced by the target’s remaining armor.
How to play around it: BKB dispels Corrosive Haze. In fights, save BKB for after Slardar ults you, not before. Also, target Slardar with Smoke Screen early in fights to prevent him from casting Corrosive Haze.
3. Zeus
Zeus’s Lightning Bolt provides True Sight in a small area, and his ultimate Thundergod’s Wrath hits all enemy heroes globally — revealing invisible ones. Zeus essentially gives his entire team free detection on a cooldown.
How to play around it: Play around Zeus ult cooldown (90 seconds at max level). After he uses it, you have a 90-second window of safety. Avoid grouping near Zeus in fights, and build magic resistance items (BKB, Pipe aura from teammates) to reduce his damage.
4. Axe
Counter Helix procs on every attack, and since Riki’s Tricks of the Trade attacks multiple times rapidly, Axe spins constantly during it. Berserker’s Call forces Riki out of invisibility and through BKB. Blade Mail reflects Riki’s burst back at him.
How to play around it: Never use Tricks of the Trade when Axe is in the AoE. Focus other targets first. In the laning phase, avoid trading hits with Axe — Counter Helix will destroy Riki’s small HP pool. If Axe initiates with Call, have your team ready to follow up on the Axe instead.
5. Dust of Appearance Carriers (Any Support)
This is less about a specific hero and more about a playstyle. Any support who consistently carries Dust and Sentries makes Riki significantly weaker. Heroes with long-range disables who also carry detection — like Lion, Disruptor, or Shadow Shaman — are particularly dangerous.
How to play around it: Watch the enemy’s inventory. If you see Dust on a support, either avoid them or force them to use it and then disengage. Manta Style dispels Dust’s slow and true sight debuff. Diffusal Blade can also purge it.
Heroes Riki Destroys
Just as some heroes counter Riki, there are heroes that Riki absolutely feasts on. Understanding your favorable matchups helps you know when to pick Riki in the draft.
1. Sniper
Sniper is Riki’s dream target. Zero mobility, low HP, and completely reliant on range. Blink Strike closes the gap instantly, Smoke Screen silences Sniper’s abilities and items (no Hurricane Pike escape), and Tricks of the Trade finishes the job. Sniper cannot right-click through 60% miss chance either.
2. Drow Ranger
Drow Ranger loses her Marksmanship bonus when Riki is within 400 units, and Blink Strike puts Riki right on top of her. Without her ult damage, Drow is a fragile hero who melts to backstabs. Smoke Screen prevents Gust (her only defensive ability) from being cast.
3. Crystal Maiden
Slow, squishy, and often alone placing wards. Crystal Maiden is Riki’s favorite target throughout the entire game. Freezing Field can be devastating, but Smoke Screen silences it immediately. One Blink Strike + a few backstabs and Crystal Maiden is dead before she can react.
4. Nature’s Prophet
Nature’s Prophet loves split-pushing alone in side lanes — exactly where Riki thrives. Treant summons give Riki extra targets to Blink Strike to for repositioning, and Sprout does nothing against an invisible hero. Prophet’s low armor makes backstabs hit extremely hard.
5. Oracle
While Oracle has strong save abilities, Riki’s Smoke Screen prevents Oracle from casting anything — no False Promise, no Fate’s Edict, no Purifying Flames. If you can catch Oracle inside Smoke Screen before he reacts, the enemy team loses their most powerful save tool.
How Pros Play Riki in the Current Patch
Riki has seen selective pro play in 2025-2026 tournaments, primarily as a position 4 support rather than carry. Here is how the best players utilize him:
Position 4 Riki in Pro Games
Pro teams draft Riki pos 4 specifically to deny vision and create chaos. Notable recent examples:
- The vision denial game: Pro Riki players spend the first 15 minutes systematically dewarding. Since Riki is invisible, he can walk into enemy territory and deward Observer Wards without being spotted. This creates a massive vision advantage for his team.
- Smoke Screen as initiation tool: In pro games, Smoke Screen is used as a setup ability — not a damage tool. Drop it on the enemy backline, silence their saves and disables, and let your cores jump in.
- Aghanim’s Scepter timing: Pro Riki players target Aghanim’s Scepter by 25-28 minutes. The extended Tricks of the Trade on an allied initiator (Mars, Axe, Enigma) becomes a teamfight-winning combo.
Carry Riki in High-Level Pubs
Carry Riki (position 1) is more common in high-level pubs than in pro games. Top Immortal players who spam Riki carry share these patterns:
- Early Diffusal timing: The best Riki players aim for 13-14 minute Diffusal Blade. They achieve this by getting kills in lane and farming efficiently between ganks.
- Map awareness over mechanics: High-MMR Riki players spend more time looking at the minimap than the screen. They track enemy movements, predict rotations, and position themselves where the enemy does not have detection.
- Aggressive warding: Because Riki can ward without being seen, top players buy Observer Wards themselves and place them deep in enemy territory. This creates pick-off opportunities and map control that would be impossible for other carries.
For deeper analysis of Riki’s pro match data, check Riki’s Liquipedia page for tournament picks and bans.
Rank-Specific Climbing Guide
Riki plays differently at every rank bracket. Here is exactly what to focus on at each level to maximize your MMR gains.
[IMAGE_8]
Herald to Guardian — Foundation Basics
At Herald and Guardian, nobody buys detection. This is Riki’s paradise. Your game plan is simple:
- Farm Diffusal Blade first. Do not fight before you have this item unless it is a free kill.
- Pick off anyone who is alone. At this rank, supports wander alone constantly. Farm them.
- Do not die. Every death at Herald is avoidable because enemies rarely have detection. If you die, you are making positioning mistakes.
- Push towers after kills. The biggest mistake low-rank Riki players make is getting a kill and then going back to farming. Push the tower. Take map control. End the game before enemies farm enough to threaten you.
If you are struggling to climb out of Herald, consider Riki-specific coaching to identify the habits holding you back.
Crusader to Archon — Adding Game Sense
At Crusader and Archon, detection starts appearing inconsistently. Supports will buy Dust sometimes but forget other times. Your adjustments:
- Watch enemy inventories. Press Alt + click on enemy heroes to check for Dust. If a support has Dust, avoid them until they use it or you have backup.
- Start buying your own Sentries. Dewarding at this rank gives you huge map control advantages because enemies rarely check if their wards have been removed.
- Learn Smoke Screen placement. Instead of panic-dropping it, practice placing Smoke Screen between the enemy and their escape route.
- Timing matters: Aim to have Diffusal by 16 minutes and start actively hunting. At this rank, a 16-minute Diffusal Riki is a game-winning timing.
Legend to Ancient — The Macro Leap
Legend and Ancient is where Riki games become significantly harder. Detection is consistent, teammates expect more from you, and enemies punish overextension.
- BKB is no longer optional. Build it every game, usually second item after Diffusal.
- Start using Tricks of the Trade offensively in teamfights. At this rank, teamfights are more organized and Tricks of the Trade’s AoE damage becomes your primary contribution.
- Play around your team. Solo kills are harder because enemies group up and carry detection. Position near your team’s initiator and follow up rather than diving alone.
- Itemize reactively: Check the enemy team’s items every few minutes. If you see multiple Force Staffs, consider Nullifier. If you see Blade Mail on 2+ heroes, do not Tricks of the Trade into them.
Divine to Immortal — What Separates the Top 1%
At Divine and Immortal, Riki becomes a specialized last-pick hero. You only pick him when the enemy draft is vulnerable:
- Draft awareness: Pick Riki into lineups with 2+ squishy cores, weak vision supports, and limited AoE. Never pick Riki into Axe + Bounty Hunter + Zeus.
- Tempo control: Immortal Riki players dictate the pace. They smoke gank at precise timing windows (after enemy BKB usage, after enemy TP cooldowns expire, when key abilities are on cooldown).
- Aghanim’s Scepter combos: Coordinate Tricks of the Trade with allied ultimates. Mars Arena + Riki Aghs Tricks is a teamfight-ending combination.
- Late-game itemization: Immortal players know when to sell Diffusal Blade for Eye of Skadi. They know when Nullifier wins the game. They know when Butterfly is better than another damage item.
If you are hardstuck at Divine and cannot break into Immortal, an MMR boost can place you at the rank where you belong while our Immortal players show you how the hero is played at the highest level.
Tips and Tricks
These are the tricks that separate a good Riki from a great one. Most of these are not written in any tooltip — they come from thousands of hours of play.
[IMAGE_9]
Animation Cancels and Hidden Mechanics
- Orb-walk with Diffusal Blade: Manually cast Diffusal’s active on the target between auto-attacks for extra slow uptime. This also resets your attack animation for slightly faster overall DPS.
- Blink Strike + Smoke Screen combo order: Always Blink Strike first, then immediately drop Smoke Screen. Blink Strike places you behind the target, and the instant Smoke Screen prevents them from reacting. If you Smoke Screen first, they might walk out before you arrive.
- Tricks of the Trade cancel: You can cancel Tricks of the Trade early by pressing the ability key again. This is useful when you realize you are hitting a Blade Mail target or need to reposition.
- Sentry deward trick: As Riki, you can place a Sentry Ward while invisible and immediately deward the enemy Sentry that is supposed to reveal you — often before the enemy even reacts to your presence on the map.
Common Mistakes to Avoid
- Do not Tricks of the Trade into Axe. Counter Helix procs on every hit, and you will take more damage than you deal.
- Do not chase kills through the enemy jungle without vision. Walking into 3 heroes while trying to kill a support is how Riki players throw games.
- Do not skip BKB because you “feel tanky.” Invisibility is not tankiness. One stun chain and you are dead regardless of HP.
- Do not farm for 40 minutes. Riki is not Anti-Mage. Your gold efficiency comes from kills and map control, not AFK farming. If you are not fighting by 18 minutes with Diffusal, you are playing the hero wrong.
- Do not pick Riki into heavy AoE. Leshrac, Lina, Jakiro, Sand King — heroes with constant AoE reveal and damage Riki even through invisibility if they hit the right area.
Advanced Techniques Only High-MMR Players Know
- Smoke Screen vision abuse: Place Smoke Screen on the enemy side of a high ground ward spot when they try to deward. They cannot use items to destroy the ward while silenced, buying your ward extra time.
- Creep wave manipulation: When split-pushing, kill the ranged creep in the enemy wave and leave the melee creeps alive. This creates a slow push toward the enemy tower without revealing your position.
- Tricks of the Trade dodge: With practice, you can dodge predictable abilities like Lina’s Laguna Blade, Lion’s Finger of Death, or Sniper’s Assassinate by timing Tricks of the Trade to go invulnerable as the projectile arrives.
- Gem baiting: If an enemy buys Gem of True Sight, intentionally let them see you in a place where your team is hiding. They will chase the “revealed” Riki and walk into a 5-man ambush.
Frequently Asked Questions
Both roles are viable, but carry Riki has a higher winrate in pub games across all brackets. Position 4 Riki is more common in Immortal and pro games because the vision denial and Smoke Screen utility scale better with team coordination. For solo queue climbing, carry Riki is more reliable because you do not depend on your team to follow up on your ganks.
Bounty Hunter is Riki’s hardest counter because Track completely negates permanent invisibility for 30 seconds. Slardar is a close second with Corrosive Haze providing true sight and armor reduction. If you are looking for a support counter, Lion with consistent Dust usage is extremely effective.
Max Blink Strike first on carry Riki. The reduced charge cooldown and bonus damage are essential for securing early kills and farming heroes. On support Riki, max Smoke Screen first because the increased miss chance and slow provide more team utility in early fights.
Buy Aghanim’s Scepter when your team has a strong frontline initiator (Mars, Axe, Tidehunter, Enigma) who can jump into the middle of the enemy team. The ability to cast Tricks of the Trade on an ally creates devastating AoE damage combos. If your team lacks a frontline, skip Aghanim’s and build more personal damage or survivability.
First, identify who is carrying the Gem by clicking on enemy heroes. Then, focus that hero in teamfights — if they die, the Gem drops and your invisibility is restored. Second, play around the Gem’s 1200 radius. Stay more than 1200 units away and use Blink Strike to engage from outside detection range. Third, set up ambushes where the Gem carrier walks into your team. Gem carriers often get overconfident because they can see you.
Yes, Diffusal Blade remains Riki’s most important item. The Agility it provides directly increases backstab damage, and the mana burn synergizes perfectly with Riki’s playstyle of extended engagements. The slow active also helps keep targets in Smoke Screen. There is no replacement — buy it every game as your first major item.
Absolutely, but only as a last-pick into favorable drafts. Immortal Riki players pick the hero when they see squishy cores, weak vision supports, and limited AoE on the enemy team. He is a niche pick, not a first-phase hero. With proper execution, Riki maintains a 50-51% winrate even in Immortal brackets.
Dominate From the Shadows
Ready to climb with Riki but stuck in detection-heavy brackets Our Immortal-rank coaches can teach you the advanced Riki techniques that make the difference between pub stomping and actually climbing MMR.


