

Best Dota 2 Settings 2026: Options, Hotkeys, Video

Your Dota 2 settings are the foundation everything else runs on. The wrong renderer costs 30+ FPS. A misaligned hotkey layout adds 0.2 seconds to every ability cast. Camera speed set too low means your eyes reach the fight 0.5 seconds after everyone else’s. These gaps compound over hundreds of games and cost real MMR.
This guide covers every settings category — video and renderer choices, graphics tuned for FPS vs quality, hotkey layout, cast modes, camera configuration, and network tuning — with specific recommended values for 2026 (current patch 7.41f baseline). Whether you are fresh out of calibration or trying to squeeze an extra 40 FPS out of an older machine, the settings below give you a clean baseline to start from.
If you want to understand how MMR is calculated alongside your settings optimisation, our MMR boosting guide explains the ranking mechanics from calibration through to Immortal.
In This Guide
Video Settings: Resolution, Renderer, and Render Scale
The video settings tab sets the engine’s core output parameters. These decisions affect everything from visual clarity to the frame rate floor your machine delivers in a five-versus-five teamfight.
Resolution: Native Is Always the Starting Point
Run Dota 2 at your monitor’s native resolution whenever your GPU supports it. At 1080p (1920×1080) the game looks exactly as Valve designed it. Dropping below native — for example to 1600×900 — gives a small FPS boost but introduces visual softness that makes skill shots and small spell indicators harder to read in teamfights. The trade-off is rarely worth it unless your machine has less than 4 GB of VRAM and cannot achieve stable 60 FPS through other means.
If you are on a 1440p or 4K monitor, you can run at 1080p borderless windowed to recover FPS with minimal quality loss. Fullscreen Exclusive mode delivers the lowest input latency; borderless windowed is more convenient for alt-tabbing but adds a small latency overhead that is imperceptible on most systems above 100 FPS.
Renderer: Vulkan vs DX11 vs OpenGL
The renderer choice is the single biggest FPS lever in Dota 2’s video tab. Each renderer uses a different API to talk to your GPU, and the performance difference can be 20-40 FPS on identical hardware depending on the renderer and driver version.
- Vulkan — recommended for any GPU manufactured after 2018. Delivers the highest frame rates and lowest CPU overhead on modern hardware (AMD Radeon RX 5000 series and newer, Nvidia RTX 20-series and newer). If your drivers are current, start here.
- DX11 — the stable fallback. If Vulkan causes crashes or visual artefacts, switch to DX11. On some older Nvidia hardware DX11 actually outperforms Vulkan. Matches or beats Vulkan on Intel Arc cards as of mid-2026 driver releases.
- OpenGL — legacy path for very old GPUs (pre-2014) or specific Linux configurations. Do not use on Windows if your card supports Vulkan or DX11.
The practical rule: launch with Vulkan, test in a bot game for 10 minutes. If stable, keep it. If you see stutters or black flickers at any point, switch to DX11 and leave it there.
Render Scale: Near-Invisible Quality Loss at 90 Percent
Render scale determines what percentage of your native resolution the game actually renders before upscaling to the display. At 100% you get a perfect one-to-one render. At 90% the engine renders at 1728×972 on a 1080p display and then scales up. The quality difference at 90% is nearly invisible in motion; the FPS gain is 10-18% depending on GPU and resolution.
Below 80%, upscaling artefacts appear visibly on hero models and spell visual effects. If you find yourself dropping below 80% to maintain playable FPS, the real issue is shadow and effects quality — fix those first (see next section) before touching render scale further.

Graphics Settings: FPS vs Quality Tradeoffs
Dota 2 gives you six graphics quality sliders beyond the renderer and render scale. Each has a different cost-to-benefit ratio for competitive play. Here is what each setting actually costs in frames — and whether the cost is worth paying.
| Setting | FPS Impact | Ranked Play | Visual Quality |
|---|---|---|---|
| Texture Quality | Low (VRAM bound) | High | High |
| Shadow Quality | High (15-25% GPU) | Off or Low | Medium |
| Effects Quality | Medium-High | Low | Medium |
| Ambient Occlusion | High (GPU compute) | Off | Low |
| Anti-Aliasing | Medium | Off or FXAA | FXAA |
| Texture Streaming | Reduces VRAM use | On (low VRAM) / Off | Off |
Shadows: The Biggest FPS Drain to Turn Off
Shadow quality is the single setting that costs the most frames for the least competitive gain. At High or Ultra quality, shadow rendering consumes 15-25% of total GPU budget on mid-range hardware. For ranked play, set shadows to Off or Low. You will not miss them — Dota 2’s minimap, sound cues, and hero model positions give you all the spatial information you need in a fight without shadow geometry adding to the load.
Effects Quality and Readability
Counter-intuitively, reducing effects quality often improves in-game awareness. On Low or Medium, hero ability animations are less visually noisy, making it easier to track enemy positions in a clustered teamfight. This is why many high-MMR players run effects on Low — not just for FPS, but for visual clarity. High effects settings can visually obscure critical information (who is targeting whom, where the disable landed) under particle overload.
Texture Quality: Do Not Compromise Here
Unlike shadows and effects, running texture quality below High makes hero models look muddy and skill-shot indicators harder to distinguish on dark map terrain. As long as your GPU has at least 3 GB of VRAM (most GPUs from 2016 onwards), keep textures on High. It has minimal FPS impact and meaningful visual clarity benefit — especially on heroes with small targeting hitboxes like Mirana or Windranger.
Recommended FPS-Priority Profile
Shadow: Off — Effects: Low — Ambient Occlusion: Off — Anti-Aliasing: Off — Texture: High — Render Scale: 90%. This profile reliably adds 30-50 FPS on mid-range hardware (GTX 1060 or RX 580 class) compared to the Medium preset, at essentially zero visual clarity cost for competitive play.
Best Hotkey Layout for Ranked Play
Hotkeys are personal, but there are structural principles that separate efficient layouts from layouts that slow decision-making. The recommendations here come from the baseline TeamSmurf coaches use with new clients regardless of bracket.
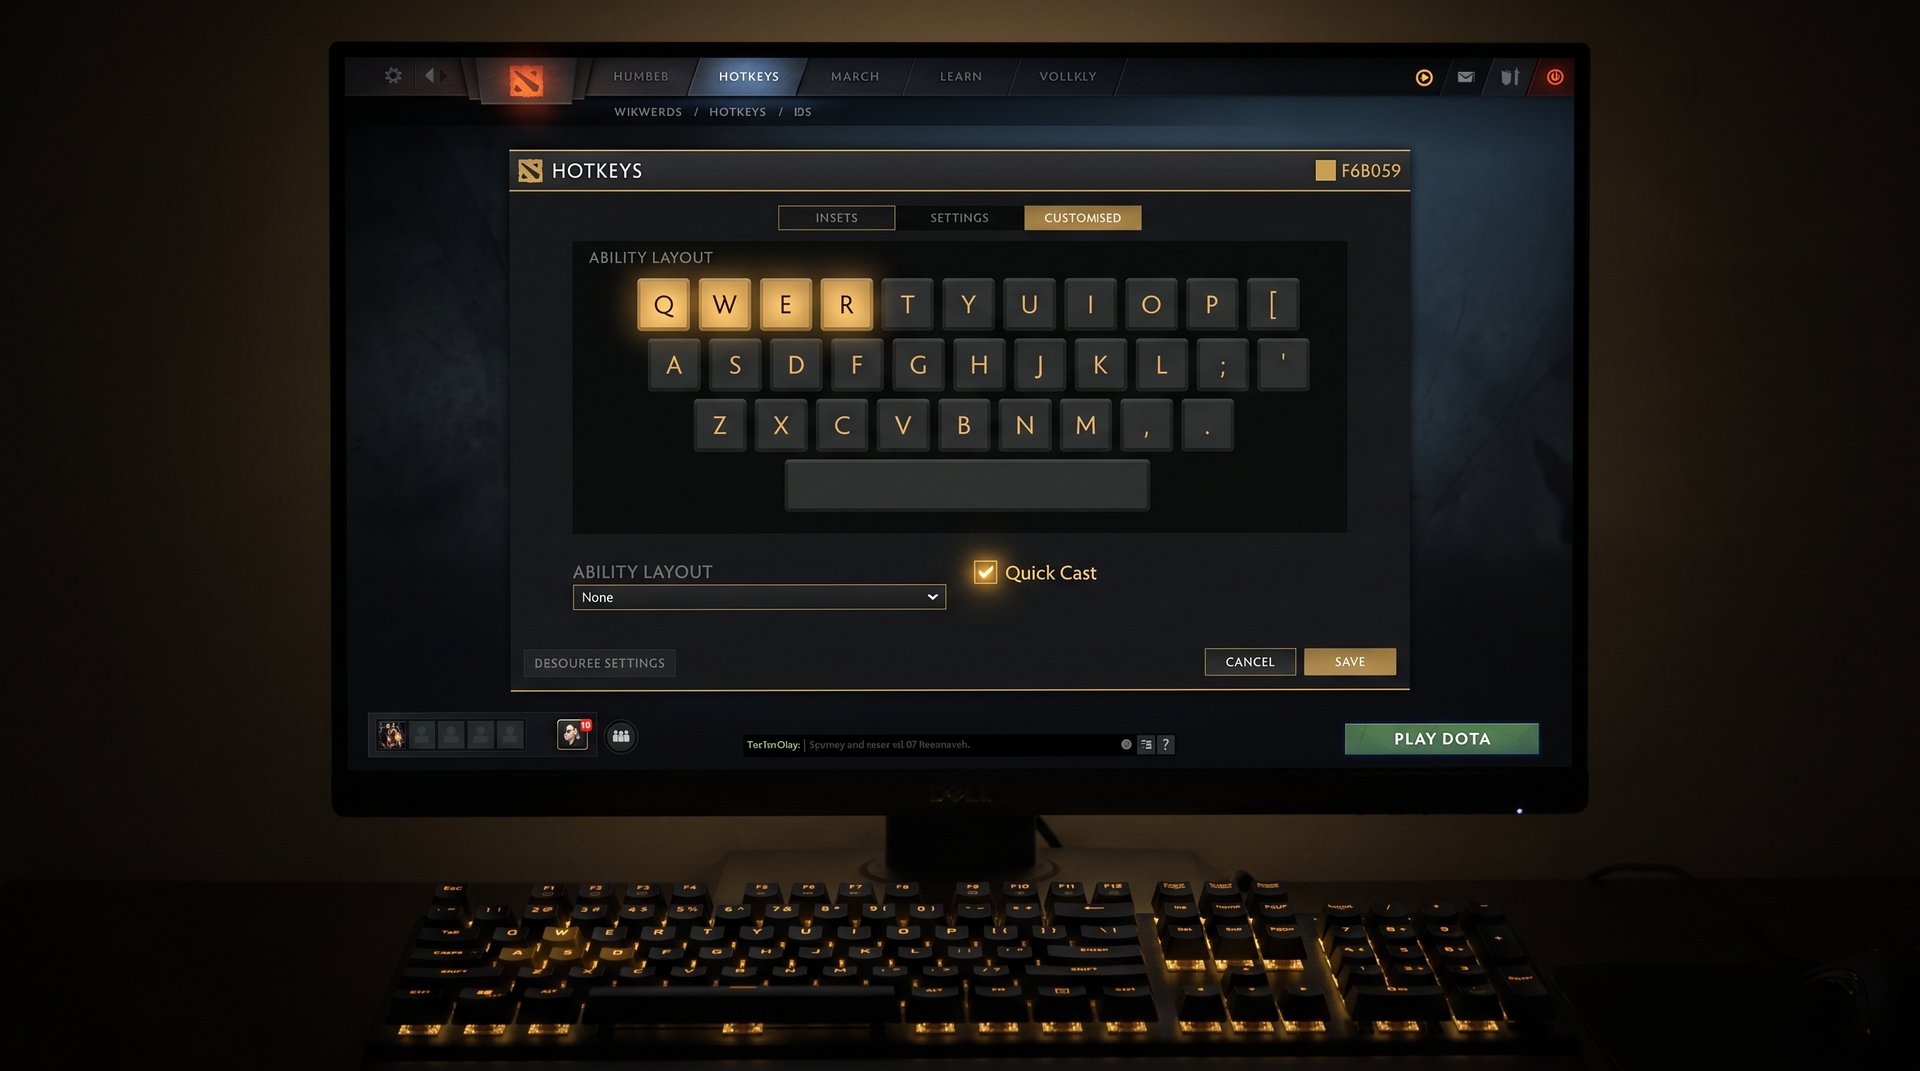
Ability Keys: QWER Plus D and F
The default QWER for abilities 1-4 is the competitive standard for a reason: QWER sits under the index, middle, ring, and pinky fingers naturally when your hand is in gaming position, minimising travel distance from WASD movement keys. Abilities D and F (default Active Items 1 and 2) complement this perfectly and are reachable without large hand movement.
What to avoid: number keys 1-6 for abilities. They are too far from the movement hand position and add noticeable reaction-time overhead for frequently used spells that need to fire mid-movement.
Item Hotkeys: Move Them Closer
Default item keys are 1-6 across the number row. The professional standard rebinds frequently used items to keys closer to the movement hand. A clean starting layout:
- Z, X, C for items 1, 2, 3 — left hand bottom row, reachable without moving your wrist
- D, F for items 4 and 5 if not already used for ability slots
- V for Town Portal — single press, reachable instantly during a fight or rotation
The goal: your most-used items (TP, active items like Black King Bar or Blink Dagger) reachable without any large hand shift. Every 100ms spent finding a key is 100ms not spent tracking the fight or repositioning your hero.
Consistency Beats Optimality
The layout you practice 1,000 games with beats the theoretically optimal layout you switched to last week. Pick a scheme, commit to it for at least 50 ranked games, then evaluate. Constant rebinding resets muscle memory and costs more MMR than any suboptimal key placement.
Quick Cast vs Smart Cast vs Legacy Cast
Cast mode determines what happens when you press an ability key. Getting this wrong is one of the most common sources of ability misfires and missed skill shots at lower MMR, and one of the most impactful single settings changes available.
| Cast Mode | How It Works | Best For | Main Risk |
|---|---|---|---|
| Legacy Cast | Press key, then click to confirm direction or target | New players learning spell ranges | Slowest — one extra click every spell |
| Quick Cast on Release | Hold key, aim cursor, release to cast | Precise directional abilities requiring held aim | Accidental cast if key held too long |
| Quick Cast | Press key, casts instantly at cursor position | High MMR ranked — nearly universal above Guardian | Misfire if cursor not positioned before keypress |
| Smart Cast | Quick Cast plus auto-target logic for unit spells | Supports where nearest ally is always correct | Fires at unintended unit in chaotic fights |
Why Quick Cast Is Standard at Ranked Level
Quick Cast removes the confirmation click from every ability use, cutting effective cast time by one full click animation on every spell — roughly 0.15-0.25 seconds depending on your mouse. Over a 40-minute ranked game this compounds into hundreds of saved actions. At Guardian bracket and above, opponents can punish the extra window that Legacy Cast creates on gap-closing abilities like Storm Spirit’s Ball Lightning, Pudge’s Hook, or Earthshaker’s Echo Slam.
Enable Quick Cast globally: Options — Hotkeys — Advanced Hotkeys — set Quick Cast to On for all abilities. You can set individual abilities to Legacy while others use Quick Cast, which is useful while learning a new hero’s range and targeting.
Smart Cast: For Specific Playstyles Only
Smart Cast is a modifier on top of Quick Cast, not a separate mode. It adds auto-targeting logic: unit-targeted spells fire at the nearest valid target rather than requiring precise cursor placement. Useful for pure support players where Healing Ward or Urn should always hit the nearest low-health ally. Creates targeting problems on nukers or any hero where precise target selection matters (Bane’s Nightmare, Lion’s Hex). Recommended off unless you play position 5 support exclusively.
Camera Settings and Speed
Camera control is the most underrated settings category. Poor camera configuration forces your eyes to work harder than necessary, adding a perceptible delay to off-screen reactions in a game where half a second decides who lives.
Camera Speed: Higher Than Default
Dota 2’s default camera speed is 2000. Most high-MMR players run between 2500 and 3200. Faster camera movement lets you check ward positions, off-screen fights, and return to your hero without the sluggish pan the default creates. A slow camera forces you to wait out the pan; a fast camera makes map checks feel instant.
Start at 2500 and raise by 200 units per session until panning feels instantaneous but not disorienting. The right speed is one where you can look at a ward position and snap back to your hero in a single natural eye movement with no perceptible travel time.
Edge Panning: Most High-MMR Players Turn It Off
Edge panning scrolls the camera when your cursor reaches the screen edge. Most experienced players disable it. The argument against: when your cursor is at the screen edge to trigger a pan, it is away from your hero and enemy units for the entire duration of the pan. Middle mouse button drag lets you pan while keeping cursor aim available for instant spell casts or right-click commands.
If you use a laptop trackpad without a scrollable middle button, edge panning may be your only practical navigation option — keep it on at low sensitivity. For all other setups, turning off edge panning and learning middle mouse navigation is a meaningful map awareness upgrade.
Camera Lock and Hero Follow
Spacebar locks the camera to your hero by default. Many players bind a secondary key (Alt+F is common) to toggle camera lock so they can free-look the map mid-fight without a two-handed keyboard action. The test: you should never consciously search for the camera lock key during a fight. If you do, move it somewhere more reflexive.
Network and Game Settings
Dota 2’s network settings split between the in-game UI and the developer console. They are worth checking once per setup — especially if you play across multiple regions or notice jitter in fast-paced fights.
Interpolation and Update Rate
The two console variables most relevant to network feel are cl_interp and cl_updaterate. Interpolation controls how the game smooths entity positions between received server packets — lower values reduce visual delay but require a stable connection.
- cl_interp 0.05 — recommended for stable, low-jitter connections (fiber or cable, under 50ms ping)
- cl_interp 0.1 — smoother on connections over 80ms ping or with visible packet variation
- cl_updaterate 30 — Dota 2’s default; matches the server tick rate and is correct for most players
Set these via the developer console (tilde key ~ once the console is enabled under Advanced Options). Type the variable name, a space, and the value, then press Enter. These persist across sessions.
Region Selection
In Dota 2’s matchmaking settings, explicitly select which regions to queue. Playing on your nearest server has a real impact on how ability trade timings feel. A 30ms versus 120ms latency difference visually shifts when spells register relative to when your opponent reacts — this affects whether certain ability trades feel reliable or like a coin flip.
Auto Attack Setting
The auto-attack setting under Game — Gameplay controls whether your hero attacks nearby enemies when no other command is queued. For position 1 carries, Always On is correct. For supports and offlaners, Never or Defensive Only prevents accidental aggro in the early laning phase when you should be stacking or pulling instead of trading hits.
Advanced Options Worth Enabling
Several settings outside the main tabs materially improve game awareness. These are often missed because they require Advanced Settings or the developer console.
Minimap Hero Size
The console command dota_minimap_hero_size 700 increases hero icon sizes on the minimap beyond the in-game slider’s maximum. The default is 600; setting 700-800 makes team positions significantly easier to read during clustered fights. Values above 800 begin overlapping icons on a busy minimap — 700 is the practical sweet spot for most monitor sizes.
Disable Auto Attacks for a Session
Console command dota_disable_auto_attacks 1 applies for the current session. More reliable than the in-game toggle, and useful for support players who want precise aggro control during the laning phase. Set to 0 to re-enable. Add it to your autoexec.cfg to make it permanent.
FPS Cap
Cap your frame rate to your monitor’s refresh rate or 1-2 frames below it. Uncapped FPS causes unnecessary GPU heat and power draw with no gameplay benefit — and can cause micro-stutters when the GPU over-produces frames the display cannot render. Use fps_max 144 in the developer console (substitute your monitor’s actual refresh rate). The in-game FPS limiter in Advanced Video Settings does the same thing.
Autoexec.cfg: Persist Console Settings
Console variables reset when Dota 2 restarts unless you add them to an autoexec.cfg file. Create or edit the file at: Steam/steamapps/common/dota 2 beta/game/dota/cfg/autoexec.cfg. Each line is one command followed by a space and its value. Any variable that works in the console works in autoexec — the right place for cl_interp, dota_minimap_hero_size, fps_max, and any other persistent console tuning.
Once settings are dialled in, the remaining MMR gains come from decision-making, hero pool, and map awareness. If you are stuck in a bracket despite correct mechanics, the best Dota 2 boosting services give you a practical path to your target MMR. For questions about the process, our guide on is Dota 2 boosting safe covers the common concerns. A Dota 2 coaching session identifies the specific decisions holding your rank down more directly than any settings change can.
Settings Fixed — Now Fix Your MMR
An optimal settings profile gives you a cleaner foundation. The MMR gains above 4K come from game sense, draft reading, and match-up knowledge. Our Dota 2 coaches work with players at every bracket to identify the specific habits and decision points holding their rank down.



