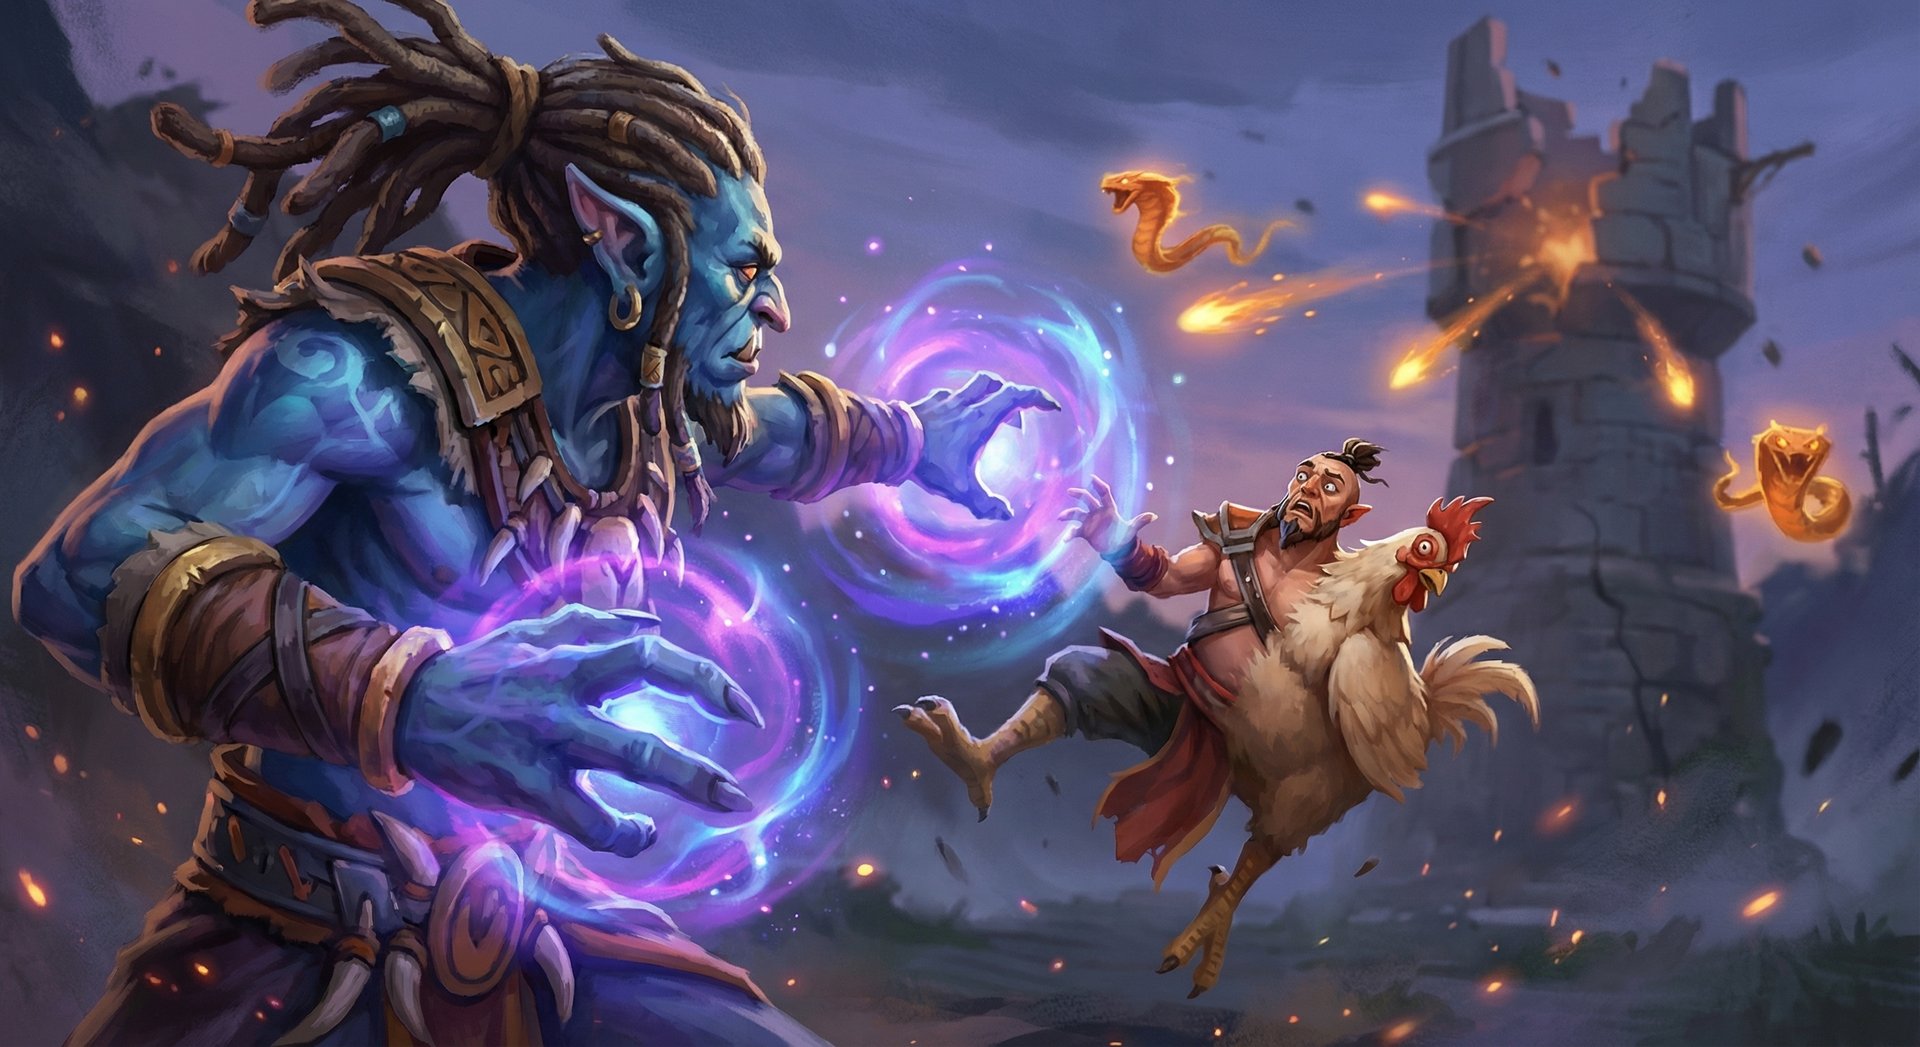
How to Master Shadow Shaman in Dota 2: The Ultimate Guide for Every Rank (2026)

Shadow Shaman is one of the most devastating position 4 and 5 heroes in Dota 2 — a walking tower-deletion machine disguised as a humble troll shaman. With two of the longest single-target disables in the game, a nuke that bounces between enemies like chain lightning, and an ultimate that can melt structures or trap heroes inside a serpent prison, Rhasta rewards players who understand timing, positioning, and objective-focused Dota.
Whether you are a Herald player looking for your first reliable support or a Divine grinder trying to close out games faster, Shadow Shaman offers something rare: a support who can single-handedly end games by taking objectives. In this guide, you will learn exactly how to play him at every skill level, which items to build and why they differ by rank bracket, how to dominate your lane, and the advanced tricks that separate good Rhasta players from great ones.
Table of Contents
Why Shadow Shaman Is Dota’s Best Tower Killer
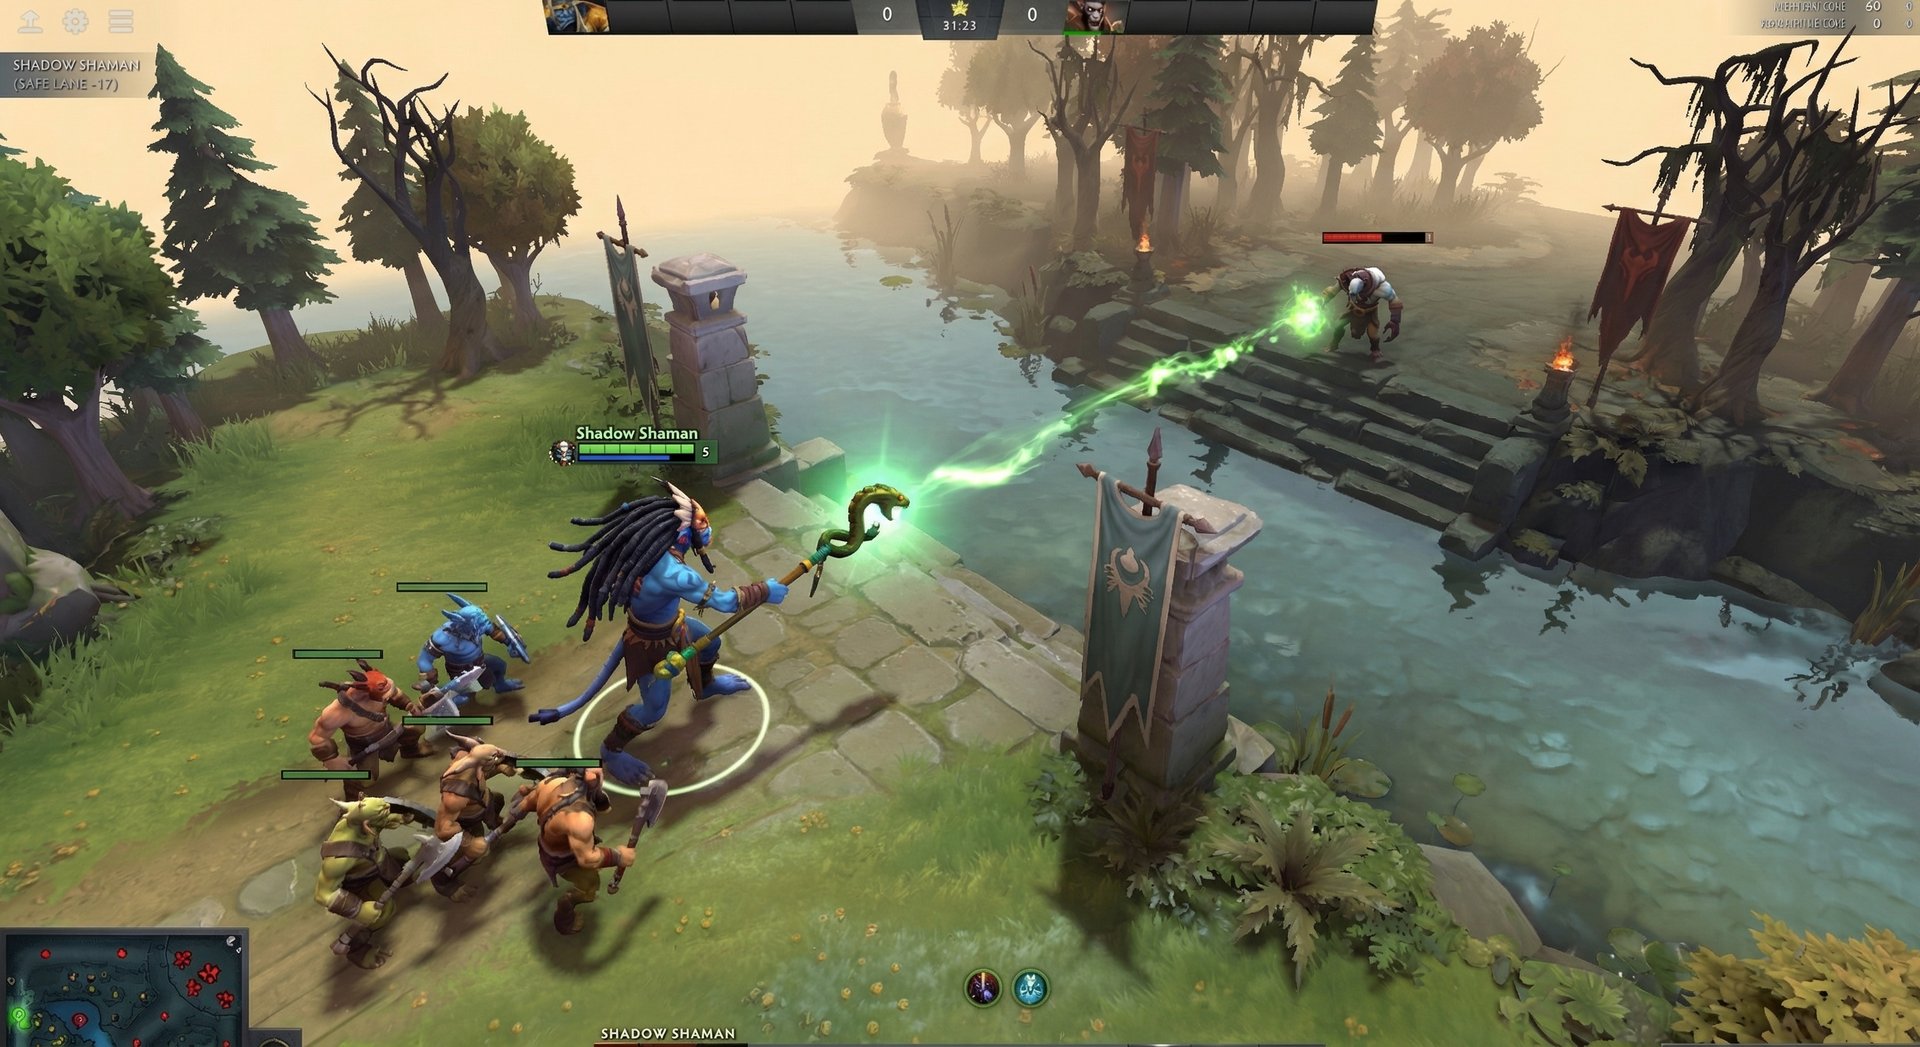
Shadow Shaman — known by his real name Rhasta — occupies a unique niche in the Dota 2 hero pool. He is a hard support with the highest tower-killing potential of any support hero in the game. His Mass Serpent Ward ultimate deals physical damage to structures, meaning a single well-placed ward trap on a tower can delete it in seconds without any allied creeps nearby.
According to Dotabuff, Shadow Shaman maintains a consistent 51-52% winrate across all brackets, with his winrate climbing above 53% in Herald through Archon where games tend to drag and objective-taking supports are disproportionately valuable. His pick rate sits around 7-9%, making him a consistently popular support choice without being a first-ban priority.
What makes Rhasta special is his kit synergy. Hex and Shackles provide over 8 seconds of combined lockdown on a single target — enough to guarantee a kill on virtually any hero in the game when paired with even one ally. Ether Shock gives him strong lane harassment and push potential. And Mass Serpent Ward is a game-winning ultimate that forces the enemy team to respond to your pushes or lose buildings.
Current meta relevance: In patch 7.38, Shadow Shaman thrives in push-oriented lineups and deathball strategies. With games averaging around 35-40 minutes in pub play, his ability to accelerate the game by taking early towers makes him an excellent pick when your team wants to end before the enemy carry comes online.
Abilities Deep Dive
Ether Shock (Q)
Ether Shock releases a burst of chain lightning that bounces between nearby enemies, dealing 140/200/260/320 magical damage to each target hit. At max level, it hits up to 7 targets, making it one of the strongest early-game nukes for both lane harassment and wave clearing.
Hidden mechanics and tips:
- Bounce priority: Ether Shock prioritizes the closest valid targets. You can manipulate bounces by positioning so enemy heroes are nearest to the initial target.
- Cast range is 600 — longer than most players realize. You can often Ether Shock from fog or treeline without exposing yourself.
- Wave clear timing: At level 3 Ether Shock (260 damage), you can one-shot ranged creeps. At level 4 (320 damage), you nearly one-shot the entire creep wave with a single cast.
- Mana cost is steep (95/105/135/160). Early game, you can only afford 2-3 casts before you are completely dry. Always carry clarities.
Hex (W)
Hex transforms an enemy unit into a harmless critter for 1.25/2/2.75/3.5 seconds. The target cannot attack, cast spells, or use items during the duration. Their movement speed is set to 100/100/100/100 — essentially rooted in place for practical purposes.
Hidden mechanics and tips:
- Hex is an instant cast with no projectile. Unlike Lion’s Hex, Shadow Shaman’s version applies immediately, making it impossible to react to with BKB if you are in range.
- Hex dispels certain buffs on the target, including Haste, Double Damage, and some other rune-based effects.
- Movement speed during Hex is 100, but the target can still technically move. At high MMR, hexed targets will try to juke into trees — be ready to follow.
- Cast range is 500 — shorter than Ether Shock. Positioning aggressively for Hex is one of the biggest skill expressions on Shadow Shaman.
- Hex cancels channeling spells. Use it to interrupt Black Hole, Fiend’s Grip, Death Ward, and similar abilities.
Shackles (E)
Shackles channels on an enemy unit, stunning and dealing 60/120/180/240 magical damage per second for 2.75/3.5/4.25/5 seconds. This is a channeling ability — Shadow Shaman cannot move, attack, or use items during Shackles. If Shadow Shaman is stunned, silenced, or killed, the channel breaks.
Hidden mechanics and tips:
- Shackles pierces spell immunity at all levels — but does not deal damage through BKB. The stun still applies. This is critical for locking down BKB carries in the late game.
- The channel tether has a break distance. If the target is forced far enough away (Force Staff, Hook, etc.), the channel breaks.
- Shackles deals damage in 0.1-second ticks, totaling 660/840/1020/1200 magical damage at max duration before reductions. Combined with Ether Shock, Shadow Shaman can deal 1,500+ magical damage solo.
- You can Hex first, then Shackles immediately as Hex ends for a combined 8.5 seconds of disable at max level. This combo kills most heroes with minimal ally assistance.
- Shackles grants vision of the target during channeling. Use this to prevent juke attempts in trees.
Mass Serpent Ward (R) — Ultimate
Mass Serpent Ward summons a ring of 10 serpent wards at the target location. Each ward has 2/3/4 attacks per second and deals 40-45/55-60/70-75 physical damage. Wards last 45 seconds and are stationary — they cannot move but will attack the nearest enemy unit or structure within range.
Hidden mechanics and tips:
- Wards deal physical damage — they benefit from armor reduction (Desolator aura from allies, Solar Crest, etc.) and are not affected by magic resistance.
- Total DPS of 10 wards at level 3: Approximately 700-750 physical damage per second. This melts towers in 5-6 seconds and kills most heroes trapped inside in under 3 seconds.
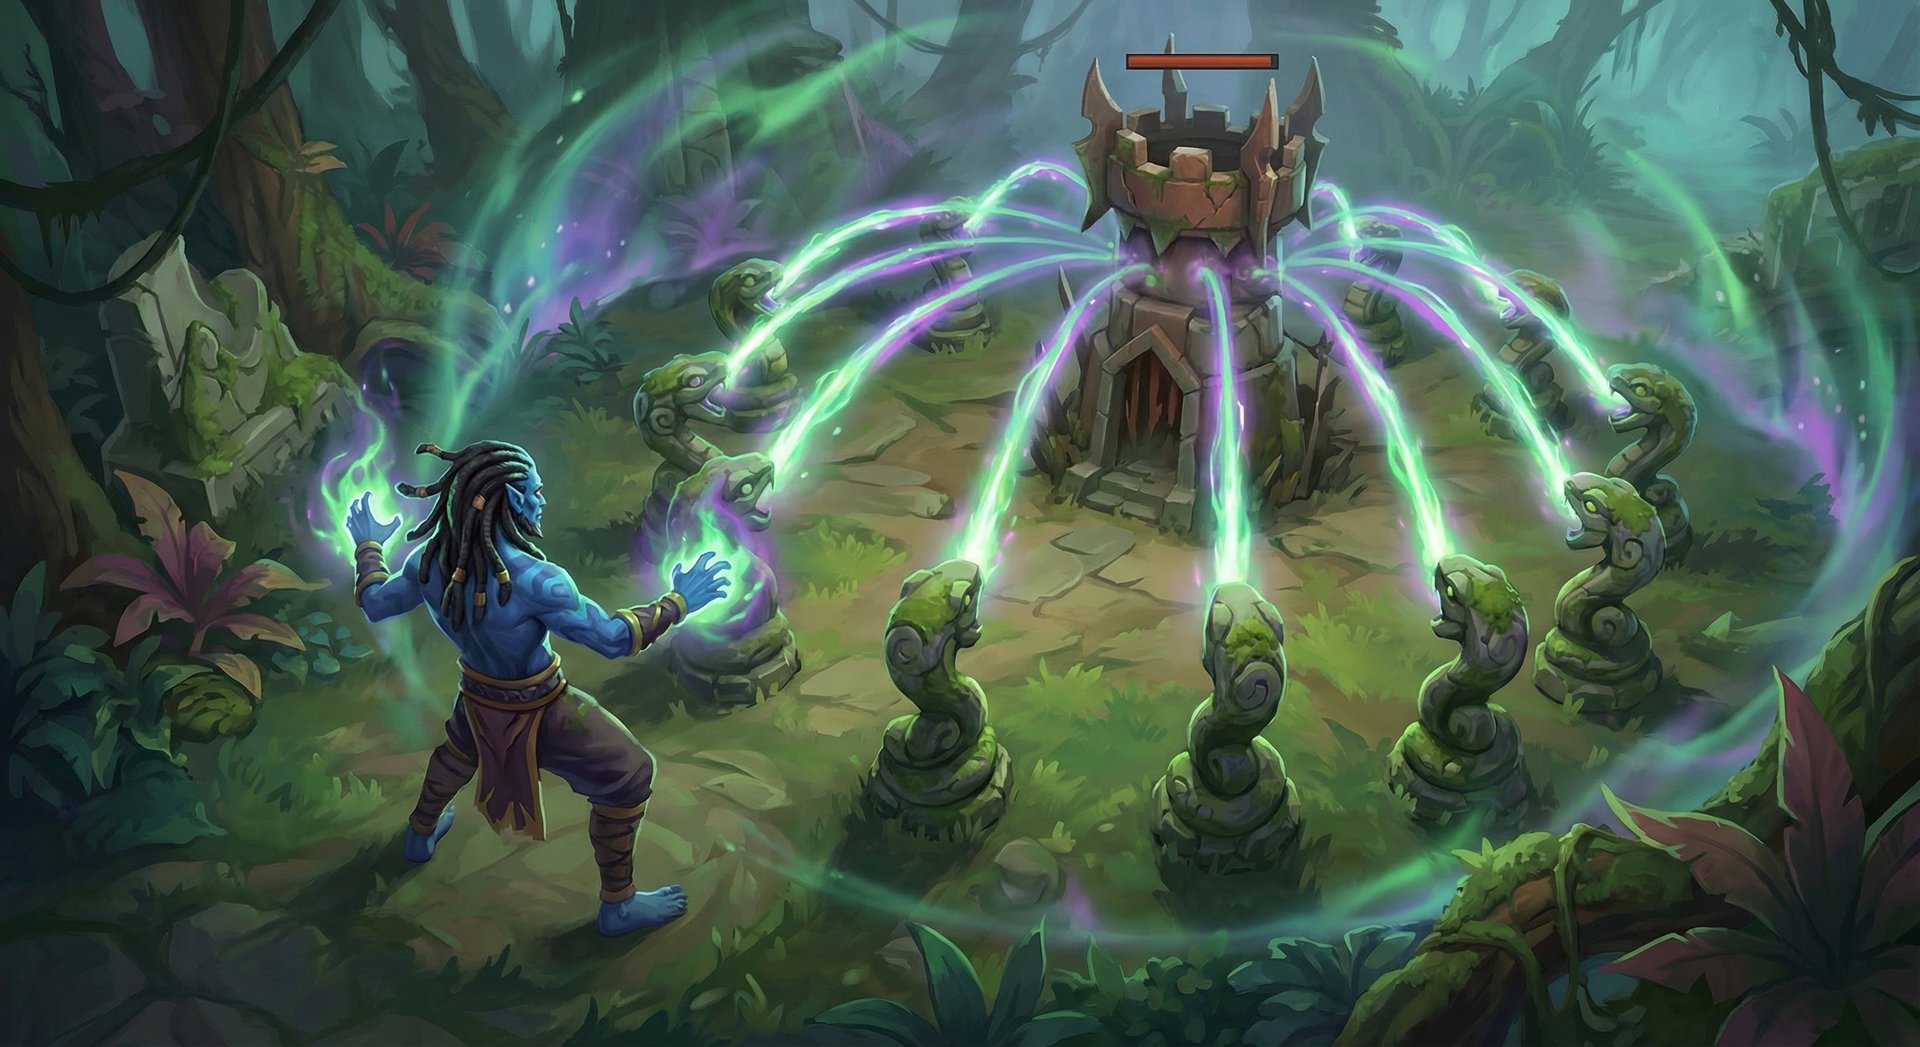
- Trap placement: If you place wards directly on top of a hero, they form a tight ring that traps the target inside. The target cannot move without destroying wards first. This is the single most important Shadow Shaman skill to practice.
- Tower pushing: Place wards slightly in front of a tower but within attack range. The tower will target one ward at a time, and with 10 wards, the tower dies before it can kill them all.
- Each ward gives gold and XP when killed. At 100-150 gold per ward, enemies can gain up to 1,500 gold from destroying all 10. Do not drop wards carelessly.
- Aghanim’s Scepter adds Serpent Wards to Shackles, spawning wards around the shackled target. This massively increases your kill potential and push power.
- Aghanim’s Shard causes Mass Serpent Ward to split into two groups when placed, allowing simultaneous push on two lanes or a wider trap setup.
Skill Build Order
| Situation | Level 1 | Level 2 | Level 3 | Level 4 | Level 5 | Level 6 | Priority |
|---|---|---|---|---|---|---|---|
| Standard (pos 5) | Q | W | E | Q | Q | R | Q > E > W > R |
| Kill lane (pos 4) | E | W | Q | E | E | R | E > Q > W > R |
| Push-focused | Q | E | Q | Q | Q | R | Q > E > W > R |
| Roaming ganker | W | E | Q | E | E | R | E > W > Q > R |
Standard build maxes Ether Shock first for lane harass and wave clear. Kill lane maxes Shackles for maximum lockdown duration. Push-focused is identical to standard but prioritizes early levels in Q for faster wave pushing. Roaming ganker values the disable duration of Shackles to set up kills across the map.
Item Builds by Rank Bracket
| Rank Bracket | Starting Items | Early Game | Core Items | Late Game |
|---|---|---|---|---|
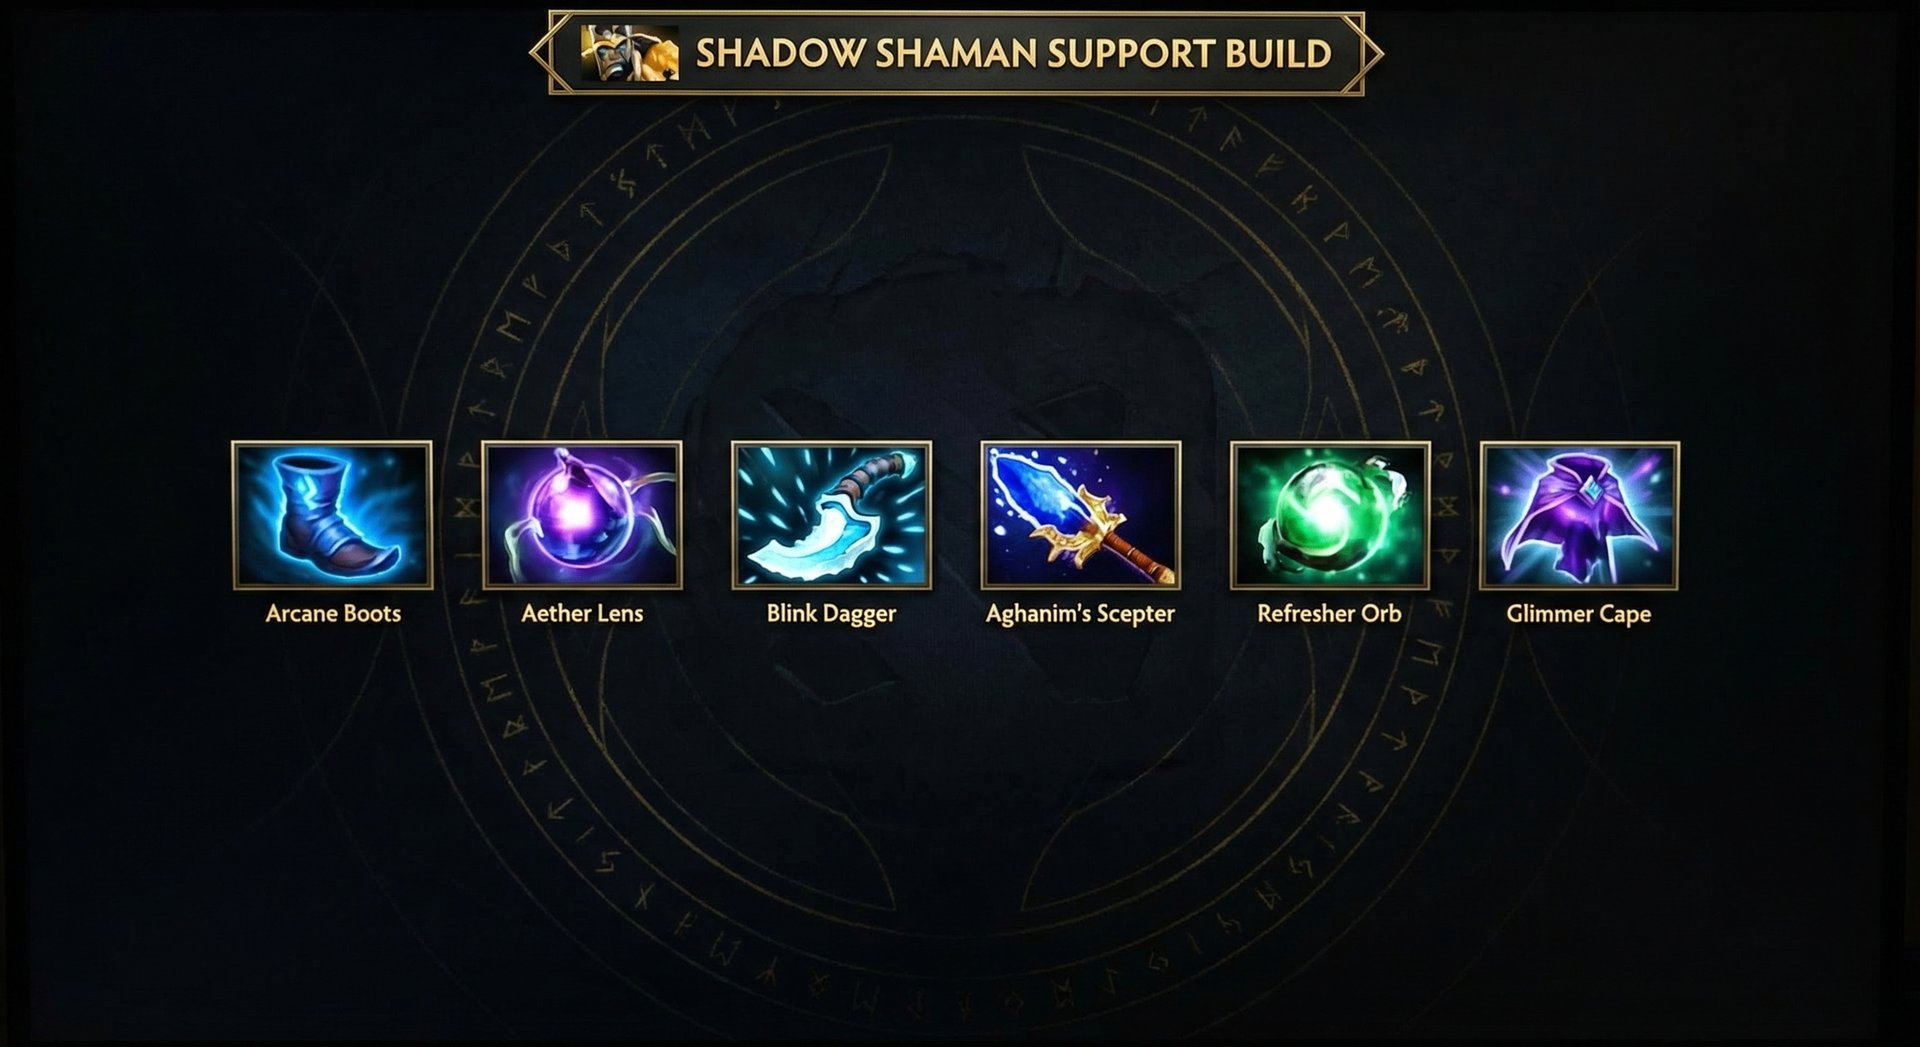
| Herald – Crusader | Tango, Clarity x2, Blood Grenade, Observer Ward | Arcane Boots, Magic Wand | Aether Lens, Glimmer Cape | Aghanim’s Scepter, Force Staff |
| Archon – Legend | Tango, Clarity x2, Blood Grenade, Sentry Ward | Arcane Boots, Magic Wand, Wind Lace | Aether Lens, Blink Dagger | Aghanim’s Scepter, BKB |
| Ancient – Divine | Tango, Clarity x2, Smoke, Sentry Ward | Tranquil Boots, Magic Wand, Wind Lace | Blink Dagger, Aether Lens | Aghanim’s Scepter, Refresher Orb |
| Immortal | Tango, Clarity x2, Smoke, Sentry Ward | Tranquil Boots, Magic Wand | Blink Dagger, Aghanim’s Shard | Aghanim’s Scepter, Refresher Orb, BKB |
Why Items Differ by Rank
Herald-Crusader players should prioritize Arcane Boots because mana management at this level is poor — you will run out constantly without the mana pool. Glimmer Cape is recommended over Blink because lower-ranked players rarely have the positioning discipline to use Blink effectively, and Glimmer’s defensive save on allies is more forgiving.
Archon-Legend players start transitioning to Blink Dagger as the core offensive item. At this bracket, players understand the Blink-Hex-Shackles combo and can execute it reliably. Aether Lens gives you the cast range to initiate from safe distances.
Ancient-Divine players switch to Tranquil Boots because they know how to manage mana with clarities and neutral items. Tranquils provide the movement speed needed to rotate between lanes and set up wards efficiently. Blink is non-negotiable at this level.
Immortal players often rush Blink before any other item because the kill potential it unlocks is worth more than any stat item. Aghanim’s Shard timing (around 15 minutes) is critical — the Shackle wards provide enormous push and kill power. Refresher Orb is the dream late-game item: double Mass Serpent Ward plus double Hex plus double Shackles is 20 wards of pure tower annihilation.
Laning Phase Masterclass
Shadow Shaman has one of the highest base attack damages among supports at 71-78 (with his innate bonus). This means he trades right-clicks favorably against most offlaners and enemy supports in the early game. Combine this with Ether Shock’s heavy nuke damage, and Rhasta can dominate lanes if played correctly.
Positioning and Aggression
In the safe lane (pos 5), your primary job is to zone the enemy offlaner. Shadow Shaman’s 500 attack range and high base damage let you harass from behind the creep wave. Stand between the enemy offlaner and the creep wave, forcing them to choose between last hits and taking damage.
When playing position 4, you typically lane in the offlane. Your job shifts to securing kills with Shackles. Level 1 Shackles provides 2.75 seconds of lockdown — enough for your offlaner to unload their damage and often score a kill against aggressive enemy supports who overextend.
Ether Shock Harass Pattern
The most mana-efficient harass pattern is:
- Wait for the enemy to walk near their own creeps (ensuring bounces hit them).
- Cast Ether Shock targeting a creep adjacent to the enemy hero.
- Follow up with 2-3 right-clicks while they are caught off guard.
- Retreat before drawing excessive creep aggro.
This pattern deals approximately 200-250 damage (after magic resistance) plus your right-click damage at level 2, which is roughly 25-30% of most heroes’ HP pools.
Kill Setup at Level 3-5
At level 3, Shadow Shaman has access to all three basic abilities. The kill combo is:
- Hex the target (instant disable, they cannot react).
- Walk closer during the Hex duration.
- Ether Shock for immediate burst damage.
- Shackles as Hex wears off for extended lockdown.
- Your carry finishes the kill during Shackles.
This combo provides 4-6 seconds of total disable depending on skill levels, which is almost always lethal in a 2v1 scenario.
Lane Partner Synergies
Shadow Shaman pairs best with carries who have high early damage but lack their own lockdown:
- Juggernaut: Hex/Shackles into Blade Fury is a guaranteed kill at level 2. One of the most iconic lane combos in Dota.
- Ursa: Lock them down, Ursa stacks Fury Swipes. Dead in seconds.
- Troll Warlord: Extended disable lets Troll build fervor stacks. Brutal kill pressure.
- Lifestealer: Feast damage during long disables melts targets.
- Luna: Lucent Beam plus Ether Shock nuke combo is devastating.
When to Rotate
Consider leaving your lane at level 5-6 if:
- Your carry is ahead and can solo the lane safely.
- Mid or offlane needs a gank — your double disable guarantees kills.
- You have Ether Shock maxed and can push out a wave before rotating.
- Your ultimate is up and a tower is contestable.
Do NOT rotate if: Your carry is losing the lane, you have no mana, or there are no kill targets elsewhere on the map.
Mid and Late Game Transitions
Shadow Shaman’s Timing Windows
Shadow Shaman has two major power spikes that you must capitalize on:
Spike 1: Level 6 (Mass Serpent Ward)
The moment you hit level 6, identify the weakest enemy tower. Ideally, push the safe lane T1 tower with your team. Drop wards on the tower, Shackle anyone who tries to TP to defend, and watch the tower melt. A successful level 6 push typically takes the tower in 10-12 seconds and gives your team a massive gold and map control advantage.
Spike 2: Blink Dagger timing (14-18 minutes)
Blink Dagger transforms Shadow Shaman from a lane support into a roaming assassin. You can now initiate on any hero from 1,200 range (Blink + Hex range). The combo is Blink-Hex-Shackles-Ether Shock-Wards. If you catch a core hero alone, they are dead 100% of the time unless they have Linken’s Sphere.
Teamfight Positioning
In teamfights, Shadow Shaman is a backline initiator. You should never be the first one jumping in unless you are catching an isolated target. Your positioning priorities are:
- Stay at max Blink range (1,200 units from the fight).
- Identify the highest-value Hex target — usually the enemy carry or the hero channeling a key spell.
- Blink-Hex the priority target, then immediately Shackle them if your team follows up.
- Drop Mass Serpent Ward in the middle of the fight or on the target to zone enemies.
- Use Ether Shock on clustered enemies for AoE damage.
Critical rule: Do not Shackle unless you are safe. Shackles roots you in place for up to 5 seconds — if the enemy team turns on you during channel, you are dead. Always wait for your frontline to absorb the initial burst before committing to Shackles.
Objective-Taking Strategy
Shadow Shaman’s greatest strength in the mid-late game is converting teamfight wins into objectives. After winning a fight:
- Always push a tower immediately. Drop wards on the tower to accelerate the push.
- If the enemy is dead for 30+ seconds, consider pushing high ground with wards.
- Roshan timing: Mass Serpent Ward significantly speeds up Roshan kills. Drop wards inside the pit and Shackle Roshan for damage output.
- Split pushing: In the late game, you can drop wards on a side lane tower and TP to join your team. The wards push independently for 45 seconds.
BKB Timing Decisions
BKB on Shadow Shaman is a luxury but sometimes necessary item. Build it when:
- The enemy has multiple stuns that break your Shackles channel.
- You need to Shackle the enemy carry but they have backline support who will stun you.
- Games are going late and your life matters more (no buyback gold for supports).
Skip BKB when your team has other initiators and you play more of a follow-up role.
Counters: Heroes That Destroy Shadow Shaman
1. Nyx Assassin
Nyx is Shadow Shaman’s worst nightmare. Spiked Carapace reflects Ether Shock damage and stuns you, and Vendetta’s break from invisibility interrupts Shackles before you can react. Mana Burn devastates Rhasta’s small mana pool. How to play around it: Never Ether Shock unless you have vision of Nyx. Save Hex for when Nyx reveals himself. Buy Sentry Wards aggressively.
2. Anti-Mage
Anti-Mage’s Counterspell blocks your Hex (the most critical part of your combo), and Blink allows him to escape Shackles range after Hex wears off. Mana Break drains your already limited mana. How to play around it: Pop Counterspell with Ether Shock first, then follow with Hex. Or wait until AM uses Counterspell offensively before going in. Ward traps are effective if AM blinks into them.
3. Juggernaut
Blade Fury grants spell immunity, making Juggernaut immune to Hex and the damage portion of Shackles. Omnislash kills you instantly since you are a low-HP support who stands still during Shackles. How to play around it: Wait for Blade Fury to end before using your disables. Stay far back in fights to avoid Omnislash targeting. Ghost Scepter is a good counter-item.
4. Rubick
Rubick can steal Mass Serpent Ward and use your own wards against your team. Telekinesis interrupts Shackles, and Fade Bolt reduces your already mediocre right-click damage. How to play around it: After using Mass Serpent Ward, immediately cast Ether Shock or Hex so Rubick steals a less impactful spell. Never leave wards as your last cast.
5. Lifestealer
Rage provides spell immunity, ignoring all of Shadow Shaman’s disables. Feast sustain makes it hard to kill him even with wards. Infest lets him escape ward traps inside an ally. How to play around it: Do not waste disables on Lifestealer during Rage. Focus on disabling other enemy heroes. Ward trap him before he activates Rage if possible.
Heroes Shadow Shaman Destroys
1. Phantom Assassin
PA has no built-in escape from Hex + Shackles and her low HP pool in the early and mid game makes her extremely vulnerable to ward traps. Blur does not help against the physical damage from Mass Serpent Ward. Shadow Shaman can shut down PA’s entire game by constantly pressuring her towers and catching her with Blink-Hex combos.
2. Sniper
Sniper’s biggest weakness is being caught — and Shadow Shaman is the ultimate catcher. Blink-Hex closes the distance instantly. Sniper has no mobility spell to escape Shackles, and ward traps are a death sentence since he has no AoE to clear them quickly.
3. Medusa
Mass Serpent Ward shreds Medusa’s Mana Shield because the wards deal physical damage. Hex prevents Stone Gaze, and the extended disable chain burns through Medusa’s mana during Shackles. In the late game, ward traps force Medusa to waste Split Shot on clearing wards instead of fighting your team.
4. Drow Ranger
Drow has no escape ability and relies on keeping enemies at range. Blink-Hex eliminates that advantage entirely. Shackles holds her in place while your team collapses. Her Marksmanship is disabled in close range, and ward trap damage melts her fragile HP pool.
5. Crystal Maiden
Crystal Maiden’s Freezing Field channel is instantly canceled by Hex. She is slow, squishy, and has no escape — perfect food for Shadow Shaman’s disable chain. In lane, Rhasta’s higher base damage and Ether Shock harass completely dominate CM.
How Pros Play Shadow Shaman in the Current Patch
Shadow Shaman sees regular play in competitive Dota, particularly in push-oriented and early-aggression drafts. Here is how the best players in the world utilize Rhasta:
Draft Context
Pro teams pick Shadow Shaman when they want to end games early. He is frequently paired with heroes like Lone Druid, Beastmaster, and Lycan — other heroes with summons that accelerate tower pushes. The “deathball” strategy of grouping as five and marching down towers is where Rhasta shines brightest.
In recent tournament play, top-tier teams like Team Spirit, Gaimin Gladiators, and Tundra Esports have utilized Shadow Shaman in their position 5 role. Players like Puppey and Cr1t- are known for their Shadow Shaman play, often timing their Blink Dagger around 12-14 minutes and immediately converting it into kills and objectives.
Pro Build Priorities
At the highest level, pros almost universally follow this priority:
- Boots + Wind Lace by minute 3-4 for rotation speed.
- Blink Dagger by minute 12-15 (this is the non-negotiable timing).
- Aghanim’s Shard at minute 15 if available.
- Aether Lens or Force Staff depending on whether they need range or escape.
- Aghanim’s Scepter if the game goes past 35 minutes.
Pro Positioning Patterns
Professional Shadow Shaman players position completely differently from pub players. They rarely use Shackles in teamfights unless the target is already locked down by another hero. Instead, they use Hex as a follow-up disable on priority targets and save Shackles for post-fight tower pushes. The reasoning: a dead Shadow Shaman contributes nothing, but a living Shadow Shaman with Mass Serpent Ward available converts every fight into an objective.
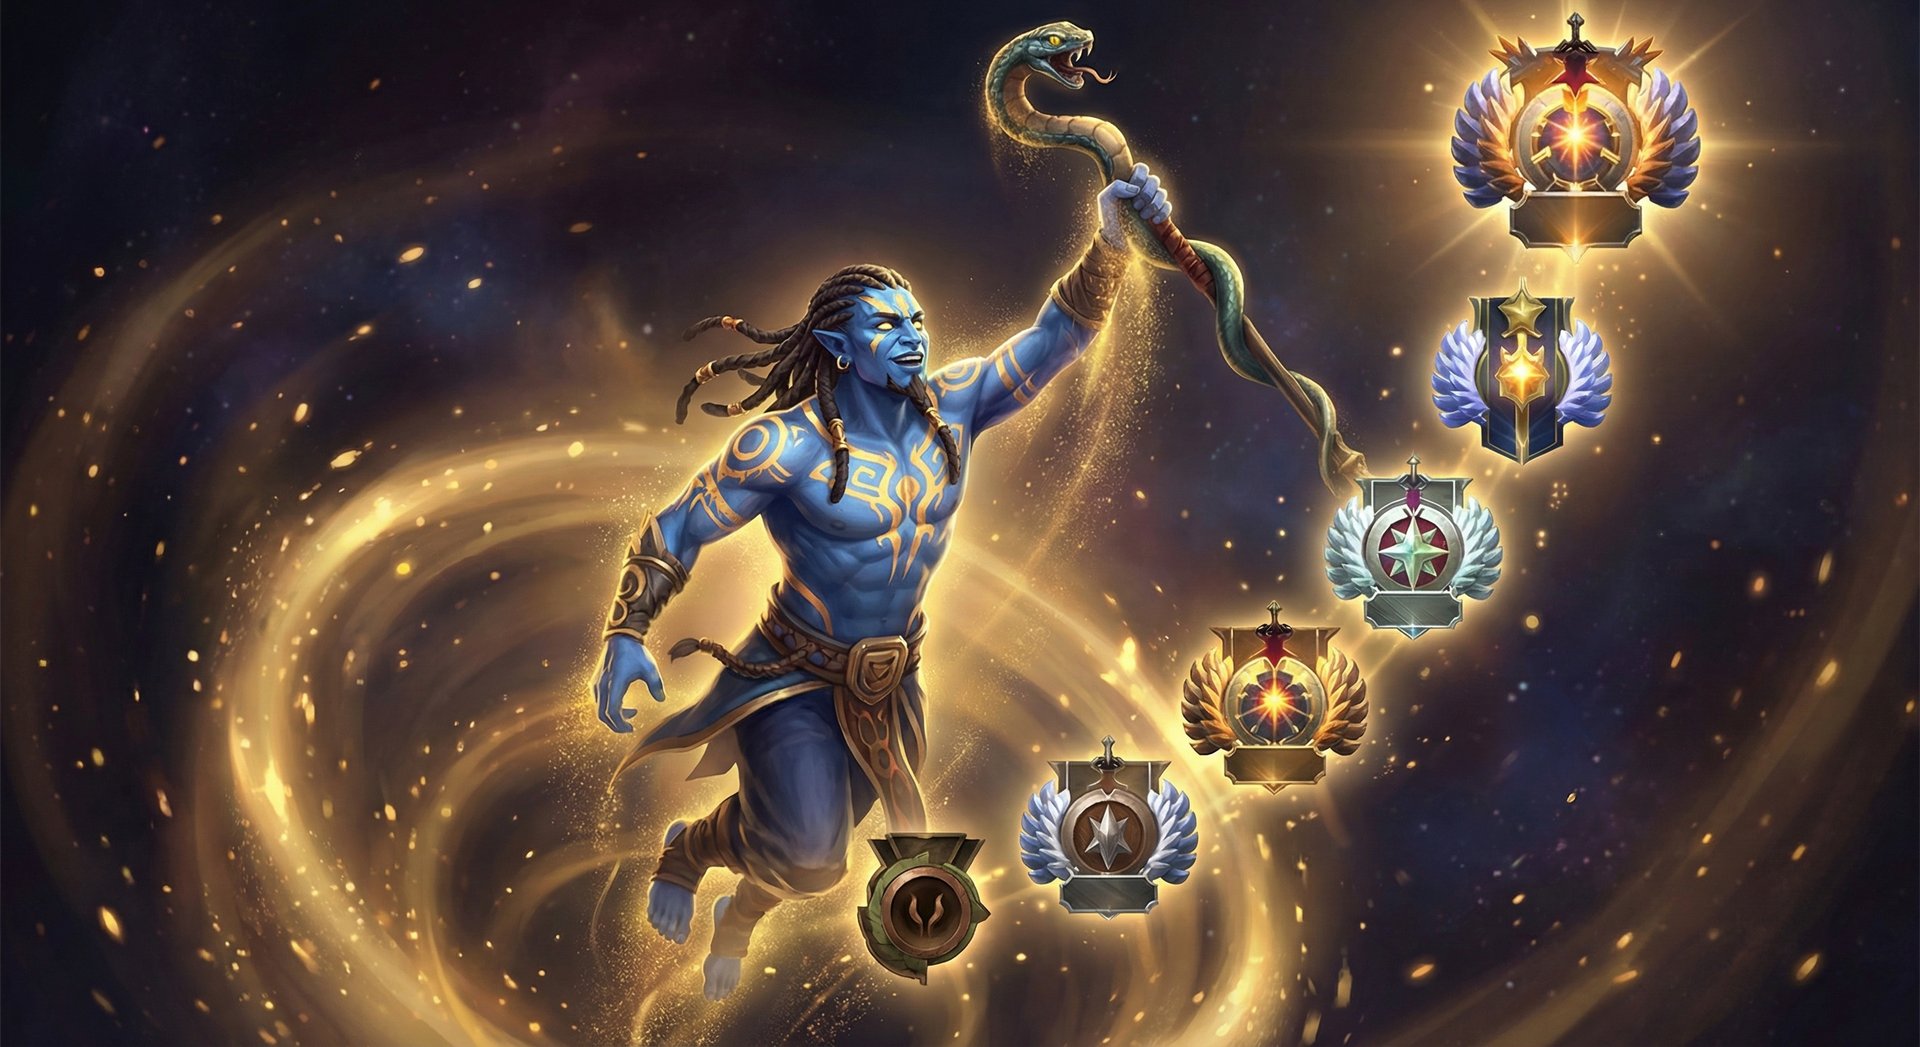
Rank-Specific Climbing Guide
Herald to Guardian: Building the Foundation
At this rank, Shadow Shaman is one of the most impactful heroes you can play because games at this level lack objective focus. While your teammates fight over nothing in the river, you can solo push towers with Mass Serpent Ward and win the game by yourself.
Focus on these fundamentals:
- Always carry TP scrolls. You should have at least one on you at all times.
- Use Mass Serpent Ward on towers, not heroes. At this rank, ward trapping heroes is unreliable. Just drop wards on towers whenever your ultimate is up.
- Buy wards and place them. Even one Observer Ward in the right spot (enemy jungle entrance) can prevent ganks and give information.
- Max Ether Shock first for lane and wave clear. You will get more value from pushing waves than from trying to execute combos.
- Stay alive. A dead support cannot push towers. Play safe, stay behind your team, and only commit after the fight starts.
Crusader to Archon: Adding Game Sense
At this rank, you should start looking at the minimap every 3-5 seconds and making decisions based on enemy positions.
Key improvements:
- Learn the Blink-Hex combo. Practice in demo mode until you can Blink and Hex within 0.3 seconds.
- Time your pushes with enemy deaths. When an enemy core dies, immediately push a tower.
- Communicate your ultimate cooldown. Tell your team when Mass Serpent Ward is ready so they know when to group.
- Start buying Smokes and using them for ganks with one or two allies.
- Ward placement upgrades: Move beyond basic rune wards to offensive wards in enemy jungle camps.
Legend to Ancient: The Macro Leap
This is where Shadow Shaman play becomes strategic rather than mechanical. You need to think about the game in terms of objectives and timings.
Advanced concepts:
- Track enemy BKB timings. Know which heroes have BKB and whether it is on cooldown. Your disables are most valuable when BKBs are down.
- Aggressive warding patterns. Place deep wards behind enemy T2 towers to track rotations.
- Roshan timing: After a successful teamfight, evaluate Roshan versus tower push. Shadow Shaman can accelerate both.
- Itemization flexibility: Build Glimmer Cape against heavy magic burst, Force Staff against melee carries, Aeon Disk in extreme cases.
- Lane cutting: In the mid-game, use Ether Shock to cut creep waves behind enemy towers before pushing.
Divine to Immortal: What Separates the Top 1%
At Divine and above, Shadow Shaman players are calculated assassins who treat every cooldown as a resource.
Elite-level techniques:
- Bait and punish: Use yourself as bait knowing your team is positioned to counter-initiate. When the enemy jumps on you, your team collapses while you Hex the attacker.
- Ward placement mind games: Drop Mass Serpent Ward in fog of war to threaten areas without enemies even seeing the wards.
- Refresher timing: In games where you reach Refresher Orb, practice the full combo: Blink-Hex-Wards-Refresh-Wards-Hex-Shackles. This is 20 wards and nearly 15 seconds of disable.
- Deny ward gold: When wards are about to expire or be killed, body-block enemies from farming them. Each denied ward saves the enemy 100+ gold.
- Smoke rotations: Coordinate Smoke ganks centered around your Blink-Hex initiation. At this level, a single pickoff can decide the game.
Tips and Tricks
Animation Cancels and Hidden Interactions
- Shift-queue your combo: After Blinking, you can shift-queue Hex to execute instantly. This removes human reaction time from the equation and makes your initiation frame-perfect.
- Ether Shock during Hex: While an enemy is Hexed, Ether Shock them immediately. The nuke damage lands while they are still disabled, and you can transition into Shackles as Hex ends.
- Ward trapping precise placement: To guarantee a ward trap, click the ground directly under the enemy hero’s model. The wards form a circle around the cast point, not around the nearest enemy.
- Break Shackles intentionally: Sometimes it is better to cancel your own Shackles early (by pressing S) to reposition rather than committing to the full channel in a dangerous spot.
Common Mistakes to Avoid
- Using ultimate defensively: Mass Serpent Ward is an offensive tool. Dropping it in your base to defend is almost always wrong — those wards should be on an enemy tower.
- Shackling the wrong target: Do not Shackle the tanky offlaner unless they are a channeling hero. Save Shackles for high-priority squishy targets.
- Forgetting to Hex first: The correct combo is always Hex into Shackles, never Shackles first. Hex is instant; Shackles requires you to walk into 400 range and stand still.
- Wasting wards on creep waves: Never drop Mass Serpent Ward on a creep wave. The wards die quickly to AoE and the cooldown is too valuable.
- Not buying Blink: Shadow Shaman without Blink is like Tidehunter without Blink — you are half a hero. Rush it after boots.
- Standing too close in teamfights: You are one of the squishiest heroes in the game. Stay at max range and only commit when it is safe.
Advanced Mechanics Only High-MMR Players Know
- Ward blocking camps: Mass Serpent Ward can block neutral camps if placed correctly. Use this to deny enemy farm during pushes.
- Split ward placement: With Aghanim’s Shard, you can split wards across two targets — place one group on a tower and another group to zone enemies.
- Hex to cancel TPs: Always save Hex if you see an enemy channeling a TP scroll. The instant cast means they cannot react.
- Shackles as a damage tool: At max level, Shackles deals 1,200 magical damage over the full duration. That is more than a level 3 Laguna Blade. Do not underestimate it.
- Ward tanking Roshan: Drop Mass Serpent Ward inside the Rosh pit to tank Roshan hits while your team DPSes. This significantly reduces the HP loss on your cores during Roshan attempts.
Frequently Asked Questions
Shadow Shaman works in both roles, but he is most commonly played as position 5 in the current meta. As pos 5, he provides lane dominance with high base damage and Ether Shock harass, then transitions into an objective-taking machine. Position 4 Shadow Shaman is viable in kill lanes with aggressive offlaners like Mars or Axe, where the extended Shackles duration secures early kills.
Use wards on heroes when you have a guaranteed kill — typically after Blink-Hex-Shackles when the target has no escape. Use wards on towers in all other situations. The general rule: if you are not 100% sure the ward trap will result in a kill, put them on a tower instead. Tower damage is guaranteed value; failed ward traps give the enemy 1,000+ gold.
Aim for 12-15 minutes in a normal game. If you are winning the lane, 10-12 minutes is achievable. If the game is rough, 16-18 minutes is acceptable but you should be looking for every opportunity to farm (stacking camps, pushing waves with Ether Shock). Beyond 20 minutes without Blink means you need to adjust your farm priority.
Ether Shock pops Linken’s Sphere. The combo becomes: Blink in range, Ether Shock to pop Linken’s, then immediately Hex into Shackles. Alternatively, your teammates can pop Linken’s with their single-target spells first. In the worst case, even without popping Linken’s, you can still drop Mass Serpent Ward to push objectives.
It depends on game state. Aghanim’s Scepter is better when you need consistent damage output — the Shackle wards add significant push and kill power every time you use Shackles. Refresher Orb is better for one decisive push attempt — 20 wards from double Mass Serpent Ward can end the game in a single high-ground siege. If you can only afford one, Aghanim’s Scepter is more versatile.
Three rules: (1) Never Shackle first in a teamfight — wait for your frontline to absorb initiation. (2) Hex the biggest threat to your channel before Shackling a different target. (3) Position in fog or behind terrain so enemies cannot easily target you during the channel. BKB is also an option in games where channel interrupts are frequent.
Go into Demo Mode and practice the Blink-Hex-Shackles combo until it becomes muscle memory. Set up a hero dummy and practice ward trapping by casting Mass Serpent Ward directly on the dummy’s position. Practice the Refresher combo (Blink-Hex-Wards-Refresh-Hex-Wards-Shackles) until you can execute it in under 2 seconds. Then move to unranked games to practice in real conditions.
Dominate with Shadow Shaman Like the Pros
Want to take towers faster and climb MMR with Rhasta? Our Immortal-rank coaches can teach you the exact combos, ward placements, and timings that top players use to win games before the enemy team knows what hit them.


