How to Master Keeper of the Light in Dota 2: The Ultimate Guide for Every Rank (2026)

Keeper of the Light — also known as Ezalor or simply KotL — is one of the most misunderstood heroes in Dota 2. At first glance, he looks like a fragile old man riding a horse, spamming a channeled nuke from the trees. But in the hands of a skilled player, KotL is an absolute menace who controls the pace of entire games through infinite mana sustain, devastating wave clear, and map-wide presence that makes space like few other supports can.
In the current patch, Keeper of the Light sits at a 52.4% winrate across all brackets according to Dotabuff, with his winrate climbing above 55% in Divine and Immortal games where players understand how to leverage his kit properly. He is consistently picked in pro matches as a position 4 or 5 who can single-handedly enable greedy cores through Chakra Magic while zoning entire lanes with Illuminate.
This guide breaks down everything you need to know about mastering Keeper of the Light — from hidden ability interactions and rank-specific item builds to pro-level positioning secrets and the exact timing windows that separate a 2K KotL from an 8K one. Whether you are a Herald learning the basics or a Divine player looking to push into Immortal, this guide will give you the tools to dominate with the Grandmaster of Light.
Table of Contents
Why Keeper of the Light Is the Ultimate Utility Support
Keeper of the Light is a ranged intelligence support who excels at mana management, wave clear, and providing vision control that no other hero in the game can match. He is typically played as a position 4 or 5, though some high-MMR players run him as a greedy position 4 with farm priority thanks to Illuminate’s ability to clear entire waves in seconds.
What makes KotL unique is his ability to fundamentally change how your team plays. With Chakra Magic, your mid Invoker never runs out of mana. Your offlane Bristleback can spam Quill Spray forever. Your carry can use abilities freely during the laning phase without worrying about bottle charges or clarity potions. This single ability alone makes KotL a top-tier enabler in any draft.
KotL at a Glance
| Attribute | Details |
|---|---|
| Primary Role | Support (Position 4/5) |
| Attack Type | Ranged (600 range) |
| Primary Attribute | Intelligence |
| Base Movement Speed | 335 (one of the fastest supports) |
| Winrate (All Ranks) | 52.4% |
| Winrate (Divine+) | 55.1% |
| Pick Rate | 8.2% |
| Complexity | Medium |
KotL’s 335 base movement speed is one of the highest among supports, making him naturally difficult to catch and excellent at positioning during fights. Combined with his long attack range and the threat of Illuminate from fog, he controls space without needing expensive items.
The hero’s identity revolves around three pillars: wave clear (Illuminate can nuke entire creep waves from 1550 range), mana sustain (Chakra Magic is the best mana restoration ability in the game), and vision control (Solar Bind and Illuminate provide crucial information). If you enjoy playing heroes that make your entire team better while punishing enemies for grouping up, KotL is your hero.
Abilities Deep Dive
Illuminate (Q)
Illuminate is KotL’s signature ability and the reason enemies dread seeing him in their lane. This channeled nuke sends a wave of light in a line, dealing up to 350 damage at max level after a full 3-second channel. The range is massive at 1550 units, and the wave width is 375, making it impossible to dodge in tight corridors.
Hidden mechanics most players miss:
- Partial channel damage: You do not need to fully channel Illuminate. Releasing at 1.5 seconds deals roughly half damage, which is often enough to secure ranged creeps or poke heroes. Smart KotL players mix up their channel times to stay unpredictable.
- Tree destruction: Illuminate destroys trees in its path, which is both a blessing and a curse. Use it to deward juke paths, but be aware you are removing your own hiding spots too.
- Vision: The Illuminate wave provides flying vision along its entire path. This means you can scout Roshan, check high ground, or reveal enemies hiding in trees — all from a safe distance.
- Creep wave manipulation: A max-level Illuminate one-shots ranged creeps and leaves melee creeps at roughly 30% HP. This lets you instantly shove waves to create map pressure, stack camps, or deny farm to enemy offlaners.
Blinding Light (W)
Blinding Light is a 575 AoE knockback that also applies a miss chance debuff. At max level, it causes enemies to miss 80% of their attacks for 4 seconds. This ability is criminally underrated in lower brackets and is often the difference between winning and losing team fights.
Key interactions:
- Knockback distance is 400 units. This is enough to push enemies into your team, off high ground, or away from your carry. The positioning potential is enormous.
- Miss chance stacks multiplicatively with evasion. If an enemy PA with 50% evasion gets hit by Blinding Light, she effectively has 90% evasion — meaning physical damage dealers on the enemy team become nearly useless for 4 seconds.
- Interrupts channeling. Blinding Light cancels TP scrolls, Black Hole, Fiend’s Grip, and any other channeled abilities. Always keep mana reserved for this in fights.
- Can push enemies over cliffs and into trees. In the laning phase, pushing an enemy into trees near the side shop forces them to use a Tango or TP, wasting precious resources.
Chakra Magic (E)

Chakra Magic is what makes KotL a tier above most other supports in terms of enabling your team. It restores 320 mana at max level and reduces the cooldown of the target’s last-used ability by 6 seconds. The implications of this are massive.
Why Chakra Magic is broken:
- The cooldown reduction applies to ultimates. Casting Chakra on your Tidehunter after Ravage means his next Ravage comes 6 seconds sooner. On heroes with long cooldown ults like Enigma, Magnus, or Tidehunter, this can change entire team fights.
- Self-cast enables infinite Illuminate spam. In the laning phase, Chakra yourself, channel Illuminate, Chakra again. You can nuke the wave every single time it arrives.
- It works on any ally. Your mid Storm Spirit with Chakra Magic effectively has infinite mana. Your Bristleback becomes an unkillable Quill Spray machine. Your Phantom Assassin can spam daggers without ever going dry.
- The mana cost is only 25/35/45/55. For the amount of mana it gives back, this ability is incredibly efficient. You can cast it 5-6 times before running out of mana yourself.
Spirit Form / Will-O-Wisp (R)
KotL’s ultimate, Will-O-Wisp, summons a flickering light that hypnotizes nearby enemies. Heroes caught within its 725 AoE are repeatedly pulled toward the wisp and stunned in rhythmic intervals. At max level, Will-O-Wisp pulses for 3.6 seconds per flicker cycle, making it one of the most powerful team fight ultimates in the game when placed correctly.
Critical Will-O-Wisp knowledge:
- The wisp can be destroyed. It has a fixed number of HP (hits to kill), so enemies can right-click it during the off-intervals. Place it where enemies cannot easily target it — behind trees, on cliffs, or in the middle of chaotic fights where clicking it is difficult.
- BKB does not dispel the hypnotize if cast before BKB. However, activating BKB during the off-interval prevents the next flicker from affecting you. The timing interaction is something many players get wrong.
- Synergizes with AoE damage. Will-O-Wisp groups enemies together. Combine it with Invoker Meteor, Enigma Black Hole, or any AoE ultimate for devastating wombo combos.
- Cast range is 900. You can place it from safety during the setup phase of fights. Do not walk into the middle of enemies to cast it.
Recommended Skill Builds
| Build | Level 1-4 | Max Order | When to Use |
|---|---|---|---|
| Standard Support | Q-E-Q-W | Q > E > W | Most games — wave clear + mana sustain |
| Aggressive Lane | Q-W-Q-E | Q > W > E | Kill lanes with knockback setups |
| Mana Battery | E-Q-E-Q | E > Q > W | Paired with mana-hungry cores (Storm, Bristle) |
| Defensive | W-E-Q-Q | Q > W > E | Against aggressive dive heroes |
Item Builds by Rank Bracket
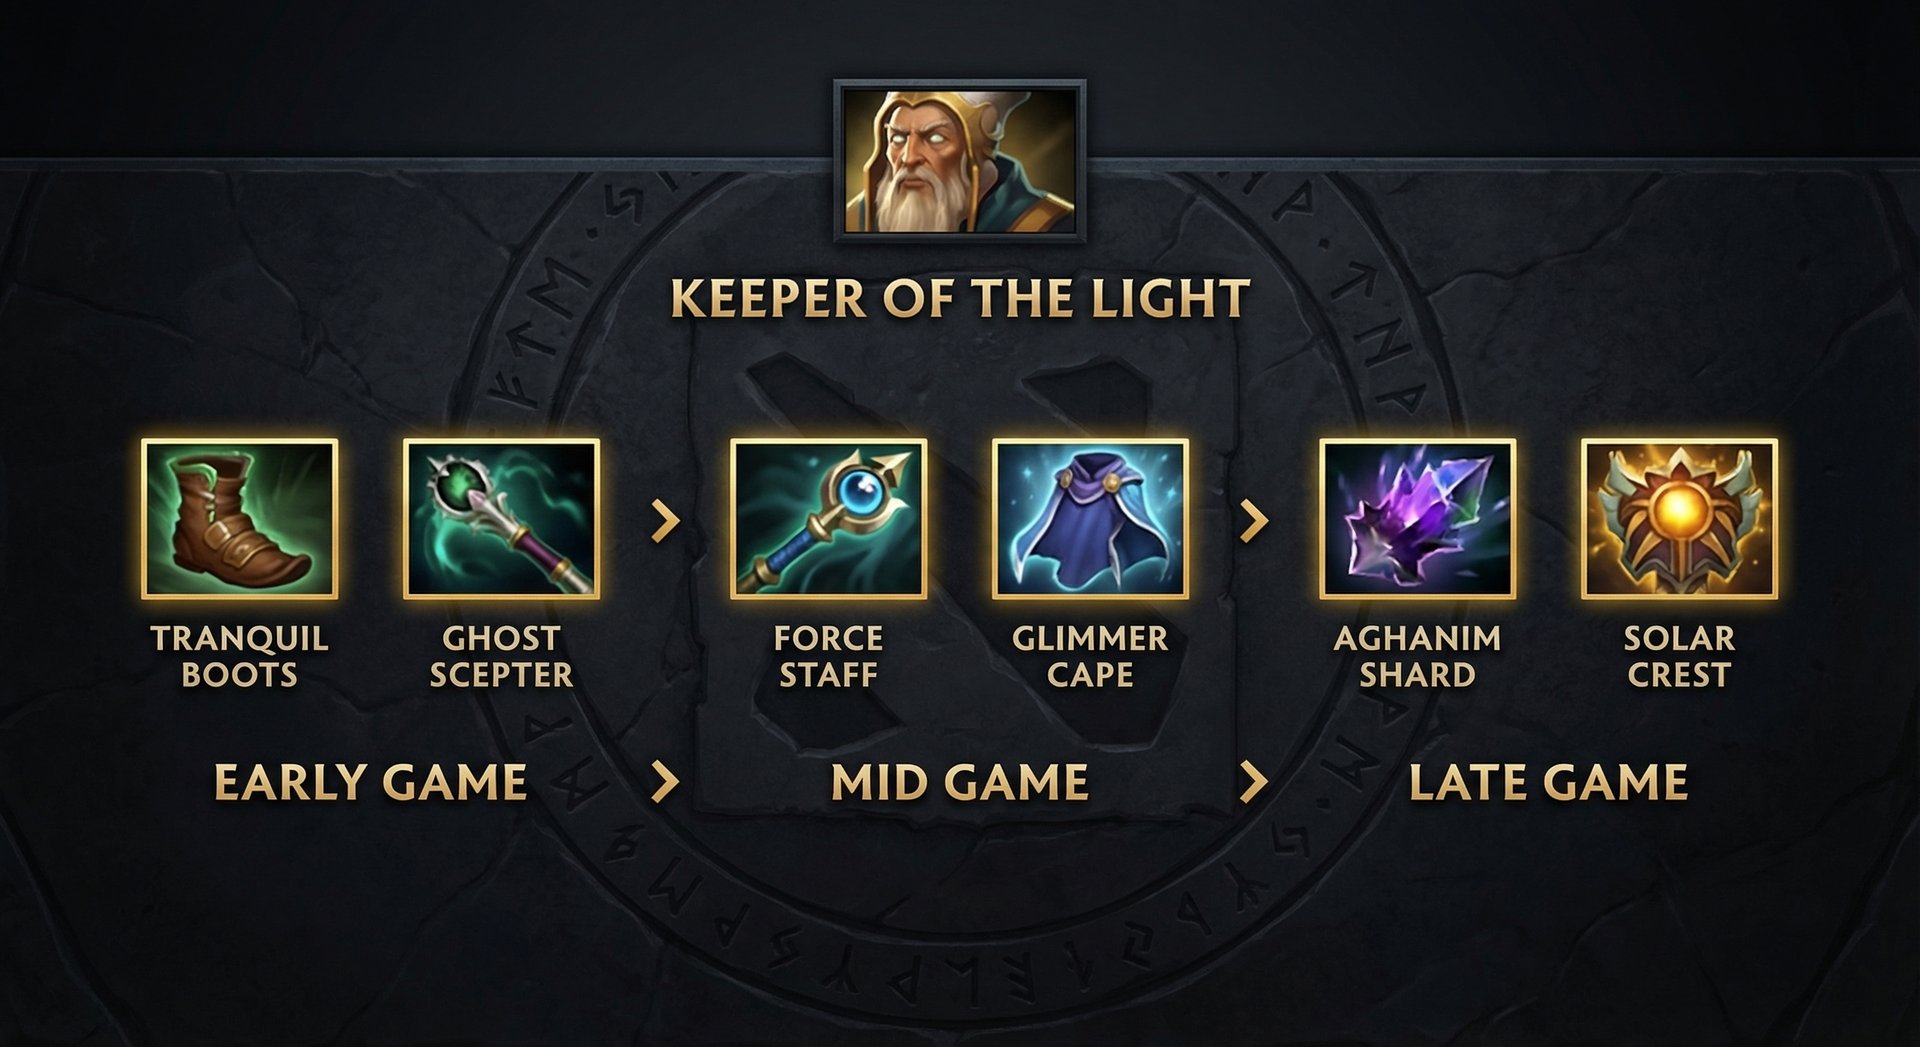
KotL’s item builds vary significantly by rank because the tempo of games and the level of coordination differ drastically. A Herald game lasts 45+ minutes on average, while Immortal games often end around 30-35 minutes. Your itemization should reflect the pace of your bracket.
| Rank | Starting Items | Early Game | Core Items | Late Game |
|---|---|---|---|---|
| Herald-Crusader | Tango, Clarity x3, Blood Grenade, Courier | Arcane Boots, Magic Stick | Glimmer Cape, Force Staff | Aghanim’s Scepter, Aeon Disk |
| Archon-Legend | Tango, Clarity x2, Blood Grenade, Sentry Ward | Tranquil Boots, Magic Wand | Force Staff, Glimmer Cape | Solar Crest, Aghanim’s Shard |
| Ancient-Divine | Tango, Clarity x2, Blood Grenade, Sentry | Tranquil Boots, Wind Lace | Force Staff, Ghost Scepter | Aghanim’s Shard, Lotus Orb |
| Immortal | Tango, Clarity x2, Blood Grenade, Sentry | Boots of Speed, Wind Lace | Force Staff, Glimmer or Ghost | Aghanim’s Shard, Refresher Orb |
Why Items Differ by Rank
Herald-Crusader: Games in this bracket are long and uncoordinated. Arcane Boots give you a bigger mana pool to work with since players at this level do not manage mana well. Glimmer Cape is the best defensive item because enemies rarely buy detection. Aghanim’s Scepter is a reasonable late-game pickup since you will have the farm in extended games.
Archon-Legend: Players start understanding game tempo here. Tranquil Boots are better than Arcane Boots because KotL’s mana sustain comes from Chakra Magic, not items. The gold saved goes into faster Force Staff, which is KotL’s most important item for saving allies and repositioning enemies.
Ancient-Divine: Ghost Scepter becomes critical because enemy cores start actively targeting supports. You need to survive the initial burst before you can cast your spells. Aghanim’s Shard is prioritized for the Illuminate heal, which adds massive sustain during pushes and fights.
Immortal: At the highest level, KotL players go for the fastest possible Force Staff and then build entirely around what the game needs. Refresher Orb might seem greedy, but double Will-O-Wisp in a team fight is game-ending. The focus is on maximum impact per gold spent.
Laning Phase Masterclass
KotL’s laning phase is where you set the tone for the entire game. Played correctly, you can single-handedly zone the enemy offlaner while keeping your carry topped off on mana. Played poorly, you steal farm with Illuminate and leave your carry worse off than if they had no support at all.
Safe Lane Support (Position 5)
The golden rule: Do not Illuminate the creep wave unless you are pushing intentionally. In the first 5 minutes, your Illuminate should target the enemy heroes, not the creeps. Stand behind the trees near the lane and channel Illuminate through the tree line to hit the offlaner as they approach for last hits.
Laning sequence (first 3 minutes):
- Use your first Clarity immediately. You want to spam Illuminate from level 1.
- Position in the trees between the tier 1 and tier 2 towers on the safe lane. This gives you an angle to channel Illuminate across the lane without being seen.
- Channel Illuminate for 2-2.5 seconds (you do not always need the full channel) and release toward the enemy offlaner’s farming position.
- At level 2, take Chakra Magic. Chakra yourself, then immediately start channeling Illuminate again. This rotation gives you Illuminate every 8-9 seconds.
- After 2-3 Illuminates, the enemy offlaner will be at half HP or forced to use regeneration. Zone them aggressively with right-clicks between channels.
Offlane Support (Position 4)
KotL as a position 4 plays differently. Your job is to push the enemy safe lane creep wave aggressively to deny farm and create space. Illuminate the wave from behind trees to shove it under the enemy tower, forcing their support to deal with the push. Then rotate to stack camps or gank mid.
Chakra Magic priority in the offlane: Give Chakra to your offlaner, not yourself. Heroes like Mars, Bristleback, Timbersaw, or Axe become absolute monsters with infinite mana in the early game. A Bristleback who never runs out of mana is nearly impossible to lane against.
Lane Partner Synergies
| Lane Partner | Synergy Rating | Why It Works |
|---|---|---|
| Bristleback | S-Tier | Infinite Quill Spray mana, ungankable lane |
| Mars | S-Tier | God’s Rebuke spam + Arena into Will-O-Wisp |
| Phantom Assassin | A-Tier | Stifling Dagger spam in lane, Blinding Light saves |
| Juggernaut | A-Tier | Bladefury + Illuminate kills from level 2 |
| Slark | A-Tier | Pounce + Blinding Light combo, mana for Pact |
| Storm Spirit | S-Tier | Infinite Ball Lightning mana (if offlane duo) |
Mid and Late Game Transitions
KotL’s mid game begins the moment the laning phase breaks down — typically around the 10-12 minute mark. This is where many KotL players make their biggest mistakes: they either stay in lane too long farming Illuminate or they group up too early without vision.
The 10-20 Minute Window
Your priorities in order:
- Ward aggressively. KotL’s movement speed (335 base + Wind Lace) makes him one of the best warders in the game. Place deep wards in enemy territory while using Illuminate to scout ahead.
- Push waves that your cores cannot. Use Illuminate to shove dangerous lanes that your carry would die farming. This creates map pressure without risking your important heroes.
- Chakra your mid player. By 10 minutes, your mid hero likely has their key ability leveled. A Storm Spirit, Invoker, or Queen of Pain with permanent Chakra Magic becomes a mid-game monster.
- Stack camps between pushes. Illuminate can clear stacked camps quickly, providing gold for your next item.
Team Fight Positioning
KotL is not a frontline hero. Your positioning in fights should follow this hierarchy:
- Stay 1200+ units behind your frontline. This gives you channel time for Illuminate and keeps you alive to cast Chakra and Blinding Light.
- Will-O-Wisp placement is everything. Place it where the fight will happen, not where it is happening. Anticipate enemy movement and drop it on their retreat path or on a choke point.
- Blinding Light timing: Save it for when the enemy carry commits. A 4-second, 80% miss chance on their Phantom Assassin or Troll Warlord makes their BKB timing worthless.
- Force Staff is your panic button. Use it on allies who get caught, not on yourself. If you are in a position where you need Force Staff to survive, you were positioned wrong to begin with.
Late Game (35+ Minutes)
KotL scales surprisingly well into the late game. Will-O-Wisp becomes more impactful as team fights become more decisive, and Chakra Magic’s cooldown reduction is worth more when allied abilities cost 200+ mana. Your job shifts from wave control to fight setup and save support.
Late game checklist:
- Always carry a TP scroll and use it to defend base immediately when creeps push in. Illuminate clears mega creeps efficiently.
- Aghanim’s Shard (if not already purchased) is a must — the healing Illuminate sustains pushes and defenses.
- Consider Refresher Orb if you have the gold. Double Will-O-Wisp is one of the most powerful teamfight tools in Dota 2.
- Buy Smoke of Deceit and initiate Rosh attempts by scouting with Illuminate vision.
Counters: Heroes That Destroy Keeper of the Light

KotL has clear weaknesses, and certain heroes exploit them ruthlessly. Understanding your counters lets you either avoid them in the draft or play around them when you are stuck in a bad matchup.
Top 5 Counters
1. Nyx Assassin
Nyx is KotL’s worst nightmare. Mana Burn deals damage based on your intelligence multiplied by a factor, and KotL has one of the highest intelligence gains in the game. A single Mana Burn can chunk 40% of KotL’s HP while also destroying his mana pool. Vendetta into Mana Burn is usually a guaranteed kill on KotL at any stage of the game. Play around this: Stay near allies, buy Aeon Disk, and always carry a Sentry Ward for the area you are standing in.
2. Clockwerk
Battery Assault interrupts Illuminate’s channel instantly, and Hookshot into Power Cogs traps KotL in a small space where he cannot escape or channel anything. Clockwerk’s ability to isolate supports from their team makes KotL’s life miserable. Play around this: Buy Force Staff as your first item — it breaks Cogs. Position extremely far from the fight if Clockwerk has not used Hookshot yet.
3. Spirit Breaker
Charge of Darkness catches KotL regardless of positioning. KotL has no escape, no disable to stop the charge (Blinding Light does not cancel Charge), and no survivability to tank the burst. Spirit Breaker turns KotL’s preferred backline position into a death sentence. Play around this: Buy Ghost Scepter or Glimmer Cape, stay near allies who can stun the Charge, and ward Charge paths.
4. Spectre
Haunt finds you no matter where you hide. KotL relies on being invisible in the backline, but Spectre’s ultimate spawns an illusion on every enemy hero globally. The Desolate damage from Spectre’s passive destroys KotL since he is usually alone and away from creeps. Play around this: Stand near allies or creeps at all times to negate Desolate, and buy Ghost Scepter for Haunt timing.
5. Anti-Mage
Mana Break burns through KotL’s mana pool fast, and Mana Void can one-shot him if his mana drops significantly (since KotL’s mana pool is enormous, the Mana Void damage is catastrophic). Blink makes it impossible to kite Anti-Mage. Play around this: Keep mana above 50% during fights, avoid being the last hero alive in fights, and buy Aeon Disk as a last resort.
Heroes Keeper of the Light Destroys
Just as KotL has weaknesses, there are matchups where he is absolutely dominant. Picking KotL into these heroes gives your team an enormous advantage.
Top 5 Favorable Matchups
1. Phantom Lancer
Illuminate clears PL’s illusion army instantly. A full-channel Illuminate through a cluster of Phantom Lancer illusions leaves only the real PL standing and severely damaged. Blinding Light’s 80% miss chance also cripples PL’s damage since illusions inherit the miss debuff.
2. Broodmother
Spiderlings die to Illuminate in one hit. Broodmother’s entire strategy revolves around building a spider army, and KotL deletes that army every 10 seconds for free. This matchup alone makes KotL a viable counter-pick.
3. Chaos Knight
Similar to PL, Chaos Knight’s Phantasm illusions are his primary damage source. Illuminate wipes them out, and Blinding Light causes them all to miss. Without his illusions, CK is just a mediocre strength hero with moderate damage.
4. Huskar
Blinding Light’s 80% miss chance is devastating against Huskar, who relies on Burning Spear auto-attacks for damage. KotL also keeps his team topped off on mana during the Huskar push timing, buying time for your team to scale past Huskar’s power spike. Will-O-Wisp also controls Huskar in fights since he has no natural way to break it.
5. Medusa
Medusa is extremely mana-dependent for Mana Shield. Illuminate does not drain mana directly, but the constant pressure of wave clear and team fight control forces Medusa to use abilities she would rather save. More importantly, Blinding Light wastes Medusa’s BKB duration by causing her to miss attacks during the window she is supposed to deal maximum damage.
How Pros Play Keeper of the Light in the Current Patch
Professional players have been picking KotL consistently throughout the 2025-2026 DPC season, particularly as a position 5 paired with aggressive offlaners. The hero’s versatility and low item dependency make him an ideal fit for the current meta, which favors early aggression followed by objective-based play.
Notable Pro Picks
Puppey (Team Secret) has been one of the most prolific KotL players this season, picking the hero 8 times with a 75% winrate. His build focuses on maxing Chakra Magic first to enable his cores, often skipping Illuminate levels until later. Puppey prioritizes Tranquil Boots into Force Staff into Solar Crest, emphasizing team utility over personal impact.
Cr1t (OG) plays a more aggressive position 4 KotL, maxing Illuminate first and actively pushing lanes to create pressure. His build features early Ghost Scepter against physical damage lineups and Glimmer Cape against magic lineups. Cr1t’s KotL games are characterized by aggressive warding deep in enemy territory, using Illuminate to scout safely.
Key pro strategies:
- Early Roshan setup: Pros use Illuminate vision to safely check Roshan while allies position for the attempt. KotL’s Chakra Magic also sustains the Roshan damage-dealer’s mana throughout the fight.
- Will-O-Wisp as a zoning tool, not a damage tool. Pros often drop Will-O-Wisp to zone enemies away from an objective (tower, Roshan) rather than trying to land it on 5 heroes. The threat alone creates space.
- Stacking with Illuminate: Between fights, pro KotL players stack 2-3 camps simultaneously by timing Illuminate to hit jungle camps at the :53 mark while pulling a nearby camp manually.
Rank-Specific Climbing Guide
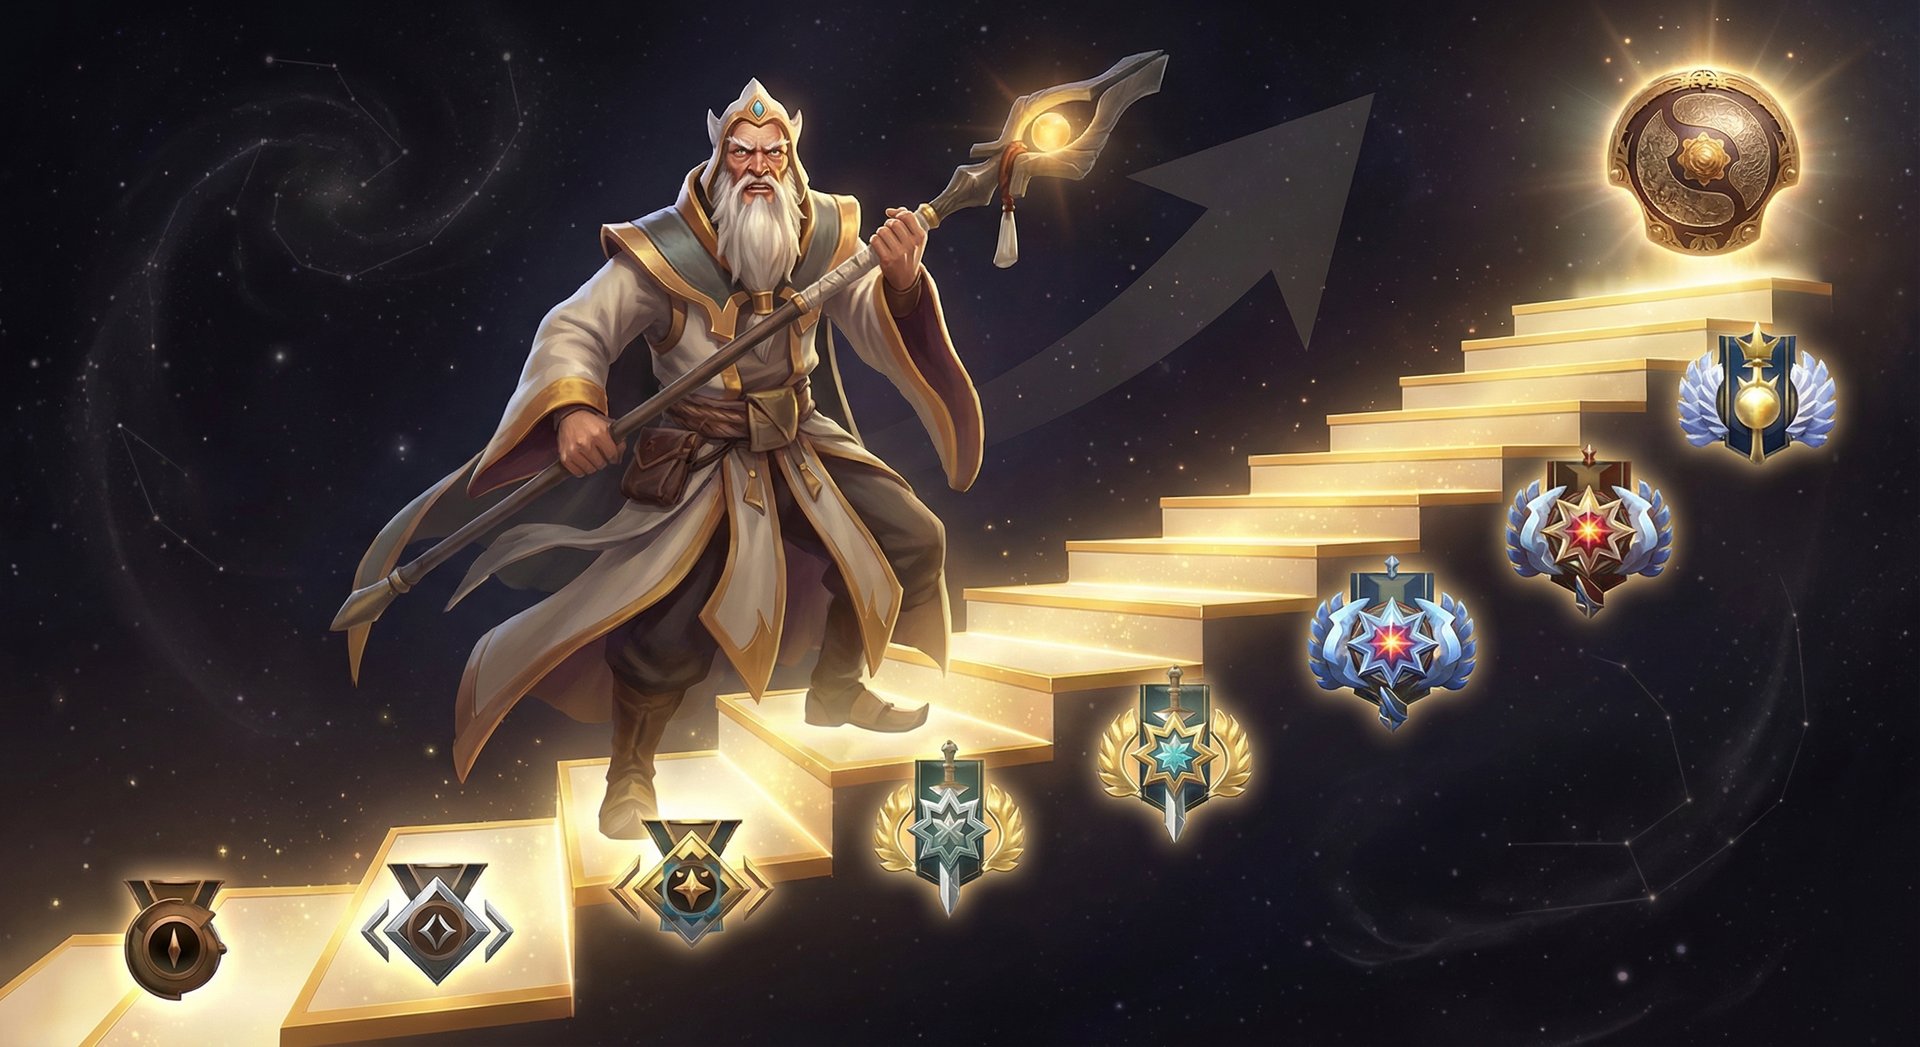
Herald to Guardian: The Foundation
At this bracket, most players do not know what KotL does. Use this to your advantage.
- Max Illuminate and spam it. In Herald-Guardian, enemies walk into Illuminate constantly. You can deal 2,000+ hero damage in the laning phase alone just by channeling from the trees.
- Buy Arcane Boots. You need the mana pool safety net since you will not be managing Chakra Magic optimally yet.
- Push waves relentlessly. In this bracket, nobody shoves lanes. If you Illuminate every wave, you create constant tower pressure that forces enemies to respond. This alone wins games.
- Use Will-O-Wisp in every fight. Even if placement is not perfect, enemies at this rank do not know to destroy it or use BKB against it. A poorly placed Will-O-Wisp still catches 2-3 heroes in Herald.
Crusader to Archon: Adding Game Sense
- Switch to Tranquil Boots. You should be managing mana through Chakra Magic now. The movement speed from Tranquils helps you position for Illuminate and escape ganks.
- Start giving Chakra to cores. At this rank, you should identify which core on your team benefits most from Chakra Magic and prioritize them. A mana-hungry mid like Invoker or Storm Spirit should receive most of your Chakra casts.
- Buy Force Staff before all other items. Force Staff is your most impactful item. Use it to save allies from Clockwerk Cogs, Slark Pounce, or enemy initiations. One good Force Staff save is worth more than 10 Illuminates.
- Place Will-O-Wisp before fights start. Instead of reacting, anticipate where the fight will happen and pre-place your ultimate. Drop it on Roshan entrances, tower siege positions, or behind choke points.
Legend to Ancient: The Macro Leap
- Illuminate for information, not just damage. Use the flying vision from Illuminate to scout enemy movements. Channel it toward Roshan, toward enemy jungle, or down lanes to check for incoming ganks.
- Ward timing windows. After you shove a wave with Illuminate, the enemy has to respond to the creeps. This 10-15 second window is when you place deep wards. Illuminate creates its own ward timing.
- Chakra Magic cooldown reduction optimization. Start tracking which ally ability benefits most from the 6-second cooldown reduction. Ravage, Black Hole, Reverse Polarity — these are game-changing.
- Itemize reactively. Stop buying the same items every game. Against heavy magic damage, get Glimmer Cape. Against physical burst, Ghost Scepter. Against catch heroes, Force Staff. Read the game.
Divine to Immortal: What Separates the Top 1%
- Illuminate cancel mind games. Fake-channel Illuminate by starting the channel and immediately canceling it. This forces enemies to dodge, wasting their time and positioning. Then channel the real one from a different angle.
- Will-O-Wisp placement art. At Immortal, enemies will try to destroy the wisp immediately. Place it on cliffs, behind trees, or in positions where enemies have to walk into your team to reach it. The best Will-O-Wisp placements force enemies to choose between taking the stun or walking into a worse position to kill the wisp.
- Blinding Light as a setup tool. Instead of using Blinding Light defensively, use the knockback to push enemies into your team’s AoE abilities. Push enemies into Mars Arena, Invoker combos, or toward your carry.
- Map-wide Illuminate pressure. At Immortal, KotL players maintain lane equilibrium on all three lanes by TPing and Illuminating waves. This creates a level of map control that forces enemy responses. You should be clearing at least 3-4 waves per minute in the mid game.
Tips and Tricks
Animation Cancels and Hidden Mechanics
- Shift-queue Illuminate during Chakra. Cast Chakra Magic on yourself, then immediately shift-click Illuminate. This removes the gap between abilities and maximizes your channel uptime.
- Blinding Light into Illuminate combo. Use Blinding Light to push enemies into the path of a channeling Illuminate. This requires prediction but devastates enemy positioning.
- Illuminate direction change. If you start channeling Illuminate and enemies dodge, you can still aim the release in any direction within your facing angle. This catches enemies who think they have dodged it.
- Will-O-Wisp placement on cliffs. When near Roshan or high ground areas, place Will-O-Wisp on elevated terrain. Enemies cannot right-click it to destroy it without high ground vision, making it nearly indestructible.
Common Mistakes to Avoid
- Stealing farm with Illuminate. The number one mistake KotL players make. Do not Illuminate creep waves that your carry is farming. Use it on waves that are pushing toward your towers or in enemy territory.
- Holding Will-O-Wisp for the “perfect” moment. A Will-O-Wisp that catches 2 heroes is still good. Do not wait for 5-man catches — they rarely happen. Use it early in fights to control space.
- Forgetting to Chakra allies. Many KotL players self-cast Chakra exclusively. Your core who is fighting needs that mana more than you need your next Illuminate. Prioritize team needs.
- Not buying enough Sentry Wards. KotL pushes waves into dangerous territory. You need vision to do this safely. Carry Sentries to deward common spots and detect incoming ganks.
- Walking too far forward in fights. KotL’s cast ranges are long for a reason. If you are within 600 units of enemy heroes, you are too close. Stay back, cast from fog, and use terrain to your advantage.
Advanced Techniques Only High-MMR Players Know
- Double-wave Illuminate timing. At the 5-minute mark, the creep waves sync up. If you Illuminate at the right angle near the tier 1 tower, you can hit both the current wave and the stacked wave, dealing massive damage and pushing two waves simultaneously.
- Smoke + Illuminate scout. Before using Smoke of Deceit with your team, channel Illuminate in the direction you are going. The vision reveals if enemies are nearby without breaking the smoke.
- Blinding Light cliff trapping. Near certain cliff areas on the map (especially near the offlane side shop and Roshan), Blinding Light can push enemies onto cliffs where they are stuck without a TP scroll. This is a guaranteed kill if timed correctly.
- Chakra Magic timing for buyback. If your core hero buys back and TPs into a fight, have Chakra Magic ready. They will arrive with full HP but potentially low mana. Immediately Chakra them so they can use abilities upon arrival.
Frequently Asked Questions
KotL works well in both roles, but position 5 is more common in the current meta. As a pos 5, you focus on enabling your carry with Chakra Magic and zoning the offlaner with Illuminate. As a pos 4, you play more aggressively — pushing waves, stacking camps, and roaming for kills. Position 4 KotL gets more farm and reaches Force Staff faster, but position 5 KotL provides better laning support.
Pick KotL when your team has mana-hungry cores (Storm Spirit, Bristleback, Invoker), when the enemy team relies on illusion heroes (PL, CK, Broodmother), or when you need a support who can push waves safely. Avoid picking KotL into Nyx Assassin, Spirit Breaker, or Clockwerk if possible — these heroes make your life extremely difficult.
Aghanim’s Shard is best purchased between 15-25 minutes. The healing Illuminate transforms your team’s ability to sustain during pushes and team fights. In the current patch, the Shard makes Illuminate heal allies it passes through, which is particularly powerful when your team is grouping for objectives. Do not rush it before Force Staff, however — Force Staff is almost always more important as your first major item.
Nyx is your hardest counter. Buy Sentry Wards for every fight and place them where you plan to stand. Aeon Disk is a potential lifesaver against Vendetta + Mana Burn burst combos. Stay near allies at all times so Nyx cannot pick you off solo. In the laning phase, ward Nyx’s common gank paths and play further back than usual. If Nyx is on the enemy team, your positioning needs to be twice as careful.
Absolutely. KotL is one of the highest game-impact supports because he provides wave clear, mana sustain, vision, and one of the best team fight ultimates in the game. In high-MMR games, a good KotL player can have more impact than a mediocre carry. The key is maximizing Chakra Magic on the right ally, placing Will-O-Wisp in the right position, and using Illuminate to control the map tempo.
Aghanim’s Scepter is situational on KotL. It upgrades Will-O-Wisp to have more flicker pulses and a larger radius, which is strong but expensive. In most games, your gold is better spent on Force Staff, Glimmer Cape, and Aghanim’s Shard. Only buy Aghanim’s Scepter if the game goes very late and you have already purchased your core utility items. In games that end around 30-35 minutes, you will rarely have the farm for it.
Place Will-O-Wisp proactively, not reactively. Drop it on the location where you want the fight to happen — Roshan pit entrance, tower siege spot, or high ground choke point. The best placements are on cliffs or behind trees where enemies cannot easily destroy it. In team fights, aim to catch at least 2-3 heroes. Remember that the wisp can be destroyed, so placing it where enemies have to walk into your team to reach it creates a lose-lose situation for them.
Master Keeper of the Light with Expert Coaching
Learning KotL from a guide is great — but learning from an Immortal-rank coach who can watch your replays, correct your positioning, and teach you fight-specific Will-O-Wisp placements is even better. Our coaches have 8,000+ MMR and specialize in turning good support players into great ones.


