How to Climb from Legend to Ancient as Pos 5 Hard Support in Dota 2

Legend rank is where Dota 2 starts feeling real. You understand the game, you know what you’re supposed to do, and yet — you’re stuck. You win one, lose two. You play a perfect lane, your carry farms well, and then it all falls apart in the mid-game. Sound familiar
If you’re a position 5 hard support player trapped in Legend and looking to break into Ancient, this guide is for you. We’re not going to give you vague advice like “improve your game sense” or “watch replays.” We’re going to break down exactly what separates Legend supports from Ancient supports, give you five heroes to master with full builds, and walk you through the ten mistakes that are silently destroying your MMR.
This is the most comprehensive pos 5 climbing guide you’ll find anywhere. Bookmark it. You’re going to need it.
Table of Contents
- What Separates Legend from Ancient at Position 5
- Top 5 Heroes to Climb from Legend to Ancient as Pos 5
- 10 Specific Mistakes Legend Pos 5 Players Make
- Phase-by-Phase Guide: How to Play Pos 5 from Laning Through Late Game
- The Teammate Problem: Why Games Feel Unwinnable
- Realistic Timeline: How Long Does It Take to Climb from Legend to Ancient
- Frequently Asked Questions
- Ready to Climb Get Expert Help
What Separates Legend from Ancient at Position 5
Before we talk about heroes and item builds, you need to understand the fundamental gap between Legend and Ancient support players. It’s not mechanical skill — Legend players can cast spells just fine. It’s not hero knowledge — you probably know what every hero in the game does. The difference is efficiency, timing, and proactive decision-making.
Ancient Supports Dictate the Pace of the Game
The single biggest difference is initiative. A Legend pos 5 reacts to what’s happening. An Ancient pos 5 creates what’s happening. When an Ancient support rotates mid at the 4-minute mark, it’s not because mid pinged for help — it’s because they recognized that the enemy mid pushed the wave, the rune is about to spawn, and there’s a kill window. They planned for it 30 seconds ago.
Legend supports wait for things to happen. Ancient supports make things happen. That’s the core mindset shift, and every specific improvement flows from it.
Map Awareness Isn’t Just “Looking at the Minimap”
Every Legend player thinks they have good map awareness. Most don’t. Real map awareness at the Ancient level means you’re tracking enemy cooldowns, predicting rotations based on which heroes are missing and for how long, and constantly evaluating whether you’re in a position to make a play or about to be caught out. It means knowing that when the enemy offlaner disappears at minute 8, they’re probably smoking mid — not just noting “oh, he’s gone” and continuing to pull.
Resource Management and Efficiency
Ancient supports squeeze more out of less. They stack camps while pulling. They grab bounty runes on time. They have better spell usage — not spamming mana on pointless harass but saving it for kill attempts. When you compare the net worth of a Legend 5 and an Ancient 5 at the 20-minute mark, the Ancient player often has 1,000-1,500 more gold despite buying more support items. That gold comes from stacking efficiency, kill participation, and not dying as much.
Dying With Purpose vs. Dying for Nothing
Legend supports die a lot. Some deaths are fine — trading your life for a key enemy hero or saving your carry is a good exchange. But Legend players die for nothing constantly. They walk into fog alone to place a ward and get picked off. They stay in a lost fight too long. They rotate to a tower that was already dead before they arrived. Ancient supports have a much better sense of when they’re about to die and make conscious decisions about whether that death accomplishes anything.
Communication and Team Coordination
Ancient pos 5 players communicate more and better. They ping smoke timings. They use chat wheel effectively. They call out enemy items (BKBs, Blinks, key cooldowns). They suggest Roshan timings. Legend supports often play in their own bubble, reacting to pings rather than creating the team’s plan. Even if your teammates don’t listen to every call, making them consistently raises your win rate over time.
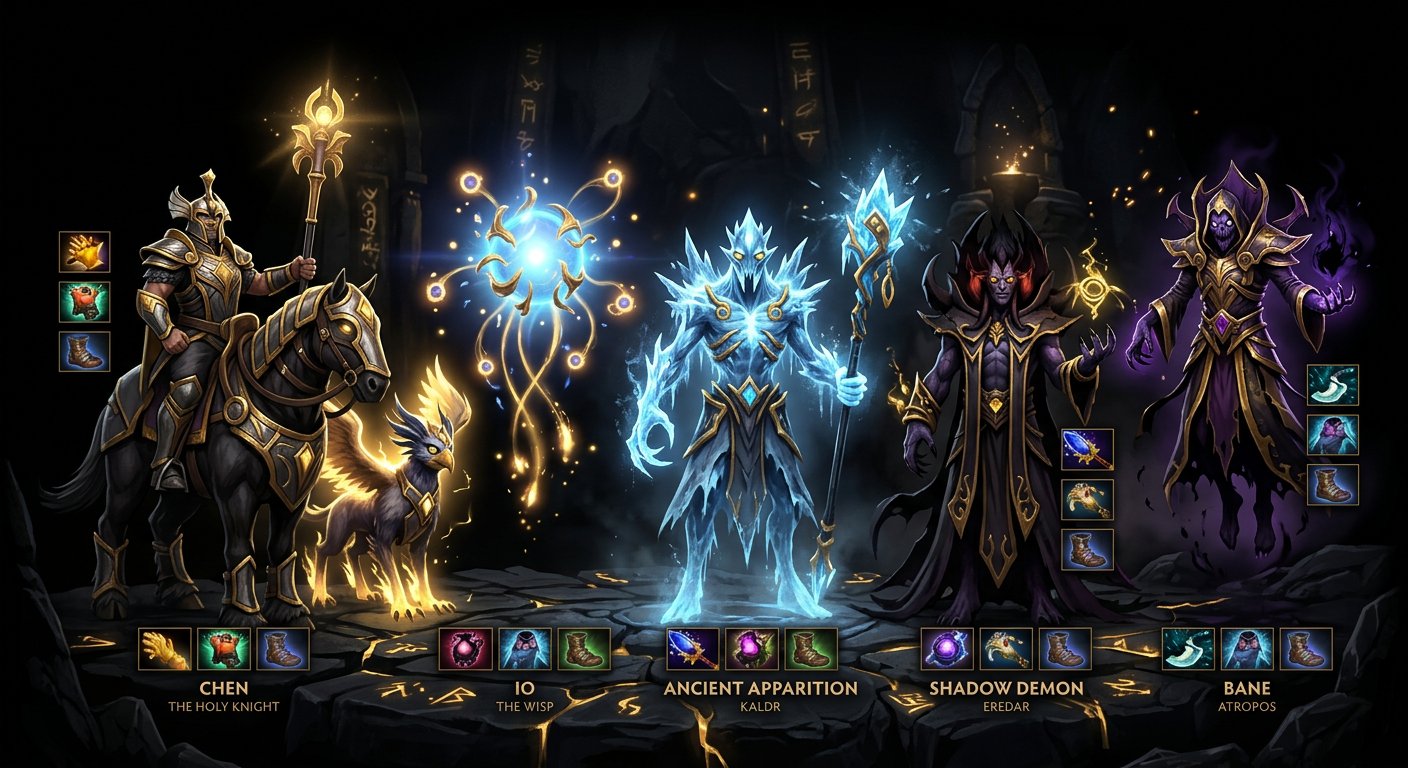
Top 5 Heroes to Climb from Legend to Ancient as Pos 5
Hero selection matters enormously at this bracket. You want heroes that have high impact even with limited farm, can win lanes, and scale into the mid and late game. Here are the five best pos 5 heroes for climbing out of Legend, with full breakdowns.
1. Chen
Chen is the ultimate “I will carry this game from pos 5” hero in the current meta. He’s terrifying in lane, dominates the early game, and his ability to take objectives with creep auras makes him a one-man army. The reason Chen is so effective at Legend is that players in this bracket don’t know how to deal with him. They don’t kite the creeps properly, they don’t focus the right targets, and they underestimate his healing.
Skill Build
Level 1: Holy Persuasion (W) — grab a creep before the horn and bring it to lane. The Harpy Stormcrafter and Hill Troll Priest are your best level 1 options. Harpy gives you a ranged nuke; Hill Troll heals your carry.
Level 2: Divine Favor (E) — the heal-on-hit passive keeps your carry healthy and lets you trade aggressively.
Level 3: Holy Persuasion (W) — grab a second creep. Now you have a small army.
Level 4: Divine Favor (E)
Max priority: W → E → Q. Take your ultimate at 6, 12, 18. Penitence (Q) is mostly a value point for the slow; the real power is in your creeps and healing. Some games you can skip Q entirely until level 10+ if the lane is going well and you just need more creep control and sustain.
Item Build
- Starting items: Tango, Healing Salve, Blood Grenade, Observer Ward, Sentry Ward
- Early game (0-10 min): Boots of Speed, Magic Stick, Wind Lace
- Core (10-25 min): Mekansm → Guardian Greaves (if you can afford it), or Holy Locket for a cheaper healing spike. Hand of Midas is viable if the game is going well — Chen farms it fast with creeps and it solves his XP problems.
- Late game: Aghanim’s Scepter (Ancient creeps are absurdly strong), Pipe of Insight, Vladimir’s Offering, Solar Crest
Playstyle
Chen’s laning stage is about domination. You show up with a strong creep, you harass the enemy offlaner out of the lane, and you secure your carry’s farm. At level 5-7, you should be looking to take the enemy offlane tower with your creeps tanking the tower shots. After that, rotate mid with your army and take that tower too.
In the mid-game, Chen is a pushing machine. Group with your team, send creeps at towers, and use your global heal ultimate to save teammates across the map. The biggest mistake Legend Chen players make is playing too passively — sitting behind the carry and healing. You should be leading the charge, sending creeps to scout, and creating pressure on multiple lanes with your converted units.
Chen falls off late game if you don’t have Aghanim’s Scepter. Ancient creeps with their auras and abilities (the Granite Golem’s HP aura, the Thunderhide’s attack speed aura) can make your entire team significantly stronger in late-game fights. Prioritize getting Aghs in longer games.
2. Io (Wisp)
Io is the highest win-rate support in high-MMR pubs for a reason. The hero is incredibly powerful when played correctly, and at Legend rank, your enemies have no idea how to deal with a good Io. The Tether stun, the Relocate ganks, the constant healing — it all adds up to an overwhelming advantage.
Skill Build
Level 1: Tether (Q) — this is your laning tool. Tether to your carry for the movement speed bonus and the heal sharing.
Level 2: Overcharge (E) — the attack speed bonus on your carry is extremely strong for trading in lane.
Level 3: Tether (Q)
Level 4: Spirits (W) — now you have kill potential with the spirit damage.
Max priority: Q → E → W. Take Relocate at 6, 12, 18. Some players like maxing W first for damage, but Q max gives you the strongest tether stun duration and heal sharing, which is more consistent at this bracket.
Item Build
- Starting items: Tango, Healing Salve, Enchanted Mango x2, Observer Ward
- Early game: Bottle (yes, on pos 5 Io — you share the regen via Tether), Magic Stick → Magic Wand, Boots of Speed
- Core: Holy Locket (the single most important item — doubles your healing output), Mekansm, Urn of Shadows → Spirit Vessel
- Late game: Guardian Greaves, Glimmer Cape, Heart of Tarrasque (luxury, but the HP regen shares through Tether)
Playstyle
Io’s laning stage is about keeping your carry alive and winning trades. Tether to your carry, toggle Overcharge during fights, and use your Spirits to harass when the enemy steps too close. You’re not trying to solo kill anyone — you’re making your carry unkillable and giving them massive attack speed to out-trade the opponents.
At level 6, Io’s game changes completely. Relocate is one of the most powerful abilities in Dota 2. Communicate with your carry (or your mid) and set up Relocate ganks. The combo is simple: Tether your partner, Relocate behind an enemy, your partner stuns/kills them, you Relocate back. At Legend, enemies rarely have TP reactions fast enough to respond.
In the mid-game and late-game, Io is a force multiplier. You make your best core 30-40% stronger just by existing next to them. Identify which core on your team is performing best and glue yourself to them. Heal them, Overcharge them, save them with Relocate. A fed carry with an Io attached is nearly impossible to kill.
The key to climbing with Io is partner coordination. If your carry ignores you, switch to your mid or offlaner. Find whoever is willing to play with you and amplify them. Don’t waste Io on a carry who refuses to fight.
3. Ancient Apparition
Ancient Apparition is the anti-healing, long-range teamfight monster that punishes the healing-heavy lineups common in Legend bracket. Heroes like Huskar, Alchemist, Necrophos, and Morphling are popular in Legend, and AA’s Ice Blast completely shuts them down. Beyond countering specific heroes, AA provides enormous teamfight damage from a safe position.
Skill Build
Level 1: Cold Feet (Q) — this is your laning stun. Combo it with your carry’s slow or stun for guaranteed procs.
Level 2: Chilling Touch (E) — the bonus magic damage on attacks is very strong for trading in lane.
Level 3: Cold Feet (Q)
Level 4: Ice Vortex (W) — the slow zone and magic damage amplification sets up kills beautifully.
Max priority: Q → W → E. Some games you max E first for harass-heavy lanes, but Q max gives you the most reliable kill potential. Take Ice Blast at 6, 12, 18 always.
Item Build
- Starting items: Tango, Healing Salve, Blood Grenade, Observer Ward, Clarity x2
- Early game: Boots of Speed, Magic Stick → Magic Wand, Wind Lace
- Core: Tranquil Boots, Glimmer Cape or Force Staff (depends on enemy lineup — Glimmer against magic burst, Force Staff against gap-closers)
- Mid game: Aghanim’s Shard (if available and useful), Aether Lens for cast range
- Late game: Aghanim’s Scepter, Scythe of Vyse (dream item), Octarine Core
Playstyle
AA’s laning phase is about Cold Feet setups. The stun triggers if the enemy doesn’t move 740 units away from the cast point within 4 seconds. So you need to cast it when enemies are committed — when they’re going for a last hit, when they’re being body-blocked by your creeps, or when your carry has a slow to keep them in range. Don’t just throw Cold Feet randomly; it’s a wasted mana if they simply walk away.
Use Chilling Touch to harass from range — the extra magic damage on your attacks adds up quickly and forces regen usage. Combined with Ice Vortex’s slow, you can create constant pressure on the enemy offlaner.
At level 6, AA becomes a global threat. Ice Blast has unlimited range, and hitting it consistently is the single most important skill to develop on this hero. Practice the timing — the tracer travels at 1,500 speed, so a cross-map blast to the enemy safelane takes about 4-5 seconds. You don’t need to hit perfect snipes every time; using it in teamfights where enemies are clustered is much more reliable and effective.
In the mid and late game, AA plays far behind. You cast Ice Vortex for vision and slow, throw Cold Feet on anyone who gets stunned, and launch Ice Blast into every fight. Your job is to stay alive — a dead AA contributes nothing. Position at the very back, behind even your other support. Your spells have enormous range; use it.
4. Shadow Demon
Shadow Demon is one of the most versatile and underrated pos 5 heroes in the Legend bracket. He has insane lane harass with Shadow Poison stacks, one of the best saves in the game with Disruption, and his ultimate pierces BKB. Legend players consistently underestimate Shadow Poison damage, and that’s your ticket to free wins.
Skill Build
Level 1: Shadow Poison (W) — start stacking poison from level 1. Each stack increases the release damage exponentially.
Level 2: Disruption (Q) — your save and setup spell. Use it defensively to protect your carry or offensively to set up ganks.
Level 3: Shadow Poison (W)
Level 4: Shadow Poison (W)
Max priority: W → Q → E. Shadow Poison max is non-negotiable — at 5 stacks, it deals enormous damage and Legend players constantly eat stacks. Disseminate (E) is a value point or skip until later. Take Demonic Purge at 6, 12, 18.
Item Build
- Starting items: Tango, Healing Salve, Blood Grenade, Observer Ward, Clarity x2
- Early game: Boots of Speed, Magic Stick, Clarity spam (Shadow Poison is mana-hungry)
- Core: Arcane Boots, Glimmer Cape, Aether Lens (cast range is crucial for landing poisons and saving with Disruption)
- Mid game: Force Staff, Aghanim’s Shard
- Late game: Aghanim’s Scepter (two charges of Disruption), Refresher Orb (luxury), Scythe of Vyse
Playstyle
In lane, Shadow Demon is a bully. Shadow Poison has 1,500 cast range and goes through creeps. Hit the enemy offlaner every time it’s off cooldown. At 3-4 stacks, they either run away (mission accomplished) or eat massive damage when you release. Most Legend offlaners don’t respect Shadow Poison stacking at all — they’ll stand there taking 4-5 stacks and suddenly lose 60% of their HP.
Disruption is one of the most skill-testing spells in the game. It banishes a target for 2.5 seconds and creates two illusions of them. Defensively, you use it to save your carry from ganks — banish them right before the stun hits. Offensively, you use it to set up ganks — the 2.5-second banish gives your team time to position, and the illusions deal real damage. The key is timing. Too early and the enemy walks away after the banish; too late and your carry is already dead.
Shadow Demon excels in the mid-game at enabling pick-offs. Demonic Purge is a strong slow that pierces BKB at Aghanim’s Scepter, which makes SD one of the best pos 5 heroes against BKB-dependent carries. Smoke with your team, find a target, Disruption → Demonic Purge → Shadow Poison stack → kill.
Late-game Shadow Demon with Aghanim’s Scepter is a nightmare for enemy carries. Three charges of Demonic Purge that pierce spell immunity, continuous dispel on the targets, and the ability to break passives with the Scepter upgrade. You go from a squishy support to a hero that demands respect from even the most farmed carries.
5. Bane
Bane is the quintessential lane-winning pos 5. Nightmare and Brain Sap give you absolute dominance in the laning stage, and Fiend’s Grip is one of the longest disables in the game. If you want to win lanes and create kill opportunities from minute zero, Bane is your hero.
Skill Build
Level 1: Brain Sap (W) — pure damage nuke that heals you. This is how you win the lane.
Level 2: Nightmare (Q) — setup, save, and disable all in one.
Level 3: Brain Sap (W)
Level 4: Brain Sap (W)
Max priority: W → Q → E. Brain Sap max gives you incredible sustain and damage in lane. Enfeeble (E) is usually a value point at level 4 or later for the status resistance reduction, which makes your other disables more effective. Take Fiend’s Grip at 6, 12, 18.
Item Build
- Starting items: Tango, Healing Salve, Blood Grenade, Observer Ward, Enchanted Mango
- Early game: Boots of Speed, Magic Stick → Magic Wand, Wind Lace
- Core: Tranquil Boots, Glimmer Cape (top priority — Glimmer + Fiend’s Grip makes the channel much harder to cancel), Aether Lens
- Mid game: Force Staff, Aghanim’s Shard (if valuable)
- Late game: Aghanim’s Scepter, BKB (yes, BKB on support Bane if the game demands uninterruptible Fiend’s Grips), Aeon Disk
Playstyle
Bane’s laning stage is oppressive. Brain Sap deals 300 pure damage at max level and heals you for 300. That means every time you cast it, you create a 600 HP swing. In lane, you can trade with virtually any offlaner and come out ahead because Brain Sap keeps your HP topped off while chunking theirs. The mana cost is high, so manage your mana carefully — every Brain Sap should count.
Nightmare is an incredibly versatile spell. Offensively, it’s a 7-second disable that sets up ganks. Defensively, you can Nightmare a diving enemy to stop their aggression, or Nightmare your own carry to save them from a projectile stun (advanced technique — the Nightmare blocks the incoming spell). You can also Nightmare an enemy and then channel Fiend’s Grip on them as the Nightmare ends for a near-guaranteed full channel.
Fiend’s Grip is the centerpiece of Bane’s kit. A 6-second channel that locks down any hero in the game, pierces BKB with Aghanim’s Scepter. The entire game revolves around landing good Grips. Position yourself where enemies can’t easily cancel your channel — behind trees, in fog, or with Glimmer Cape active. The combo is: Nightmare a secondary target (removing them from the fight), then Fiend’s Grip the primary target. Now two enemies are disabled.
Bane scales well into the late game because Fiend’s Grip remains relevant at every stage. A 6-second disable on the enemy carry wins fights regardless of the timer. The challenge is surviving long enough to cast it and not getting instantly blown up. Positioning is everything on late-game Bane.
10 Specific Mistakes Legend Pos 5 Players Make
These aren’t generic mistakes — these are the specific, observable patterns that keep Legend supports from ranking up. Fix even half of these, and you’ll see your MMR climb.
Mistake #1: Standing Behind Your Carry Doing Nothing in Lane
This is the most common sin. You’re in the safelane, standing behind your carry, leeching XP, occasionally throwing a spell. You’re not harassing, not pulling, not stacking — just existing. Every second you spend standing around is a second wasted. If you can’t harass the offlaner (because they outrange you or have too much regen), then go pull. If the pull camp is blocked, deward it. If pulling isn’t efficient, stack the medium or large camp. If none of that works, leave the lane and gank mid. Do something.
Mistake #2: Not Pulling Enough (or Pulling Wrong)
Pulling is the most powerful pos 5 tool in the laning stage, and Legend supports either don’t do it enough or do it incorrectly. A single pull does three things simultaneously: denies an entire creep wave of XP from the enemy, gives you gold and XP, and fixes your lane equilibrium. You should be pulling every other wave if possible.
The common mistake is doing a small camp pull without connecting it to a stack or the large camp. A half-pull just creates a double wave that pushes the lane into the enemy tower — the exact opposite of what you want. Always full-clear: pull through to the large camp, or pull a stacked small camp. If you’re not connecting pulls, you’re actively hurting your carry.
Mistake #3: Dying for Wards
A ward is worth 80 gold. Your death is worth 200+ gold to the enemy, plus XP, plus 30+ seconds of you being off the map. The math never works out. If placing a ward requires walking through dangerous territory without vision, don’t place it. Use safer ward spots. Place wards on the edges of your team’s controlled territory and move them forward as you gain map control. Never walk into the enemy jungle alone to place a deep ward — it’s suicide 90% of the time, and the ward gives about 60 seconds of useful vision before it’s dewarded anyway.
Mistake #4: Not Buying Enough Regen in Lane
Legend supports often start with one set of tangoes and a salve, burn through their regen in the first 3 minutes, and then sit in lane at half HP unable to trade. Meanwhile, the Ancient support is ferrying out clarities, mangoes, and salves on cooldown. They spend 300-400 gold on regen in the first 5 minutes, but they win the lane because they can sustain the pressure. Don’t be afraid to spend gold on regen. A won lane is worth far more than an early pair of boots.
Mistake #5: Not Rotating When the Lane Is Won (or Lost)
Two scenarios where Legend supports stay in lane way too long:
Won lane: Your carry is level 6, the offlaner is level 4, you’ve taken the tower. Your job here is done. Leave. Go stack camps, smoke mid, place aggressive wards. Your carry doesn’t need you anymore — they need space, and you create space by being active elsewhere.
Lost lane: The enemy offlaner has killed your carry twice, they’re two levels ahead, and the lane is a disaster. Staying in lane won’t fix this. Leave. Go help another lane, stack camps for your carry to recover in, and minimize the damage. Soaking XP in a lost lane makes two heroes underfarmed instead of one.
Mistake #6: Using Smoke of Deceit Improperly (or Not At All)
Legend supports buy maybe one or two smokes per game. Ancient supports use four to six. Smoke is the most cost-efficient item in Dota 2. For 50 gold, you get guaranteed invisibility that isn’t revealed by wards, allowing you to walk past the enemy’s entire vision network and make a kill.
The timing for smoke is when you see an enemy hero alone or out of position on the map. Ping the smoke, gather your team (even just one or two heroes), and go. Don’t smoke five people to find someone — smoke two or three and play off the information. Don’t smoke with no target in mind; have a plan before you pop it.
Mistake #7: Terrible Teamfight Positioning
This one kills Legend supports constantly. You walk to the front of your team, get initiated on, and die before casting a single spell. Your 2,000-gold Glimmer Cape never gets used. Your Fiend’s Grip is never channeled. Your Ice Blast is never launched. You contributed nothing to the fight because you were dead before it started.
As a pos 5, you should almost always be the furthest back hero in your team during fights. Stand at max cast range. Let your frontline initiate. Wait for the enemy to commit their spells, then walk in and use your abilities. A support who casts all their spells in a fight is worth more than a support with 3,000 extra gold who dies instantly.
Mistake #8: Ignoring Power Spikes and Timing Windows
Every team has a timing when they’re strongest relative to the enemy. Maybe your team has a Beastmaster who just hit level 6 and an AA with Ice Blast — that’s a kill window. Maybe the enemy carry just bought a BKB and your team’s disable-heavy lineup is on a timer. Legend supports play at the same pace regardless of the game state. Ancient supports accelerate when they have an advantage and play carefully when they’re behind.
Pay attention to items and levels. When your mid completes a key item (Blink Dagger on a Puck, BKB on a Storm Spirit), that’s the signal to smoke and fight. When the enemy carry is farming a crucial item and hasn’t completed it yet, that’s the window to apply pressure. These timing-based decisions win games at every MMR.
Mistake #9: Not Adapting Item Builds to the Game
Legend supports often follow the same item build every game regardless of what’s happening. They rush Glimmer Cape even when the enemy has no magic damage. They buy Force Staff even when nobody on the enemy team has gap-closing abilities. Your item build should be a direct response to the game.
Ask yourself: What is the enemy’s kill threat If it’s magic burst (Lion, Lina, Zeus), Glimmer Cape. If it’s physical initiation (Slark, Riki jumping your carry), Force Staff. If the enemy has a lot of healing (Necrophos, Oracle), Spirit Vessel. If your team needs sustain in fights, Mekansm. Think about what problem your team has, and buy the item that solves it.
Mistake #10: Giving Up Too Early
This is the most destructive mistake, and it’s purely mental. Legend players give up at 15 minutes when the score is 5-15. They stop warding, stop smoking, stop trying to make plays. They afk in base or follow the carry around aimlessly.
Here’s the reality: Legend games are incredibly volatile. A team that’s down 10 kills at 15 minutes can easily win if they get one good fight. The enemy team will make mistakes — they’ll overextend, they’ll split up, they’ll fight without BKB. Your job is to be ready when that happens. Keep warding, keep smoking, keep looking for opportunities. The games you win from behind are the ones that push your MMR up the fastest, because you’re gaining MMR in games that most Legend players would have mentally conceded.
Phase-by-Phase Guide: How to Play Pos 5 from Laning Through Late Game
Laning Phase (0:00 – 8:00)
Pre-horn (before 0:00): Buy your starting items, place your observer ward (the most common safelane ward spots give vision of the enemy offlaner’s approach), and help your carry secure the ranged creep in the first wave if possible. If you’re playing Chen, grab your first creep now.
First two waves (0:00 – 1:00): Establish lane dominance. Trade aggressively with the enemy offlaner. Use your spells to harass. Position between the enemy offlaner and their creep wave to zone them from XP range if possible. At this stage, the enemy support (pos 4) may still be in lane — be careful of 2v2 fights and know your matchup’s power level.
Minutes 1-3: This is your pulling window. Once the lane stabilizes, start pulling on even-minute marks (the creep waves sync well with pull timing). Stack the small camp at :53 and pull the next wave into the stacked camp for a full clear. While pulling, harass the offlaner when they try to contest.
Minutes 3-5: Evaluate the lane. Is your carry farming well Are you winning If yes, continue pressuring and consider diving the offlaner with your carry if there’s a kill opportunity. If the lane is even or losing, consider a rotation mid — especially if you have a stun or strong ganking spell. The 4-minute rune spawn is an excellent gank timing.
Minutes 5-8: This is the transition period. Your carry should be approaching level 6. The enemy might start grouping. Place a ward that covers the area between mid and your safelane to spot rotations. Start stacking jungle camps for your carry — even two stacks on the large camp provide 200-300 bonus gold when your carry farms them. If the tower is low, consider taking it and moving to the next phase.
Mid-Game (8:00 – 25:00)
Minutes 8-12: The laning phase is over. This is where Legend supports fall apart because there’s no clear “assignment.” Your job now is threefold: ward aggressively for your team’s movement, stack camps for your cores, and look for smoke ganks on isolated enemy heroes.
Place wards that show the enemy’s rotation paths — the entrances to their jungle, the Roshan area, and the high ground spots that reveal where they’re farming. Don’t place all your wards at once; spread them out so you always have vision somewhere.
Minutes 12-18: This is the critical teamfight phase. Most games are decided here. Your priorities are:
- Be at every fight. If you see your team moving to fight, be there. Your spells and items are more valuable than the jungle camp you’re farming.
- Secure objectives after fights. Won a fight Push a tower or take Roshan. Don’t go back to farming — capitalize on the advantage.
- Track enemy items. When you see the enemy carry complete BKB or a key item, communicate it to your team. This information changes how you fight.
Minutes 18-25: Games in Legend bracket often hit a stalemate around this point. Both teams are afraid to push high ground, and the game devolves into farming and occasional pickoffs. This is where good ward placement and smoke usage break the game open. Ward the enemy’s side of the map to see their farming patterns, smoke to catch the most farmed enemy hero, and use the numbers advantage to take Roshan or push a lane.
Late Game (25:00+)
Late game as a pos 5 is about three things: not dying, using your items at the right time, and enabling your cores to end the game.
Positioning: You’re the squishiest hero on the map. One stun and you’re dead. Stay behind your team at all times. Use fog of war and trees to your advantage. In teamfights, don’t walk forward — let the fight come to you.
Buyback awareness: Always have buyback gold after 30 minutes. If you die without buyback in a late-game fight, the enemy pushes your base and wins. A support buyback that allows you to cast your spells in the defending fight is often game-winning. Track your gold and don’t buy items that leave you without buyback unless it’s a do-or-die moment.
Item usage: Your Glimmer Cape, Force Staff, or other defensive items win late-game fights more than any core’s item. A perfectly timed Glimmer on your carry during a teamfight negates thousands of magic damage. A Force Staff saving your mid from a Clockwerk Cogs wins the fight. Focus on using your items reactively — wait for the enemy’s initiation, then respond.
Defending high ground: If you’re behind, ward your own jungle entrances and the Roshan area. Smoke defensively to scout before the enemy pushes. Use your abilities to clear creep waves from safety — Shadow Poison, Ice Blast, and Disruption illusions all help clear waves without putting you in danger.
Ending the game: If you’re ahead, ward the enemy jungle, smoke to find pickoffs, and push with your team after kills. Don’t walk up high ground without a significant advantage (Aegis, numbers, or a major item timing). Many Legend games are thrown by an impatient team pushing high ground 5v5 into a defending lineup.
The Teammate Problem: Why Games Feel Unwinnable
Let’s address the elephant in the room. You’re reading this guide, you’re improving your play, and you’re still losing because your carry went Battle Fury on Spectre, your mid died seven times to the enemy Pudge, and your offlaner thinks he’s the carry and takes all the farm.
We get it. It’s frustrating. And it’s real — you will have unwinnable games. But here’s the thing that separates players who climb from players who stay stuck: you focus on the 60-70% of games that are winnable, not the 15-20% that aren’t.
The Three Categories of Games
Free wins (15-20%): Your team is better, the enemy makes critical mistakes, and you win regardless of how you play. You gain MMR here no matter what.
Free losses (15-20%): Your carry disconnects, three lanes lose simultaneously, or the enemy has a smurf. You lose these no matter what you do. Accept it and move on.
Swing games (60-70%): These are the games that determine your rank. Both teams are roughly equal, and the game could go either way. YOUR play in these games is what pushes your win rate above 50% and makes you climb. This is where all the advice in this guide matters most.
How to Maximize Your Impact in Swing Games
Win the laning phase. A carry who’s 1,000 gold ahead at 10 minutes because you dominated the lane makes fewer mistakes and is harder to tilt. Be the reason your carry has a good game.
Shotcall. Even simple calls — “smoke here,” “Roshan now,” “back, they have buyback” — give your team structure. Most Legend games devolve into chaos because nobody communicates. Be the leader.
Don’t tilt your team. Never flame. Never ping someone’s death. Never type essays about what went wrong. Your job is to create a positive environment where people play their best. Mute toxic players instantly and focus on your own game.
Play your best hero. This isn’t the time to practice new heroes. If you’re trying to climb, spam your best two or three pos 5 heroes. Consistency is more important than versatility at this bracket.
When You Want a Shortcut
Sometimes the grind just isn’t realistic. Maybe you have limited time to play, maybe you’re stuck in a losing streak and need a reset, or maybe you just want to see how higher-level support play looks from inside your account. That’s exactly what Team Smurf’s MMR boosting service is for — professional players who can demonstrate what Ancient-level pos 5 play looks like on your account, giving you replays to study and an MMR foundation to build on.
Realistic Timeline: How Long Does It Take to Climb from Legend to Ancient
Let’s be honest and specific, because too many guides promise unrealistic results.
The Math
Legend 1 to Ancient 1 is roughly 700-800 MMR. At 25-30 MMR per win (minus the same for losses), you need a net positive of about 27-32 wins. If you’re winning 55% of your games (which is a solid, realistic improvement), that means:
- 55% win rate over 200 games: 110 wins, 90 losses. Net +20 wins × 28 MMR = +560 MMR. Not quite Ancient yet.
- 55% win rate over 300 games: 165 wins, 135 losses. Net +30 wins × 28 MMR = +840 MMR. Ancient achieved.
- 58% win rate over 200 games: 116 wins, 84 losses. Net +32 wins × 28 MMR = +896 MMR. Comfortable Ancient.
Realistic Expectations
If you play 3-4 games per day: Expect 2-4 months to climb from Legend to Ancient, assuming you’re genuinely improving and implementing the advice in this guide.
If you play 1-2 games per day: Expect 4-8 months. Fewer games means slower improvement and more variance.
If you play 5+ games per day: Expect 1-3 months, but be careful of burnout and tilt. Playing too many games in a row degrades your decision-making. Take breaks after two consecutive losses.
The Improvement Curve
Your improvement won’t be linear. You’ll have streaks where you gain 300 MMR in a week, followed by plateaus or losing streaks. This is normal. The key indicators that you’re on the right track are:
- Your average deaths per game are decreasing
- Your ward placement is more intentional and varied
- You’re stacking more camps per game
- You’re using smoke more frequently
- You’re making rotation decisions proactively rather than reactively
If these metrics are improving but your MMR is flat, keep going — the MMR will follow. If you’ve been stuck for 100+ games with no improvement in these areas, it might be time to get professional coaching to identify your blind spots.

Frequently Asked Questions
Ready to Climb Get Expert Help
Climbing from Legend to Ancient as a pos 5 is achievable, but it requires deliberate practice, the right hero pool, and a willingness to improve your decision-making at every stage of the game. Some players make this jump in a few months. Others get stuck for years.
Written by Team Smurf’s Immortal-rank analysts — Rankings last verified February 2026


