Best Offlane Heroes to Climb MMR in Dota 2: Pos 3 Tier List 2026

The offlane is the most misunderstood role in Dota 2. It’s not the “tanky front-liner who builds auras” role. It’s not the “second carry who farms all game” role. And it’s definitely not the “pick whatever and hope for the best” role. The offlane — Position 3 — is the tempo-setting role. You dictate when your team fights, where your team fights, and who your team kills first.
A great offlaner wins the lane against the enemy carry, transitions into a team fight monster by 15-20 minutes, and creates enough space and chaos for their own carry to farm freely. A bad offlaner loses lane, becomes irrelevant, and leaves the team with no front-liner and no initiation.
This complete Pos 3 tier list for 2026 covers 15+ offlane heroes across S, A, and B tiers. We’ll break down lane matchups, initiation guides, itemization paths, and the critical decision of when to join fights versus when to split push. Whether you’re a Guardian player trying to climb or an Ancient offlaner looking to break into Divine, this guide will help.
For the fastest possible climb, TeamSmurf’s MMR boosting service features professional players who dominate the offlane with many of these exact heroes.
Table of Contents
- What the Offlane Role Actually Requires
- S-Tier Offlaners: The Meta Dominators
- A-Tier Offlaners: Reliable Picks
- B-Tier Offlaners: Situational Winners
- The Art of Initiation: How to Start Team Fights
- Lane Matchup Guide
- Offlane Itemization Paths
- When to Fight vs. When to Split Push
- Bracket-Specific Offlane Advice
- FAQ
What the Offlane Role Actually Requires
Before picking heroes, understand what Pos 3 needs to do:
- Win (or survive) the lane against the enemy carry + support. You’re 1v2 or 2v2 in the hardest lane on the map. Your goal is to get levels and deny farm from the enemy carry.
- Transition into a team fight initiator or front-liner. By 15-20 minutes, you should be the one starting fights, soaking damage, and creating space for your carry.
- Build aura and utility items. Offlaners don’t build selfish damage items — they build items that help the entire team (Pipe, Crimson Guard, Vladmir’s, etc.).
- Control the game’s tempo. When you smoke and gank, your team fights. When you push a tower, your team takes objectives. The offlaner dictates the pace.
The ideal offlaner: Tanky enough to survive initiation, has a reliable stun or initiation tool, builds team-benefiting items, and is impactful even without farm priority.
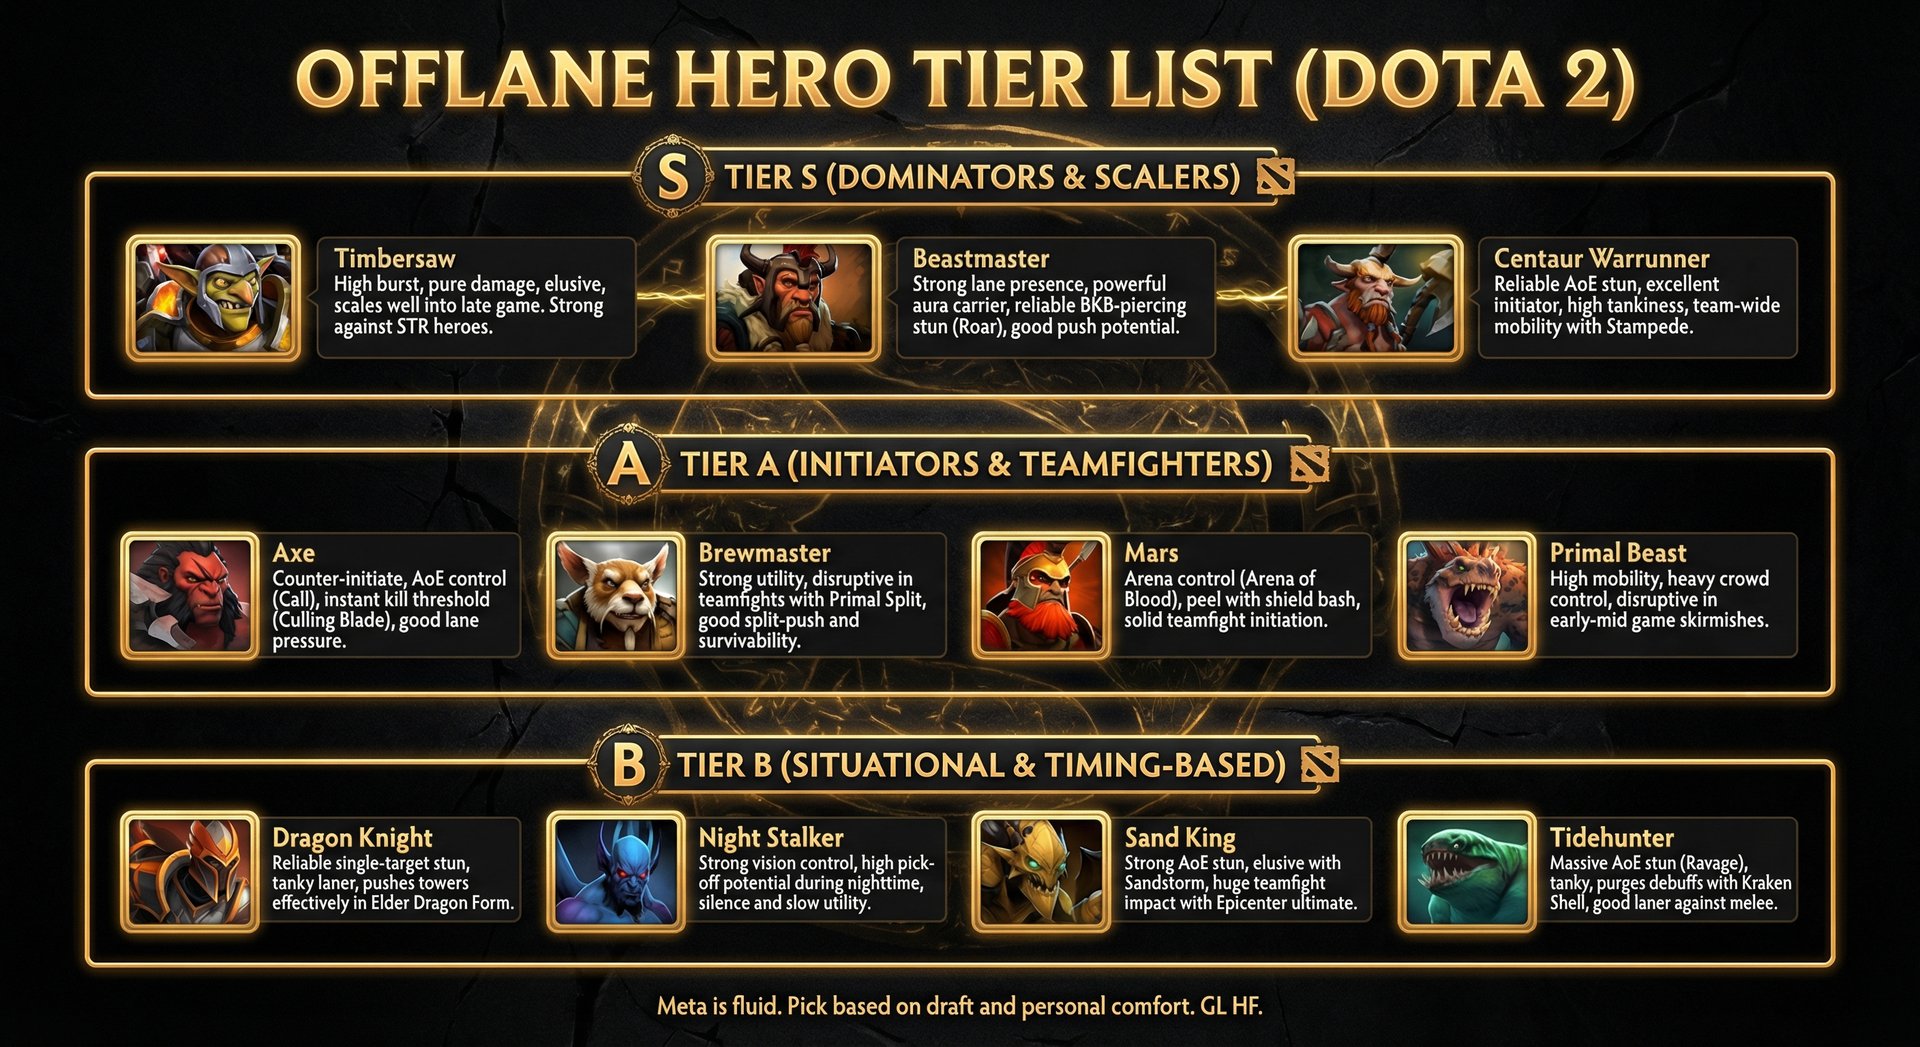
| Tier | Heroes | Summary |
|---|---|---|
| S-Tier | Axe, Mars, Centaur Warrunner, Tidehunter, Beastmaster | Lane dominators with game-changing team fight impact |
| A-Tier | Bristleback, Sand King, Underlord, Night Stalker, Slardar, Legion Commander | Strong and reliable with some matchup dependency |
| B-Tier | Timbersaw, Dark Seer, Enigma, Pangolier, Doom, Necrophos | High ceiling but situational; punished in bad matchups |
S-Tier Offlaners: The Meta Dominators
1. Axe
Win rate: ~53% | Best brackets: All brackets | Difficulty: Low
Axe is the quintessential offlaner and has been for years. Berserker’s Call is a BKB-piercing AoE taunt that forces enemies to attack you — this alone makes Axe one of the best initiators in the game. Counter Helix punishes enemies who attack him by dealing return damage in an AoE. And Culling Blade executes heroes below a health threshold, providing a kill guarantee.
Why Axe is S-tier:
- Berserker’s Call pierces BKB — one of only a few disables that do this
- Counter Helix makes him a lane bully — creeps spinning procs damage the enemy carry
- Culling Blade executes through healing, saving abilities, and provides a speed buff to allies
- Blink → Call combo is simple, devastating, and effective at every MMR
- Naturally tanky — 3.0 STR gain makes him hard to kill
- Battle Hunger provides lane harass and movement speed
Laning: Axe’s lane strategy is unique: run between the enemy creeps and force Counter Helix procs. Stand between the enemy creep wave and the carry, spin on the creeps (which damages nearby enemies), and zone the carry away from last hits. With a Stout Shield and regen, you can tank creep aggro and come out ahead thanks to Counter Helix damage.
This “creep cutting” technique is Axe’s signature move. In lower brackets, enemy carries have no idea how to deal with it. They either run away (losing all farm) or try to fight you (and lose to Counter Helix + your Pos 4 support).
Itemization:
- Starting: Stout Shield, Tango, Ring of Protection, Mango
- Early game: Vanguard → Boots → Blink Dagger (CORE)
- Mid game: Blade Mail → BKB OR Pipe of Insight (depending on enemy damage type)
- Late game: Overwhelming Blink, Heart of Tarrasque, Assault Cuirass, Aghanim’s Scepter
Initiation combo: Blink → Berserker’s Call (catch 2+ heroes) → Blade Mail (reflect damage while they’re forced to attack you) → team follows up. In the late game with Overwhelming Blink, you deal additional damage on landing. If an enemy drops below the Culling Blade threshold during the Call, immediately ult them for the guaranteed kill.
Pro tip: In lower brackets (Herald through Archon), enemies often clump behind their tower during pushes. Blink past the tower into 3+ heroes, Call, and watch them melt to Counter Helix + Blade Mail. This single play wins more low-MMR games than almost any other initiation.
2. Mars
Win rate: ~52% | Best brackets: Archon through Immortal | Difficulty: Medium
Mars is a fight-controlling monster. Arena of Blood creates a massive circular barrier that traps enemies inside and blocks projectiles from outside — it’s one of the most impactful ultimates in the game. God’s Rebuke is a massive cleave that crits and pushes enemies back. Bulwark reduces frontal damage significantly.
Why Mars is S-tier:
- Arena of Blood controls entire team fights — enemies trapped inside are forced to fight on your terms
- Spear of Mars stuns enemies against terrain — reliable initiation
- God’s Rebuke deals massive AoE damage and scales with items
- Bulwark makes him extremely tanky from the front
- Strong laning phase with God’s Rebuke harass and last-hitting
Laning: Mars wins most lanes with God’s Rebuke. The ability has a massive AoE, deals bonus damage, and pushes creeps and heroes back. Use it to simultaneously harass the enemy and secure last hits. Spear of Mars should be used when you have a tree line or tower behind the enemy — the stun on terrain impact is devastating.
Itemization:
- Early game: Phase Boots → Soul Ring → Blink Dagger
- Mid game: BKB → Desolator OR Pipe of Insight
- Late game: Assault Cuirass, Refresher Orb, Satanic, Overwhelming Blink
Initiation combo: Blink → Arena of Blood (catch 2-3 heroes) → Spear of Mars (pin someone to the Arena wall for bonus stun) → God’s Rebuke. With BKB active, you can’t be interrupted during this combo. Refresher Orb allows double Arena + double Spear, which is absolutely devastating in late-game fights.
3. Centaur Warrunner
Win rate: ~53% | Best brackets: Herald through Ancient | Difficulty: Low
Centaur is the tankiest offlaner in Dota 2 and one of the simplest to execute. Hoof Stomp provides an AoE stun. Double Edge deals massive burst damage (at the cost of self-damage, which is negligible with his HP pool). Retaliate returns damage to attackers. And Stampede gives your entire team max movement speed and slow resistance — one of the best team fight initiation ultis in the game.
Why Centaur is S-tier:
- Stampede is a team-wide engage/disengage tool — incredibly versatile
- Hoof Stomp provides reliable AoE stun
- Double Edge + Stomp deals 500+ burst damage at level 7
- Retaliate punishes enemies for attacking you — synergizes with tanky build
- Naturally tanky — 4.0 STR gain, one of the highest in the game
- Simple execution — Blink → Stomp → Double Edge is all you need
Laning: Centaur’s laning is straightforward. Use Double Edge to harass the enemy carry (it’s essentially free damage since your HP pool can absorb the self-damage). Last hit with your high base damage. Retaliate punishes the enemy support for right-clicking you. At level 6, Stampede gives global gank potential — run at anyone on the map.
Itemization:
- Early game: Hood of Defiance OR Vanguard → Phase Boots → Blink Dagger
- Mid game: Pipe of Insight OR Crimson Guard (depending on enemy damage) → Aghanim’s Shard
- Late game: Heart of Tarrasque, Overwhelming Blink, Assault Cuirass
4. Tidehunter
Win rate: ~52% | Best brackets: All brackets | Difficulty: Low
Tidehunter is the team fight king of offlaners. Ravage is arguably the best initiation ultimate in Dota 2 — a massive AoE stun that hits in a huge radius. Kraken Shell provides passive damage block and auto-dispels debuffs at a health threshold. Anchor Smash reduces enemy damage. Gush provides armor reduction and slow.
Why Tidehunter is S-tier:
- Ravage is the best AoE initiation in the game — 2.8 seconds of stun in a massive radius
- Kraken Shell makes him naturally tanky and dispels debuffs automatically
- Anchor Smash reduces enemy carry’s damage by 60% — massive in team fights
- Gush provides armor reduction for physical damage lineups
- Extremely forgiving in lane — Kraken Shell’s damage block lets you tank harassment
Laning: Tidehunter is almost impossible to bully out of lane thanks to Kraken Shell. Just stand in the creep wave, last hit with Anchor Smash, and tank whatever the enemy throws at you. Your lane goal isn’t to dominate — it’s to survive, get levels, and hit level 6 with Blink Dagger timing.
Itemization:
- Early game: Arcane Boots → Blink Dagger (CORE)
- Mid game: Pipe of Insight → Refresher Orb (double Ravage!)
- Late game: Shiva’s Guard, Aghanim’s Scepter, Overwhelming Blink
Initiation: Blink → Ravage → Anchor Smash → Gush. With Refresher Orb, double Ravage is one of the most devastating combos in Dota 2. Your team needs to be ready to follow up — ping or voice chat before you go in.
5. Beastmaster
Win rate: ~52% | Best brackets: Legend through Immortal | Difficulty: Medium
Beastmaster is the vision and pickoff king of the offlane. Hawk provides scouting vision. Boar provides a powerful slow. Wild Axes deals damage and applies stacks. And Primal Roar is a BKB-piercing single-target stun with massive cast range — perfect for catching priority targets.
Why Beastmaster is S-tier:
- Primal Roar pierces BKB — guaranteed catch on any hero
- Hawk provides free scouting vision — no wards needed for information
- Boar provides a strong slow for chasing and kiting
- Inner Beast aura gives attack speed to nearby allies — great in team fights
- Dominates lane with Wild Axes spam and summons
- Excellent at taking Roshan with summons + aura
Laning: Beastmaster clears waves rapidly with Wild Axes. Boar harasses the enemy carry constantly. Send Hawk to scout the enemy jungle for ganking information. At level 6, Primal Roar guarantees a kill on any hero if your team can follow up.
Itemization:
- Early game: Helm of Iron Will → Boots → Helm of the Overlord (micro dominated creep)
- Mid game: Blink Dagger → Aghanim’s Scepter (extends Roar cast range massively)
- Late game: Assault Cuirass, Refresher Orb, BKB
A-Tier Offlaners: Reliable Picks
6. Bristleback
Win rate: ~53% | Best brackets: Herald through Legend | Difficulty: Very Low
Bristleback is the unkillable front-liner. His passive (Bristleback) reduces all damage taken from behind by 40%, and his Quill Spray stacks deal increasing damage the more they stack on a target. Combined with Warpath (which gives damage and movement speed per spell cast), Bristle becomes a snowballing monster that’s nearly impossible to kill from behind.
Key strengths:
- Bristleback passive makes him absurdly tanky when attacked from behind
- Quill Spray stacks deal exponentially increasing damage
- Warpath makes him faster and harder-hitting with each spell
- Nasal Goo reduces armor and slows — devastating when chasing
- Extremely simple to play — just face away from enemies and spam Quill Spray
- Dominates lanes he shouldn’t win by simply being unkillable
Itemization: Vanguard → Phase Boots → Aghanim’s Shard → Pipe/Crimson → Heart of Tarrasque → Assault Cuirass. Bristle wants to be as tanky as possible — more HP = more Quill Sprays = more Warpath stacks = more damage.
Counter warning: Bristle is hard-countered by Silver Edge (breaks his passive) and heroes with Break (Viper). If the enemy picks these, reconsider Bristle.
7. Sand King
Win rate: ~51% | Best brackets: Archon through Divine | Difficulty: Medium
Sand King is a team fight powerhouse with one of the best AoE ultimates in the game. Epicenter deals massive pulsing damage in an AoE. Burrowstrike is a reliable stun + mobility spell. Sand Storm provides AoE damage and invisibility. Caustic Finale causes creeps to explode when they die, providing farming acceleration.
Key strengths:
- Epicenter deals devastating AoE damage when channeled properly
- Burrowstrike is a gap-closing stun — reliable initiation
- Sand Storm provides AoE farming + invisibility for escape
- Blink → Burrowstrike → Epicenter combo is devastating
Itemization: Arcane Boots → Blink Dagger → BKB (channel Epicenter without interruption) → Aghanim’s Scepter → Shiva’s Guard
8. Underlord
Win rate: ~54% | Best brackets: Herald through Ancient | Difficulty: Low
Underlord is the highest win-rate offlaner in pubs for good reason. Firestorm provides massive AoE damage and lane clear. Pit of Malice roots enemies in an AoE. Atrophy Aura reduces enemy damage while giving Underlord bonus damage from nearby deaths. And Dark Rift teleports your ENTIRE team to any allied unit on the map.
Key strengths:
- Firestorm clears waves and camps instantly — excellent farming speed
- Pit of Malice is a reliable AoE root that goes through BKB
- Atrophy Aura steals enemy damage — cripples enemy right-clickers
- Dark Rift provides global team mobility — split push then TP to fights
- Extremely tanky with high STR gain
Itemization: Arcane Boots → Pipe of Insight OR Crimson Guard → Guardian Greaves → Assault Cuirass → Shiva’s Guard. Underlord builds full aura/utility — every item benefits the team.
9. Night Stalker
Win rate: ~52% | Best brackets: Crusader through Divine | Difficulty: Low-Medium
Night Stalker is a tempo monster who transforms at nighttime. During the day, he’s mediocre. At night, he gains massive movement speed, attack speed, and his abilities become enhanced. Void is a nuke + slow (during day) / mini-stun (at night). Crippling Fear silences and misses. Hunter in the Night provides passive buffs at night. And Dark Ascension gives flying vision and flying movement.
Key strengths:
- Night-time power spike is enormous — can solo kill most heroes
- Crippling Fear silences enemies, preventing spell casts
- Dark Ascension provides flying movement and vision — insane scouting
- Creates massive pressure during night cycles
- Strong ganking potential — run at enemies with night speed bonuses
Itemization: Phase Boots → Armlet OR Echo Sabre → BKB → Aghanim’s Scepter → Basher → Assault Cuirass
10. Slardar
Win rate: ~51% | Best brackets: Archon through Ancient | Difficulty: Medium
Slardar is an armor-shredding initiator. Slithereen Crush provides an AoE stun. Bash of the Deep provides a passive bash. Guardian Sprint gives massive movement speed. And Corrosive Haze reduces enemy armor by a massive amount AND provides true sight — no invisible hero can hide.
Key strengths:
- Corrosive Haze shreds armor — amplifies all physical damage from your team
- Slithereen Crush is a reliable AoE stun
- Bash provides lockdown during extended fights
- Excellent against invisible heroes (Corrosive Haze provides true sight)
- Strong Roshan threat with armor reduction
Itemization: Power Treads → Blink Dagger → BKB → Assault Cuirass → Aghanim’s Scepter
11. Legion Commander
Win rate: ~52% | Best brackets: Herald through Legend | Difficulty: Low-Medium
Legion Commander is a snowball offlaner who gains permanent damage from winning Duels. Duel forces a 1v1 fight between LC and the target — the winner gains permanent bonus damage. Overwhelming Odds provides AoE nuke and movement speed. Press the Attack provides a strong dispel + attack speed + heal. Moment of Courage provides passive lifesteal procs.
Key strengths:
- Duel wins provide permanent +10/14/18 damage per kill — snowballs incredibly hard
- BKB-piercing disable with Aghanim’s Scepter
- Press the Attack dispels and heals — versatile defensive ability
- Overwhelming Odds provides lane clear and burst damage
- Strong dueling potential with Blink + BKB + Blade Mail
Itemization: Phase Boots → Blade Mail → Blink Dagger → BKB → Assault Cuirass → Aghanim’s Scepter
Critical tip: Only Duel targets you can KILL. Dueling a tanky hero and losing gives THEM permanent damage. Target squishy supports and mid heroes early on to stack Duel damage.
B-Tier Offlaners: Situational Winners
12. Timbersaw
Win rate: ~49% | Best brackets: Legend through Immortal | Difficulty: Medium-High
Timbersaw is the anti-strength hero specialist. Reactive Armor gives stacking HP regen and armor when attacked. Timber Chain provides insane mobility by hooking to trees. Whirling Death steals primary attribute. Chakram deals massive pure damage in an AoE. Against strength-heavy lineups with lots of melee heroes, Timber is unstoppable.
Why he’s B-tier: Timber gets destroyed by Silver Edge (breaks Reactive Armor), Spirit Vessel (reduces healing), and magic-heavy lineups. He’s also weak in open areas with no trees (Timber Chain needs trees to hook to). Very matchup dependent.
When to pick: Pick Timber against 3+ strength/melee heroes. Avoid picking against heavy magical burst and heroes with Break.
Itemization: Arcane Boots → Kaya → Eul’s Scepter → Bloodstone → Aghanim’s Scepter → Shiva’s Guard
13. Dark Seer
Win rate: ~50% | Best brackets: Legend through Immortal | Difficulty: Medium
Dark Seer is a utility and team fight specialist. Ion Shell deals AoE damage around a target, providing farming and lane harassment. Surge gives massive movement speed to an ally. Vacuum pulls enemies together in an AoE. And Wall of Replica creates illusions of enemies that pass through it.
Why he’s B-tier: Dark Seer doesn’t have a reliable stun, which limits his initiation. His combo (Vacuum → Wall) has a long cooldown and requires setup. He’s also not the tankiest offlaner, meaning he can get bursted in fights.
When to pick: Pick DS when your team already has stuns and you need AoE setup. Vacuum into Enigma Black Hole, or Vacuum into Echo Slam, are game-winning combos.
Itemization: Mekansm → Guardian Greaves → Pipe → Aghanim’s Scepter → Refresher Orb
14. Enigma
Win rate: ~51% | Best brackets: Archon through Immortal | Difficulty: Medium
Enigma has the most feared ultimate in Dota 2: Black Hole. A channeled AoE disable that pulls all enemies toward the center and deals massive damage over 4 seconds. When Black Hole hits 3+ heroes, the fight is over. Midnight Pulse provides percentage-based HP damage in an area. Demonic Conversion provides farming Eidolons.
Why he’s B-tier: Black Hole is channeled — any stun cancels it. Enemy teams with reliable stuns (Rubick, Silencer) make Black Hole risky. Enigma also has a slow start — he needs jungle farm with Eidolons before becoming relevant. In lower brackets, Enigma players get their Black Hole canceled constantly.
When to pick: Pick Enigma when the enemy has limited stuns and can’t easily cancel Black Hole. Pair with BKB for guaranteed channels.
Itemization: Arcane Boots → Blink Dagger → BKB → Refresher Orb → Aghanim’s Scepter
15. Pangolier
Win rate: ~49% | Best brackets: Ancient through Immortal | Difficulty: High
Pangolier is a mobile disruptor with one of the most unique kits in Dota 2. Rolling Thunder turns Pango into an unstoppable rolling ball that stuns everything it hits. Swashbuckle provides rapid attacks in a line. Shield Crash provides damage reduction. Lucky Shot disarms and slows.
Why he’s B-tier: Pangolier requires precise mechanical execution. Rolling Thunder is hard to control, and missing your stuns feels terrible. Below Ancient, most Pango players can’t execute combos consistently.
Itemization: Arcane Boots → Diffusal Blade → Aghanim’s Shard → BKB → Gleipnir → Aghanim’s Scepter
16. Doom
Win rate: ~50% | Best brackets: Legend through Immortal | Difficulty: Medium
Doom’s ultimate (Doom) is the strongest single-target disable in the game — it mutes all items and silences all abilities for its duration. In every game, there’s one enemy hero that your team can’t deal with. Doom removes that hero from the fight entirely.
Key strengths:
- Doom ultimate removes any hero from the fight
- Devour provides bonus gold and stolen abilities from neutral creeps
- Scorched Earth gives AoE damage, healing, and movement speed
- Flexible builds — can go aura or damage depending on the game
Itemization: Phase Boots → Blink Dagger → BKB → Shiva’s Guard → Refresher Orb → Aghanim’s Scepter
17. Necrophos
Win rate: ~52% | Best brackets: Herald through Ancient | Difficulty: Low
Necrophos is a sustain-based offlaner who excels in extended fights. Heartstopper Aura passively drains enemy HP. Death Pulse provides AoE heal/damage. Ghost Shroud amplifies healing received and makes you immune to physical damage. Reaper’s Scythe deals percentage-based damage and adds respawn time to killed heroes.
Key strengths:
- Reaper’s Scythe adds respawn time — punishes deaths harder than any other hero
- Heartstopper Aura passively deals percentage HP damage — free value
- Incredibly hard to kill in extended fights due to sustain from Death Pulse + Shroud
- Strong lane bully with Death Pulse harass
Itemization: Power Treads → Holy Locket → Radiance → BKB → Aghanim’s Scepter → Heart
The Art of Initiation: How to Start Team Fights
As the offlaner, you’re typically the one who starts team fights. Poor initiation loses fights before they begin. Good initiation wins fights before they start. Here’s a comprehensive guide to initiating effectively:
The Initiation Checklist
Before you Blink in, ask yourself:
- Is my team ready Check that your cores are nearby and not farming across the map. Ping before you go.
- Can I catch 2+ priority targets A Ravage on one support is wasteful. A Ravage on the carry + mid wins the fight.
- Do I have BKB / key items Initiating without BKB against heavy disable is suicide.
- Is the enemy team clumped enough Wait for them to group before using AoE initiations.
- Am I initiating on the right side of the fight Blink to where your team can follow up, not into 5 enemies with your team 2000 range behind you.
Initiation Techniques
| Technique | How It Works | Best Heroes |
|---|---|---|
| Blink + Stun | Blink Dagger into range, immediately use AoE stun | Axe, Centaur, Tidehunter, Sand King |
| Smoke + Walk | Smoke up, walk into position, break smoke with initiation | All offlaners |
| Long-range ability | Use a long-range spell to start the fight from safety | Mars (Spear), Beastmaster (Roar), Slardar (Haze) |
| Charge/Rush | Use a movement ability to close distance and start fighting | Night Stalker, Pangolier (Rolling Thunder) |
| Counter-initiation | Wait for the enemy to initiate, then use your abilities to turn the fight | Tidehunter, Enigma (Black Hole after enemy commits) |
Common Initiation Mistakes
- Going in alone: Your team needs to be within follow-up range. A solo Ravage is worthless if your team is 2000 units away.
- Using everything at once: Stagger your abilities. Use your stun first, then your damage, then your slow. This prevents enemies from reacting between abilities.
- Initiating on supports: Focus your initiation on enemy CORES. Stunning two supports while the enemy carry free-hits your team is a losing proposition.
- Not having Blink: On most offlaners, Blink Dagger is non-negotiable. Without it, you telegraph your initiation and enemies simply walk away.
Lane Matchup Guide
Understanding offlane matchups is crucial. Here’s how the S-tier offlaners fare against common safelane carries:
| Offlaner | Strong Against | Weak Against |
|---|---|---|
| Axe | Melee carries (PA, AM, Spectre), illusion heroes | Ranged carries (Drow, Luna), heroes that ignore Call (Lifestealer Rage) |
| Mars | Most carries — Spear + Arena is universal | Lifestealer (Rage ignores Arena), mobile heroes (AM, Slark) |
| Centaur | Melee carries, squishy supports | Ranged harassment, sustain lanes (Jugg + CM) |
| Tidehunter | Physical damage carries (Kraken Shell blocks), low-kill-threat lanes | Heavy magic harassment, Acid Spray lanes |
| Beastmaster | Most lanes — Wild Axes + Boar dominate | AoE clear that kills summons, aggressive dual lanes |
General laning tips for offlaners:
- Focus the support, not the carry: If you can bully the enemy support out of lane, their carry is left alone and vulnerable.
- Pull the enemy creep wave: Drag enemy creeps toward your tower for safer farming and denying carry XP.
- Use creep aggro tricks: Right-click an enemy hero to draw creep aggro, then move creeps toward you for better positioning.
- Don’t die for nothing: A kill on you gives the enemy carry gold and XP. If the lane is impossible, just soak XP from range and jungle once you can.
Offlane Itemization Paths
Offlane itemization is fundamentally different from carry itemization. You’re not building for maximum personal damage — you’re building for maximum team impact.
Core Offlane Items
| Item | Cost | When to Buy |
|---|---|---|
| Blink Dagger | 2250 | Almost every game. Non-negotiable on most offlaners. |
| BKB | 4050 | When you need uninterrupted initiation (Enigma, Sand King, Axe). |
| Pipe of Insight | 3475 | Against 2+ magic damage heroes. Aura blocks 400 magic damage for your team. |
| Crimson Guard | 3600 | Against physical damage lineups. Active blocks damage for your team. |
| Guardian Greaves | 5375 | Provides mana, healing, and a dispel aura for your team. |
| Blade Mail | 2100 | On heroes who get attacked during initiation (Axe, LC, Bristle). |
| Assault Cuirass | 5250 | Aura item — gives armor + attack speed to your entire team. |
| Lotus Orb | 3850 | Dispels debuffs, reflects spells. Great against single-target heavy teams. |
Item Priority Framework
- First item: Blink Dagger (or hero-specific core like Vanguard on Axe, Hood on Centaur)
- Second item: Pipe OR Crimson Guard (based on enemy damage type)
- Third item: BKB (if needed) OR another aura item
- Fourth item: Assault Cuirass, Shiva’s Guard, or hero-specific luxury
The offlaner’s golden rule: If you’re ever unsure what to build, buy Pipe against magic damage or Crimson Guard against physical damage. You can’t go wrong with team aura items.
When to Fight vs. When to Split Push
Offlaners face the same fight-vs-farm dilemma as carries, but with a twist: split pushing is a legitimate strategy for offlaners, especially those with strong pushing tools.
When to Group and Fight
- Your team has a 5v5 advantage (better team fight lineup)
- You just hit a major item (Blink, BKB, Pipe)
- Your carry has their core items and is ready to fight
- Roshan is available and you can force a fight there
- The enemy team is missing a key hero (splitpushing, dead)
When to Split Push
- Your team DOESN’T have a 5v5 advantage
- You’re on a strong pushing hero (Underlord, Beastmaster, Nature’s Prophet)
- The enemy team is grouping — split pushing forces them to respond, creating space for your carry to farm
- You need to apply pressure on multiple parts of the map
- Your team is waiting for a key item timing (carry needs 2 more minutes for BKB)
The split push rule: Split push when it creates more value than your presence in a team fight. If you can take a tower while your team plays safe 4v5 (not fighting, just defending), that’s often more valuable than a risky 5v5.
Understanding when to group and when to split is one of the hardest decisions in Dota 2. If you want personalized advice on your game sense, TeamSmurf’s coaching program offers replay analysis focused on offlane decision-making.
Bracket-Specific Offlane Advice
| Bracket | Best Offlane Picks | Key Focus |
|---|---|---|
| Herald-Guardian | Axe, Bristleback, Wraith King, Centaur | Pick tanky heroes that don’t die. Just survive lane and show up to fights. Don’t try complex combos. |
| Crusader-Archon | Axe, Centaur, Tidehunter, LC, Sand King | Start using Blink combos. Practice initiating. Buy aura items. |
| Legend-Ancient | Mars, Beastmaster, Tidehunter, Enigma, SK | Lane matchup knowledge matters. Ward for your team. Coordinate smokes. |
| Divine-Immortal | Mars, Beastmaster, Pango, Dark Seer, Enigma | Every decision matters. Pick based on lineup synergy and counters. |
If you’re struggling to climb through the lower brackets, check out our detailed guides on escaping Herald and climbing from Guardian to Crusader.
For the fastest climb, TeamSmurf’s MMR boosting service can get you to your target rank while you focus on improving your offlane mechanics.
Frequently Asked Questions
Conclusion: Dominate the Offlane, Dominate the Game
The offlane is the most impactful role for setting the game’s tempo in Dota 2. S-tier picks like Axe, Mars, Centaur, Tidehunter, and Beastmaster provide reliable initiation and team fight dominance. A-tier picks like Bristleback, Sand King, and Underlord offer strong alternatives with different playstyles. And B-tier picks like Enigma and Pangolier reward mastery with some of the highest ceilings in the game.
Focus on three things: win or survive the lane, build team items, and initiate fights at the right time. Do these consistently and you’ll climb MMR as an offlaner faster than you ever thought possible.
Ready to Climb Start Your Boost Today
Team Smurf is the #1 rated Dota 2 boosting service in 2026. Immortal-rank boosters, maximum safety, competitive pricing, 24/7 support.
Written by Team Smurf’s Immortal-rank analysts — Rankings last verified February 2026


