How to Master Mirana in Dota 2: The Ultimate Guide for Every Rank (7.40c)

Mirana is one of the most versatile heroes in Dota 2, and that is exactly what makes her both brilliant and frustrating to play. She can run as a hard carry with Mjollnir and Daedalus, dominate the midlane with Sacred Arrow snipes, or play as a roaming position 4 setting up kills across the map. In patch 7.40c, Mirana sits at roughly a 48% winrate across all brackets — a number that hides how absurdly strong she becomes in the hands of players who understand her kit. At Divine and Immortal, her winrate jumps closer to 51%, and in pro matches she remains a contested pick thanks to her facet system offering two completely different playstyles.
This guide breaks down everything you need to dominate with Mirana in 2026. We cover her abilities in detail, item builds that actually work at your rank, laning strategies that win games before the horn sounds, and the advanced mechanics that separate the Herald arrow-missers from the Immortal playmakers. Whether you are playing carry Mirana with Solar Flare or support Mirana with Moonlight Shadow, this is the only guide you need.
Table of Contents
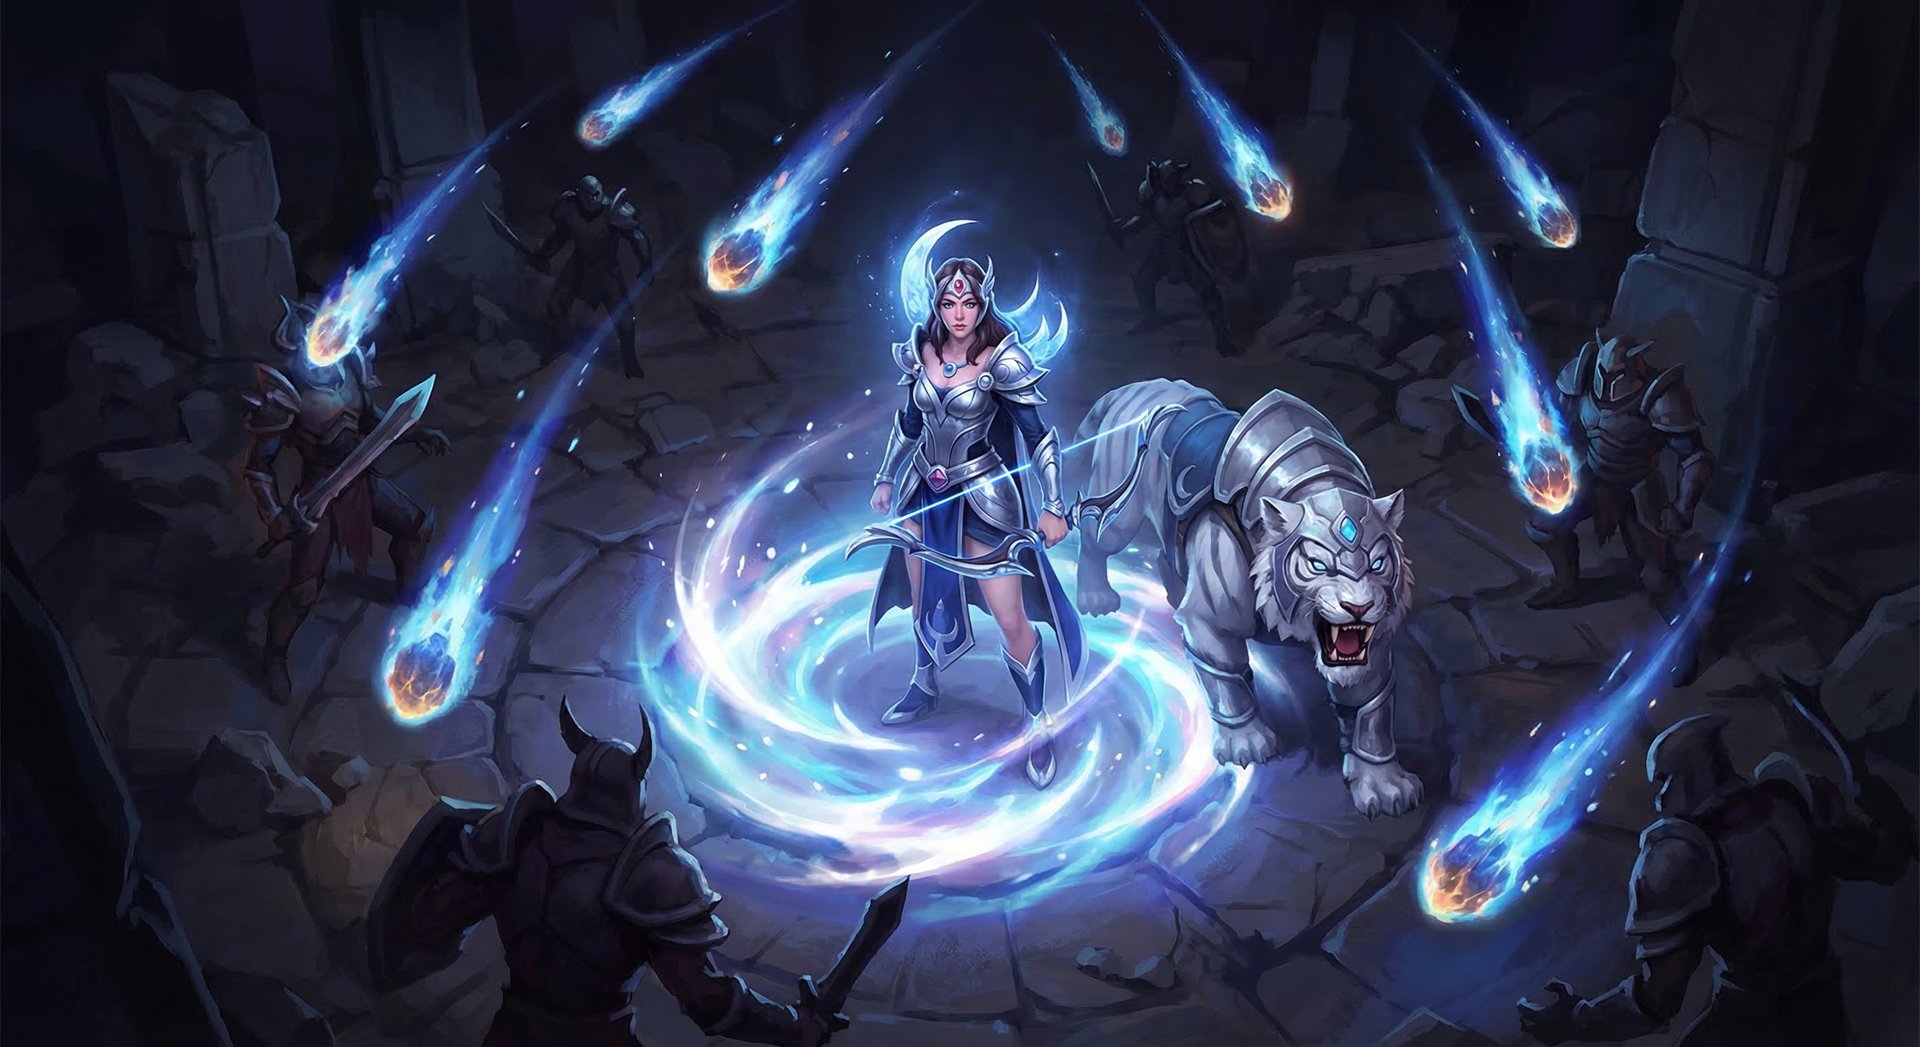
Why Mirana Is Dota’s Most Versatile Hero
Mirana, the Princess of the Moon, has been a staple of Dota 2 since the earliest days of the game. She rides her giant white tiger companion Sagan into battle, armed with a magical bow that channels lunar energy. What makes Mirana genuinely unique among Dota’s 126-hero roster is that she can legitimately be played in almost every position — carry, mid, offlane, soft support, or even hard support in specific drafts. Very few heroes offer this kind of draft flexibility.
In the current 7.40c meta, Mirana’s pick rate hovers around 8-9% across all brackets, making her one of the more popular heroes in ranked matchmaking. Her overall winrate of approximately 48% might look underwhelming at first glance, but this is heavily dragged down by lower-rank players who miss arrows and pick her into bad matchups. At Immortal rank, Mirana players with 100+ games on the hero maintain winrates above 54%, which tells a very different story.
The introduction of the facet system fundamentally changed how Mirana is played. You now choose between Solar Flare, which replaces her ultimate with a global damage and attack speed steroid, and Moonlight Shadow, the classic team-wide invisibility ultimate. This single choice determines whether you are playing an aggressive right-click carry or a utility-focused support. Understanding when to pick which facet is the first step toward mastering Mirana in 2026.
Her attribute spread tells the story of her versatility: 20 + 1.7 Strength, 24 + 2.5 Agility, and 22 + 1.2 Intelligence. She is an Agility hero with decent base stats but poor base damage (around 49-54), which means last-hitting in lane requires practice. Her 630 attack range is excellent, giving her strong harass potential, and her 0.5 second cast animation on spells — while long compared to many heroes — becomes manageable once you learn to compensate for it.
Abilities Deep Dive
Starstorm (Q)
Starstorm calls down a wave of meteors in a 650 radius around Mirana, dealing magical damage to all enemy units caught within it. The closest enemy unit to Mirana takes an additional 75% damage from a second meteor. At max level, Starstorm deals 300 damage to all units in the area and 525 damage (300 + 225) to the primary target. With a 10-second cooldown at level 4 and a manageable mana cost of 120/140/160/180, this is your primary farming and fighting tool.
Hidden mechanics worth knowing: The secondary meteor always hits the closest enemy hero if one is in range, prioritizing heroes over creeps. This means in lane, you can position yourself closer to the enemy hero than to creeps and guarantee the bonus damage lands on them. The secondary meteor has a slightly delayed impact (about 0.3 seconds after the primary wave), which is relevant for timing kills and ensuring you get credit for the last hit.
Starstorm has a 650 radius, which is slightly larger than most players realize. You do not need to be directly on top of enemies to hit them. The damage type is magical, so it is reduced by magic resistance. Against heroes with Hood of Defiance or Pipe of Insight, your Starstorm damage falls off significantly, which is one reason carry Mirana transitions to physical damage items.
Sacred Arrow (W)
Sacred Arrow is Mirana’s signature ability and the single most satisfying skillshot in Dota 2. She fires a long-range arrow that stuns and damages the first enemy hero it contacts. The stun duration scales with distance traveled — from 0 seconds at point-blank range to a devastating 3.5 seconds at maximum distance (3000 units). The bonus damage also scales with distance, dealing up to 190 additional magical damage on top of the base 100/160/220/280.
At maximum range with level 4 Sacred Arrow, you deal 280 + 190 = 470 magical damage and stun for 3.5 seconds. That is enough time to run from fog, Leap in, cast Starstorm, and land several auto-attacks before the target can react. This is why long-range arrows win games.
Critical interactions:
- Creep kills: Sacred Arrow instantly kills the first non-ancient creep it hits. This is incredibly useful for clearing a creep that is blocking your arrow path to a hero. At higher MMR, players intentionally position arrows to snipe a creep and continue toward the hero behind it — this does not work. The arrow stops on the first unit hit.
- Linken’s Sphere: Sacred Arrow pops Linken’s Sphere, consuming the stun and damage. If the enemy carry has Linken’s, you need to pop it with another spell first or coordinate with teammates.
- BKB: Spell immune heroes are completely immune to Sacred Arrow. The arrow passes through them without stopping.
- Fog arrows: Arrows fired from fog of war are significantly harder to dodge. Always try to fire arrows from trees, high ground, or beyond enemy vision.
Skill build note: Many players max Sacred Arrow first, but this is often wrong. The stun duration does not increase with levels — it always scales with distance. What increases is the base damage (100/160/220/280) and the cooldown reduction (18/17/16/15 seconds). In most games, maxing Starstorm first gives you far more consistent damage output and farming speed.
Leap (E)
Leap is a mobility spell that charges forward in the direction Mirana is facing, granting bonus movement speed and attack speed to Mirana and nearby allied heroes upon landing. The movement and attack speed bonuses last for 5 seconds. Leap has a charge-based system with 2 charges, and charge restore times of 45/35/25/15 seconds depending on level.
The details that matter:
- Leap distance: 650 units in 7.40c (buffed from 575 in earlier patches). This is roughly the same distance as a Force Staff push.
- Attack speed bonus: 20/40/60/80 at levels 1-4. At max level, this is a significant steroid that makes carry Mirana terrifying in fights.
- Movement speed bonus: 4%/8%/12%/16%. Not huge, but it helps chase down kills or disengage after a fight.
- Allied aura: Nearby allies within 900 radius also receive the attack and movement speed bonuses. This is often overlooked but incredibly strong in team fights.
- Disjointing: Leap disjoints projectiles. You can dodge Sven’s Storm Hammer, Vengeful Spirit’s Magic Missile, or any targeted projectile by timing your Leap correctly. This is a core defensive mechanic that separates good Mirana players from great ones.
Leap cannot cross impassable terrain in most cases, but it can move you over small gaps and ledges. Practice the specific spots on each map where Leap allows you to escape over terrain — particularly around the river cliffs and Roshan pit entrances.
Ultimate: Solar Flare / Moonlight Shadow
Mirana’s ultimate depends entirely on which facet you choose at the start of the game. Both are powerful, but they push Mirana in completely opposite directions. We cover both in detail in the Facets section below.
Facets: Solar Flare vs Moonlight Shadow
Solar Flare
Solar Flare replaces Moonlight Shadow with a completely different ultimate. When activated, Solar Flare creates a global effect that gradually increases the attack speed and damage of Mirana and all allied heroes over 6 seconds, reaching maximum power at full ramp-up. Allies receive 50% of the bonus values that Mirana gets. The duration was buffed from 14 to 18 seconds in recent patches, making it one of the longest-lasting steroids in the game.
Why Solar Flare is the carry facet: At max level, Solar Flare gives Mirana up to 80 bonus attack speed and 80 bonus damage. Combined with Leap’s attack speed buff, carry Mirana effectively has +160 attack speed during fights before any items. This transforms her into a legitimate right-click monster who can trade with heroes like Drow Ranger and Sniper in the mid-to-late game.
When to pick Solar Flare:
- You are playing position 1 or 2 Mirana
- Your team already has initiation and does not need Moonlight Shadow setups
- The enemy team has high mobility and invisibility detection would counter Moonlight Shadow anyway
- You want to play aggressively and push the tempo with early fighting
Moonlight Shadow
The classic Moonlight Shadow makes Mirana and all allied heroes invisible with bonus movement speed. Invisibility returns after a fade delay even if broken, as long as the spell’s duration has not expired. This is a global ultimate — every allied hero anywhere on the map receives the effect.
Why Moonlight Shadow is the support/utility facet: Team-wide invisibility is one of the most powerful utility spells in the game. It enables smoke-like ganks without using a Smoke of Deceit, allows your entire team to reposition in fights, and forces the enemy team to invest in detection (Dust, Sentries, Gem). At lower ranks where players rarely carry detection, Moonlight Shadow wins games by itself.
When to pick Moonlight Shadow:
- You are playing position 4 or 5 Mirana
- Your team has strong gankers who benefit from invisibility (Slardar, Spirit Breaker, Tusk)
- The enemy team lacks reliable true sight (no Zeus, no Slardar, no Bounty Hunter)
- You are playing at a rank where detection is inconsistent (below Ancient)
Aghanim’s Scepter Upgrade
Mirana’s Aghanim’s Scepter upgrades Sacred Arrow to fire two additional arrows in a spread pattern. The primary arrow now also triggers a Starstorm on impact at the corresponding ability level. This is a massive power spike that turns Mirana from a single-target pickoff hero into an AoE menace.
The Scepter upgrade is strongest on carry Mirana because it combines burst damage with her right-click output. Landing a max-range arrow + Starstorm proc deals over 900 magical damage before reductions, and the multi-arrow spread makes it significantly easier to hit at least one arrow in team fights.
Aghanim’s Shard Upgrade
Mirana’s Shard gives Starstorm charges and allows it to proc automatically during Sacred Arrow hits. This passive interaction means that every time Sacred Arrow contacts an enemy hero, a Starstorm-like meteor shower triggers around the impact point. This works independently of Starstorm’s cooldown and does not cost mana, making it a free burst of damage on every arrow hit.
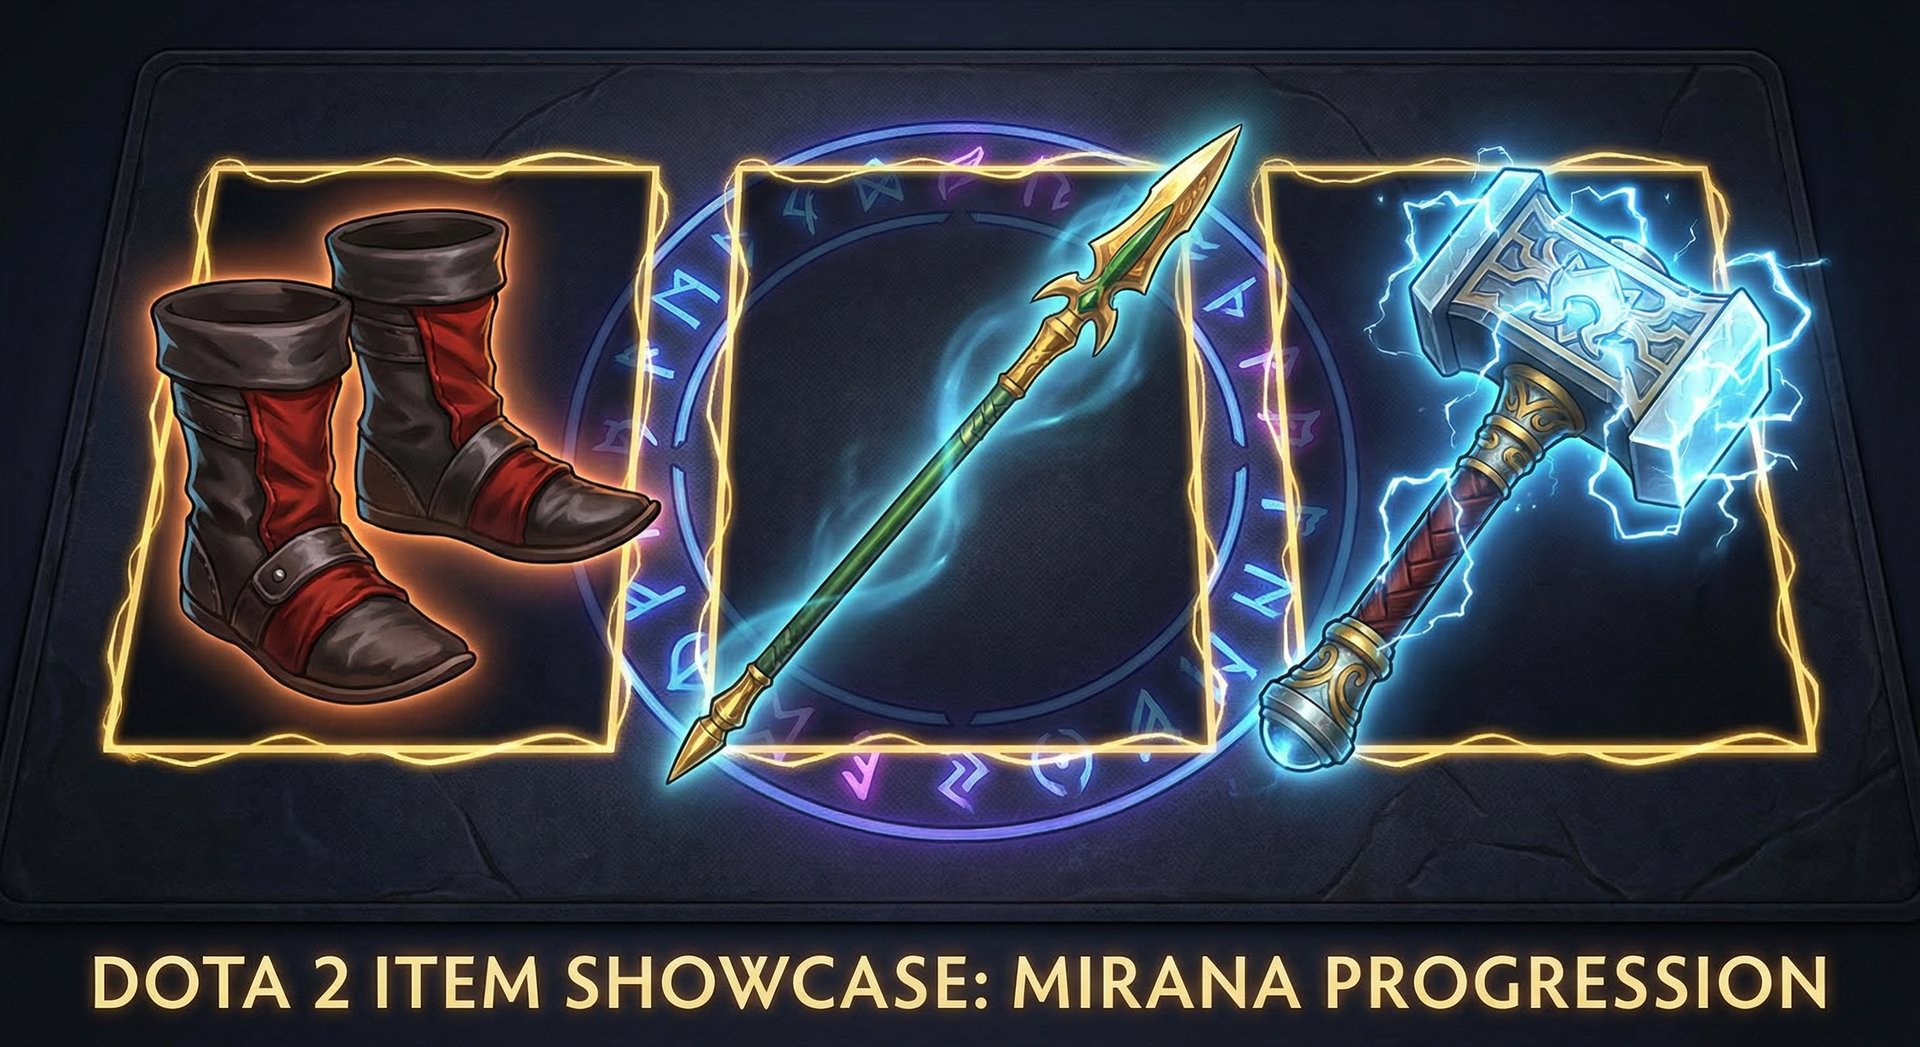
Item Builds by Rank
Carry Mirana (Solar Flare)
| Rank | Starting | Early Game | Core Items | Late Game |
|---|---|---|---|---|
| Herald – Crusader | Tango, Circlet, 2x Iron Branch, Quelling Blade | Wraith Band, Boots, Magic Wand | Power Treads, Dragon Lance, Maelstrom | Mjollnir, BKB, Daedalus |
| Archon – Legend | Tango, Slippers, Circlet, Iron Branch | Wraith Band, Power Treads, Magic Wand | Dragon Lance, Maelstrom, BKB | Mjollnir, Daedalus, Skadi |
| Ancient – Divine | Tango, Slippers, Circlet, Mango | Wraith Band, Power Treads, Wand | Dragon Lance, Maelstrom, Manta Style | Mjollnir, Skadi, Butterfly |
| Immortal | Tango, Circlet, Slippers, Mango | Wraith Band, Power Treads | Dragon Lance, Maelstrom, BKB/Manta | Mjollnir, Daedalus, Linken’s/Skadi |
Why Dragon Lance is core on carry Mirana: Mirana already has 630 attack range. Dragon Lance pushes this to 770, which is longer than Drow Ranger and Sniper’s base ranges. At 770 range, you can right-click enemies from positions where they physically cannot reach you without closing distance. Combined with Leap for repositioning, this makes carry Mirana one of the safest ranged carries in team fights.
Why Maelstrom/Mjollnir over other farming items: Mirana’s base attack speed is solid thanks to Leap and Solar Flare steroids, which means Maelstrom procs frequently. The chain lightning accelerates her farming speed dramatically — with Maelstrom, you clear jungle camps in 2-3 seconds. Mjollnir later provides the attack speed to make your crits from Daedalus proc more often.
BKB timing: This is the biggest item decision for carry Mirana players. At lower ranks (Herald through Legend), you can often delay BKB until after your second core item because enemies do not chain-stun effectively. At Ancient and above, you almost always need BKB as your second or third major item because coordinated lockdown will kill you before you can Leap away.
Support Mirana (Moonlight Shadow)
| Rank | Starting | Early Game | Core Items | Situational |
|---|---|---|---|---|
| Herald – Crusader | Tango, Clarity, Observer Ward, Sentry Ward, Blood Grenade | Wind Lace, Arcane Boots | Urn of Shadows, Force Staff, Glimmer Cape | Spirit Vessel, Eul’s Scepter |
| Archon – Legend | Tango, Clarity, Observer, Sentry, Blood Grenade | Wind Lace, Arcane Boots | Urn, Force Staff, Aghanim’s Shard | Eul’s, Glimmer, Ghost Scepter |
| Ancient – Divine | Tango, 2x Clarity, Observer, Sentry | Boots, Wind Lace, Magic Wand | Urn, Arcane Boots, Aghanim’s Shard | Force Staff, Lotus Orb, Solar Crest |
| Immortal | Tango, 2x Clarity, Observer, Sentry | Boots, Wind Lace, Wand | Urn/Vessel, Force Staff, Shard | Lotus Orb, Glimmer, Eul’s |
Why Urn is essential on support Mirana: Mirana excels at roaming and getting kills in the early game. Sacred Arrow stuns into Starstorm burst generates kills reliably, and Urn charges stack fast. Spirit Vessel upgrade is excellent if the enemy has high HP regeneration heroes like Alchemist, Huskar, or Lifestealer.
Aghanim’s Shard priority: On support Mirana, Shard is often your best power spike. The passive Starstorm proc on arrow hits adds burst damage without requiring gold investment in damage items. At Ancient and above, good support Mirana players prioritize Shard at the 15-minute mark because it dramatically increases kill potential on roams.
Laning Phase Masterclass
Carry Mirana: Safelane
Mirana’s laning phase as a carry is her weakest point. Her base damage of 49-54 is poor compared to other carries like Juggernaut (52-56) or Phantom Assassin (53-59), and her 0.5 second attack animation feels sluggish when trying to secure last hits under pressure. The key to surviving Mirana’s laning phase is understanding that you are not trying to dominate — you are trying to farm safely until Dragon Lance.
Last-hitting tips:
- Use Starstorm to secure ranged creep last hits when contested. The 300 damage at level 4 guarantees the kill and damages nearby heroes.
- Toggle Power Treads to Agility for last-hitting (bonus damage) and switch to Strength when trading hits.
- Mirana’s projectile speed is 900, which is average. Get used to the travel time at max range because missing last hits at 630 range is common for new Mirana players.
Trading pattern: Mirana’s trading pattern is simple but effective. Use your 630 range advantage to attack the enemy offlaner whenever they walk forward to contest creeps. Most melee offlaners have to get within 150-200 range of creeps, meaning you get 2-3 free right-clicks before they can respond. If they commit and run at you, use Leap backward to disengage and gain attack speed on the way out.
Kill setup with support: Mirana has one of the strongest kill setups in the safelane when paired with a support who has a stun or slow. Heroes like Shadow Shaman, Crystal Maiden, or Lion can hold an enemy in place long enough for you to land a guaranteed Sacred Arrow at medium range (1.5-2 second stun). Arrow into Starstorm into right-clicks with Leap attack speed buff should kill or force out any offlaner before level 6.
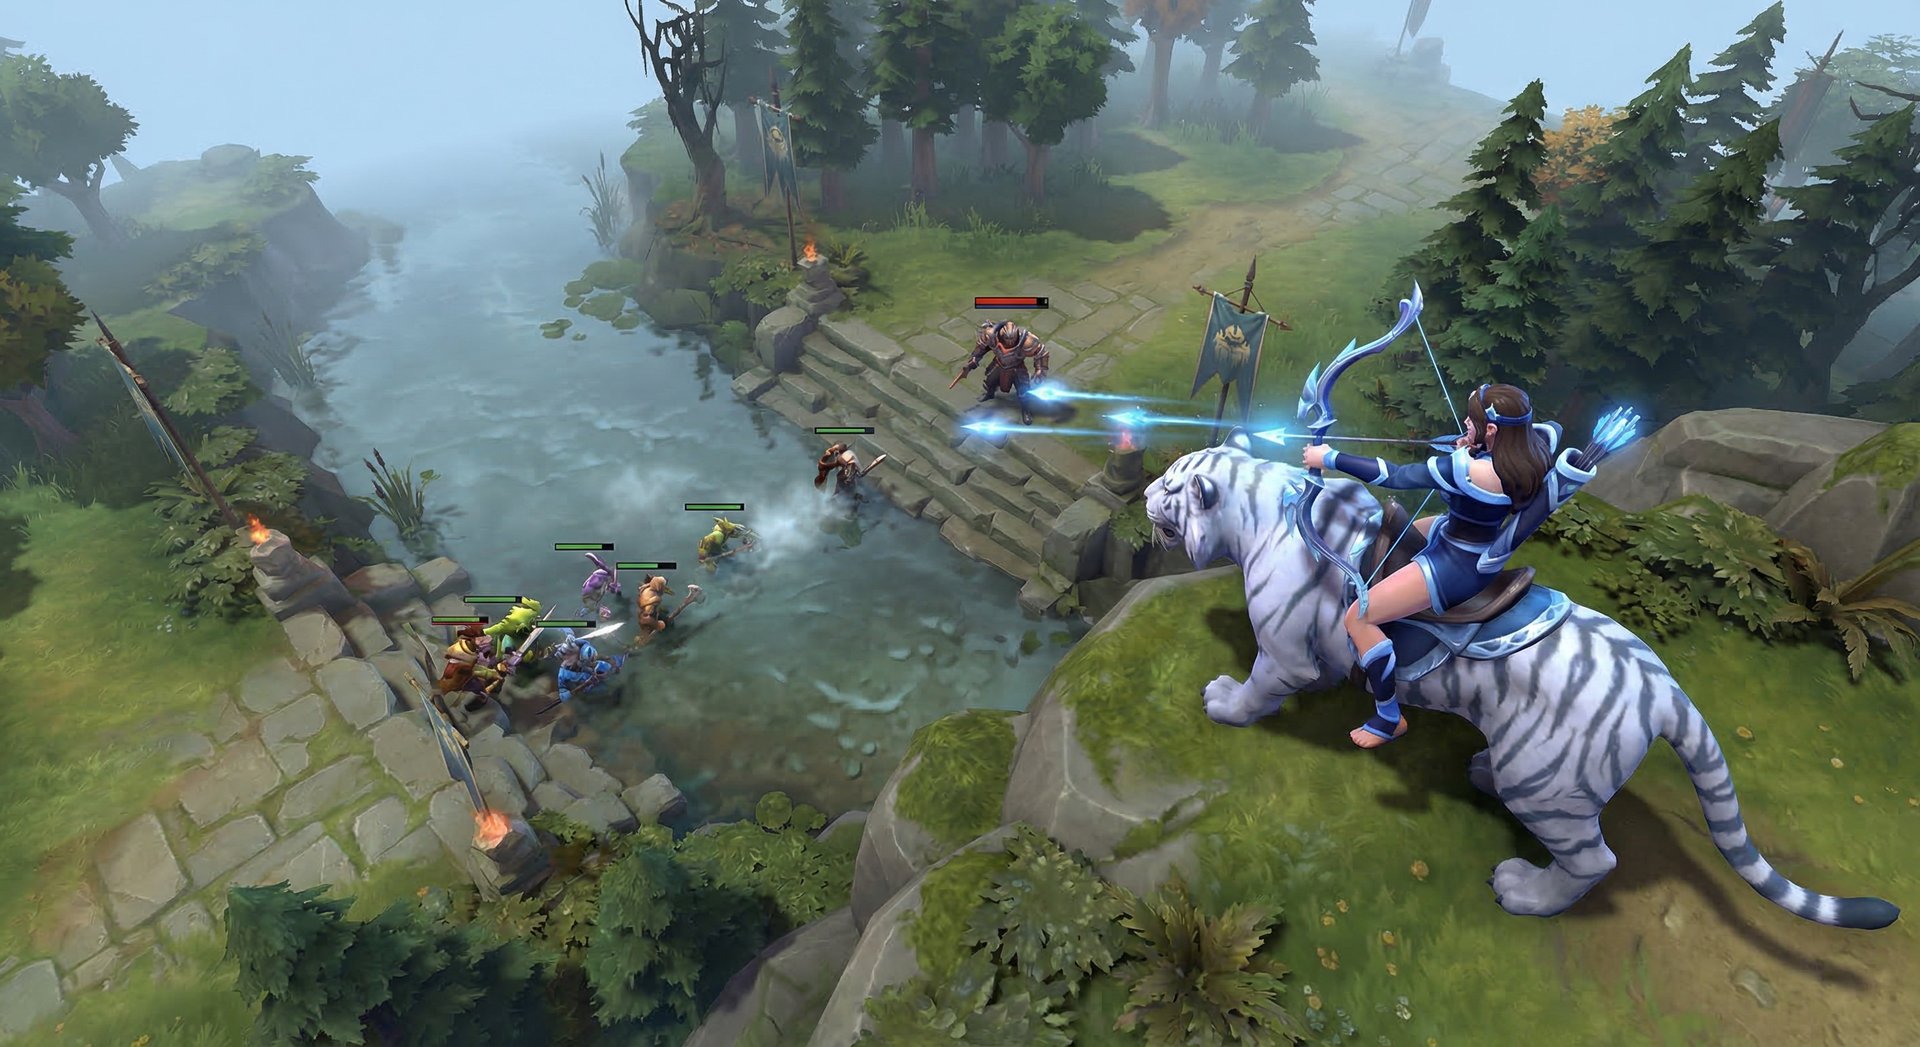
Support Mirana: Position 4 Roaming
Support Mirana’s laning phase is about making life miserable for the enemy safelane carry. Your Sacred Arrow is the most threatening single-target disable at level 1, and smart rotations from fog can generate first blood opportunities that snowball the early game.
Arrow angles that work:
- From behind tier 1 tower: Walk behind the enemy safelane tier 1 tower and fire an arrow along the lane toward the carry. At this distance, you get nearly maximum stun duration.
- Through trees: Sacred Arrow is not blocked by trees, only by units. Fire through tree lines to catch enemies who think they are safe.
- Smoke + Arrow: Use Smoke of Deceit to get behind the enemy, break smoke with an arrow from maximum range. This guarantees 3+ second stun and often results in a kill.
When to rotate: If you have not gotten a kill in your lane by minute 3, look at the minimap. Is the enemy mid overextended? Is your offlaner getting dived? Mirana’s Leap and Arrow make her one of the fastest and most effective roaming supports in the game. A single arrow kill on the enemy mid at minute 4-5 can swing the entire game.
Mid Mirana
Mid Mirana is viable but niche in 7.40c. She struggles against strong laners like Lina, Templar Assassin, and Storm Spirit who can out-last-hit and out-trade her. Where mid Mirana excels is in matchups against squishy heroes who are vulnerable to Sacred Arrow setups — heroes like Puck, Zeus, or Shadow Fiend who cannot afford to get hit by a 3-second stun at any point in the laning phase.
If you are playing mid Mirana, prioritize Bottle first, then Power Treads and Dragon Lance. Control the rune spawns aggressively — Mirana’s Leap allows her to reach rune spawns faster than most mid heroes, and Starstorm spam keeps the wave pushed so you have time to contest.
Mid and Late Game Transitions
Carry Mirana’s Power Curve
Carry Mirana’s power curve is unusual compared to traditional carries. She does not scale as hard as Anti-Mage, Phantom Assassin, or Faceless Void in the ultra-late game, but she hits her power spikes earlier and more aggressively.
Key timing windows:
- Dragon Lance + Maelstrom (18-22 minutes): This is your first major spike. You now farm fast, have excellent range, and deal meaningful damage in fights. This is when you should start joining team fights and taking objectives.
- Mjollnir + BKB (26-30 minutes): Your second spike. With BKB active, Solar Flare running, and Leap’s attack speed bonus, you output more DPS than most carries at this point. This is Mirana’s strongest relative timing — push high ground now if possible.
- Daedalus/Skadi (35-40 minutes): Third spike. Daedalus crits with your attack speed steroids create massive burst. Skadi gives you the tankiness and slow to kite effectively. Beyond this point, other hard carries start outscaling you.
Team fight positioning: Carry Mirana plays fights from the back, similar to Drow Ranger. Your 770 range (with Dragon Lance) lets you hit frontline heroes without exposing yourself. Save Leap for repositioning during the fight — do not Leap in aggressively unless you have BKB active and are confident in the commit. Your DPS comes from sustained right-clicks with Solar Flare buff, not from diving into the enemy team.
Support Mirana’s Transition
Support Mirana transitions from a roaming kill threat in the early game to a utility powerhouse in the mid and late game. Your primary job after 20 minutes is using Moonlight Shadow to enable team movements, landing clutch arrows to pick off key targets, and keeping your cores alive with Force Staff and Glimmer Cape.
Vision control: Mirana is one of the best ward-placing supports because Leap allows her to access unconventional ward spots quickly and escape if caught. Always carry Observer and Sentry Wards — your mobility makes deep warding safer than it is for most supports.
Late-game arrows: A single 3.5-second Sacred Arrow on the enemy carry at 40+ minutes wins Roshan fights, wins high ground pushes, and wins games. Your arrow becomes more valuable as the game goes later because death timers are longer and a single pickoff can end the game. Position behind your team, look for angles, and throw arrows constantly. You only need to hit one.
BKB Timing Decisions
BKB timing is everything on carry Mirana. Here is the decision framework:
- Buy BKB second (after Dragon Lance + Maelstrom) when: The enemy has multiple stuns, silences, or disables that prevent you from right-clicking. Examples: Lion, Shadow Shaman, Earthshaker, Storm Spirit.
- Delay BKB until third item when: The enemy’s disables are single-target and your Leap + positioning can avoid most of them. Examples: Teams with only one stun, teams that are behind and cannot threaten you.
- Skip BKB entirely when: Almost never. Even if the game looks easy, BKB prevents buyback scenarios where you die to chain-stun in a late-game fight. Only skip if the game will end before 30 minutes.
Counters: Heroes That Destroy Mirana
Mirana has clear weaknesses that specific heroes exploit ruthlessly. Understanding these counters helps you avoid bad matchups in the draft and adapt your gameplay when you face them.
1. Bloodseeker
Winrate vs Mirana: ~54%
Bloodseeker is Mirana’s worst nightmare. Thirst reveals invisible heroes and provides bonus movement speed, completely negating Moonlight Shadow. Rupture punishes Leap usage — if Mirana Leaps while Ruptured, she takes massive damage. Bloodrage amplifies his damage output against Mirana’s relatively low HP pool. There is almost no way for Mirana to escape a Bloodseeker who has committed to killing her.
How to play around it: If facing Bloodseeker, pick Solar Flare instead of Moonlight Shadow. Build Linken’s Sphere to block Rupture. Never Leap while Ruptured — stand still and fight or use TP scroll. Manta Style can purge Bloodrage if timed correctly.
2. Slardar
Winrate vs Mirana: ~53%
Slardar’s Corrosive Haze provides true sight on Mirana, revealing her through Moonlight Shadow. His Bash stuns through BKB in later levels, and his armor reduction amplifies physical damage against Mirana’s mediocre armor. Sprint allows him to chase Mirana even after Leap.
How to play around it: Again, Solar Flare is the better facet against Slardar. Focus on kiting with Dragon Lance range and use Leap defensively. Manta Style dispels Corrosive Haze. Force Staff creates distance after Slardar initiates.
3. Bounty Hunter
Winrate vs Mirana: ~52%
Track provides true sight and bonus gold for killing Mirana. Jinada’s slow and bonus damage make trades painful. Bounty Hunter’s ability to roam and find Mirana in the jungle disrupts farming patterns. Track revelation negates Moonlight Shadow entirely.
How to play around it: Carry Sentry Wards to deward Bounty Hunter’s approach routes. Use Starstorm to break Shadow Walk (the AoE will hit him if he is nearby). Manta Style dispels Track. Communicate Track status to your team.
4. Zeus
Winrate vs Mirana: ~51%
Zeus’s Lightning Bolt provides true sight in a radius, revealing invisible heroes. Thundergod’s Wrath hits all enemy heroes globally, breaking Moonlight Shadow for the entire team. Nimbus provides persistent vision in an area. Zeus’s magical burst also threatens Mirana’s relatively low HP pool before BKB.
How to play around it: BKB blocks all of Zeus’s damage and prevents true sight from Lightning Bolt. Pipe of Insight from your offlaner significantly reduces his burst. Solar Flare is again preferred since Moonlight Shadow is almost useless against Zeus.
5. Spirit Breaker
Winrate vs Mirana: ~52%
Charge of Darkness provides vision on the target through fog and invisibility. Nether Strike goes through BKB. Greater Bash stuns through magic immunity. Spirit Breaker’s ability to globally charge Mirana means she is never safe on the map, regardless of wards or positioning.
How to play around it: Linken’s Sphere blocks Charge of Darkness. Stay near teammates so they can help when Spirit Breaker charges in. Use Leap immediately after Charge connects to create distance before Nether Strike follow-up. Aeon Disk is a desperation option that prevents burst death.
Heroes Mirana Destroys
Mirana thrives against heroes who lack mobility, rely on channeling spells, or are vulnerable to long-range initiation.
1. Crystal Maiden
Mirana winrate: ~55%
Crystal Maiden is slow (280 base movement speed), fragile, and has no escape. A Sacred Arrow from fog is essentially a death sentence at any point in the game. Starstorm burst one-shots Crystal Maiden in the mid game. Moonlight Shadow allows your team to walk through Crystal Maiden’s wards without detection. She also cannot cancel Freezing Field if stunned by Arrow.
2. Drow Ranger
Mirana winrate: ~54%
Drow Ranger loses her Marksmanship bonus when enemies are within 400 range. Mirana’s Leap closes this distance instantly, removing Drow’s primary damage source. Sacred Arrow’s stun gives Mirana enough time to close the gap and stay on top of Drow. Moonlight Shadow also negates Drow’s ability to attack from safety since she cannot see invisible targets.
3. Sniper
Mirana winrate: ~53%
Sniper has zero mobility. Sacred Arrow from fog hits him, stuns for 3.5 seconds, and he dies. Leap closes the distance that Sniper relies on. Starstorm outranges Shrapnel for wave clear. Even with Hurricane Pike, Sniper cannot escape a Mirana who commits with Leap + Solar Flare attack speed.
4. Techies
Mirana winrate: ~52%
Mirana’s mobility with Leap lets her navigate around mine fields. Moonlight Shadow allows the entire team to push without being visible to Techies’ mine placement. Sacred Arrow’s instant creep kill helps demine pathways. Techies’ immobility makes him a free arrow target.
5. Witch Doctor
Mirana winrate: ~56%
Witch Doctor’s Death Ward is a channeled ultimate that Sacred Arrow instantly interrupts from maximum range. Maledict has a cast range shorter than Mirana’s attack range. Paralyzing Cask requires nearby units to bounce effectively — Mirana often fights from positions where Cask cannot chain. Witch Doctor’s low base armor and HP make him an easy Starstorm + Arrow kill.
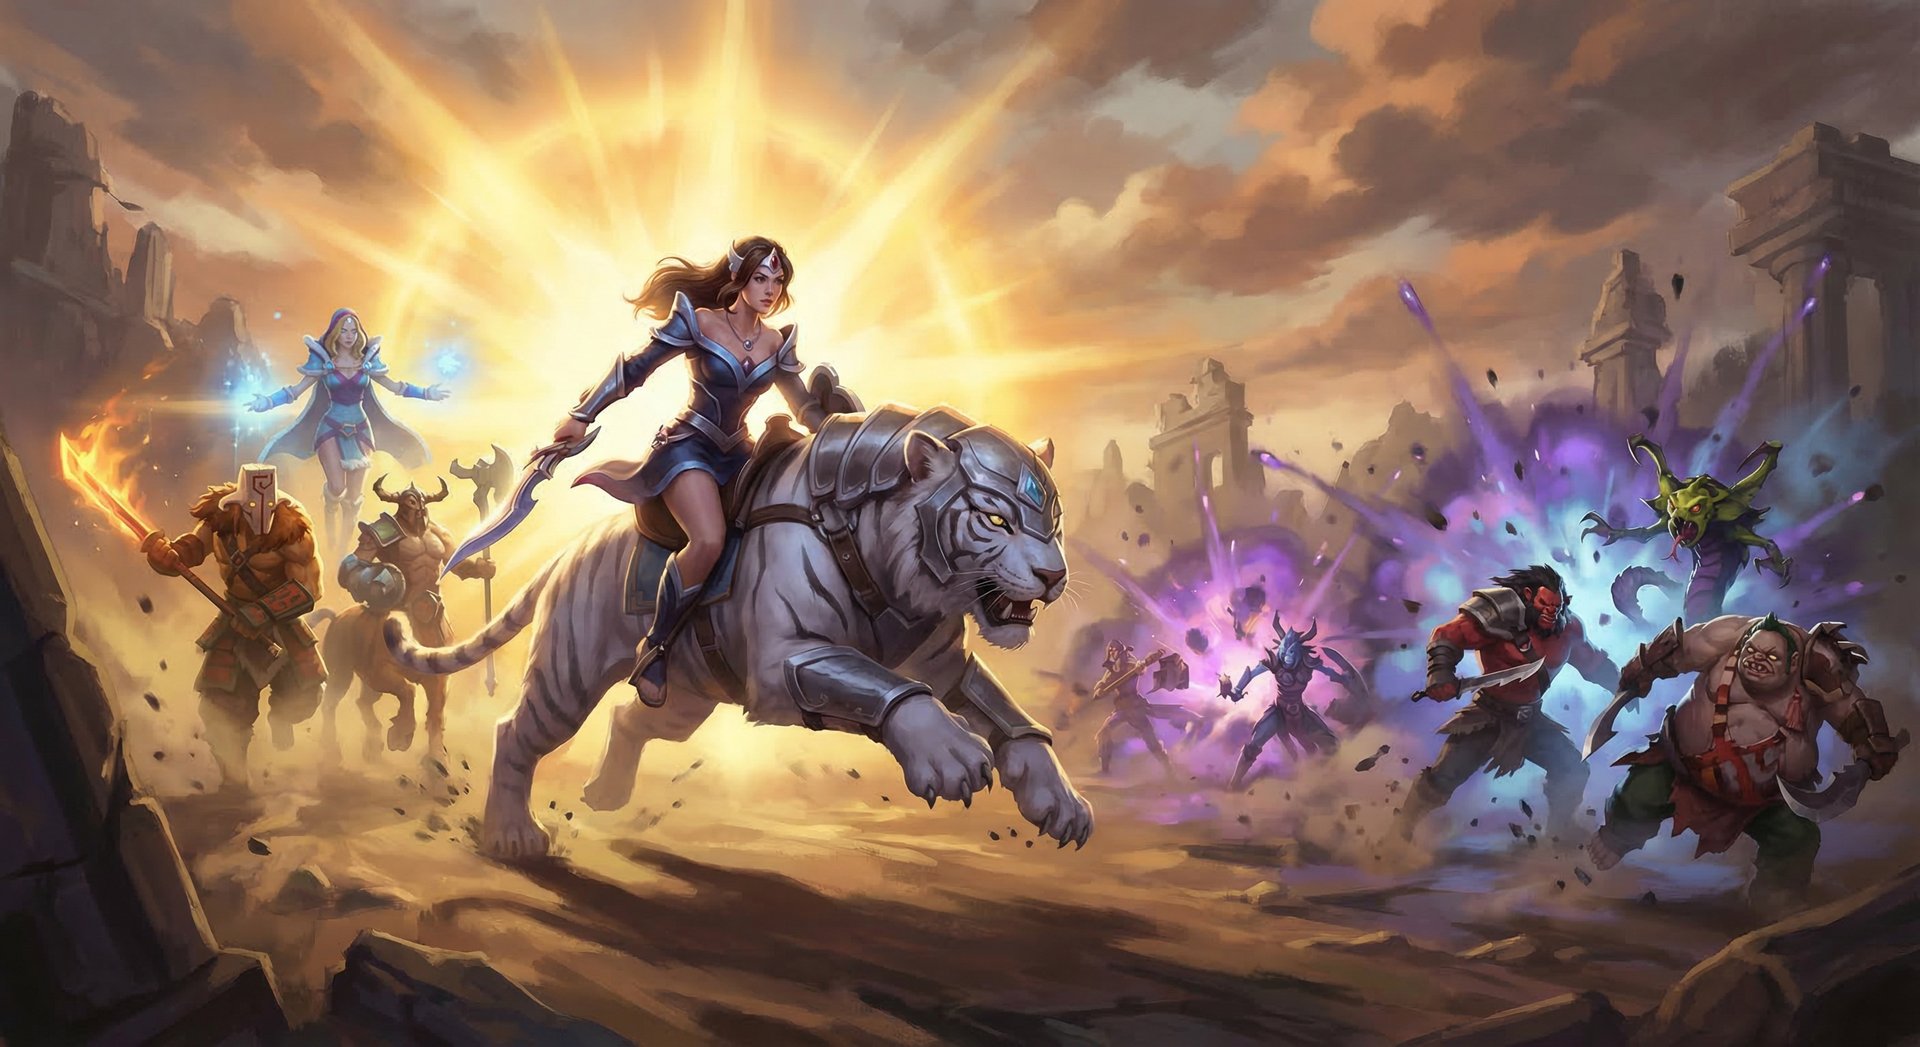
How Pros Play Mirana in Patch 7.40c
In the current professional meta, Mirana has maintained a consistent presence in drafts, particularly in regional leagues and DPC qualifiers heading into 2026. She appears most frequently as a position 1 carry with Solar Flare, though position 4 Moonlight Shadow Mirana still sees occasional picks in specific draft strategies.
Carry Mirana in Pro Play
Professional carry Mirana players prioritize an aggressive early game. The typical pro build is Wraith Band > Power Treads > Dragon Lance > Maelstrom, with the first team fight participation at 15-18 minutes when Dragon Lance is complete. Pro players recognize that Mirana’s power window is between 20-35 minutes and push objectives aggressively during this period.
Key patterns from pro matches:
- Arrow-first initiations: Pro teams use Mirana arrows as primary initiation tools. A max-range arrow on the enemy mid or carry forces an immediate 4v5 that results in tower trades or Roshan.
- Solar Flare timing: Pros activate Solar Flare 2-3 seconds before the team fight fully commits, allowing the damage and attack speed to ramp up before they start hitting. Casting it too late means you lose several seconds of maximum buff during the fight’s peak.
- Dragon Lance positioning: Pro Mirana players abuse the 770 range to hit towers and heroes from angles that are physically impossible for the enemy team to contest without committing cooldowns. This siege pressure is a major reason carry Mirana sees pro play.
Notable Pro Mirana Players
Several professional players have made Mirana a signature hero. Players on teams like Falcons Esports and Team Liquid have demonstrated the hero’s viability at the highest level. In the ESL Pro Tour 2025/2026 season, Mirana appeared in approximately 6-8% of professional drafts, with a balanced pick rate between carry and support roles.
The hero particularly shines in best-of-three and best-of-five series where teams can flex Mirana between positions. Drafting Mirana early in the pick phase forces opponents to guess whether she is carry or support, which is a significant draft advantage that pros exploit consistently.
Aghanim’s Scepter Rush Strategy
One notable pro strategy is the Aghanim’s Scepter rush on mid Mirana. The idea is to skip Dragon Lance entirely and rush Scepter as a first major item (after Treads). The triple-arrow spread with built-in Starstorm proc creates a massive power spike at 18-20 minutes that is nearly impossible for enemy teams to fight into. This strategy works best when your team has other right-click damage dealers and Mirana’s job is initiation and burst rather than sustained DPS.
Rank-Specific Climbing Guide
Herald to Guardian: The Foundation
At Herald and Guardian, the single most impactful thing you can do on Mirana is practice Sacred Arrow in demo mode until you can hit arrows consistently. Most Herald Mirana players miss 80% or more of their arrows, which means they are essentially playing a hero with one less spell. Spend 15 minutes before each session in demo mode firing arrows at moving bot targets from different ranges and angles.
What to focus on:
- Max Starstorm first. Forget the flashy arrow builds. Starstorm is point-and-click damage that cannot miss. Level it first and use it to farm and trade.
- Build simple items. Power Treads, Dragon Lance, Maelstrom, BKB. Do not get creative with Aghanim’s Scepter or Manta Style until you are comfortable with the basics.
- Use Solar Flare. Moonlight Shadow requires team coordination that does not exist at this rank. Solar Flare gives you personal damage output.
- Farm, farm, farm. At this rank, the team with more items wins. Focus on 50+ last hits by 10 minutes and keep farming between fights.
Crusader to Archon: Adding Game Sense
At Crusader and Archon, you should be hitting roughly 40-50% of your Sacred Arrows. The next step is understanding when to throw arrows, not just how. The best arrows are thrown from fog of war, from behind trees, or immediately after an ally stuns or slows an enemy.
What to focus on:
- Arrow setups: Coordinate with your lane partner. Tell them “stun first, I arrow.” A guaranteed setup arrow is worth infinitely more than a random fog arrow.
- Map awareness: Start watching the minimap for enemies who are standing still (farming jungle, hitting tower, channeling TP). These are free arrow targets.
- Item timing: You should complete Dragon Lance + Maelstrom by 20-22 minutes consistently. If you are slower, focus on improving your farming patterns — alternate between lane creeps and nearby jungle camps.
- Leap usage: Stop using Leap offensively unless you have a guaranteed kill. Save it for escape. At this rank, dying once costs you more than missing a kill opportunity.
Legend to Ancient: The Macro Leap
Legend and Ancient is where Mirana players start understanding macro gameplay. You now need to think about objective-based arrow usage — firing arrows to secure Roshan, to defend towers, and to create space for your team to push.
What to focus on:
- Fight timing: Carry Mirana’s strongest fight is at 25-30 minutes with Mjollnir + BKB. Communicate with your team to force fights during this window. If the game goes to 50 minutes, most hard carries will outscale you.
- Tower pressure: Your 770 range with Dragon Lance means you can hit towers from outside of most heroes’ initiation range. Push lanes aggressively and threaten towers whenever your team has map control.
- Manta Style timing: At Ancient and above, start incorporating Manta Style into your build. The dispel removes silences and slows that would otherwise kill you. Manta illusions also apply Mjollnir lightning, increasing your farming speed further.
- Ward game: If playing support Mirana, your Leap allows you to place aggressive deep wards in spots that other supports cannot safely reach. Ward behind enemy tier 2 towers and in jungle entrances to give your team information advantage.
Divine to Immortal: What Separates the Top 1%
At Divine and Immortal, Mirana becomes a chess piece. Your mechanical skills should be polished — arrows land 60%+ of the time, your item build adapts to each game, and your Leap timing is instinctive. What separates Divine from Immortal is decision-making under pressure.
What to focus on:
- Arrow economy: At Immortal, throwing an arrow and missing is not just a wasted spell — it is information. The enemy now knows your arrow is on cooldown for 15 seconds and they can play aggressively. Only throw arrows when you have a high-probability setup or when the risk-reward is heavily in your favor.
- Solar Flare activation timing: Activate Solar Flare 3-4 seconds before a fight peaks, not when it starts. The 6-second ramp-up means early activation gives you maximum DPS during the critical moment of the fight. Late activation means the fight is decided before your steroid reaches full power.
- Linken’s Sphere vs BKB: At Immortal, many games come down to whether Linken’s or BKB is the correct defensive choice. Linken’s is better against single-target initiation (Doom’s Doom, Beast Master’s Roar, Batrider’s Lasso). BKB is better against AoE disable compositions. Making the wrong choice loses games.
- Aghanim’s Shard timing: At Immortal, the 15-minute Shard purchase on both carry and support Mirana is often the correct play. The passive Starstorm proc on arrow hits adds so much burst that it changes how enemies have to position around you.
- Buyback management: Always keep buyback gold after 30 minutes. Mirana without buyback is a liability because she can be caught by surprise initiations despite her mobility.
Tips and Tricks
Animation Cancels and Hidden Mechanics
- Arrow + Starstorm combo: Cast Starstorm immediately after releasing Sacred Arrow. The Starstorm will hit enemies in range while your arrow is still traveling. If the arrow lands on a distant target, the Shard-procced Starstorm will hit them again at the impact point, dealing double Starstorm damage.
- Leap direction: Leap moves Mirana in the direction she is facing, not the direction she is moving. This means you can issue a move command in one direction, then quickly click behind you and Leap backward. This is essential for dodging ganks — you can keep walking toward safety while Leaping in the escape direction.
- Projectile disjointing: Leap disjoints projectiles at the start of the leap animation, not the end. This means you need to press Leap before the projectile reaches you, not as it hits you. Practice the timing against Sven’s Storm Hammer and Wraith King’s stun in demo mode.
- Starstorm positioning: The secondary Starstorm meteor hits the closest enemy. In team fights, position yourself closer to the enemy carry than to frontline heroes to ensure the bonus damage hits the high-value target.
- Cast animation canceling: Mirana’s 0.5 second cast animation on Sacred Arrow can be partially hidden by casting from trees or fog. The arrow appears to come “from nowhere” because enemies cannot see the cast animation.
Common Mistakes to Avoid
- Throwing arrows from lane: Firing Sacred Arrow from visible lane positions gives enemies time to dodge. Always fire from fog, trees, or high ground.
- Leaping forward without escape: Using both Leap charges aggressively leaves you with zero escape for 15-45 seconds. Save at least one charge for defense unless the kill is guaranteed.
- Ignoring Starstorm farming: Many Mirana players undervalue Starstorm for farming. With Maelstrom, Starstorm + 2-3 attacks clears any jungle camp. Use it on cooldown when farming.
- Building damage before survivability: Rushing Daedalus or Butterfly before BKB leads to a pattern where you deal massive damage for 2 seconds then die. Build survivability (BKB, Linken’s, Manta) before going full damage.
- Moonlight Shadow at wrong times: Using Moonlight Shadow to farm or scout is wasteful. Its cooldown is 120/110/100 seconds. Save it for fight initiations, Roshan attempts, or emergency team escapes.
Advanced Techniques for Immortal Players
- Predictive arrows: At Immortal, hitting arrows requires predicting enemy movement patterns 1-2 seconds into the future. Watch where enemies have been walking in the last 5 seconds and extrapolate their trajectory. Most players walk in predictable patterns between jungle camps and lanes.
- Multi-arrow spread with Scepter: The three arrows from Aghanim’s Scepter spread in a cone. Aim the center arrow slightly to one side of the target — the spread means one of the three arrows will hit even if the enemy dodges laterally.
- Solar Flare fight clock: Track the 18-second duration mentally. Know when Solar Flare is about to expire so you can disengage if the fight is not won. Fighting without Solar Flare as carry Mirana dramatically reduces your DPS.
- Shard arrow snipe combos: With Shard, every arrow hit procs a Starstorm at the impact point. At max range, this means Arrow (470 damage) + Starstorm proc (300 damage) + potential secondary meteor (225 damage) = 995 magical damage before reductions. This kills most supports outright.
Frequently Asked Questions
Both are viable, but carry Mirana with Solar Flare has a higher winrate in most brackets. Her right-click damage output with Dragon Lance, Mjollnir, and Solar Flare makes her a legitimate position 1 threat. Support Mirana with Moonlight Shadow is stronger at lower ranks where detection is unreliable. At Divine and above, carry Mirana is generally the stronger choice.
Max Starstorm first (Q), then Leap (E), with one early point in Sacred Arrow (W). The standard build is Q-W-Q-E-Q-R-Q-E-E-E. Starstorm provides consistent farming speed and damage, while Leap’s attack speed buff scales well with carry items. Arrow level 1 is enough for the stun since duration scales with distance, not level.
Three rules: First, always fire from fog of war or trees so enemies have less reaction time. Second, aim where enemies will be in 1-2 seconds, not where they are now. Third, use setup stuns from allies — a guaranteed arrow after a Crystal Maiden freeze or Lion stun is worth more than ten blind fog arrows. Practice in demo mode for 15 minutes daily and your accuracy will improve dramatically within a week.
Scepter is strongest as a second or third core item on carry Mirana or as a late luxury on support Mirana. The triple-arrow spread with Starstorm proc is a massive team fight spike. Rush it only on mid Mirana when your team already has sustained damage dealers and needs you for burst and initiation. On carry Mirana, Dragon Lance and Maelstrom come first.
Mirana’s overall 48% winrate is dragged down by lower-bracket players who miss arrows, pick the wrong facet, and build incorrectly. She is a high-skill-cap hero where the gap between a bad Mirana and a good Mirana is enormous. At Immortal rank, experienced Mirana players maintain 53-55% winrates, proving the hero is strong when played correctly.
Solar Flare for carry and mid Mirana in almost all games. Moonlight Shadow for support Mirana when the enemy lacks reliable true sight (no Zeus, Slardar, or Bounty Hunter). At Ancient rank and above, Solar Flare has a consistently higher winrate because detection is always available at high levels, making Moonlight Shadow less impactful.
Bloodseeker is statistically Mirana’s worst counter. Thirst reveals invisible heroes (countering Moonlight Shadow), Rupture punishes Leap usage, and Bloodrage amplifies burst damage against Mirana’s low HP pool. If the enemy picks Bloodseeker, choose Solar Flare and build Linken’s Sphere to block Rupture.
Master Mirana With Expert Coaching
Landing arrows is great, but landing them consistently at your rank requires practice with a coach who knows Mirana inside and out. Our Immortal-rank coaches will review your replays, fix your positioning, and teach you the arrow setups that pros use.


