How to Master Batrider in Dota 2: The Ultimate Guide for Every Rank (2026)

Few heroes in Dota 2 inspire as much respect — and fear — as Batrider. For over a decade, this fire-riding maniac has been one of the most consistently picked and banned heroes in professional Dota, and for good reason. His ability to single-handedly remove an enemy hero from a teamfight with Flaming Lasso makes him one of the most impactful initiators in the entire game.
But Batrider is not just a one-trick pony. His laning dominance through Sticky Napalm stacking, his ability to farm dangerous areas with Firefly, and his vision control make him a complete package for players who want to dictate the pace of every game. In this guide, we will break down everything you need to know to master Batrider — from ability mechanics and item builds across every rank bracket, to the pro-level tricks that separate a good Batrider from a game-winning one.
Whether you are a Herald player looking to understand what makes this hero tick or an Ancient player trying to break into Divine, this guide has you covered. Let’s ride.
Table of Contents

Why Batrider Is Dota’s Most Feared Initiator
Batrider is an Intelligence-based offlaner and midlaner who has been a staple of competitive Dota 2 since the game’s earliest days. His role is simple in theory but devastating in practice: fly in, drag an enemy hero out of position with Flaming Lasso, and let your team delete them before the fight even begins.
According to Dotabuff, Batrider maintains a roughly 50-51% winrate across all brackets, but that number climbs significantly in Divine and Immortal where players understand his initiation timing. His pick rate fluctuates with patches, but he has never truly fallen out of the meta — a testament to how fundamentally strong his kit is.
What makes Batrider unique compared to other initiators like Magnus or Enigma Three things:
- Reliability: Flaming Lasso is a point-and-click ultimate. No skillshot, no channel. You click a hero, they get dragged. Period.
- Mobility: Firefly gives him unobstructed movement over terrain, making his initiation angles nearly unlimited.
- Lane dominance: Sticky Napalm turns Batrider into one of the most oppressive laners in the game, capable of zoning out almost any hero from minute one.
Batrider is primarily played in the offlane (position 3), though he sees occasional mid play in specific matchups. He excels in lineups that need a reliable way to pick off key targets — enemy carries, supports holding crucial saves, or mobile heroes that would otherwise escape a traditional teamfight.
Abilities Deep Dive
Sticky Napalm (Q)
Sticky Napalm is the foundation of Batrider’s laning dominance. Each cast applies a stack to enemies in the target area, and every stack amplifies all damage Batrider deals to that target — from abilities, items, and even attack damage. The stacks also apply a movement and turn rate slow that becomes crippling at high counts.
Key mechanics most players miss:
- The damage amp applies to all sources: Radiance burn, Urn of Shadows ticks, and even Orb of Venom all get amplified per stack. At 6+ stacks, a single Urn charge melts HP bars.
- Turn rate slow is the real killer: At 4-5 stacks, enemies literally cannot turn around fast enough to fight back or run efficiently. This makes kiting melee heroes trivially easy.
- Low mana cost, spammable: With a 3-second cooldown and modest mana cost, you can keep stacks rolling indefinitely if you manage your mana pool.
- Does not draw creep aggro: Sticky Napalm does not trigger lane creep aggression, letting you harass freely without pushing the wave.

Flamebreak (W)
Flamebreak is a Molotov-style projectile that knocks enemies back on impact and leaves a burning trail. This ability is crucial for both offensive combos and defensive plays.
- The knockback interrupts channeling: Use it to cancel TPs, Black Hole, Fiend’s Grip, or any channeled ability.
- Knockback direction matters: Enemies get pushed away from the impact point. Position your throw to knock targets toward your team, not away from them.
- Synergy with Sticky Napalm: The burn damage from the trail gets amplified by Napalm stacks. At 5+ stacks, standing in the Flamebreak trail is devastating.
- Vision tool: The projectile provides flying vision along its path, making it useful for scouting Rosh pit or high ground before committing.
Firefly (E)
Firefly is what transforms Batrider from a lane bully into a terrifying initiator. When activated, Batrider takes flight, gaining unobstructed movement over all terrain while leaving a trail of fire beneath him. The fire damages and provides vision of the ground below.
- Unobstructed movement is the key: You can fly over cliffs, trees, and any terrain obstacle. This lets you approach from angles that are impossible for most heroes.
- Tree destruction: The fire trail destroys trees, which can reveal juking enemies or clear paths for your team to follow.
- Duration management: Firefly lasts 18 seconds at max level. You need to initiate during the first 8-10 seconds to have enough flight time to drag your Lasso target back safely.
- DPS adds up: The trail damage with Napalm stacks is significant. In early skirmishes, flying over enemies repeatedly while they have 4-5 stacks can kill supports outright.

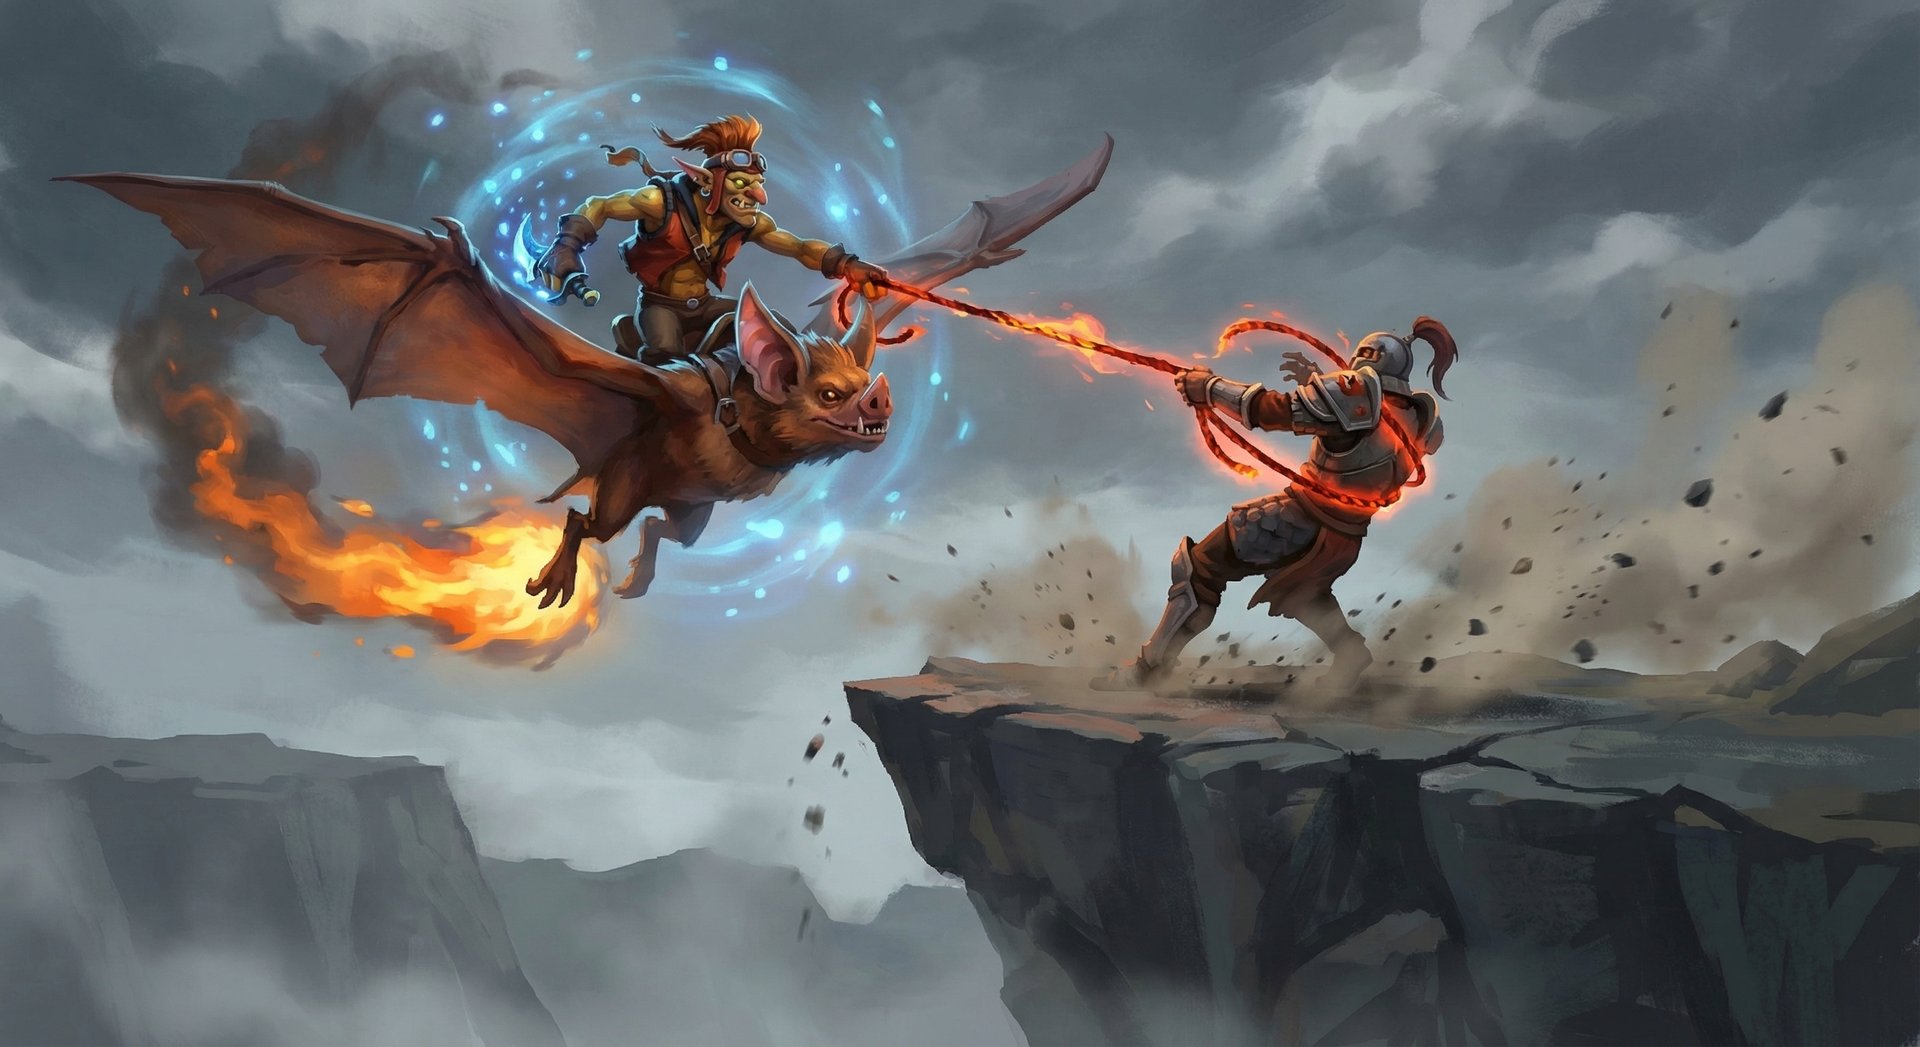
Flaming Lasso (R) — Ultimate
The signature spell. Flaming Lasso latches onto an enemy hero and drags them behind Batrider for 3.5 seconds. The target is completely disabled — stunned, silenced, and muted — during the drag. This is one of the strongest single-target lockdown abilities in Dota 2.
- Point-and-click: Unlike Reverse Polarity or Black Hole, Lasso cannot miss. If you are in range and the target is not Linken’s-protected or spell-immune, they get grabbed.
- Pierces spell immunity with Aghanim’s Shard: Batrider’s Shard upgrade allows Lasso to grab spell-immune targets and also grabs a secondary target near the primary one. This is one of the most game-changing Shard upgrades in Dota.
- Break range: If Batrider moves too far from the lasso connection point (roughly 400 units beyond the initial cast range), the lasso breaks. Getting Force Staffed or pushed too far will end it prematurely.
- Drag distance: With Blink Dagger and Force Staff, you can drag a target over 1500 units back into your team. The combo is: Firefly in, Blink on target, Lasso, Force Staff backward.
Skill Build Order
The standard skill build for offlane Batrider:
| Level | Skill | Reasoning |
|---|---|---|
| 1 | Sticky Napalm | Lane harass from level 1 |
| 2 | Firefly | Escape/kill threat with Napalm stacks |
| 3 | Sticky Napalm | More damage amp per stack |
| 4 | Flamebreak | Knockback for kill setups or defense |
| 5 | Sticky Napalm | Max harass potential |
| 6 | Flaming Lasso | Kill combo online |
| 7 | Sticky Napalm | Maxed — damage amp peaks |
| 8-10 | Firefly | Duration and DPS for fights |
| 11 | Flaming Lasso | Reduced cooldown |
| 12-14 | Flamebreak | Max utility last |
Item Builds by Rank
Batrider’s item build is one of the most consistent in Dota — Blink Dagger is non-negotiable. Everything else revolves around getting Blink online as fast as possible, then extending your initiation range and survivability.

| Rank | Starting | Early Game | Core | Late Game |
|---|---|---|---|---|
| Herald-Crusader | Tango, Quelling Blade, Circlet, Branches x2 | Boots, Magic Wand, Wind Lace, Bracer | Blink Dagger, Boots of Travel, Force Staff | BKB, Shiva’s Guard, Refresher Orb |
| Archon-Legend | Tango, Quelling Blade, Circlet, Branches x2 | Boots, Magic Wand, Wind Lace | Blink Dagger, Boots of Travel, Force Staff | BKB, Aghanim’s Scepter, Shiva’s Guard |
| Ancient-Divine | Tango, Quelling Blade, Circlet, Faerie Fire | Boots, Magic Wand, Wind Lace | Blink Dagger, Boots of Travel, Force Staff | BKB, Aghanim’s Shard, Shiva’s Guard, Refresher |
| Immortal | Tango, Quelling Blade, Circlet, Faerie Fire | Boots, Wand, Wind Lace | Blink, BoTs, Force Staff | BKB, Shard, Shiva’s, Refresher, Linken’s |
Why Items Differ by Rank
Herald-Crusader: Players at this level often struggle with mana management, so a Bracer for extra stats helps survive lane. Boots of Travel might seem expensive, but Batrider farms the map with Firefly and needs the global mobility. BKB is listed as late game because lower-rank players rarely time it correctly — but it is still essential.
Archon-Legend: At this bracket, players start understanding Batrider’s timing windows. The Aghanim’s Scepter becomes more valuable because team coordination improves enough to follow up on double Lasso grabs.
Ancient-Divine: Shard timing becomes critical here. Getting Shard at minute 15 to pierce BKB on enemy carries is a massive power spike. Players at this level know to target the BKB-dependent carry.
Immortal: Linken’s Sphere appears as a luxury because at the highest level, enemies will try to cancel your Lasso with instant disables. Linken’s gives you that extra layer of protection during initiation. Refresher Orb for double Lasso in critical fights.
Item Timing Benchmarks
- Blink Dagger: Aim for 12-14 minutes. Anything past 16 minutes and you are behind.
- Force Staff: 18-20 minutes. This completes your initiation toolkit.
- BKB: 22-26 minutes. Essential before high ground pushes.
- Aghanim’s Shard: Minute 15 is the sweet spot — buy it the moment it becomes available if the enemy carry relies on BKB.
Laning Phase Masterclass
Batrider’s laning phase is where you establish the tempo for the entire game. Played correctly, you will make the enemy carry’s life miserable and create enough space for your own carry to farm freely.

Level 1-3: Establishing Dominance
Start by stacking Sticky Napalm on the enemy carry from the very first creep wave. Stand near the creep equilibrium point and spam Napalm every time the enemy comes close to last hit. At 3-4 stacks, your right-click attacks deal significantly bonus damage per hit, and the movement slow makes it nearly impossible for them to trade back.
Key laning principles:
- Manage the wave, not just the hero: Sticky Napalm hits creeps too if you are not careful with placement. Try to target the Napalm where only the enemy hero stands, away from the creep wave.
- Mana management is everything: At level 1, each Napalm cast costs mana you cannot afford to waste. Keep a tango or clarity running and be selective about when you stack aggressively versus when you last hit.
- Coordinate with your support: If your lane support can apply any additional slow or damage while the enemy has 4+ stacks, the kill potential is enormous. Heroes like Jakiro, Venomancer, or Ogre Magi pair beautifully with Batrider in lane.
Level 4-6: The Kill Window
Once you have Firefly and at least 3 points in Sticky Napalm, your kill potential spikes. The standard kill combo in lane is:
- Stack Napalm to 4-5 on the enemy carry from range
- Activate Firefly and fly directly over them
- Use Flamebreak to knock them back toward your tower
- Keep right-clicking and reapplying Napalm while flying over them
At level 6, this combo becomes almost guaranteed with Flaming Lasso. Even if the enemy carry has a support nearby, you can Lasso the carry and drag them under your tower for a kill.
Lane Partner Synergies
| Support Partner | Synergy Rating | Why It Works |
|---|---|---|
| Jakiro | Excellent | Dual Breath + Liquid Fire with Napalm stacks is absurd damage |
| Ogre Magi | Excellent | Ignite DoT gets amplified by every Napalm stack |
| Venomancer | Great | Poison Sting + Gale with Napalm = permanent slow and huge damage |
| Shadow Demon | Great | Disruption setup into Lasso, Shadow Poison amplified by Napalm |
| Grimstroke | Good | Ink Swell provides stun for Lasso follow-up, Stroke of Fate amplified |
When to Rotate
Batrider should look to rotate once he hits level 6 and ideally has Boots of Speed plus a Wind Lace. Your rotation timing depends on your lane state:
- Won lane hard: Rotate at 6-7 minutes. Your carry is farming freely and the enemy offlane or mid needs pressure.
- Even lane: Stay until 8-9 minutes. Secure your tower and farm Blink timing.
- Lost lane: Farm jungle camps with Firefly stacks and Napalm. Batrider clears stacked camps very quickly with Firefly trail damage.
Mid and Late Game Transitions
Batrider’s game plan post-laning phase is straightforward: get Blink Dagger, then make picks. Your job is to find the enemy’s most important hero, Lasso them out of position, and let your team burst them down before the fight even starts.

The 12-20 Minute Window
This is where Batrider is at his absolute strongest. With Blink and Force Staff, you have roughly 1800-2000 initiation range (Blink distance + Force Staff + Firefly movement). Most enemy heroes will not have BKB yet, making your Lasso nearly unstoppable.
What to do during this window:
- Smoke ganks: Lead every smoke rotation. Your Blink + Lasso is the most reliable pick-off tool in the game.
- Rosh control: Fly over the Rosh pit with Firefly to scout, then Lasso out the enemy carry if they are attempting Roshan.
- Tower pushes: After a successful pick, immediately push a tower. Batrider’s Firefly does decent building damage and clears creep waves fast.
The 20-35 Minute Transition
As the game progresses, enemy carries will start completing BKB, which significantly reduces your impact unless you have Aghanim’s Shard. This is the critical transition point for Batrider players.
Without Shard: You need to target non-BKB heroes. The enemy support holding Glimmer Cape or Force Staff for saves Lasso them first. Remove the save, then your team can kill the carry conventionally.
With Shard: You can continue targeting the enemy carry even through BKB. The secondary grab from Shard also creates chaos in teamfights — dragging two heroes simultaneously is game-breaking.
Late Game (35+ Minutes)
Batrider does not scale as hard as a traditional carry, but Refresher Orb changes the equation entirely. Double Lasso in a teamfight removes two heroes from the enemy lineup, and with Shard, that becomes potentially four heroes affected. At this stage, your job is:
- Initiate with Lasso on the highest-priority target
- Pop Refresher immediately after the first Lasso ends
- Grab the second-highest priority target
- Your team should win the 5v3 that follows
Counters: Heroes That Destroy Batrider
Even the best Batrider players need to know their hard counters. These five heroes can shut down your initiation and make your life miserable.

1. Oracle
Oracle is Batrider’s worst nightmare. Fortune’s End dispels Sticky Napalm stacks, Fate’s Edict provides magic immunity to the Lasso target, and False Promise keeps the dragged hero alive through your team’s burst. A good Oracle can single-handedly neutralize Batrider’s entire combo.
How to play around it: Lasso the Oracle first. Without his saves, the enemy carry is vulnerable. If Oracle positions far back, use smoke to approach from an angle where you can reach him before the fight breaks out.
2. Abaddon
Aphotic Shield dispels Lasso instantly. If the enemy has a competent Abaddon, he will shield the Lasso target within the first second of the grab, completely wasting your ultimate. His Borrowed Time also makes him impossible to burst during teamfights.
How to play around it: Bait the Aphotic Shield with a Flamebreak or your team’s other stuns before committing Lasso. Alternatively, Lasso Abaddon himself — he cannot self-shield during Lasso.
3. Lifestealer
Rage provides spell immunity, making Lifestealer immune to Lasso (without Shard). He also naturally builds into heroes that want to fight Batrider’s early-game timing. Feast healing makes him hard to burst even when caught.
How to play around it: Rush Aghanim’s Shard. Batrider’s Shard allows Lasso to pierce spell immunity, completely neutralizing Lifestealer’s Rage advantage. Time your initiation after Rage expires if you do not have Shard.
4. Vengeful Spirit
Nether Swap can save any Lasso target by swapping them back to safety. The range on Swap is long enough that Vengeful Spirit can stay behind and still react to your initiation. She also provides Vengeance Aura to help her team kill you during the Lasso animation.
How to play around it: Focus Vengeful Spirit first, or initiate when Swap is on cooldown. Track her cooldown timer mentally — Swap has a 60/45/30 second cooldown.
5. Legion Commander
Press the Attack dispels Sticky Napalm and can remove debuffs from Lasso targets (though it does not break Lasso itself, it heals through the damage). More importantly, Duel can lock down Batrider during Firefly approach, and if you get Dueled before you Lasso, you are often dead.
How to play around it: Never initiate from vision. LC needs to see you to Duel you. Use smoke, tree cover, and Firefly angles over cliffs to get the jump before she can react.
Heroes Batrider Destroys
Batrider is not just about avoiding counters — he hard-counters some of the most popular heroes in Dota 2.
1. Sniper
Sniper relies on positioning and distance. Batrider flies over terrain, blinks on top of him, and Lassos him into your team. Sniper has zero escape against this combo. His low base armor also means Napalm-amplified damage melts him.
2. Medusa
Medusa wants to stand still and fight. Lasso pulls her completely out of position, away from her team. Her Stone Gaze is useless because Batrider approaches from behind with Firefly. Without BKB, she is a free kill every time Lasso is off cooldown.
3. Anti-Mage
Anti-Mage’s Blink escape is useless against point-and-click Lasso. He cannot Blink during the disable, and the 3.5-second duration is usually enough for your team to kill him. Batrider is one of the few heroes that reliably catches Anti-Mage.
4. Tinker
Tinker hides in trees and teleports around the map. Firefly destroys trees and reveals him. Lasso prevents Rearm and TP. Once caught, Tinker dies instantly due to his fragile stat line.
5. Drow Ranger
Drow loses Marksmanship when Batrider closes the distance. Lasso pulls her point-blank into your team, negating her entire damage advantage. She has no escape and no way to prevent the initiation.
How Pros Play Batrider in the Current Patch
Batrider has been a consistent presence in competitive Dota 2 throughout 2025 and into early 2026. Here is how the best players in the world approach the hero.
zai (Falcons) has long been regarded as one of the best Batrider players in the world. His approach emphasizes aggressive ward placement before initiation — placing an Observer Ward on the enemy’s high ground before smoking in, giving his team vision of all five enemies. This lets him identify the exact target for Lasso before committing.
Collapse (Team Spirit) plays a more aggressive style, often skipping Force Staff entirely in favor of an earlier BKB. His logic: if you Blink and Lasso a target, you need to survive the counter-initiation more than you need to drag them further. BKB rush at 16-18 minutes makes his Lasso attempts much safer.
Key pro-level patterns:
- Pre-fight Napalm stacking: Pros throw 3-4 Napalm stacks on the enemy frontline before committing to a fight. This means even if the Lasso target survives, the rest of the enemy team is slowed and taking amplified damage.
- Lasso target priority: In pro games, Batrider almost never Lassos the enemy carry in the early game. Instead, he targets the hero providing the most save — Oracle, Dazzle, or Omniknight — to strip the team of defensive capabilities.
- Firefly duration awareness: Top players track Firefly duration precisely. They know they need at least 6-8 seconds of flight remaining when they Blink-Lasso to drag the target back safely over terrain.
- Tower plays: Pros frequently Lasso enemy heroes under their own tower for guaranteed kills during the laning phase, even diving slightly to secure the drag range.
Recent tournament appearances have shown Batrider performing well on Liquipedia’s tracked matches, with a pick-ban rate that consistently hovers around 30-40% in Tier 1 events.
Rank-Specific Climbing Guide

Herald to Guardian: Foundation Basics
At this bracket, most players do not even understand what Batrider does. Your advantage is that nobody expects the Lasso initiation, and nobody buys Linken’s Sphere or Force Staff to counter you.
Focus on:
- Lane harass with Napalm: Just spamming Sticky Napalm on the enemy carry will win you the lane 90% of the time at this bracket. Most Herald players do not know how to play around it.
- Getting Blink Dagger: Do not overcomplicate your build. Boots into Blink. That is it. Once you have Blink, you can kill anyone on the map.
- Basic Lasso combo: Blink on target, press R. Do not worry about Force Staff drag distance or Firefly angles yet. Just get comfortable clicking Lasso on the right hero.
Common mistake: Buying too many small items before Blink. Skip Bracer, skip Drum of Endurance. Go straight Blink.
Crusader to Archon: Adding Game Sense
Players at this bracket start understanding basic positioning, which means your Lasso targets will not always be standing in the open. You need to develop your game sense around when to initiate, not just how.
Focus on:
- Smoke timing: Buy smokes and coordinate ganks with your team. Batrider with smoke is the scariest thing in Dota at this bracket.
- Blink + Force Staff combo: Learn to Blink in, Lasso, then immediately Force Staff backward. This doubles your effective drag distance and puts the target deep into your team.
- Targeting priority: Stop always Lassoing the closest hero. Start identifying the highest-value target before fights begin.
Common mistake: Wasting Lasso on supports when the enemy carry is in Blink range. Always scan the fight before committing your ultimate.
Legend to Ancient: The Macro Leap
At this bracket, the game becomes more about macro decisions than mechanical skill. Your Lasso combo is clean, but winning games requires reading the map and making proactive plays.
Focus on:
- Map movements: After winning your lane, rotate to the enemy safe lane or mid to apply pressure. Do not sit in the offlane farming when you could be creating space.
- Rosh timing: Batrider is one of the best heroes for contesting Roshan. Use Firefly to scout, Lasso to pull the enemy carry out of the pit.
- BKB timing: At this bracket, enemies will start buying stuns and disables to counter your Blink-Lasso. Getting BKB before critical fights is essential.
- Ward game: Place aggressive Observer Wards before teamfights. Vision lets you identify your Lasso target before committing.
Common mistake: Not buying Aghanim’s Shard when the enemy carry has BKB. Shard is one of the strongest single-item purchases in Dota for Batrider.
Divine to Immortal: What Separates the Top 1%
At the highest level, Batrider games are decided by inches. Everyone knows the hero, everyone knows the combos. What separates good Batriders from Immortal-level ones is:
Focus on:
- Initiation angle diversity: Never approach from the same angle twice. Use Firefly over cliffs, through trees, from behind Rosh pit — make your approach unpredictable.
- Cooldown tracking: Track enemy BKB durations, Linken’s cooldowns, and save ability timers. Initiate when the enemy’s defensive tools are down.
- Lasso break prevention: Know exactly how far you can drag before the leash breaks. Factor in enemy Force Staffs, Pike pushes, and allied repositioning abilities that might accidentally break your Lasso.
- Refresher timing: In ultra-late game scenarios, popping Refresher between Lassos for a double grab can win the game outright. Practice the timing: Lasso ends, Refresher, immediate second Lasso on the next priority target.
- Stack farming: Use Firefly to clear 2-3 stacked jungle camps simultaneously. This accelerates your Blink timing by 2-3 minutes compared to conventional farming.
Common mistake: Trying to Lasso the enemy carry every single fight. Sometimes the play is to Lasso the support who is holding Force Staff or Glimmer, then let your team kill the exposed carry conventionally.
Tips and Tricks
Animation Cancels and Hidden Mechanics
- Napalm stacking while Firefly is active: You can — and should — keep applying Napalm during Firefly. The damage amplification applies to the Firefly trail damage, creating a devastating damage loop.
- Flamebreak during Lasso: You can use Flamebreak while dragging a Lasso target. Throw it ahead of you to knock away enemies trying to rescue their teammate.
- Force Staff direction: Force Staff always pushes in the direction Batrider is facing. Before using Force Staff during Lasso, make sure you are facing toward your team, not toward the enemy.
- Tree juke with Firefly: If you are being chased, activate Firefly and fly over a cliff. Most enemies cannot follow, and the trees you destroy on the way out deny juke paths behind you.
Common Mistakes to Avoid
- Lassoing without Firefly active: If you Lasso without Firefly, you cannot drag over terrain and your escape route is limited. Always activate Firefly first unless you are 100% safe.
- Blinking too deep: You have Blink + Force Staff range. Use the full range. Do not Blink into the middle of five heroes just because the carry is there — Blink to the edge and Force Staff the target out.
- Ignoring Napalm in teamfights: Many players get tunnel vision on Lasso and forget to stack Napalm on the enemy frontline. Those stacks amplify your entire team’s damage output through items like Radiance and Shiva’s.
- Late Shard purchase: If the enemy carry has BKB and you do not have Shard, you are bringing a water gun to a gunfight. Prioritize Shard timing.
- Not stacking camps: Batrider clears stacked camps incredibly fast with Firefly. Stack ancients or large camps whenever you walk past them — it is free gold.
Advanced Tricks Only High-MMR Players Know
- Pre-Blink Napalm: Before Blinking in for a Lasso, throw 2-3 Napalm stacks at your target from fog. They will be slowed before you even arrive, making the drag easier and the damage higher.
- Rosh bait Lasso: Stand inside Rosh pit with Firefly active. When the enemy team walks in to check, Lasso the first hero who enters. Your team collapses from behind while the rest of the enemy team is stuck in the pit entrance.
- Double-drag with ally: If your ally has a Force Staff, they can Force you during Lasso to extend your drag distance even further. Coordinate this with your support for 2000+ unit drags.
- Napalm vision: Sticky Napalm provides brief vision on hit. Use it to check Rosh pit or high ground without risking Firefly. The vision lasts long enough to confirm enemy positions.
Frequently Asked Questions
Offlane is the standard and optimal role for Batrider in most games. He gets more value from the longer lane (more space to harass with Napalm) and his team needs him as a frontline initiator, not a farming mid. Mid Batrider can work in specific matchups where you need to dominate a melee mid hero, but offlane is the default.
Shard is almost always the priority. It lets Lasso pierce spell immunity, which is game-changing against BKB-dependent carries. Scepter’s double Lasso grab is nice but costs significantly more gold. Buy Shard at minute 15 if the enemy has BKB builders. Consider Scepter as a luxury item after your core build is complete.
Use a cheap ability to pop the Linken’s before Lassoing. Sticky Napalm and Flamebreak both trigger Linken’s. Alternatively, ask your support to pop it with their own targeted ability. In a pinch, you can Lasso a different target — do not waste time and positioning trying to break Linken’s if a better target is available.
12-14 minutes is a good Blink timing. Under 12 minutes means you dominated the lane. 14-16 minutes is acceptable. Anything past 16 minutes means you had a rough lane — consider farming jungle stacks with Firefly to catch up. At 20+ minutes without Blink, your game impact is severely limited.
Yes, strong dispels can remove Lasso. Aphotic Shield, Fortune’s End, Press the Attack, and items like Lotus Orb can all end Lasso prematurely. This is why targeting the enemy’s save hero first is so important — remove their dispel capability, then Lasso the carry.
Batrider remains a strong pick in every meta. His ability to initiate reliably and remove key targets never goes out of style. The hero may receive buffs or nerfs patch to patch, but the fundamental value of a point-and-click disable with terrain-crossing mobility keeps him relevant in both pubs and pro play.
Take one value point in Flamebreak by level 4 for the knockback utility, but do not max it until Sticky Napalm and Firefly are both maxed. The knockback distance and damage do not scale well enough per level to justify early investment over your other two abilities. Exception: if you face channeling heroes in lane, an early Flamebreak can save your life.
Ready to Dominate with Batrider
Batrider rewards game knowledge and positioning above everything else. If you want to learn these initiation patterns from Immortal-rank players who have mastered the hero, our coaching service pairs you with top-tier Batrider specialists.
Get Batrider Coaching
Boost My MMR Instead


