How to Master Arc Warden in Dota 2: The Ultimate Guide for Every Rank (2026)

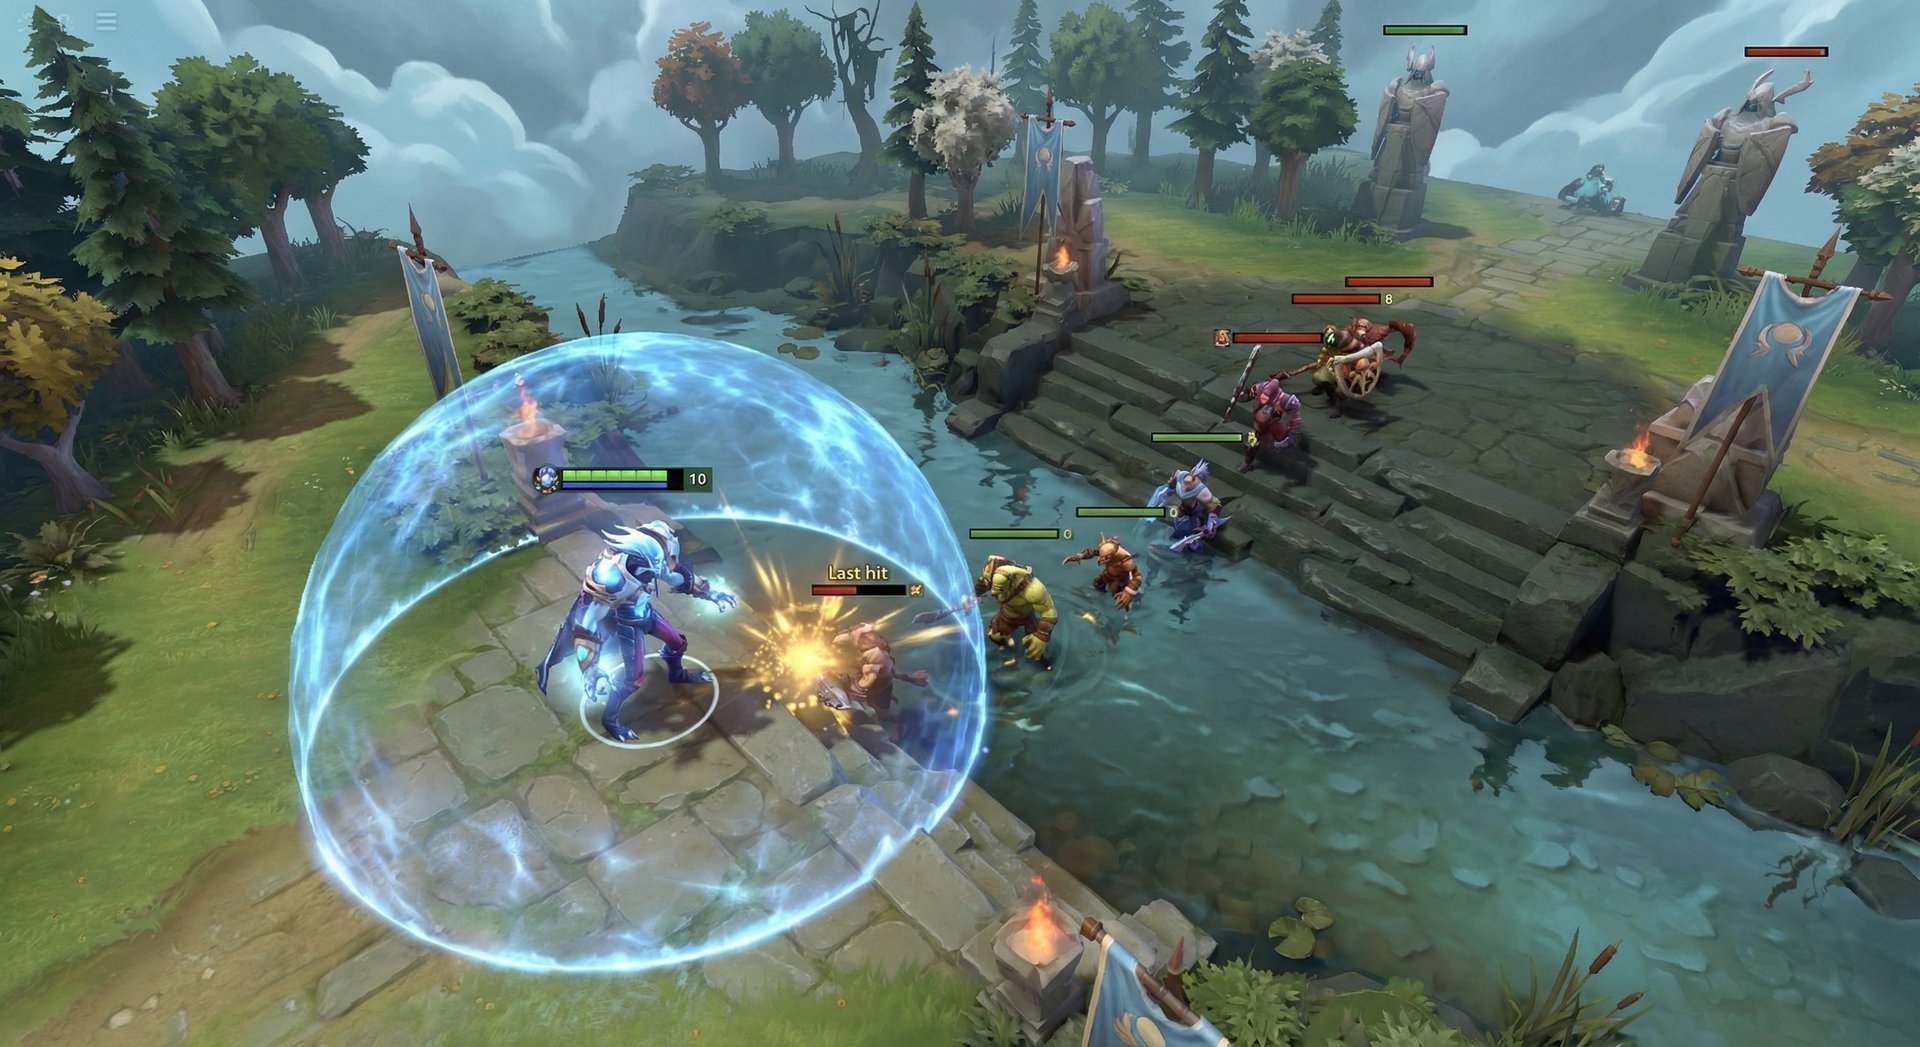
Arc Warden is one of the most mechanically demanding heroes in all of Dota 2 — and one of the most rewarding when mastered. Zet, the Self, is a primordial being tasked with preventing the fundamental forces of Radiance and Dire from destroying reality. In gameplay terms, that translates to a hero who can literally clone himself, farm two lanes at once, and overwhelm opponents with an economic advantage no other carry can match.
With a 53% winrate in Immortal pubs and increasing presence in the professional scene throughout 2026, Arc Warden has cemented himself as a premier mid and safe lane carry for players who invest the time to learn him. His Tempest Double ultimate is arguably the strongest ability in the game when used correctly — giving you a perfect copy of yourself, including all items, on a cooldown that gets shorter as you level up.
This guide takes you from your first Arc Warden game to Immortal-level mastery. Whether you are Herald or Divine, you will find rank-specific advice, item builds, laning strategies, counter matchups, and the advanced mechanics that separate casual Arc Warden players from the ones who make opponents rage quit. Let’s get into it.
Table of Contents
Why Arc Warden Is Dota’s Ultimate 1v9 Machine
Arc Warden occupies a unique niche in Dota 2: he is the only hero who can create a fully functional clone of himself — complete with all abilities and items. This means at level 6, you effectively have two heroes on the map. By minute 25, you have two six-slotted carries applying pressure across different lanes simultaneously.
Current meta status: Arc Warden sits at a 52-53% winrate across all brackets according to Dotabuff, with a pick rate hovering around 5-7%. In Immortal games, his winrate climbs above 54%, reflecting the hero’s high skill ceiling and the massive payoff for players who invest in learning him. He is primarily played mid (70% of games) with safe lane carry as a secondary role (25%).
What makes Arc Warden special is his economic scaling. With Hand of Midas on both the main hero and Tempest Double, you generate roughly 300+ bonus gold per minute on top of normal farming. By 30 minutes, a good Arc Warden player will have 2-3 items more than any other carry in the game. That gold advantage compounds — and it is nearly impossible for the enemy team to close the gap once it starts.
He is not for the faint of heart. You need strong micro skills, excellent map awareness, and the ability to manage two sets of abilities and items simultaneously. But if you are willing to put in the practice, Arc Warden can single-handedly carry games that feel unwinnable for any other hero.
Abilities Deep Dive
Flux (Q)
Flux is Arc Warden’s primary harass and chase tool. It applies a damage-over-time effect and a movement speed slow to a single target — but here is the critical mechanic most players miss: Flux is completely negated if another allied unit stands near the target. The debuff pauses when a friendly unit is within 225 radius of the target. This means Flux is devastatingly effective in 1v1 scenarios but significantly weaker in crowded team fights.
Hidden interactions:
- Flux deals 15/30/45/60 damage per tick over 6 seconds (total: 90/180/270/360 magical damage)
- The slow is 14%/21%/28%/35% — enough to prevent most heroes from escaping without a mobility spell
- Tempest Double can also cast Flux, meaning you can stack two Flux debuffs on the same target for double damage and slow
- Flux pierces spell immunity but does not deal damage to spell immune targets — the slow still applies
- If the target walks away from nearby allies, Flux immediately resumes — use this to zone supports away from their carry in lane
Magnetic Field (W)
Magnetic Field is one of the most versatile defensive abilities in the game. It creates a circular field that provides 100% evasion against ranged attacks and bonus attack speed to allied units inside it. The key detail: it only blocks attacks from outside the field. If an enemy walks inside the field, their attacks land normally.
Critical mechanics:
- Radius of 300 — smaller than most players think, so precise placement matters enormously
- Provides 50/60/70/80 bonus attack speed to allies inside
- Lasts 3.5/4.5/5.5/6.5 seconds — enough to win most extended trades
- Works on buildings — this is massive for high-ground defense and tower pushes
- Does NOT evade True Strike attacks (MKB, Bloodthorn) — watch for these items on enemy carries
- The evasion only affects ranged attacks from outside. Melee heroes and anyone inside the field can hit you normally
Spark Wraith (E)
Spark Wraith places an invisible ward-like spirit at a target location. After a 2-second activation delay, it will seek and damage the first enemy unit that comes within range. Think of it as a magical mine with a homing effect.
Why Spark Wraith is secretly broken:
- Deals 100/160/220/280 magical damage per wraith
- Wraiths last 45 seconds — you can stack multiple wraiths in one location for burst damage traps
- Provides a brief moment of vision when a wraith activates — useful for scouting Roshan or jungle camps
- Has a 4-second cooldown at all levels, meaning you can place 10+ wraiths while farming
- Wraiths apply a 0.4/0.5/0.6/0.7 second movement slow and mini-stun on contact
- Stacking 3-4 wraiths in one spot creates a death trap that can delete squishy supports instantly
Tempest Double (R) — Ultimate
This is the ability that defines Arc Warden and separates him from every other hero in Dota 2. Tempest Double creates a perfect copy of Arc Warden that has all abilities, all items (with independent cooldowns), and lasts 26/32/38 seconds on a 60/50/40 second cooldown.
What the Double can do:
- Use Hand of Midas for bonus gold and XP (this is why double Midas is core)
- Use all active items independently — Gleipnir, Hex, BKB, Refresher, everything
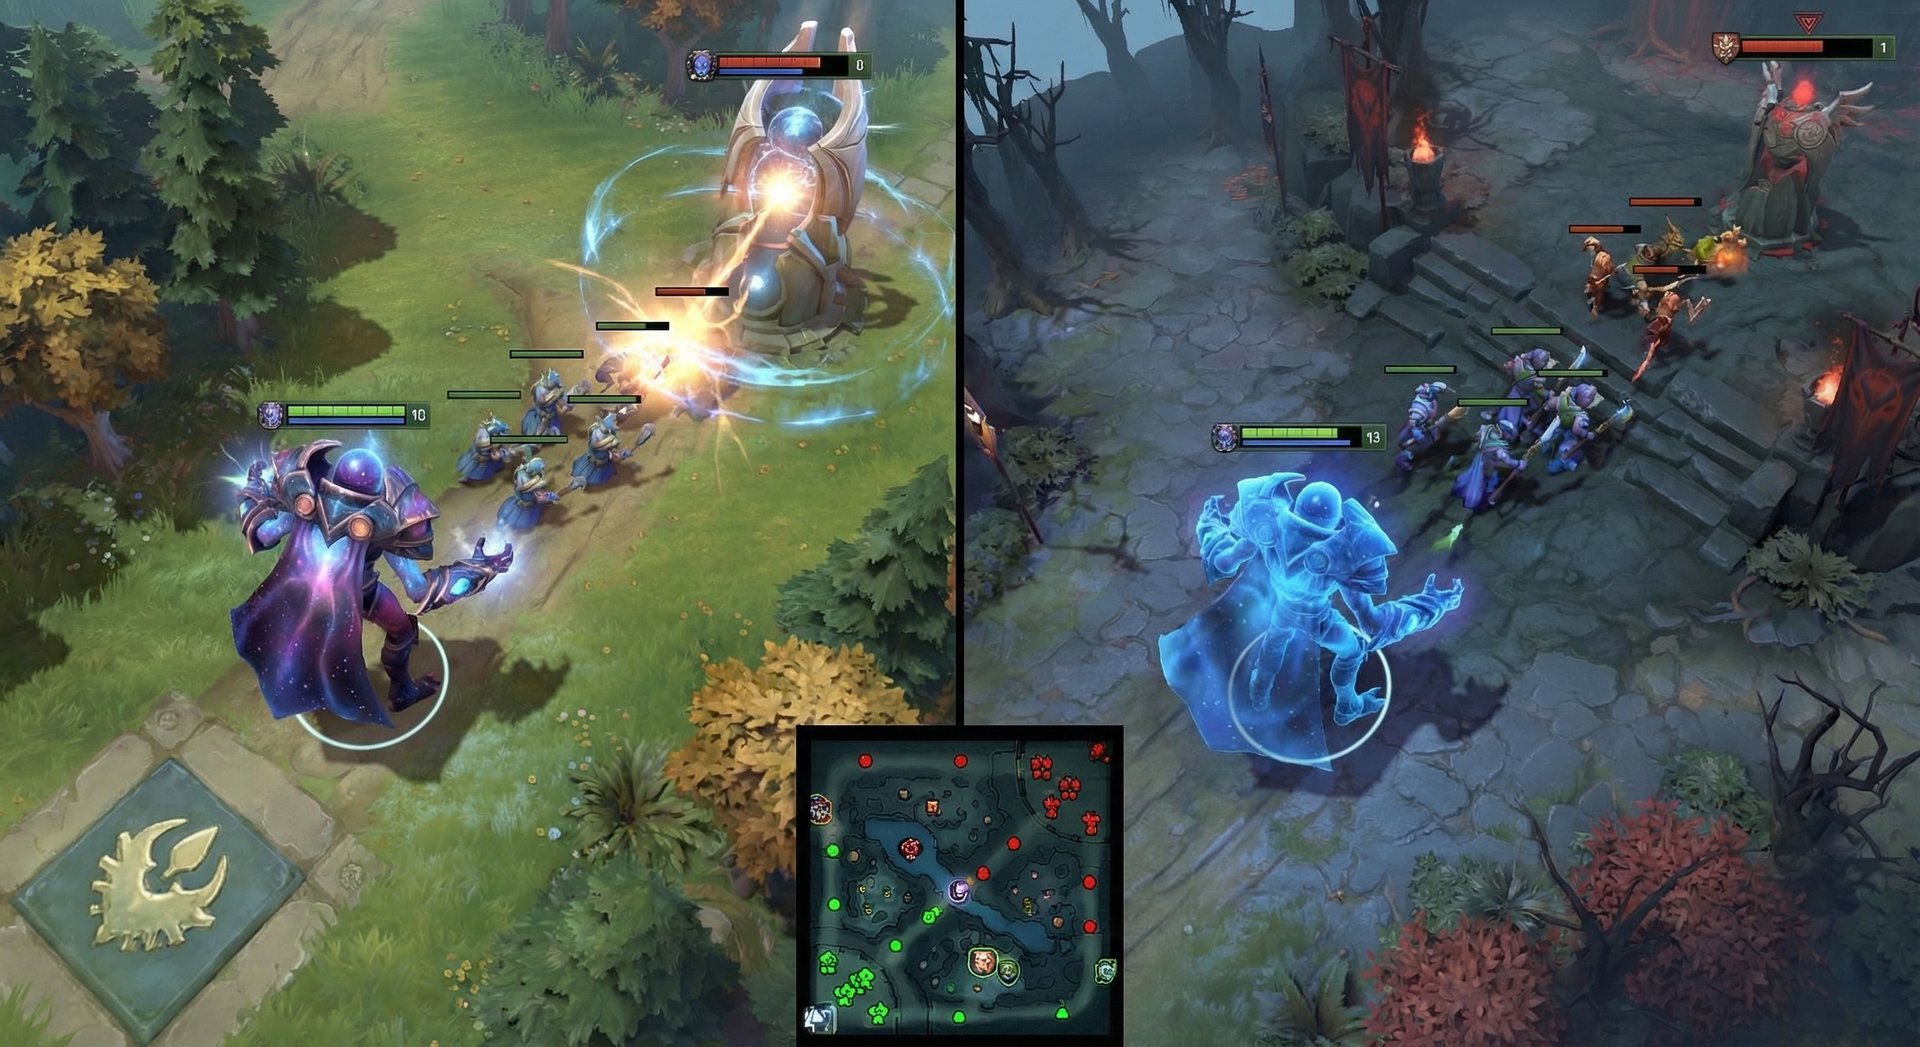
- Push a lane while the real Arc Warden farms the opposite side of the map
- Scout with no risk — if the Double dies, you lose nothing except the cooldown
- Initiate team fights by sending the Double in first to burn enemy cooldowns
What the Double cannot do:
- Pick up or drop items
- Gain gold from last hits (the gold goes to the main hero)
- Benefit from experience gain
- Use consumable items (clarities, salves, etc.) — they are consumed with no effect
Skill Build Order
Standard mid build: E-Q-E-W-E-R-E-Q-Q-Q-R-W-W-W. Max Spark Wraith first for farming speed and lane control. Flux second for kill potential. One early point in Magnetic Field at level 4 for lane trading. Ultimate at 6, 12, 18.
Safe lane carry build: Q-W-Q-E-Q-R-Q-E-E-E-R-W-W-W. Max Flux first for lane aggression when you have a support nearby to set up kills. Earlier Magnetic Field points in tough lanes where you need the evasion to survive harass.
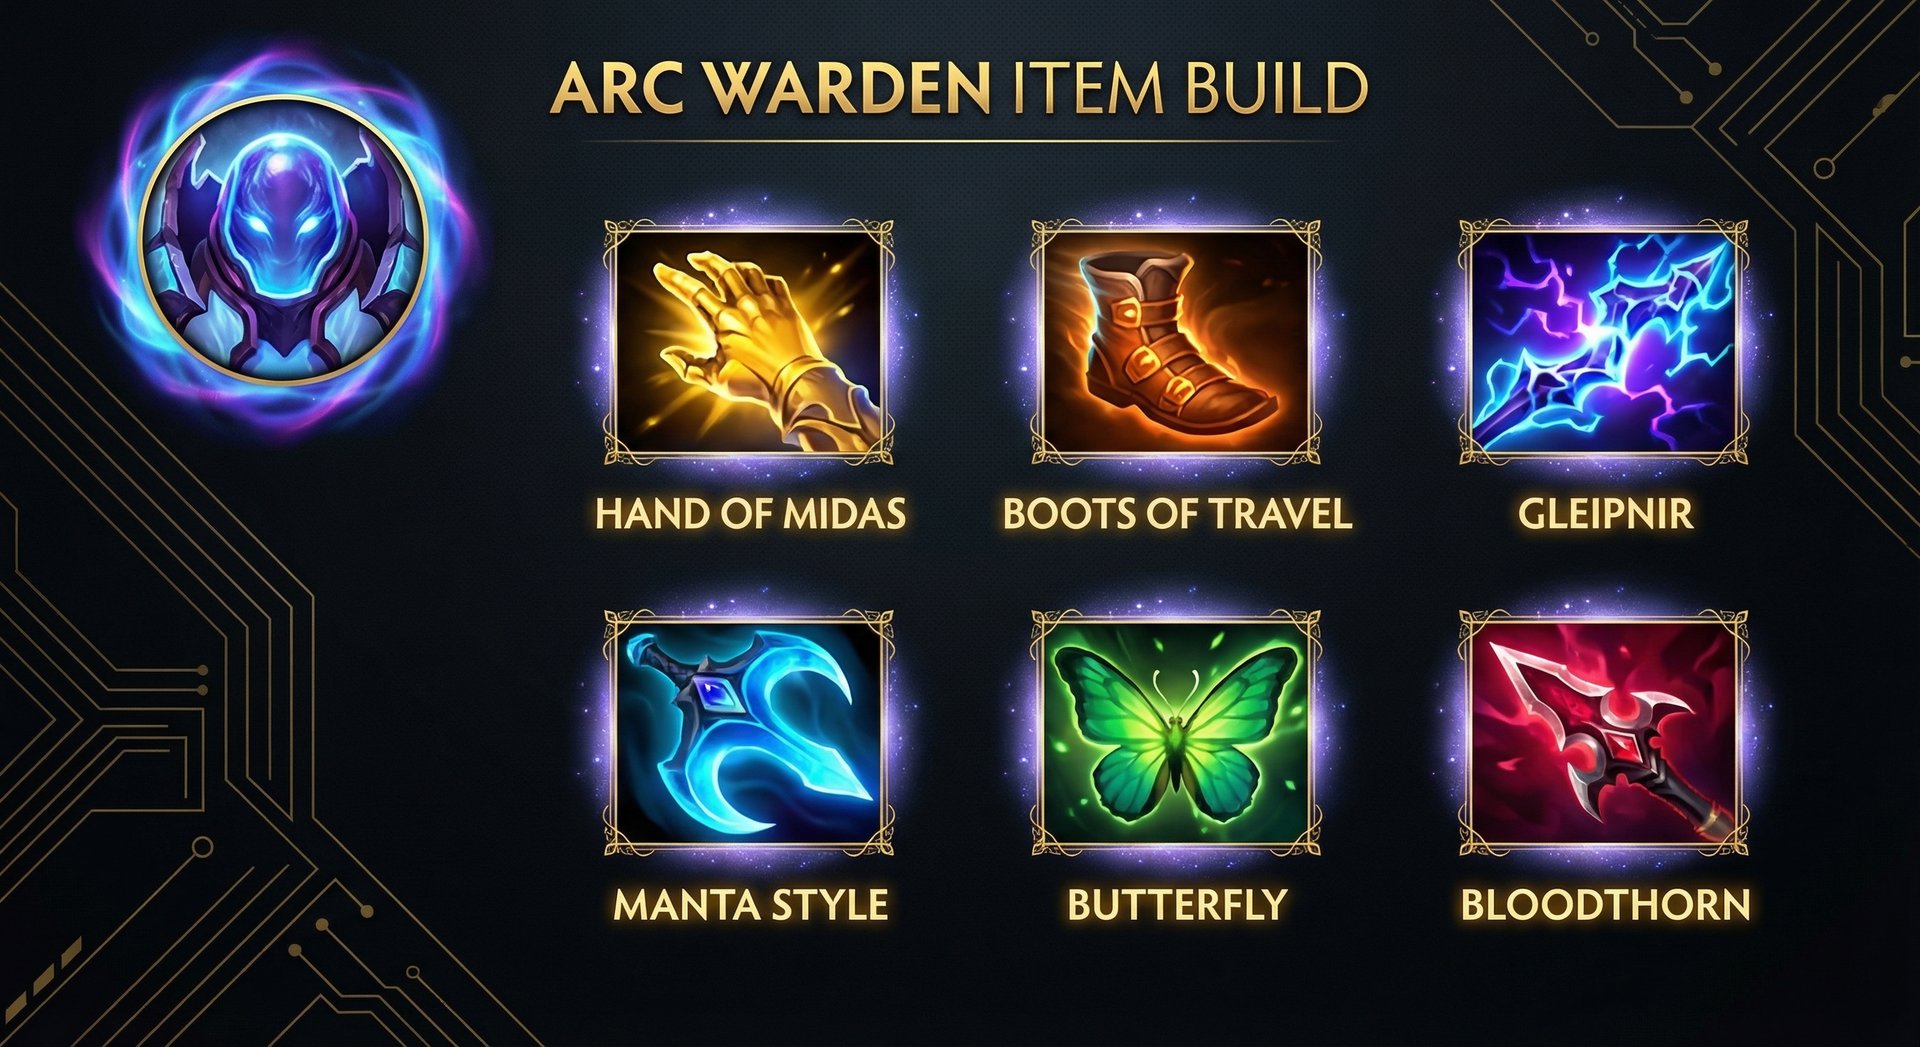
Item Builds by Rank Bracket
| Rank | Starting | Early Game | Core Items | Late Game |
|---|---|---|---|---|
| Herald – Crusader | Circlet, Slippers, Tango, Branch x2 | Wraith Band x2, Boots, Hand of Midas | Maelstrom, Boots of Travel, Dragon Lance | Gleipnir, Hurricane Pike, Butterfly |
| Archon – Legend | Circlet, Slippers, Tango, Branch x2 | Wraith Band x2, Boots, Hand of Midas | Gleipnir, Boots of Travel, Dragon Lance | Hurricane Pike, Butterfly, Bloodthorn |
| Ancient – Divine | Circlet, Slippers, Tango, Faerie Fire | Wraith Band x2, Boots, Hand of Midas | Gleipnir, Boots of Travel, Manta Style | Bloodthorn, Butterfly, Skadi |
| Immortal | Circlet, Slippers, Tango, Faerie Fire | Wraith Band, Boots, Hand of Midas | Gleipnir, Boots of Travel, Manta Style | Bloodthorn, Nullifier, Scythe of Vyse |
Why Items Differ by Rank
Herald – Crusader: At lower ranks, games tend to go longer and team fights are chaotic. Dragon Lance gives survivability through positioning, and Gleipnir provides the AoE lockdown that helps in uncoordinated fights. Skip Manta Style here — the micro requirement of managing illusions on top of Tempest Double is too demanding.
Archon – Legend: Players start understanding power spikes. Hurricane Pike becomes valuable because enemies will actually try to jump you. Bloodthorn in the late game gives you solo kill potential on any hero, and your opponents are less likely to carry Lotus Orb or Linken’s Sphere to counter it.
Ancient – Divine: Manta Style enters the build here because these players can manage the additional micro. The dispel is crucial against common threats like Orchid or Spirit Vessel. Skadi is a luxury option when you need to kite tanky cores.
Immortal: The build becomes more situational. Nullifier is picked up to break through Aeon Disk, Linken’s Sphere, and Ghost Scepter. Scythe of Vyse on both the hero and Double gives you 7 seconds of hard disable on two different targets. The item build adapts game-to-game — there is no autopilot at this level.
Core Item Explanations
Hand of Midas (never skip): This is the single most important item on Arc Warden. Your Double uses it with its own cooldown, effectively doubling the value. You get 160 gold and double XP every 90 seconds from each Midas. Rush it by minute 7-9 and never look back.
Boots of Travel: Arc Warden needs to be everywhere at once. BoTs let your Double teleport to push waves while you farm safely. They also let you split push with unmatched efficiency — TP your Double to a side lane, push the wave, then send the real hero to the opposite lane.
Gleipnir: The AoE root is incredible for setting up kills and controlling team fights. Your Double gets its own Gleipnir active, meaning you can chain-root entire teams. The Maelstrom component also accelerates your farm speed significantly.
Laning Phase Masterclass
Mid Lane (Primary Role)
Arc Warden’s laning stage is all about controlled aggression and farm efficiency. Your base damage of 51-61 is average, but Flux gives you incredible 1v1 kill potential that most mid laners cannot match in the first few levels.
Level 1-3 strategy:
- Start with Spark Wraith at level 1. Place wraiths on the ranged creep to secure last hits you would otherwise miss
- Take Flux at level 2. The moment the enemy mid steps away from their creeps, hit them with Flux for 90 damage and a 14% slow
- Use Wraith Band stats to win right-click trades. Arc Warden has solid base armor and attack range (625) — abuse it
- Stack wraiths on the enemy high ground when they retreat to fountain — they will walk through them when returning to lane
Level 4-6 strategy:
- With Magnetic Field at level 4, you can take aggressive trades under the enemy tower and evade all tower shots while inside the field
- The kill window opens at level 5 with 3 points in Spark Wraith. Stack 2-3 wraiths on the enemy’s side of the river, Flux them for the slow, and watch them walk through the wraith field
- At level 6, immediately use Tempest Double to push the wave and secure the rune. Send the Double to check runes while you farm the lane
Safe Lane (Secondary Role)
Arc Warden safe lane plays differently. You are less about solo kills and more about surviving the laning phase and hitting your Midas timing. Pair well with aggressive supports who can set up Flux — Crystal Maiden’s Frostbite into double Flux is a guaranteed kill on most offlaners.
Lane partner synergies:
- Crystal Maiden: Frostbite roots set up perfect Flux, and her aura solves your mana issues early
- Shadow Shaman: Shackles hold enemies still for maximum Flux and Spark Wraith damage
- Ogre Magi: Bloodlust on Arc Warden (and his Double) is absurdly strong with Magnetic Field attack speed
- Vengeful Spirit: Wave of Terror armor reduction plus Flux damage creates brutal kill pressure
Common Laning Mistakes
- Using Flux when enemies are grouped: The slow and damage pause near allied units. Wait for the target to be isolated
- Placing Magnetic Field too early: If you pop it before the fight starts, it will expire before the enemy commits. React to aggression, don’t predict it
- Forgetting to stack wraiths before fights: A single wraith does modest damage. Three wraiths in one spot is a death sentence for squishy heroes
- Not using Double for lane shoving: Your Double is free — use it to push waves before important rune spawns
Mid and Late Game Transitions
Timing Windows
Arc Warden’s game plan revolves around reaching critical item thresholds faster than any other hero. Here are your power spikes:
- 7-9 minutes (Midas): Your economy starts compounding. Use Double Midas on cooldown, never miss a usage
- 14-16 minutes (Gleipnir + Boots of Travel): This is your first major spike. You can now split push effectively with your Double using BoTs, and Gleipnir gives you kill threat
- 22-25 minutes (third major item): Whether it is Manta, Bloodthorn, or BKB, this is when Arc Warden becomes truly dangerous. You have two fully itemized units pressuring the map
- 30+ minutes (five to six slotted): This is where Arc Warden peaks. Two six-slotted units pushing different lanes simultaneously is nearly impossible to deal with. The enemy team has to choose which Arc Warden to address — and they will guess wrong
Team Fight Positioning
Arc Warden is not a traditional front-to-back team fighter. Your playstyle in fights should be:
- Send the Tempest Double in first. Let it absorb initial cooldowns. If they blow Ravage on your Double, you just won the fight
- Stay at maximum range with the real hero. Your 625 attack range plus Hurricane Pike active means you should almost never be in the thick of things
- Layer your Gleipnir and Flux. Double casts Gleipnir, you follow up with your Gleipnir on a different cluster. That is two AoE roots hitting 3-4 heroes
- Use Magnetic Field defensively. Drop it on yourself and your position 4/5 to protect the backline from enemy carry attacks
- Place Spark Wraiths behind the fight. As enemies retreat, they run through your wraith field and take massive damage
Split Push Strategy
This is Arc Warden’s bread and butter in the mid-late game. The split push pattern that wins games:
- Summon Tempest Double near the tier 2 or tier 3 tower you want to push
- TP the Double to the lane. Have it push with Spark Wraiths and right clicks
- Meanwhile, farm the opposite jungle or push the other side lane with the real hero
- If the enemy sends 1-2 heroes to deal with the Double, your team fights 4v3. If they ignore it, the Double takes a tower
- Repeat this cycle every 40-60 seconds. The enemy team is constantly making lose-lose decisions
When Arc Warden Falls Off
Contrary to popular belief, Arc Warden does not scale infinitely. His power curve peaks at around 35-40 minutes when the item advantage is at its highest. After 50+ minutes, enemy carries close the gap and items like MKB, Nullifier, and Abyssal Blade counter your Magnetic Field and kiting. End the game before this point whenever possible.
Counters: Heroes That Destroy Arc Warden
1. Spirit Breaker
Spirit Breaker is Arc Warden’s worst nightmare. Charge of Darkness goes through Magnetic Field, catches you while split pushing, and Nether Strike’s bash pierces evasion. The constant threat of a global-range initiation prevents Arc Warden from playing his split push game safely. Spirit Breaker can charge either the real hero or the Double — and he will always find you out of position.
How to play around it: Buy Linken’s Sphere to block Charge. Ward aggressively so you see the charge animation coming. Never stand still while farming — always be moving between camps.
2. Spectre
Spectre’s Haunt creates illusions on every enemy hero — including your Double. She can Reality to either you or your Double at any time, making split pushing incredibly dangerous. Desolate ignores Magnetic Field because Spectre will be right on top of you. Dispersion reduces your damage output significantly in extended fights.
How to play around it: Group with your team more than usual. Buy Gleipnir early to root Spectre when she appears. Manta Style dispels the Haunt illusion temporarily.
3. Nyx Assassin
Nyx punishes Arc Warden’s high intelligence and reliance on abilities. Mana Burn deals massive damage based on your int stat (one of the highest in the game). Spiked Carapace reflects your Flux and Spark Wraith damage back at you. Vendetta’s break disables Magnetic Field’s evasion passive.
How to play around it: Keep Spark Wraiths placed around yourself to spot Nyx coming out of Vendetta. Buy Aeon Disk if Nyx is consistently finding you.
4. Zeus
Zeus can kill your Tempest Double with Thundergod’s Wrath from anywhere on the map, reducing your split push effectiveness. Nimbus provides constant magical damage that ignores your Magnetic Field evasion (since it is magical, not physical). Lightning Bolt provides true sight, revealing you if you buy Shadow Blade.
How to play around it: BKB is mandatory against Zeus. Time your Double usage after Zeus has already used his ultimate. Pipe of Insight on a teammate significantly reduces his damage to your Double.
5. Broodmother
Broodmother’s spiderlings make Flux nearly useless — the target is never “alone” with spiders nearby. She can web through your jungle and aggressively contest your farm, preventing you from reaching your item timings. Her push speed threatens your buildings while you are trying to scale.
How to play around it: Gleipnir clears spiders efficiently. Play defensively and focus on farming jungle patterns away from her webs. Request teammates to gank her early before she takes over the map.
Heroes Arc Warden Destroys
1. Sniper
Sniper has zero mobility and no way to escape double Flux. Magnetic Field blocks all of Sniper’s attacks from range. Spark Wraith traps around high ground make Sniper’s life miserable. He cannot trade with you at any stage of the game.
2. Drow Ranger
Magnetic Field completely negates Drow’s primary damage source — ranged physical attacks. Flux destroys Drow in 1v1 scenarios since she lacks escape tools. Your Tempest Double can pressure Drow from multiple angles, and Marksmanship provides no benefit when Magnetic Field is active.
3. Medusa
Arc Warden outfarms Medusa and comes online faster. Mana Burn from repeated Flux applications drains her mana shield. Split pushing forces Medusa to respond to your Double, wasting her time while you farm the opposite side. She wants long, drawn-out fights — you end the game before she peaks.
4. Shadow Fiend
Shadow Fiend has no escape against double Flux in lane. Magnetic Field blocks all of his Shadowraze follow-up right-click damage. Your Spark Wraith stacks zone Shadow Fiend away from the ranged creep, denying his soul collection. After level 6, your Double + Flux combo can solo kill him repeatedly.
5. Anti-Mage
While Anti-Mage is a natural Mana Break carrier, Arc Warden’s Magnetic Field blocks his attacks from range — and AM must blink inside the field to hit you, putting him in a terrible position. Your split push matches his, meaning he cannot ignore you. Gleipnir root prevents Blink, and double Gleipnir means he cannot escape at all.
How Pros Play Arc Warden in 2026
Arc Warden has been a signature pick for several top-tier players throughout the 2025-2026 competitive season. Here is what the pros are doing differently:
Topson’s Arc Warden at ESL One Birmingham 2025
Topson revived Arc Warden mid with a Gleipnir rush build, skipping the traditional Dragon Lance entirely. His timing was consistently Midas at 8 minutes into Gleipnir at 16 minutes. The key innovation was using Double aggressively from the first spawn — not to farm, but to gank side lanes. He would TP the Double to a side lane, Flux + Spark Wraith the enemy offlaner, and get kills while farming mid with the real hero.
MATUMBAMAN’s Safe Lane Arc Warden
MATUMBAMAN played Arc Warden position 1 in several high-profile matches, building Manta Style as a second item after Midas. The reasoning: Manta illusions combined with Tempest Double’s Manta illusions create four units pushing a lane, making split push pressure overwhelming. His Double would push with Manta illusions while the real hero participated in team fights.
w33’s Bloodthorn Timing
w33 popularized the early Bloodthorn build — Midas into Orchid into Bloodthorn by 22-24 minutes. The Bloodthorn active on both the real hero and Double means two instant silences with true strike and critical damage. This build turns Arc Warden into an assassin who can delete any hero on the map with perfect execution.
Pro Build Trends for 2026
- Gleipnir over Maelstrom: The AoE root is valued more than raw farming speed at the pro level
- Manta Style rising: The dispel is critical against the prevalence of Spirit Vessel and Orchid in the meta
- Nullifier as third item: Pros are buying Nullifier earlier to break through defensive items like Aeon Disk and Linken’s Sphere
- BKB timing varies: Some pros rush BKB second, others delay it to fourth item. It depends entirely on the enemy draft
Rank-Specific Climbing Guide

Herald to Guardian: Foundation Basics
At this rank, focus on one thing only: Midas timing and Double usage. Do not worry about advanced micro or split pushing. Here is your checklist:
- Get Hand of Midas before 10 minutes every game
- Use your Tempest Double every time it is off cooldown — even just to farm a jungle camp or push a wave
- Do not skip Midas usage on the Double. Set a mental timer: Double spawns, immediately use Midas on the biggest creep nearby
- Buy Maelstrom into Gleipnir — the lightning procs accelerate your farm and the root helps in fights
- Stay in lane and farm. At this rank, the enemy team will make enough mistakes that your item advantage alone wins the game
Crusader to Archon: Adding Game Sense
Now it is time to start thinking about map pressure. You should be comfortable with basic Double micro by now.
- Start using Boots of Travel on your Double to push side lanes while you farm jungle
- Place Spark Wraith traps at common gank routes to protect yourself while farming
- Watch the minimap. When you see enemies on the opposite side of the map, send your Double to push their tower
- Practice Flux + Spark Wraith combos for solo kills. At this rank, enemy mid players rarely buy BKB before 25 minutes
- Start buying Manta Style as a third item. Use it to dodge projectile stuns and dispel silences
Legend to Ancient: The Macro Leap
This is where Arc Warden players need to develop genuine split push awareness. Games at this level are faster and enemies will punish passive farming.
- Develop a farming pattern: push wave with Double, farm two jungle camps with real hero, repeat
- Time your Double usage around objectives. Have it ready 10 seconds before a Roshan attempt or tower push
- Build Bloodthorn when the enemy has mobile cores (Slark, Ember Spirit, Storm Spirit). The silence + true strike on two units is devastating
- Learn to use Magnetic Field proactively in team fights — drop it on your frontline to give them evasion and attack speed
- Start using Spark Wraith vision to scout objectives. Place wraiths at Roshan pit entrances before contesting
Divine to Immortal: What Separates the Top 1%
At this level, Arc Warden mastery comes down to item timing optimization and Double micro perfection.
- Your Midas should be at 7 minutes consistently. 8 minutes is too slow at this bracket
- Use the Double’s items independently from the main hero. Double uses Gleipnir to root, then main hero follows up with Bloodthorn on the same target
- Master the “Double initiation” technique: send Double in with BKB activated, use all actives (Gleipnir, Hex, Bloodthorn), then follow up with the real hero
- Buy situational items every game. Nullifier against Aeon Disk carriers. Scythe of Vyse against mobile heroes. Skadi against tanky lineups. There is no autopilot build
- Time Double spawns around enemy ability cooldowns. If Enigma just used Black Hole, immediately spawn Double for an aggressive push — he cannot punish you for 200 seconds
- If you are struggling to break through to Immortal, consider professional coaching to identify specific weaknesses in your Arc Warden gameplay
Tips and Tricks
Animation Cancels and Hidden Interactions
- Spark Wraith stacking at Rosh: Place 5-6 wraiths inside the Roshan pit before your team starts the attempt. If the enemy walks in to contest, they take 1,200+ instant magical damage
- Double-Midas efficiency: Always Midas the large creep in the hard camp (Centaur, Hellbear Smasher, Satyr Tormentor) for maximum gold and XP. The XP bonus from Midas is based on the creep’s base XP value
- Magnetic Field tower defense: When defending high ground, place Magnetic Field on your tower. The tower gets 100% evasion against ranged attacks AND bonus attack speed. This makes sieging against Arc Warden incredibly difficult
- Flux isolation trick: In team fights, wait for the enemy carry to move slightly away from their team before applying Flux. Even 225 range of separation is enough for Flux to work at full power
- Double buyback bait: If your Double dies in a team fight and enemies think they killed the real Arc Warden, they may overcommit. This psychological advantage is underrated
Common Mistakes to Avoid
- Forgetting Double Midas: This sounds basic, but even 5K MMR players sometimes forget to Midas with their Double. That is 160 gold wasted every spawn. Set up a rhythm — Double spawns, Midas, then do everything else
- Building too greedily: If the enemy team has aggressive gankers (Spirit Breaker, Nyx), you need BKB or Linken’s Sphere before your damage items. Dying repeatedly because you rushed Bloodthorn over BKB is a 1K MMR mistake
- Not using Double defensively: Your Double can place Magnetic Field to save teammates. It can Flux to slow pursuing enemies. Do not always send it to push — sometimes keeping it near your team wins the fight
- Standing inside Magnetic Field vs melee heroes: Remember, Magnetic Field only evades ranged attacks from outside. If Phantom Assassin jumps inside your field, the evasion does nothing. Reposition or force her out
- Overcommitting the real hero: The beauty of Arc Warden is that you never need to take risks with your real hero. If in doubt, send the Double. Dying with the real hero loses you 40+ seconds of farm and Double usage
Advanced Mechanics Only High-MMR Players Know
- Refresher Orb Double trick: If you buy Refresher Orb, your Double spawns with Refresher off cooldown. This means your Double can Refresher its own items, effectively giving you THREE sets of item actives in a fight (real hero + Double + Double post-Refresher)
- Manta dodge with Double: You can use Manta Style on your Double to dodge projectile stuns aimed at it. This keeps the Double alive longer in fights
- Spark Wraith vision scouting: Wraiths provide 300 flying vision for 0.5 seconds when they activate. Place them in common ward spots to deward or scout without risking a support
- Boots of Travel 2 advantage: BoT2 lets you teleport to allied heroes. Your Double with BoT2 can teleport to a teammate across the map for an instant countergank — this is a game-winning move that almost nobody at lower brackets uses
Frequently Asked Questions
No. Arc Warden is consistently rated as one of the hardest heroes to play in Dota 2 due to the micro management required for Tempest Double. We recommend getting comfortable with simpler carries like Juggernaut or Wraith King before attempting Arc Warden. That said, if you are committed to learning him, start in unranked and focus on mastering Midas timings and basic Double usage before jumping into ranked matches.
Mid is the optimal lane for Arc Warden in most games because it gives you the fastest Midas timing and solo XP for an earlier Tempest Double. However, safe lane carry works well when paired with aggressive supports who can set up kills with Flux. Avoid playing Arc Warden in the offlane or support role — he needs farm priority to function.
Yes, always. There is no game where you skip Midas on Arc Warden. The Double’s Midas usage alone pays for the item in under 10 minutes. Even if you are behind, Midas accelerates your comeback potential. Rush it as your first major item in every single game.
Spirit Breaker is Arc Warden’s hardest counter. Buy Linken’s Sphere to block Charge of Darkness. Ward aggressively to spot charges early. Stay near your team during the mid game when Spirit Breaker is at his strongest. In the late game, your item advantage should let you survive his initiation and fight back. Consider asking a teammate to buy Lotus Orb for additional protection.
Send the Double to push when: enemies are visible on the opposite side of the map, you have Boots of Travel for escape, and no major team fight is imminent. Keep the Double near you when: a team fight is about to happen, you are sieging high ground, or the enemy has heroes that can kill you through your Double (Spirit Breaker, Spectre). As a rule of thumb, if you can see 3+ enemies on the minimap, your Double should be pushing the lane farthest from them.
In Immortal games, the benchmark Midas timing is 7-8 minutes. Anything before 7 minutes is excellent. 8-9 minutes is acceptable. If your Midas is later than 10 minutes, you have likely had a rough lane and need to adjust your farming pattern to catch up. Focus on Spark Wraith farming jungle camps to accelerate your recovery.
Arc Warden’s peak is around 35-40 minutes when his item advantage over other carries is at its maximum. After 50+ minutes, enemy carries catch up in items and heroes like Faceless Void, Phantom Assassin, and Spectre can outfight him. MKB counters Magnetic Field evasion, and Abyssal Blade pierces BKB. Try to end the game during your power window rather than letting it go ultra-late.
Master Arc Warden With Expert Guidance
Arc Warden’s complexity means small improvements in micro and decision-making translate to massive MMR gains. Our Immortal-rank coaches specialize in teaching advanced Double management, split push timings, and item adaptations that turn good Arc Warden players into unstoppable ones.
Get Arc Warden Coaching
Boost My MMR Instead


